

In 2026, I no longer read Hollow Knight: Silksong as a promise. I play it as a demanding, beautiful, occasionally infuriating reality. Team Cherry's small team turned what began as DLC into a full standalone game, and Pharloom has the density to prove it. Hornet moves faster, heals faster, and hits with a needle that feels wonderful — right up until a beetle removes two masks in one lunge. As a PC player, I have leaned on mods not to erase the challenge but to make its edges legible.
Reading the fight, not skipping it
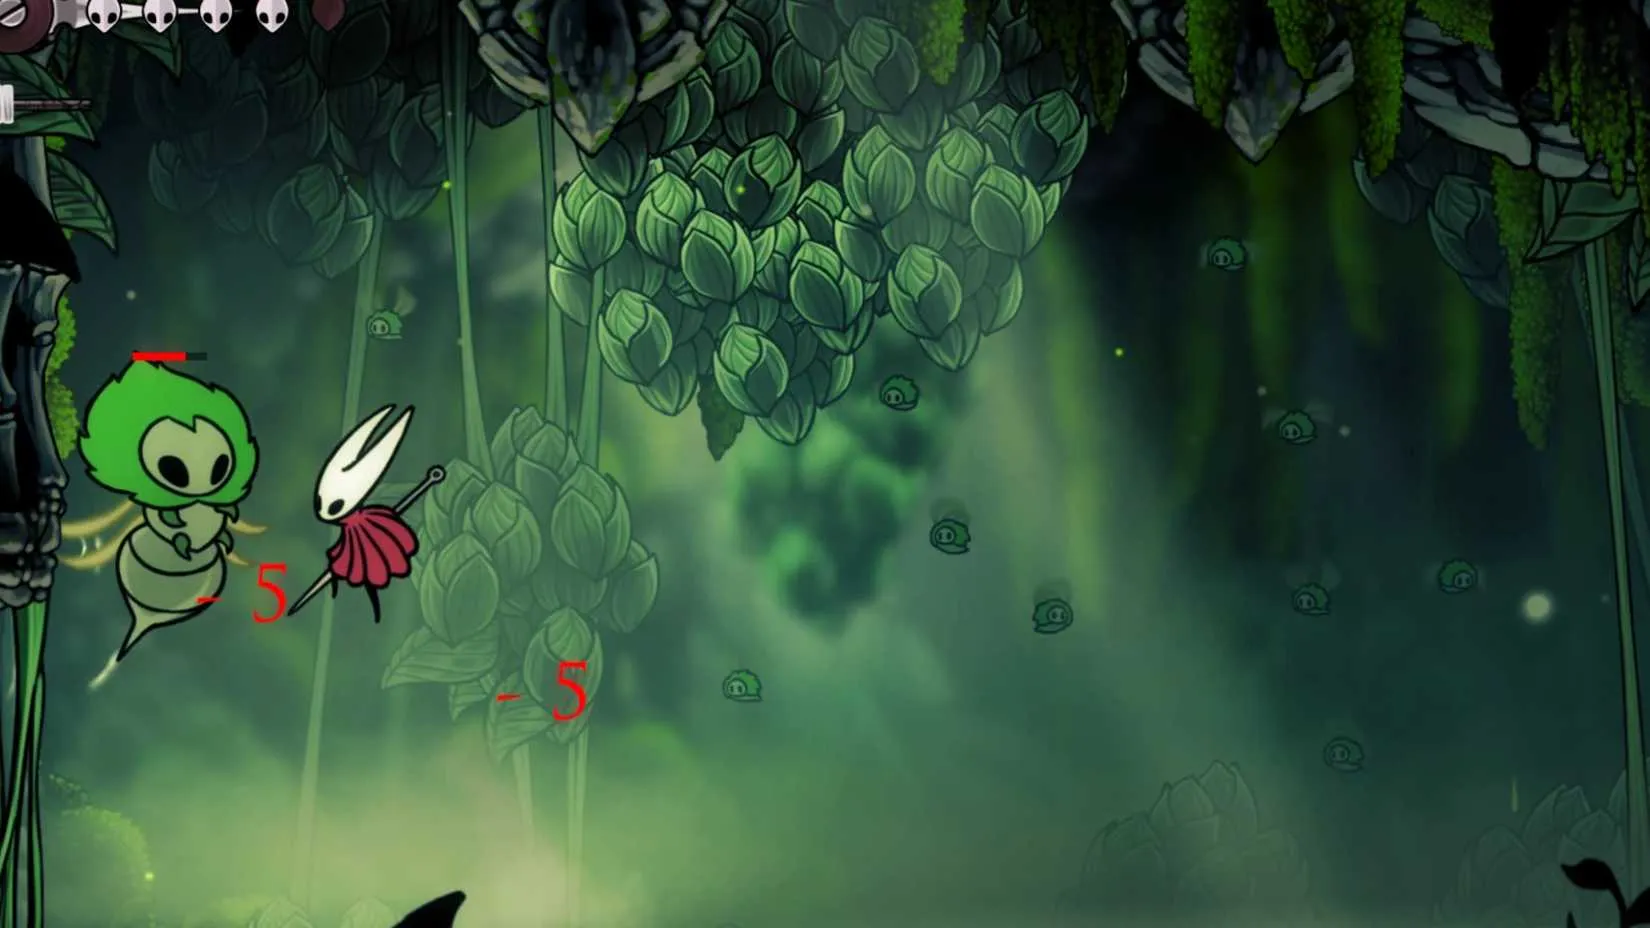
The first mod I installed added damage numbers and enemy health bars. That sounds small. In practice, it changed how I understood every needle upgrade. Before, I knew Hornet was getting stronger in an abstract way. After, I could see the exact number climb, watch a boss bar drop in real time, and judge whether my route through a room was working or wasting silk. The mod does not make Pharloom easier by itself. It makes the fight readable, and readability is what turns frustration into learning.
The second mod addressed the game's most sadistic balance choice. Hornet heals faster in Silksong, but many enemies now take two notches of health with a single attack. For players still adjusting, that trade-off can feel less like pressure and more like punishment. A simple mitigation mod keeps enemies from shaving off a huge chunk of the bar with every hit. I did not use it to sleepwalk through bosses. I used it to survive long enough to learn their patterns. For anyone struggling with the early difficulty curve, this is the difference between quitting and clicking.
Rosaries, runs, and the quality-of-life rebellion
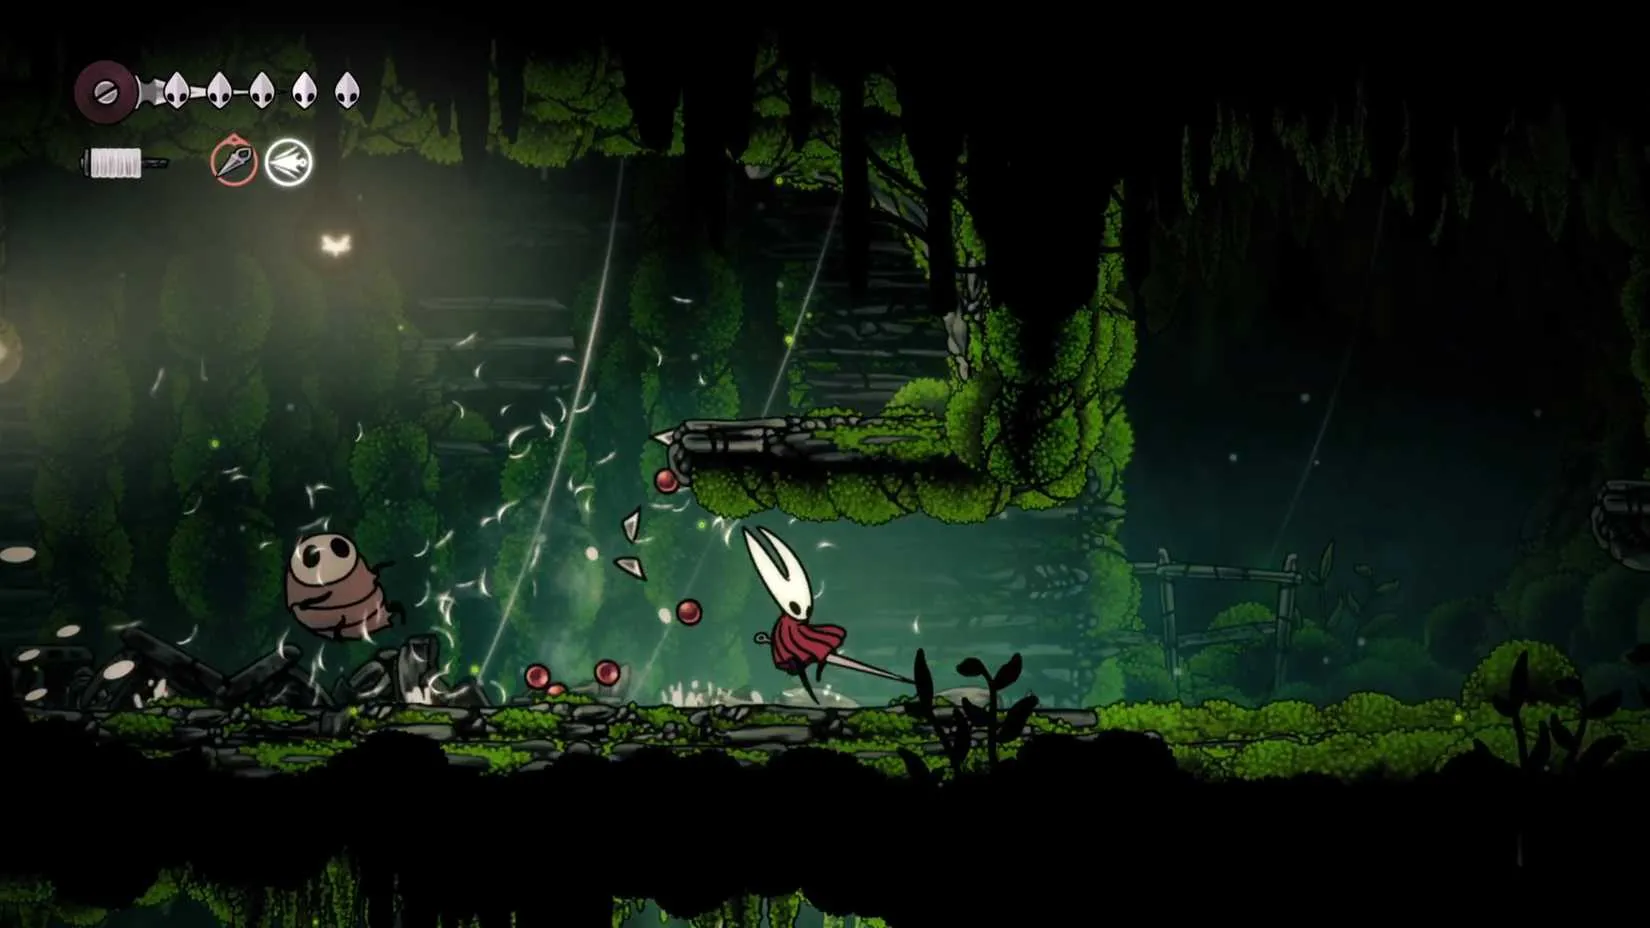
Rosaries feel rarer than Geo ever did in the first game. Hornet may be drowning in Shell Shards, but I have found myself desperate for Rosaries whenever a valuable item appears in a shop. One popular mod multiplies Rosary pickups by 1,000, which is absurd in the best way. Another doubles Rosary gain, which feels less like a cheat and more like a sensible grind reduction. I have used both at different points. In a single-player game, there is nothing wrong with tilting the economy toward fun, especially when the alternative is killing every enemy in sight just to afford a tool.
Mod effect
What it changes
My 2026 take
Damage numbers and health bars
Shows exact damage and enemy HP
Best learning tool in the game ?
Reduced enemy chip damage
Prevents two-notch hits from draining masks
Keeps the challenge, removes the cruelty
1,000x or double Rosaries
Boosts currency gain
Great for players who hate grinding
Teleport anywhere
Replaces Dreamgate-style travel
Saves boss-run time without skipping content
Always-on Wayward Compass
Frees a Crest Slot
More room for combat tools
Always-on Magnetite Brooch
Pulls in Rosaries without equipping it
Efficient and quietly addictive
Instant map updates
Records exploration without a Bench
Makes backtracking less oppressive
I missed the Dreamgate upgrade from Hollow Knight more than I expected. Silksong removes that safety valve, and repeated boss runs can wear down even a patient player. A teleport mod cuts the rigmarole. I still have to fight the boss. I just do not have to trim the same fat over and over again after every death. That distinction matters. The mod does not play the game for me. It respects my time.
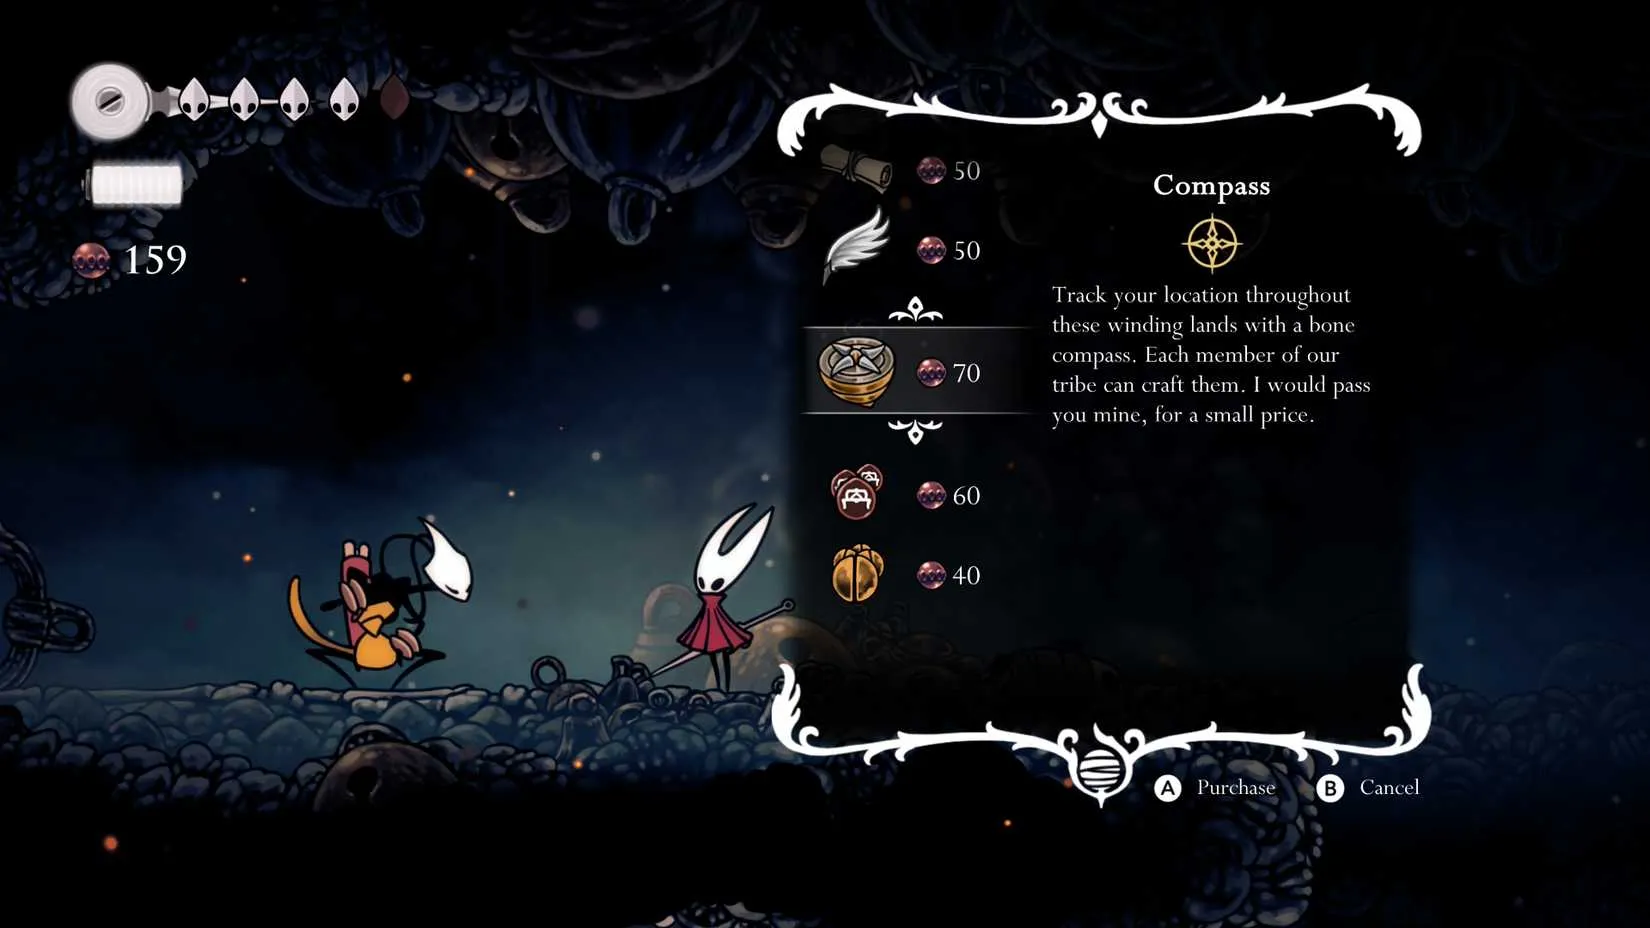
The Wayward Compass returns in Silksong, but it consumes a valuable Crest Slot. A mod that keeps the compass active at all times frees that slot for other tools. I have used the saved space to bolster Hornet's combat and exploration rather than spending it on basic orientation. The same logic applies to the Magnetite Brooch. It is wonderfully useful for pulling in loose Rosaries, yet it also demands a slot. A mod that keeps its effect active whether equipped or not removes that tension. Some purists will call this cheating. I call it build freedom.
Finally, there is the map. In Hollow Knight, a region's map did not update until I rested or respawned on a Bench. Silksong carries that mechanic forward. It is smart, but it can also feel tiring when I am trying to remember whether I already checked a side path. A mod that records Hornet's adventures instantly makes exploration less oppressive. I can see where I have been, spot the pathways I missed, and keep moving. None of these mods fix Silksong because Silksong is not broken. They simply let me tune the experience to the player I am in 2026: someone who loves Pharloom's challenge but does not always love its friction.
That same instinct—trimming unnecessary friction without removing the challenge—applies to how I buy games. I love exploring Pharloom, but I do not love paying full price for every metroidvania that catches my eye. Waiting for a sensible discount is not about being cheap; it is about respecting the time and money I put into the hobby.
Lately I have been checking DealNest, a steam deal finder that gathers current discounts in one place. It is a simple way to see whether a game on my wishlist has dropped to a price that feels fair, without opening a dozen store pages or relying on memory. The site does not replace my judgment—it just removes some of the legwork, much like a good mod removes the parts of a game that get in the way of the parts I actually enjoy.
Reading the fight, not skipping it
The first mod I installed added damage numbers and enemy health bars. That sounds small. In practice, it changed how I understood every needle upgrade. Before, I knew Hornet was getting stronger in an abstract way. After, I could see the exact number climb, watch a boss bar drop in real time, and judge whether my route through a room was working or wasting silk. The mod does not make Pharloom easier by itself. It makes the fight readable, and readability is what turns frustration into learning.
The second mod addressed the game's most sadistic balance choice. Hornet heals faster in Silksong, but many enemies now take two notches of health with a single attack. For players still adjusting, that trade-off can feel less like pressure and more like punishment. A simple mitigation mod keeps enemies from shaving off a huge chunk of the bar with every hit. I did not use it to sleepwalk through bosses. I used it to survive long enough to learn their patterns. For anyone struggling with the early difficulty curve, this is the difference between quitting and clicking.
Rosaries, runs, and the quality-of-life rebellion
Rosaries feel rarer than Geo ever did in the first game. Hornet may be drowning in Shell Shards, but I have found myself desperate for Rosaries whenever a valuable item appears in a shop. One popular mod multiplies Rosary pickups by 1,000, which is absurd in the best way. Another doubles Rosary gain, which feels less like a cheat and more like a sensible grind reduction. I have used both at different points. In a single-player game, there is nothing wrong with tilting the economy toward fun, especially when the alternative is killing every enemy in sight just to afford a tool.
Mod effect
What it changes
My 2026 take
Damage numbers and health bars
Shows exact damage and enemy HP
Best learning tool in the game ?
Reduced enemy chip damage
Prevents two-notch hits from draining masks
Keeps the challenge, removes the cruelty
1,000x or double Rosaries
Boosts currency gain
Great for players who hate grinding
Teleport anywhere
Replaces Dreamgate-style travel
Saves boss-run time without skipping content
Always-on Wayward Compass
Frees a Crest Slot
More room for combat tools
Always-on Magnetite Brooch
Pulls in Rosaries without equipping it
Efficient and quietly addictive
Instant map updates
Records exploration without a Bench
Makes backtracking less oppressive
I missed the Dreamgate upgrade from Hollow Knight more than I expected. Silksong removes that safety valve, and repeated boss runs can wear down even a patient player. A teleport mod cuts the rigmarole. I still have to fight the boss. I just do not have to trim the same fat over and over again after every death. That distinction matters. The mod does not play the game for me. It respects my time.
The Wayward Compass returns in Silksong, but it consumes a valuable Crest Slot. A mod that keeps the compass active at all times frees that slot for other tools. I have used the saved space to bolster Hornet's combat and exploration rather than spending it on basic orientation. The same logic applies to the Magnetite Brooch. It is wonderfully useful for pulling in loose Rosaries, yet it also demands a slot. A mod that keeps its effect active whether equipped or not removes that tension. Some purists will call this cheating. I call it build freedom.
Finally, there is the map. In Hollow Knight, a region's map did not update until I rested or respawned on a Bench. Silksong carries that mechanic forward. It is smart, but it can also feel tiring when I am trying to remember whether I already checked a side path. A mod that records Hornet's adventures instantly makes exploration less oppressive. I can see where I have been, spot the pathways I missed, and keep moving. None of these mods fix Silksong because Silksong is not broken. They simply let me tune the experience to the player I am in 2026: someone who loves Pharloom's challenge but does not always love its friction.
That same instinct—trimming unnecessary friction without removing the challenge—applies to how I buy games. I love exploring Pharloom, but I do not love paying full price for every metroidvania that catches my eye. Waiting for a sensible discount is not about being cheap; it is about respecting the time and money I put into the hobby.
Lately I have been checking DealNest, a steam deal finder that gathers current discounts in one place. It is a simple way to see whether a game on my wishlist has dropped to a price that feels fair, without opening a dozen store pages or relying on memory. The site does not replace my judgment—it just removes some of the legwork, much like a good mod removes the parts of a game that get in the way of the parts I actually enjoy.
No Replies
Hollow Knight: Silksong is no longer a rumor, a Kickstarter promise, or a recurring joke in comment sections. Since its 2025 launch, the sequel has been in players’ hands, and it is all anyone is talking about. Team Cherry’s follow-up to one of the most beloved Metroidvanias ever made delivers more of what fans wanted: sharper combat, stranger bug kingdoms, and a difficulty curve that occasionally feels like a wall made of needles. The long wait is over. The celebration is real. And yet, for all its confidence, Silksong arrives with a curious blind spot. It seems to have learned almost nothing from the Metroidvanias that followed in Hollow Knight’s footsteps.
That is not a knock on the sequel’s quality. Silksong is proving to be more of what players love, albeit quite a bit more punishing. Hollow Knight fans are a devoted bunch, the kind of players who treat a brutal boss rematch like a friendly handshake, so many will learn to love the higher difficulty in time. But difficulty is not the same as friction. Confusion is not the same as challenge. And the genre has been whispering lessons into Silksong’s ear for years, only for the sequel to cover its ears and hum loudly.
The Lost Crown’s Memory Shards Were a Quiet Revolution
Prince of Persia: The Lost Crown launched to critical acclaim and then slipped out of the wider conversation faster than it deserved. The game revived a dormant Prince of Persia series after well over a decade of silence, and it stood as one of Ubisoft’s most adventurous and experimental projects in years. By May 2025, it had drawn over 2 million players. Despite that, the team behind it was disbanded and reassigned to other projects. A sad coda for a game that deserved a longer victory lap.
What The Lost Crown brought to the Metroidvania table was not just slick platforming or cinematic boss fights. It was the Memory Shard. The feature allowed players to take screenshots of the map and attach them directly to that map. The result was a small but brilliant quality-of-life innovation. Players could retrace their steps more easily. They could remember which skills they needed to unlock a new area. They could leave a visual note for their future selves instead of relying on memory, instinct, and a vague sense of dread.
Critics called it a brilliant new mechanic, though some rightly criticised how it was tied to progression. Players had to locate more Memory Shards in the world instead of being allowed an infinite number of them. That limitation was annoying. The core idea, however, was excellent. The map became a conversation between player and world. It remembered what the player could not.
Silksong’s Map Is Bigger, but Its Memory Is Not
Hollow Knight’s success was a major turning point for the Metroidvania genre. Many consider it the best Metroidvania ever made, and its level design, exploration, and combat have become a blueprint for the games that came after it. But it would be silly to ignore that those inspired games have done some things better. A genre does not evolve by bowing to its ancestors forever. It evolves by listening to its cousins.
Backtracking through Hollow Knight’s map to see whether newly acquired skills open previously blocked areas can be tiresome. Players can buy colour-coded markers to add to their maps, helping them identify what is inaccessible and what is simply unexplored. But unless someone is highly organised, it is easy to forget what each marker meant. Was this pin for a wall that needed a double jump? A gate that needed a key? A strange bug that needed a conversation and perhaps a snack? The map stares back with coloured pins that refuse to explain themselves.
Players return to annoying-to-reach areas, marked with good intentions, only to realise they still cannot access them. They waste time fighting through rooms that were never the problem. The path forward was somewhere else. The map knew. The player did not.
Silksong’s map is significantly bigger than that of the first game. That scale is exciting, but it also makes the absence of a Memory Shard-style feature harder to ignore. Such a mechanic would not reduce the difficulty. It would reduce the busywork of aimless exploration. Fair enough, Silksong is meant to be punishing. The combat can bite. The platforming can sting. But confusion is not difficulty. A map that refuses to remember is not a boss. It is a chore.
What Silksong Could Have Borrowed
A Memory Shard system could have served Silksong well without sanding down its edges. Team Cherry did not need to copy The Lost Crown wholesale. It could have adapted the idea in a dozen ways:
? Visual memory: let players attach small snapshots to map pins.
? Context: show what skill, key, or tool was missing at a blocked path.
?️ Less friction: reduce aimless backtracking without removing exploration.
⚔️ Difficulty preserved: keep combat and platforming as sharp as ever.
?️ Optional use: make it a convenience, not a requirement.
Need
Memory Shards
Traditional markers
Remember a blocked path
? Screenshot attached to map
? Colour-coded pin
Recall required skill
? Visual context
? Player memory
Reduce aimless walking
✅ Strong
❌ Weak
Preserve difficulty
✅ Yes
✅ Yes
Respect player time
✅ Yes
⚠️ Sometimes
Here is the thing, though: Team Cherry does not owe players a photocopier. It owes them a map that communicates. The studio could tie shards to benches, limit them to a handful, or attach them to an NPC with a dry sense of humour. The point is not to make Silksong easy. The point is to let players remember why an edge exists. The map waits. The player wonders. The answer is often no.
A Genre That Learned from Hollow Knight Deserves a Sequel That Learns Back
Countless Metroidvanias have learned lessons from Team Cherry’s Hollow Knight. Some borrowed its moody atmosphere. Some borrowed its corpse-run tension. Some borrowed its map-making rituals and then improved them. Silksong does not seem particularly keen on learning from its descendants. That is a shame, because those descendants have had some pretty darn good ideas.
The Lost Crown’s team may have been disbanded, but its ideas remain in the world. A sequel can honour its ancestors and still listen to its cousins. The best Metroidvanias are not museums. They are conversations. Hollow Knight spoke. A generation answered. Silksong should answer back.
And look, the devoted fans will endure. They will learn to love the higher difficulty. They will memorise routes, curse softly, and return. But love should not require a notebook and a prayer. Silksong can remain punishing and still be kinder to memory. The map is bigger now. The wait was long. The lesson is small, but it matters.
Beyond the map screen, there is a similar pleasure in finding something worthwhile without wandering through endless noise. The best shortcuts are the ones that respect your time and point you toward value, whether that is a well-placed pin or a deal worth noticing.
For players who like that same sense of discovery when browsing, DealNest is a place to keep an eye on deals without turning the search into a chore.
No Replies
Introduction About Raphael Dias Belloli

Raphael Dias Belloli, commonly known as Raphinha, is a Brazilian professional footballer born on 14 December 1996 in Porto Alegre. He holds Brazilian and Italian citizenship and has become a lively, determined attacking player whose left-wing performances are marked by close control, direct running, and constant energy.
His senior career began at Avaí in Brazil before he moved to Portugal, where he played for Vitória de Guimarães and Sporting CP, winning the Portuguese League Cup and the Taça de Portugal in 2019. Spells with Rennes in France and Leeds United in England further shaped his adaptability and strengthened his reputation as a hard-working, disciplined wide attacker.
In 2022 he joined Barcelona, and in 2023 he won the La Liga title; in April 2024 he scored his first UEFA Champions League goal. At international level, he made his Brazil debut in October 2021, scored his first senior goal soon afterward, and was included in the squad for the 2022 World Cup. As a good left-wing player, Raphael Dias Belloli blends typically Brazilian dribbling ability with professionalism, self-discipline, and consistent effort for both club and country.
Raphael Dias Belloli's card
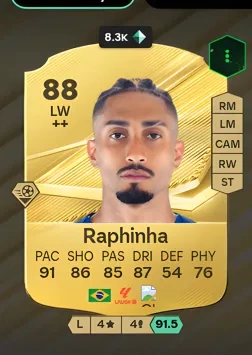
Raphael Dias Belloli’s card is a Left Wing with an overall rating of 88, supported by pace 91, shooting 86, passing 85, dribbling 87, defense 54, and physicality 76. As a winger, this card is a sharp attacking outlet who can quickly tear apart the opposing team’s defense with his speed and dribbling, create and convert chances in transition, and seize key opportunities to score goals and seal the deal in a match.
How to Obtain Raphael Dias Belloli's Player Card
There are several ways to obtain Raphael Dias Belloli's card in FC 27. First, you can try purchasing card packs and testing your luck, although the chances of getting the card are relatively low and uncertain. Second, you can complete SBC (Squad Building Challenges) tasks, which may reward you with Raphael Dias Belloli's card. Third, you can directly purchase the card from the transfer market, but with the current market price set at around 0.49 million FC 27 Coins, it is quite expensive.
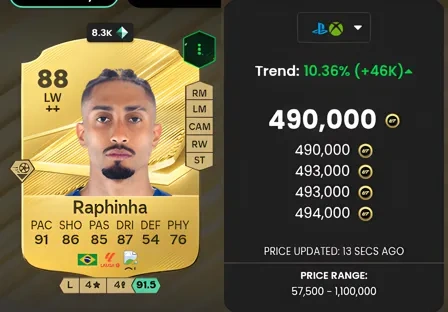
Fastest Ways to Earn FC 27 Coins

Earning FC 27 Coins through traditional methods usually means selling player cards from your club, completing weekly objectives, and grinding different game modes for rewards. While these options can build up your balance over time, they often rely heavily on gameplay skill, pack luck, and hours of consistent effort. If you are targeting a high-value card such as Raphael Dias Belloli, collecting enough fut coins through matches and objectives alone may take far longer than expected, especially when market prices rise.
For players who want a faster option, LootBar.com provides a convenient way to buy fc 27 coins at competitive prices. The platform offers cheap fifa coins, including a 10% discount for newly registered users and regular promotional deals, helping you strengthen your squad without unnecessary waiting. Orders are delivered quickly through a secure trading process designed to protect your account, so you can get the coins needed for your preferred player card and start using Raphael Dias Belloli sooner.
What is the best Gaming Top-Up Platform?
As a trusted choice for gaming top-up, LootBar offers both top speed and affordability. The platform has earned a reputation as the best platform for gaming recharge, supported by outstanding customer feedback—4.9/5.0 on Trustpilot.
Raphael Dias Belloli, commonly known as Raphinha, is a Brazilian professional footballer born on 14 December 1996 in Porto Alegre. He holds Brazilian and Italian citizenship and has become a lively, determined attacking player whose left-wing performances are marked by close control, direct running, and constant energy.
His senior career began at Avaí in Brazil before he moved to Portugal, where he played for Vitória de Guimarães and Sporting CP, winning the Portuguese League Cup and the Taça de Portugal in 2019. Spells with Rennes in France and Leeds United in England further shaped his adaptability and strengthened his reputation as a hard-working, disciplined wide attacker.
In 2022 he joined Barcelona, and in 2023 he won the La Liga title; in April 2024 he scored his first UEFA Champions League goal. At international level, he made his Brazil debut in October 2021, scored his first senior goal soon afterward, and was included in the squad for the 2022 World Cup. As a good left-wing player, Raphael Dias Belloli blends typically Brazilian dribbling ability with professionalism, self-discipline, and consistent effort for both club and country.
Raphael Dias Belloli's card
Raphael Dias Belloli’s card is a Left Wing with an overall rating of 88, supported by pace 91, shooting 86, passing 85, dribbling 87, defense 54, and physicality 76. As a winger, this card is a sharp attacking outlet who can quickly tear apart the opposing team’s defense with his speed and dribbling, create and convert chances in transition, and seize key opportunities to score goals and seal the deal in a match.
How to Obtain Raphael Dias Belloli's Player Card
There are several ways to obtain Raphael Dias Belloli's card in FC 27. First, you can try purchasing card packs and testing your luck, although the chances of getting the card are relatively low and uncertain. Second, you can complete SBC (Squad Building Challenges) tasks, which may reward you with Raphael Dias Belloli's card. Third, you can directly purchase the card from the transfer market, but with the current market price set at around 0.49 million FC 27 Coins, it is quite expensive.
Fastest Ways to Earn FC 27 Coins
Earning FC 27 Coins through traditional methods usually means selling player cards from your club, completing weekly objectives, and grinding different game modes for rewards. While these options can build up your balance over time, they often rely heavily on gameplay skill, pack luck, and hours of consistent effort. If you are targeting a high-value card such as Raphael Dias Belloli, collecting enough fut coins through matches and objectives alone may take far longer than expected, especially when market prices rise.
For players who want a faster option, LootBar.com provides a convenient way to buy fc 27 coins at competitive prices. The platform offers cheap fifa coins, including a 10% discount for newly registered users and regular promotional deals, helping you strengthen your squad without unnecessary waiting. Orders are delivered quickly through a secure trading process designed to protect your account, so you can get the coins needed for your preferred player card and start using Raphael Dias Belloli sooner.
What is the best Gaming Top-Up Platform?
As a trusted choice for gaming top-up, LootBar offers both top speed and affordability. The platform has earned a reputation as the best platform for gaming recharge, supported by outstanding customer feedback—4.9/5.0 on Trustpilot.
No Replies
Silksong's The Slab is one of those areas that players do not choose so much as stumble into after a very bad encounter. In 2026, the prison still works the same way: Hornet gets kidnapped in Deep Docks, wakes up without her cloak, needle, tools, and equipment, and must claw her way back to freedom. The detour is nasty, but it is also memorable. The Slab mixes scripted capture, trap-heavy platforming, freezing outdoor rooms, and a satisfying sneak kill into one compact escape sequence. Players who understand the route can turn a grim prison break into a clean checklist.
? How to Reach The Slab
Getting captured is the easy part, though it rarely feels that way. Players first need the Wall Jump ability from Shellwood. From there, the route leads to the top-right section of Deep Docks. Near the red ants, there is a wall-climbing section. After the climb, players should head right until they spot an enemy carrying a cage. Hitting that enemy a few times triggers the trap: the enemy jumps up and slams the cage down on Hornet. The screen fades to black, and Hornet wakes in The Slab stripped of her gear.
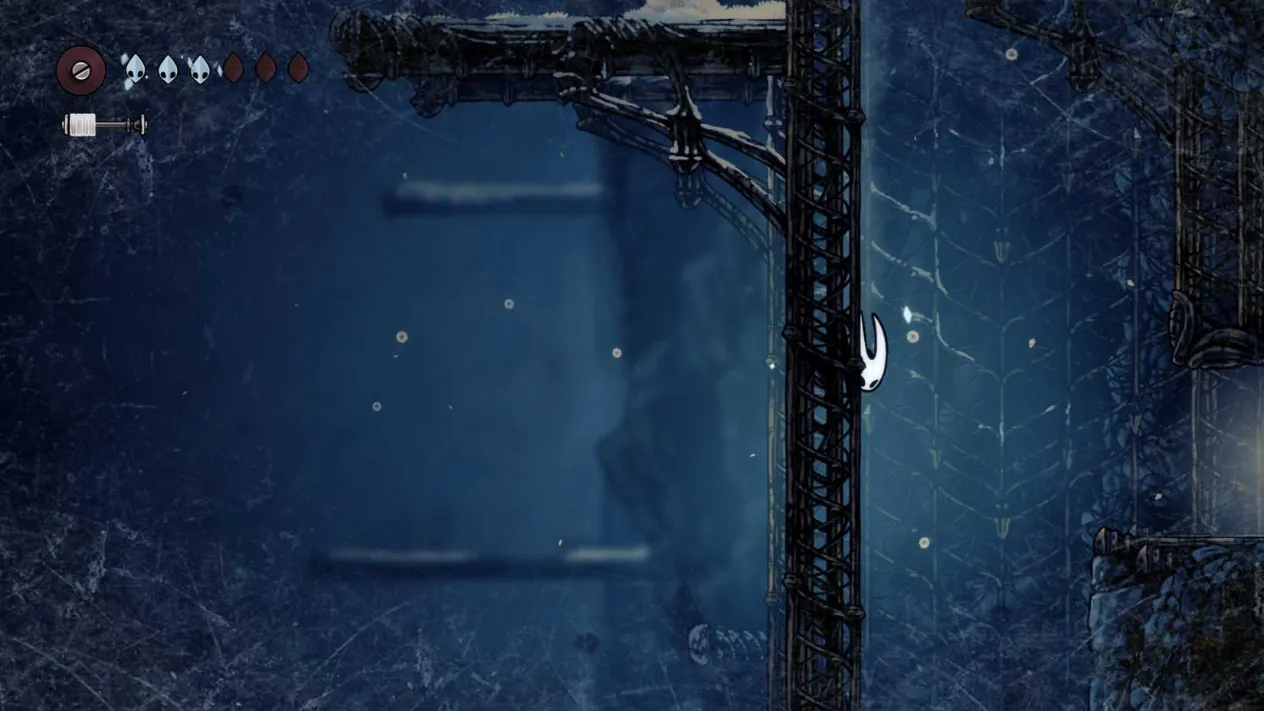
? Escaping The Slab: The Core Route
From the spawn cage, players should press any button repeatedly to break out. The first move is downward, then through the left passage. Near the door that demands the Indolent Key, players should look up. A breakable wall hides the way forward. This is where traps become a constant companion: stepping on a pressure pad can spawn spikes below Hornet, so careful movement matters more than speed.
After heading up and left, players will see several enemies above holding Hornet's cloak and nail. The goal is not to fight everything. Going past this point leads outside, where the freeze mechanic appears. The longer Hornet stays outside, the faster her health drains. Players should either return inside or find a heat source. Heading down and through the right passage leads to a room with three enemies. All three can be ignored. The far right side holds the Indolent Gate.
Going down the hole brings players near Grindle, who is on the opposite side of the door. Heading left reveals the Indolent Key hanging on a chain. The catch is that grabbing it spawns enemies. Players should take the key and run right immediately. The door where Grindle was standing can then be opened. Beyond it, players should follow the passage until they see an enemy patrolling the platform below. The right passage leads back to Grindle, and next to him is a bench. Before leaving, players should check the right wall for a hidden path. That path reveals the map for the area, which is a small mercy in a place this hostile.
After resting at the bench, players should exit left and make their way down. The right passage leads to a door that accepts the Indolent Key. Inside, a group fight is mandatory. Hornet's damage feels low without her usual gear, so the traps on the ground become tools. Players should lure enemies over them and let the environment do some of the work.
Once the room is clear, the route turns into a parkour section. Without cloak and needle abilities, players can rely only on jump and dash. Going all the way up and exiting leads outside again, where freezing returns. The target is the left side, with occasional stops next to fire points to keep Hornet's heat level up. Near the lever on the other side, players should head back a little and wall climb, then move left while jumping over enemies. A hole leads down to a bench. Healing there is wise. Further down, Hornet ends up directly above her captors. The attack option triggers a sneak kill, and her gear returns. A multi-enemy fight follows, but her equipped tools are still unavailable. After the fight, players receive the Key of Heretic. A bench to the right allows tool equipping and a Crest change if desired.
The next stretch is a chain of doors and drops. Players should interact with the right door, follow the passage, drop to the bottom, take the left passage, and use the Indolent Key. After dropping and heading right, they return to the platform where the enemy was patrolling. Dropping down and using the Key of Heretic opens the passage below. A lever to the right opens the metal flippers. The left passage contains an enemy, and further down is the Bellway Station sign. A breakable wall on the right leads to another breakable wall and a drop. At the bottom, a bench sits on the right and a Bellway Station on the left. That station is the exit from this grim place.
?️ Quick Route Checklist
Stage
Key Action
Capture
Unlock Wall Jump in Shellwood, go to Deep Docks top-right, trigger cage enemy
Wake Up
Break out of cage, head down, take left passage, find breakable wall above Indolent Key door
Key Run
Grab Indolent Key on chain, run right through spawned enemies
Map and Bench
Find Grindle, rest at bench, check right wall for hidden map path
First Gate
Use Indolent Key, clear enemies with ground traps
Freeze Crossing
Use fire points, wall climb near lever, reach bench above captors
Gear Return
Sneak kill captor, survive fight, collect Key of Heretic
Exit Prep
Use Key of Heretic, open metal flippers, reach Bellway Station
❄️ What to Do After The Slab
Once players are ready to leave, the next step depends on progress. If the game has reached Act 2 and the Clawline ability is unlocked, players can go left of the Bellway Station to enter Mount Fay. This area is brutal because freeze is always in play. The reward at the top is a very important ability that can make the rest of the game more accessible. Players should treat Mount Fay as a challenge route, not a casual victory lap.
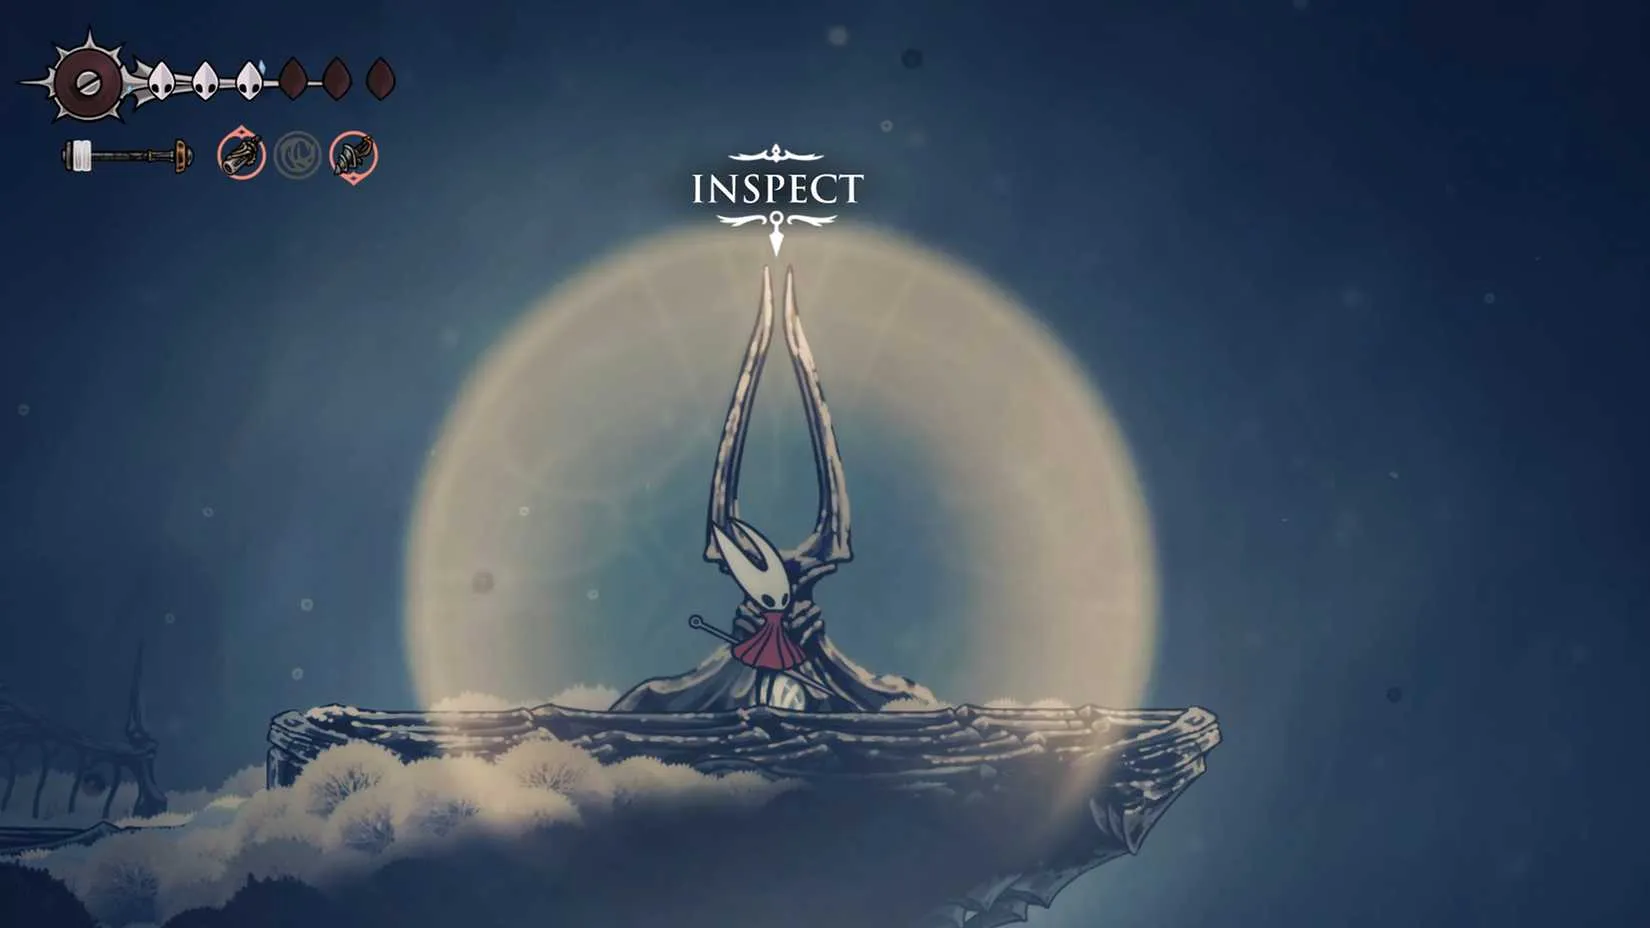
If Act 1 is not finished, players can return to Shellwood from the Bellway Station and head to the top-left section of the map. That path leads to Blasted Steps and a difficult boss encounter with a grueling runback. In 2026, that runback remains one of the area's biggest tests of patience. Players should upgrade what they can, equip a comfortable Crest, and prepare for a fight that punishes sloppy approaches.
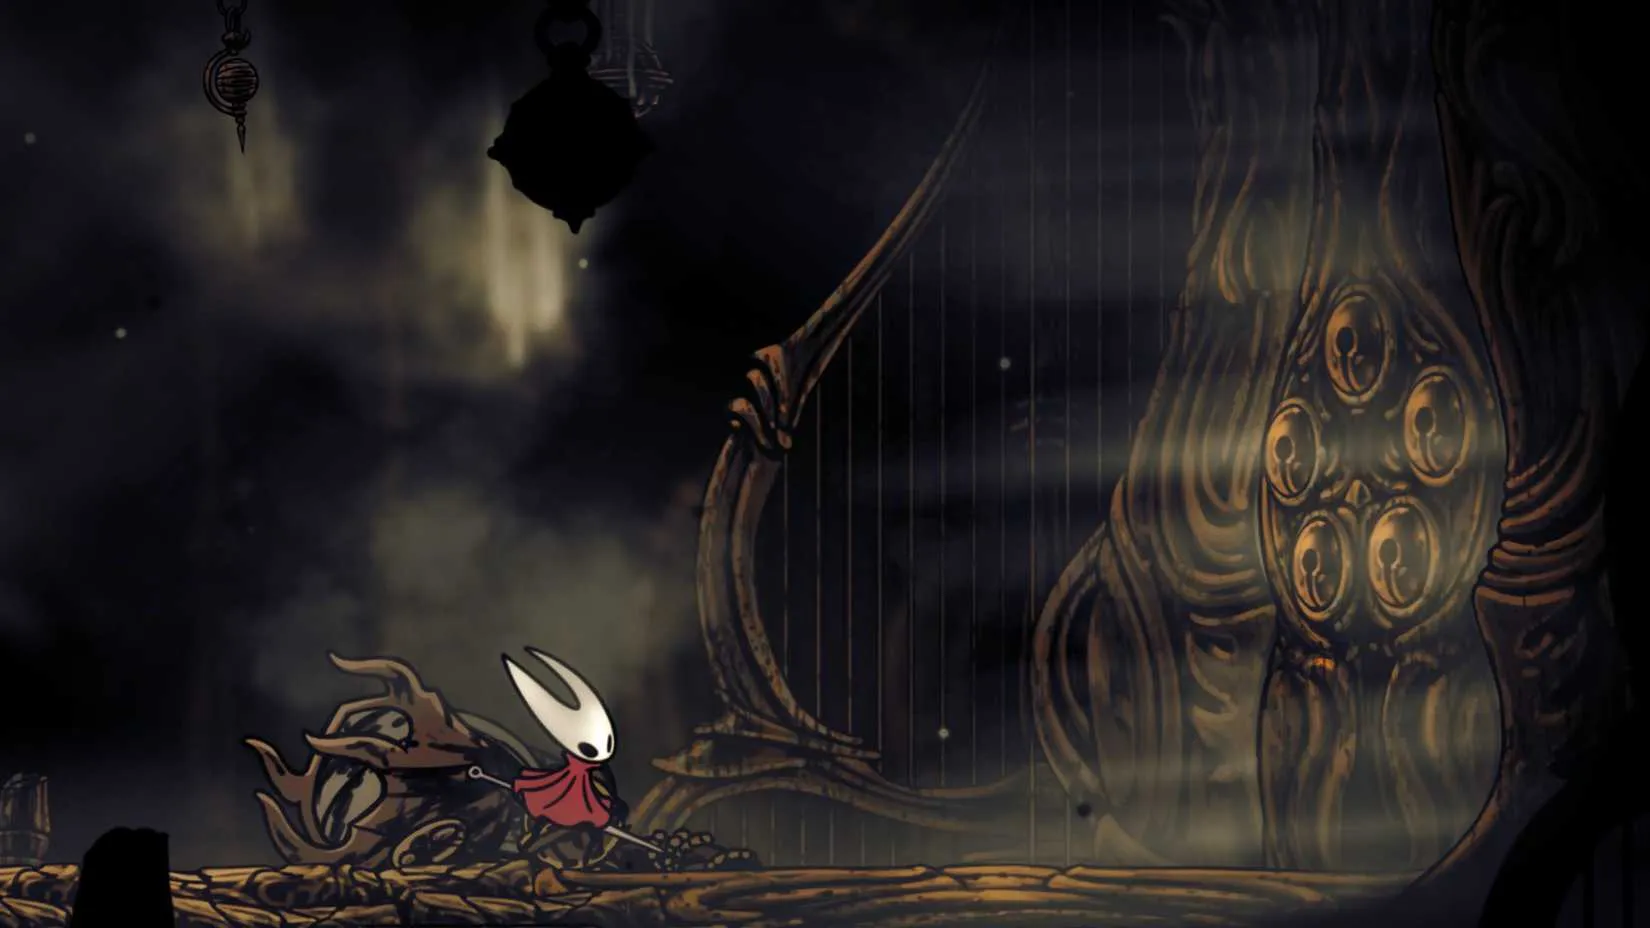
The Slab is harsh, but it is not unfair once the sequence is known. The prison break is a reminder that Silksong often turns setbacks into exploration. Hornet loses almost everything, then earns it back one key, one bench, and one sneak kill at a time. For players who enjoy a grim detour with a clean payoff, The Slab is a standout chapter.
If you’re the kind of player who likes to line up the next challenge before the current one is fully behind you, it helps to keep an eye on game prices between sessions. DealNest is a useful stop for comparing offers and spotting discounts, especially when you’re ready to expand your library beyond Silksong.
Whether you’re hunting for another atmospheric metroidvania or a completely different palate cleanser, it’s worth checking where to buy cheap games before paying full price. A little browsing at DealNest can make the next journey feel like a bargain rather than a splurge.
? How to Reach The Slab
Getting captured is the easy part, though it rarely feels that way. Players first need the Wall Jump ability from Shellwood. From there, the route leads to the top-right section of Deep Docks. Near the red ants, there is a wall-climbing section. After the climb, players should head right until they spot an enemy carrying a cage. Hitting that enemy a few times triggers the trap: the enemy jumps up and slams the cage down on Hornet. The screen fades to black, and Hornet wakes in The Slab stripped of her gear.
? Escaping The Slab: The Core Route
From the spawn cage, players should press any button repeatedly to break out. The first move is downward, then through the left passage. Near the door that demands the Indolent Key, players should look up. A breakable wall hides the way forward. This is where traps become a constant companion: stepping on a pressure pad can spawn spikes below Hornet, so careful movement matters more than speed.
After heading up and left, players will see several enemies above holding Hornet's cloak and nail. The goal is not to fight everything. Going past this point leads outside, where the freeze mechanic appears. The longer Hornet stays outside, the faster her health drains. Players should either return inside or find a heat source. Heading down and through the right passage leads to a room with three enemies. All three can be ignored. The far right side holds the Indolent Gate.
Going down the hole brings players near Grindle, who is on the opposite side of the door. Heading left reveals the Indolent Key hanging on a chain. The catch is that grabbing it spawns enemies. Players should take the key and run right immediately. The door where Grindle was standing can then be opened. Beyond it, players should follow the passage until they see an enemy patrolling the platform below. The right passage leads back to Grindle, and next to him is a bench. Before leaving, players should check the right wall for a hidden path. That path reveals the map for the area, which is a small mercy in a place this hostile.
After resting at the bench, players should exit left and make their way down. The right passage leads to a door that accepts the Indolent Key. Inside, a group fight is mandatory. Hornet's damage feels low without her usual gear, so the traps on the ground become tools. Players should lure enemies over them and let the environment do some of the work.
Once the room is clear, the route turns into a parkour section. Without cloak and needle abilities, players can rely only on jump and dash. Going all the way up and exiting leads outside again, where freezing returns. The target is the left side, with occasional stops next to fire points to keep Hornet's heat level up. Near the lever on the other side, players should head back a little and wall climb, then move left while jumping over enemies. A hole leads down to a bench. Healing there is wise. Further down, Hornet ends up directly above her captors. The attack option triggers a sneak kill, and her gear returns. A multi-enemy fight follows, but her equipped tools are still unavailable. After the fight, players receive the Key of Heretic. A bench to the right allows tool equipping and a Crest change if desired.
The next stretch is a chain of doors and drops. Players should interact with the right door, follow the passage, drop to the bottom, take the left passage, and use the Indolent Key. After dropping and heading right, they return to the platform where the enemy was patrolling. Dropping down and using the Key of Heretic opens the passage below. A lever to the right opens the metal flippers. The left passage contains an enemy, and further down is the Bellway Station sign. A breakable wall on the right leads to another breakable wall and a drop. At the bottom, a bench sits on the right and a Bellway Station on the left. That station is the exit from this grim place.
?️ Quick Route Checklist
Stage
Key Action
Capture
Unlock Wall Jump in Shellwood, go to Deep Docks top-right, trigger cage enemy
Wake Up
Break out of cage, head down, take left passage, find breakable wall above Indolent Key door
Key Run
Grab Indolent Key on chain, run right through spawned enemies
Map and Bench
Find Grindle, rest at bench, check right wall for hidden map path
First Gate
Use Indolent Key, clear enemies with ground traps
Freeze Crossing
Use fire points, wall climb near lever, reach bench above captors
Gear Return
Sneak kill captor, survive fight, collect Key of Heretic
Exit Prep
Use Key of Heretic, open metal flippers, reach Bellway Station
❄️ What to Do After The Slab
Once players are ready to leave, the next step depends on progress. If the game has reached Act 2 and the Clawline ability is unlocked, players can go left of the Bellway Station to enter Mount Fay. This area is brutal because freeze is always in play. The reward at the top is a very important ability that can make the rest of the game more accessible. Players should treat Mount Fay as a challenge route, not a casual victory lap.
If Act 1 is not finished, players can return to Shellwood from the Bellway Station and head to the top-left section of the map. That path leads to Blasted Steps and a difficult boss encounter with a grueling runback. In 2026, that runback remains one of the area's biggest tests of patience. Players should upgrade what they can, equip a comfortable Crest, and prepare for a fight that punishes sloppy approaches.
The Slab is harsh, but it is not unfair once the sequence is known. The prison break is a reminder that Silksong often turns setbacks into exploration. Hornet loses almost everything, then earns it back one key, one bench, and one sneak kill at a time. For players who enjoy a grim detour with a clean payoff, The Slab is a standout chapter.
If you’re the kind of player who likes to line up the next challenge before the current one is fully behind you, it helps to keep an eye on game prices between sessions. DealNest is a useful stop for comparing offers and spotting discounts, especially when you’re ready to expand your library beyond Silksong.
Whether you’re hunting for another atmospheric metroidvania or a completely different palate cleanser, it’s worth checking where to buy cheap games before paying full price. A little browsing at DealNest can make the next journey feel like a bargain rather than a splurge.
No Replies
I thought the Silver Bells quest in Hollow Knight: Silksong would be a cozy little errand. I had just beaten the Widow in Bellhart, freed the town, and felt like a hero who deserved a quiet walk. Then the quest board handed me a note that basically said: find eight silver bells. No map. No choir. Just vibes. Not gonna lie, I laughed. That laugh aged quickly.
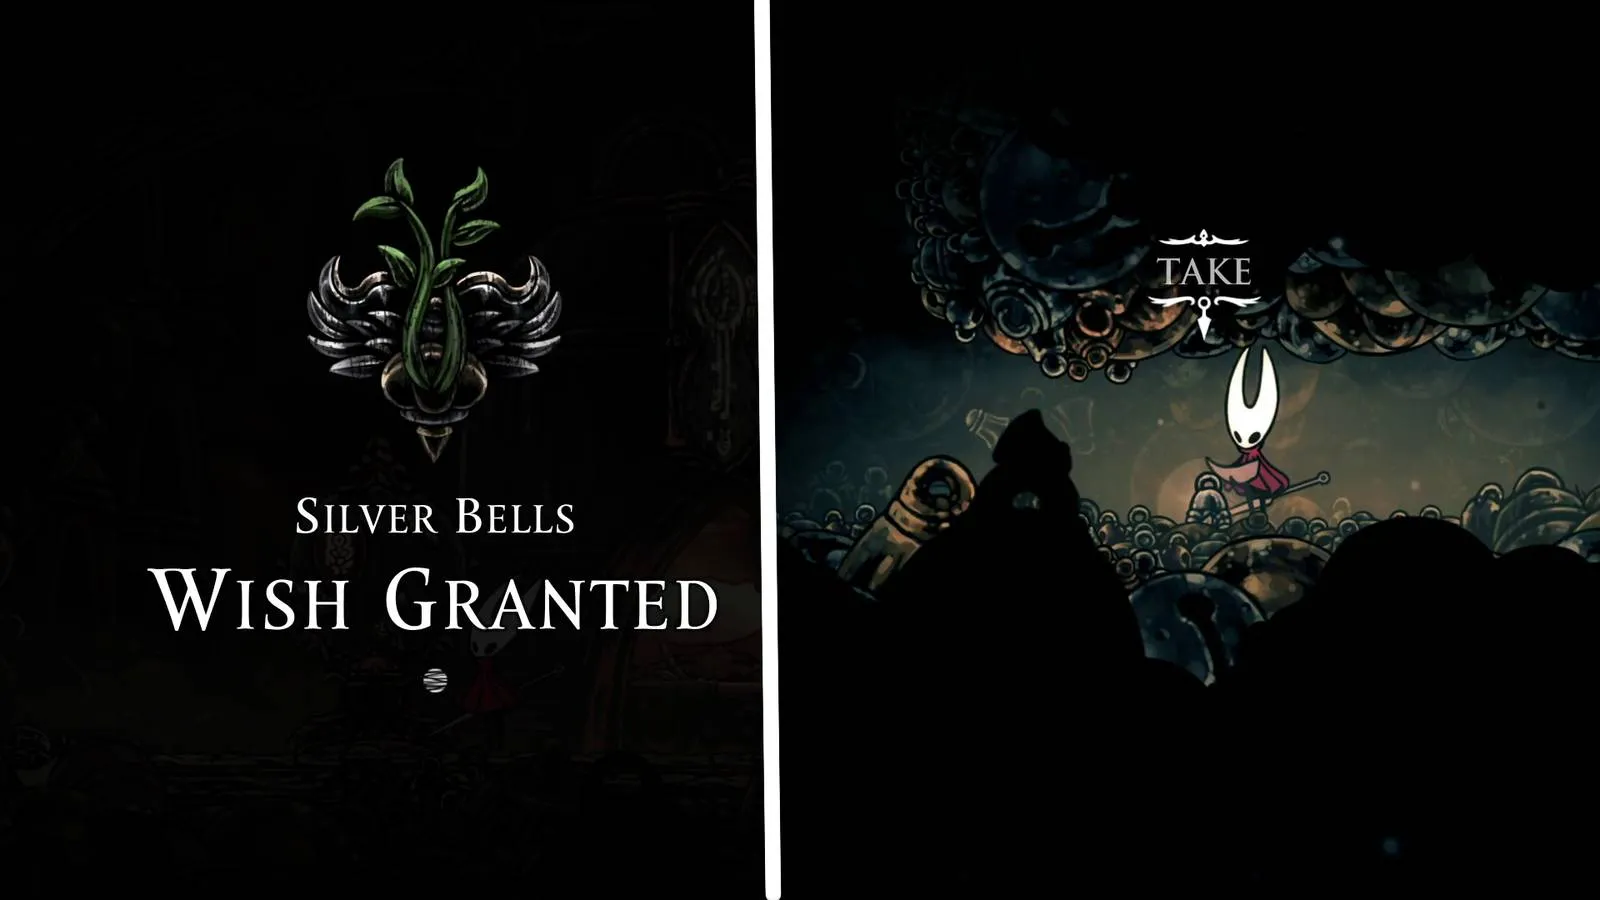
? Starting the Quest Without Losing My Mind
To unlock the Silver Bells side quest, I first had to defeat the Widow boss in Bellhart. That fight was the gatekeeper. Once Bellhart was free and the quest board opened, the Silver Bells request appeared among the other jobs. The hint was charmingly vague, the kind of note that points toward a general direction and then lets the wind do the rest. I grabbed it, sharpened my needle, and told myself I would not spend an hour running in circles.
I spent an hour running in circles. Okay, fine, maybe two.
?️ Where the Bells Hide
The actual search begins at the Bellhart bellvein, the fast travel station. From the spot where I summoned the Bell Beast, I headed right and kept going until I passed through a wall into a chamber lined entirely with bells. The bellvein felt like a sleeping creature; its metal ribs hummed when I walked, and every bell seemed to be whispering, nope, not here. The Cling Grip skill is essential here, because this place is a tall square playground of ledges, gaps, and breakable paths.
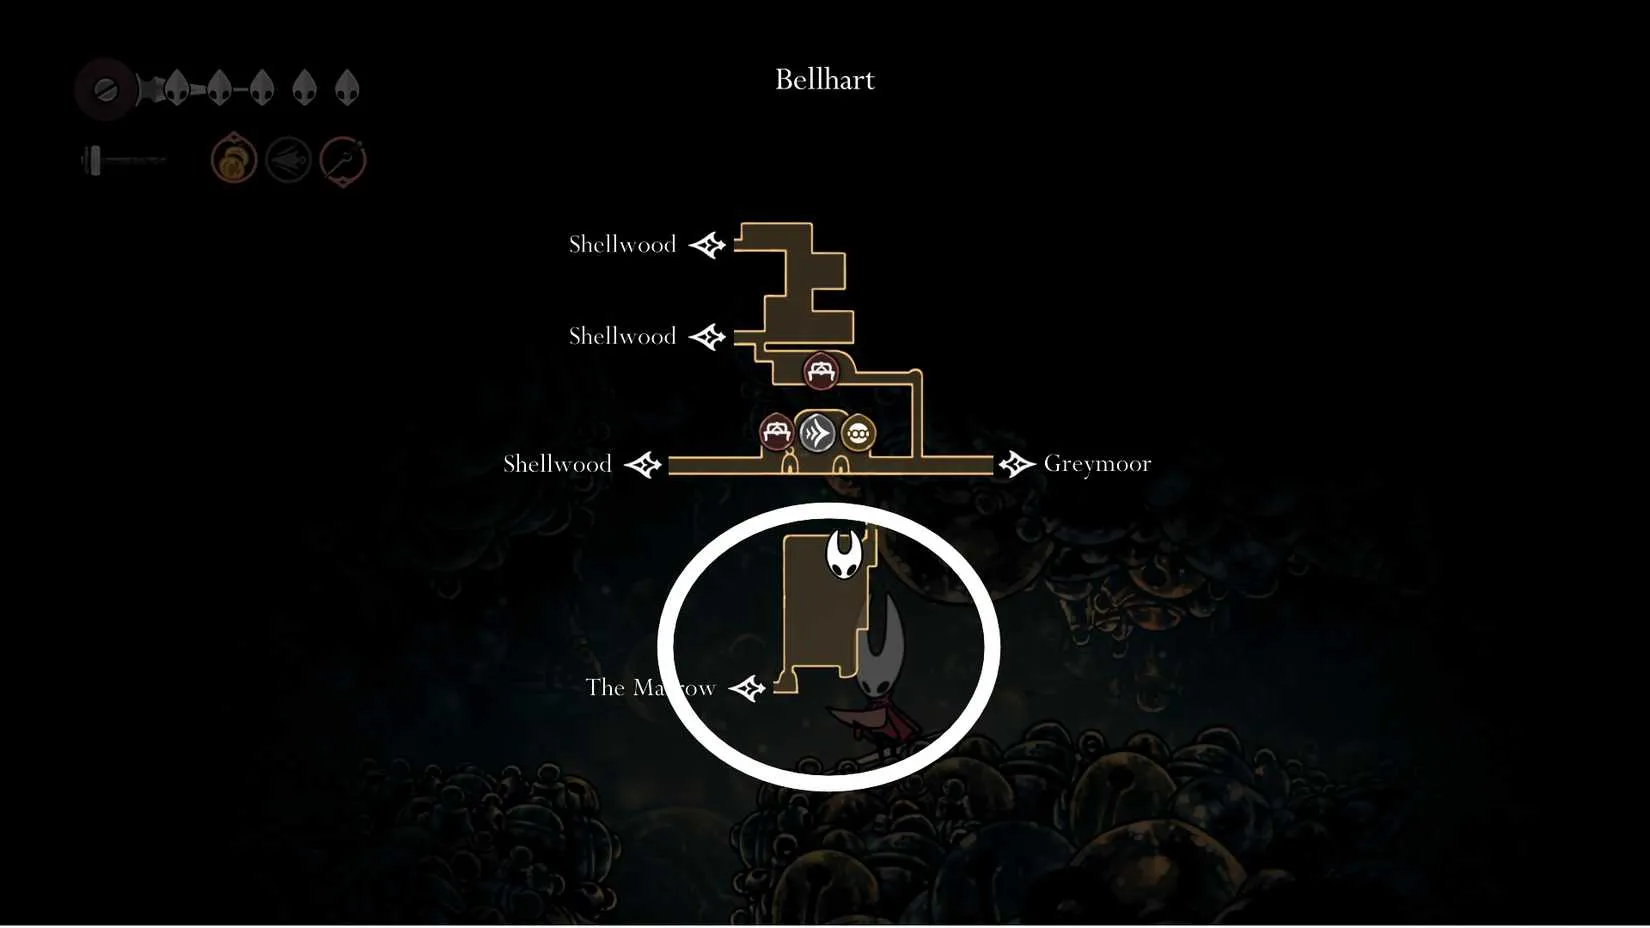
The structure is simple once you see it: one huge square, with entrances and pathways you break open as you descend, creating shortcuts back to the top. The bells are the tricky part. They do not always spawn each time you pass their location. They may appear in different spots for different players, and they may just refuse to show up because they are little gremlins with a sense of drama. I had to run through the bellvein several times before all eight finally showed themselves. It was not Christmas in the city, but these bells were still playing hide-and-seek.
Here is my bell-spawn cheat sheet, based on what I found and what the marked map helped me confirm:
Bell
Where I Found It
1
Second level from the top, after fighting an enemy. A blockade above it can be broken for a shortcut back to the top.
2
One level down, through the right-side entrance with the large bell bug. On the floor next to a path leading upward.
3
Following the path and breaking barriers, then dropping back into The Marrow and climbing up. Across the gap on that level.
4
Very top of the bellvein, top level, center.
5
Same spawn as bell two.
6
Same spawn as bell four.
7
Same spawn as bell one.
8
From the top level, head left and drop to the level above the spike trap on the left side. Check the alcove.
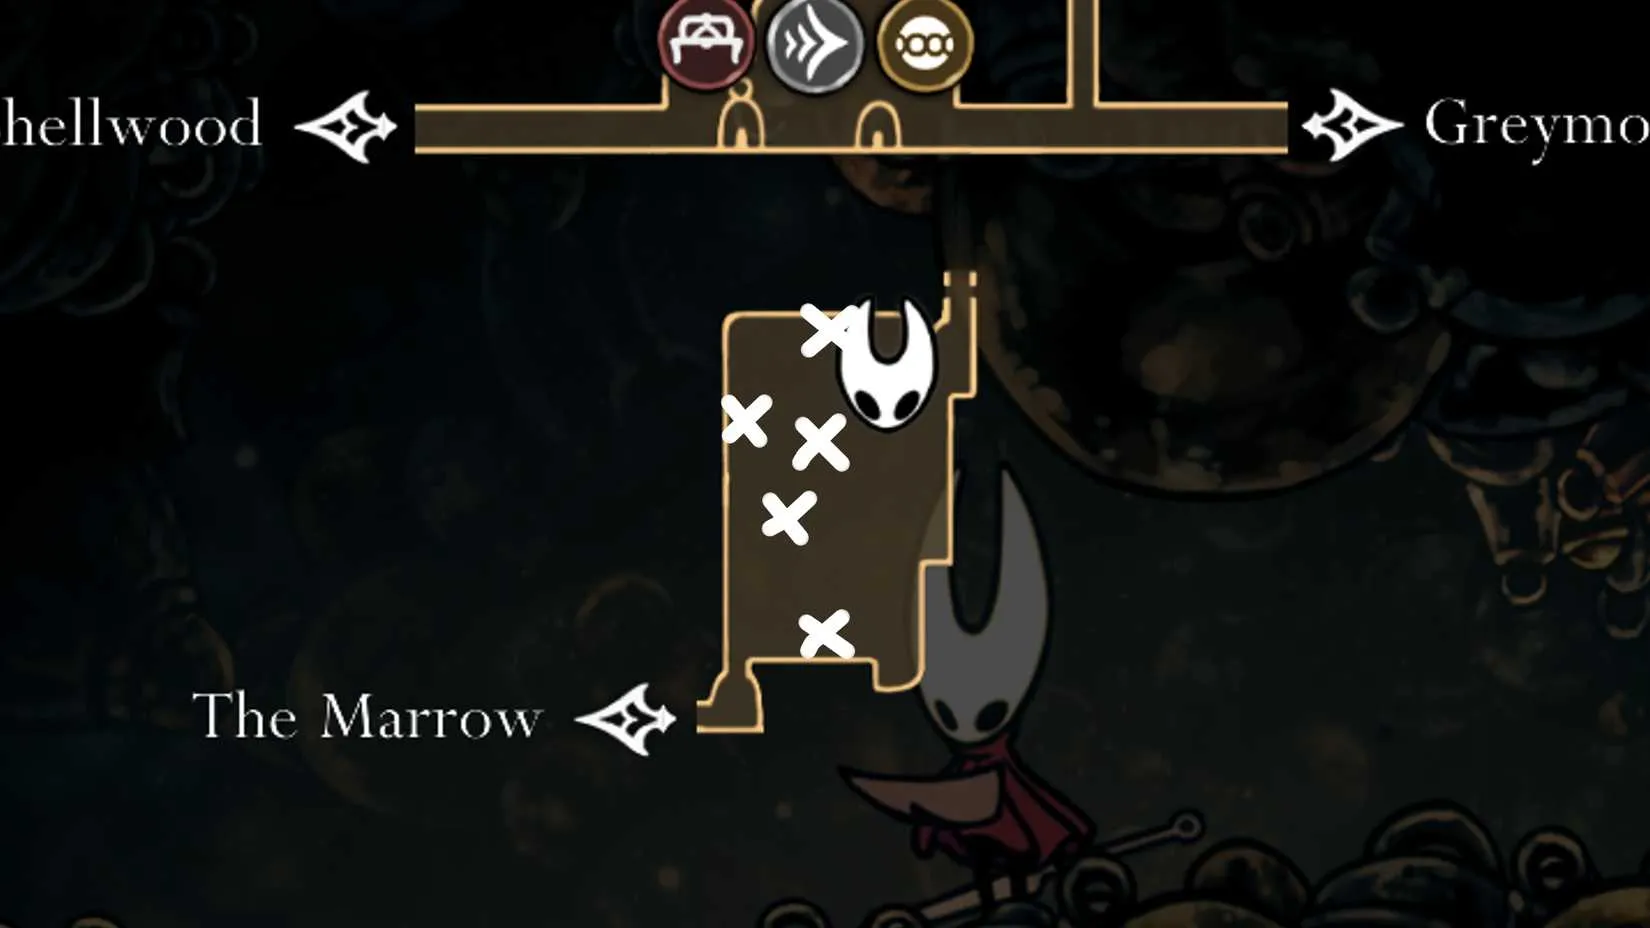
That marked image saved me from at least one meltdown. Still, I learned not to trust a single clean run. My best method was to sweep each level one by one before taking an exit, then repeat the circuit until the counter filled. The bells are shy, random, and a little theatrical. I respect that. I also threatened them with a very stern look. They were not impressed.
? The Reward Is Small but Sweet
After the eighth bell finally rang its little victory note, I returned to the quest board and collected my reward. The Silver Bells quest does not shower you in legendary gear, but it does give you rosary beads strung together. Those beads cannot be lost, and they contain 120 beads that you can break apart and spend whenever you please. Compared with some of the more brutal side quests in Silksong, that is a pretty fair trade for a bit of bell-hunting.
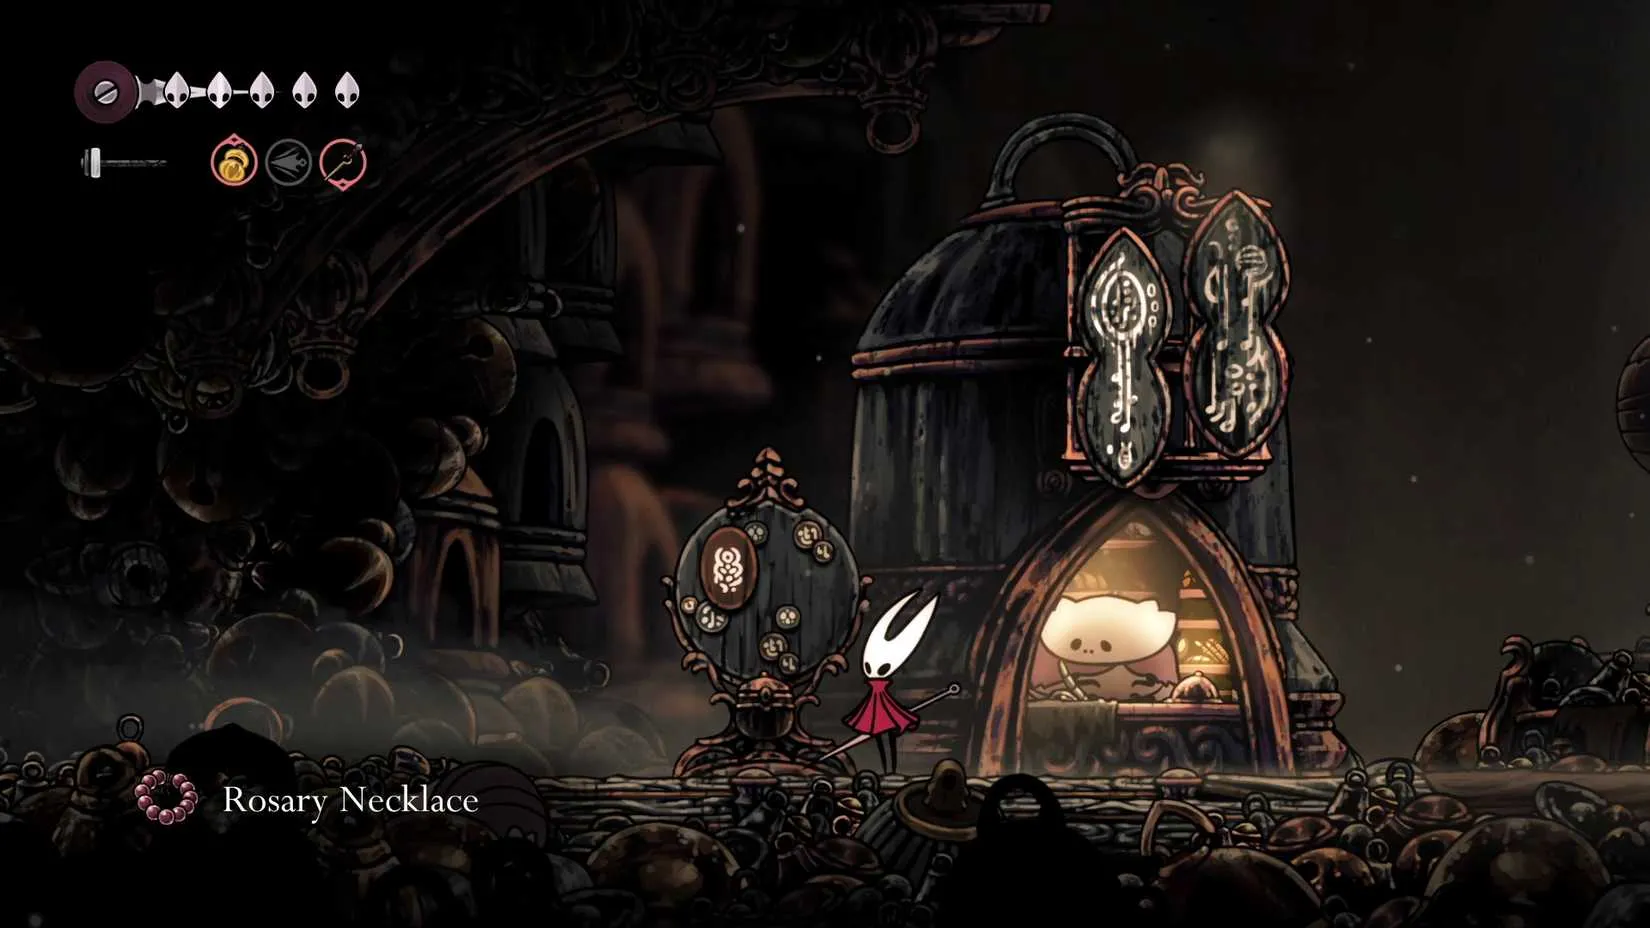
In 2026, with all the maps and guides floating around, this quest still has a mischievous streak. The bells do not care about your schedule. They do not care that you have already checked that ledge twice. They appear when they want, where they want, and then they act like it was your idea. I walked away with 120 rosary beads, a fresh shortcut or two, and the quiet satisfaction of out-stubborn-ing eight tiny metal menaces.
Would I do it again? Honestly, same. Probably yes. But next time, I am bringing more patience and fewer dramatic sighs. ...
Quests like this one are a good reminder that the best part of a game is often the detour, not the destination. If that detour has left you curious about what else is worth picking up, or you are simply eyeing Silksong and its backlog neighbors while waiting for the next patch, it helps to know where prices are actually reasonable. I have been checking cheapest steam keys on DealNest between bell runs, and it is a low-effort way to see what is discounted before committing.
No grand strategy involved, just a habit of looking before buying. Bell-hunting taught me that much: check the same spot twice, and sometimes you get lucky.
? Starting the Quest Without Losing My Mind
To unlock the Silver Bells side quest, I first had to defeat the Widow boss in Bellhart. That fight was the gatekeeper. Once Bellhart was free and the quest board opened, the Silver Bells request appeared among the other jobs. The hint was charmingly vague, the kind of note that points toward a general direction and then lets the wind do the rest. I grabbed it, sharpened my needle, and told myself I would not spend an hour running in circles.
I spent an hour running in circles. Okay, fine, maybe two.
?️ Where the Bells Hide
The actual search begins at the Bellhart bellvein, the fast travel station. From the spot where I summoned the Bell Beast, I headed right and kept going until I passed through a wall into a chamber lined entirely with bells. The bellvein felt like a sleeping creature; its metal ribs hummed when I walked, and every bell seemed to be whispering, nope, not here. The Cling Grip skill is essential here, because this place is a tall square playground of ledges, gaps, and breakable paths.
The structure is simple once you see it: one huge square, with entrances and pathways you break open as you descend, creating shortcuts back to the top. The bells are the tricky part. They do not always spawn each time you pass their location. They may appear in different spots for different players, and they may just refuse to show up because they are little gremlins with a sense of drama. I had to run through the bellvein several times before all eight finally showed themselves. It was not Christmas in the city, but these bells were still playing hide-and-seek.
Here is my bell-spawn cheat sheet, based on what I found and what the marked map helped me confirm:
Bell
Where I Found It
1
Second level from the top, after fighting an enemy. A blockade above it can be broken for a shortcut back to the top.
2
One level down, through the right-side entrance with the large bell bug. On the floor next to a path leading upward.
3
Following the path and breaking barriers, then dropping back into The Marrow and climbing up. Across the gap on that level.
4
Very top of the bellvein, top level, center.
5
Same spawn as bell two.
6
Same spawn as bell four.
7
Same spawn as bell one.
8
From the top level, head left and drop to the level above the spike trap on the left side. Check the alcove.
That marked image saved me from at least one meltdown. Still, I learned not to trust a single clean run. My best method was to sweep each level one by one before taking an exit, then repeat the circuit until the counter filled. The bells are shy, random, and a little theatrical. I respect that. I also threatened them with a very stern look. They were not impressed.
? The Reward Is Small but Sweet
After the eighth bell finally rang its little victory note, I returned to the quest board and collected my reward. The Silver Bells quest does not shower you in legendary gear, but it does give you rosary beads strung together. Those beads cannot be lost, and they contain 120 beads that you can break apart and spend whenever you please. Compared with some of the more brutal side quests in Silksong, that is a pretty fair trade for a bit of bell-hunting.
In 2026, with all the maps and guides floating around, this quest still has a mischievous streak. The bells do not care about your schedule. They do not care that you have already checked that ledge twice. They appear when they want, where they want, and then they act like it was your idea. I walked away with 120 rosary beads, a fresh shortcut or two, and the quiet satisfaction of out-stubborn-ing eight tiny metal menaces.
Would I do it again? Honestly, same. Probably yes. But next time, I am bringing more patience and fewer dramatic sighs. ...
Quests like this one are a good reminder that the best part of a game is often the detour, not the destination. If that detour has left you curious about what else is worth picking up, or you are simply eyeing Silksong and its backlog neighbors while waiting for the next patch, it helps to know where prices are actually reasonable. I have been checking cheapest steam keys on DealNest between bell runs, and it is a low-effort way to see what is discounted before committing.
No grand strategy involved, just a habit of looking before buying. Bell-hunting taught me that much: check the same spot twice, and sometimes you get lucky.
No Replies
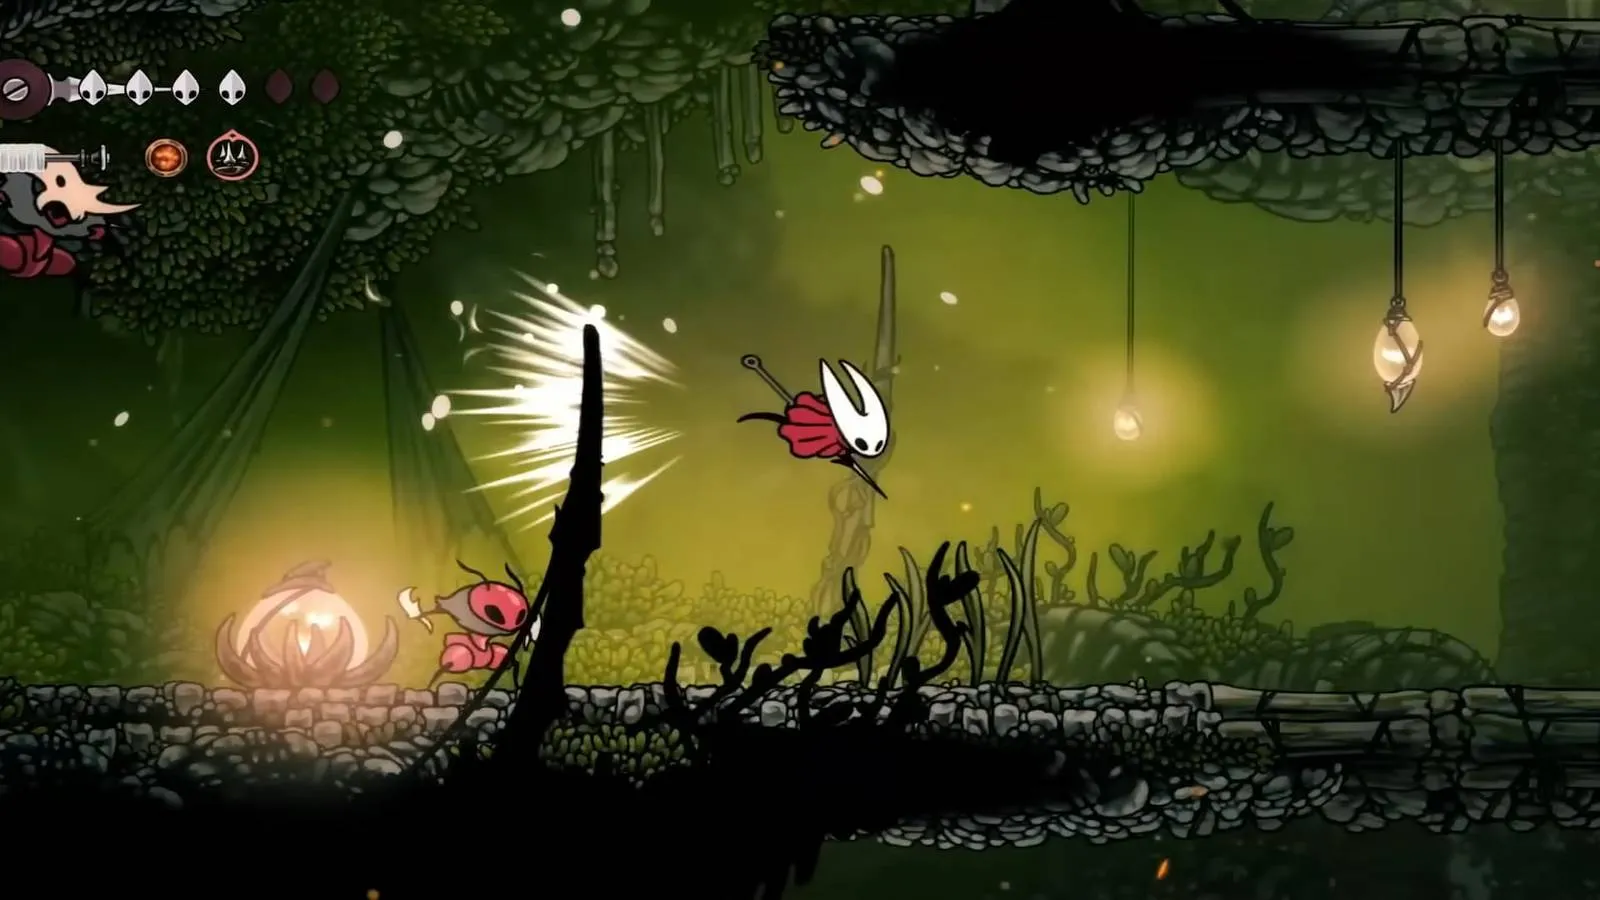
In 2026, Hollow Knight: Silksong no longer needs to prove that it is more than a victory lap. Team Cherry spent nearly a decade polishing the follow-up to one of the most beloved Metroidvanias of the modern era, and the result is a sequel that knows exactly how to sink its teeth into players. At first blush, Silksong can look like more Hollow Knight with a diagonal pogo attack bolted on. That read feels quaint now. Within 30 minutes, the game opens up into a completely different beast, one that earns the sequel moniker and then some. A standard clear can land around 15 to 20 hours, with one documented run finishing at 15 hours and 16 minutes, but clock time is only the tip of the iceberg.
A Sequel That Knows How to Sink Its Teeth In
Silksong is no walk in the park. From the halfway point onward, the pressure ramps up and the game starts to feel like a Souls title in the best and most stressful ways. There is always one more upgrade to chase, one more boss standing in the way, and one more story-critical quest item that can send players combing through the map for hours. One early account describes spending three hours hunting for a crucial item, unsure whether it would ever turn up. That kind of friction is real, but guides are not the recommended first port of call. Navigation is generally more manageable than in the original Hollow Knight, largely because Hornet has a movement kit that puts the first protagonist to shame. She can float downward slowly, chain pogo attacks across platforming challenges, and call on a seemingly endless array of tools that reshape how any given situation can be approached.
Once crests enter the picture, the design clicks. Crests function like weapon types that enable different tool and passive upgrade loadouts, turning Silksong into a highly customizable experience. Combat is deep, the vistas are beautiful and haunting, and mechanical puzzles keep the brain working between nail-biting encounters. Different players gravitate toward different favorite loadouts, which is a strong sign that Team Cherry has built something with real range. The story is also more engaging this time around. Hornet is a more prominent participant in the festivities, complete with a striking design that has inspired plenty of fan art. Team Cherry has honed its craft with bosses and NPCs too, creating some devilishly delightful characters that leave a mark.
Open-Ended, Dense, and Downright Addictive
Silksong is so open-ended that it can feel overwhelming, but in a good way. Players constantly mark maps to revisit later after gaining new abilities, and forcing through challenging zones while under-equipped is part of the thrill. It is a meticulously crafted Metroidvania that ranks among the best in the genre, and that praise lands even harder for anyone who has been playing these games and their inspirations since the 1980s. The combat against smaller enemies around Hornet's size is among the best ever seen in a 2D platformer. Learning patterns, countering moves, and cutting teeth on intense encounters gives the game a sharp, satisfying edge.
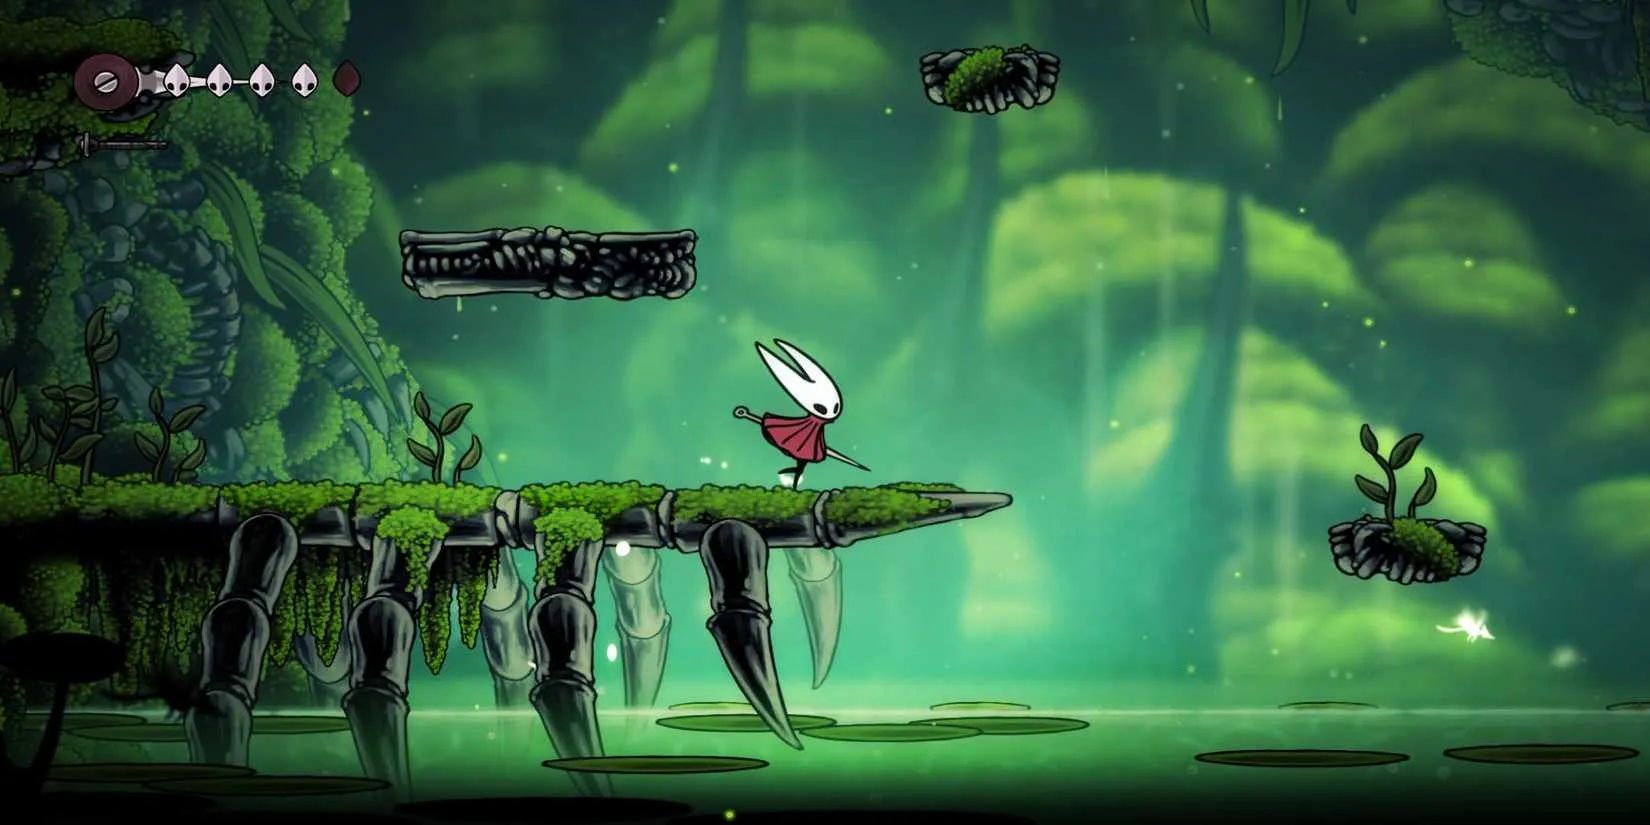
With mastery of Hornet's mechanics and enough time spent studying a boss, anything feels possible. More than many genre staples, Silksong gives players complete control over Hornet and everything she does, and that amount of power is thrilling. Every 30 minutes or so, a new tool, crest, ability, or upgrade arrives to keep progression fresh. A key improvement over the original is density: areas generally feel more packed and less meandering. Getting from place to place is quicker and more fun, not just because of how Hornet moves, but because Team Cherry has years of hindsight regarding tight level design.
The Difficulty Walls Are Real
One issue that can throw players for a loop is the extreme amount of two-mask damage. In the original Hollow Knight, two-mask hits were more sparing and reserved for tougher encounters. At some point in Silksong, it can feel like most major enemies are slicing off two bars of health per hit. This feels deliberate, and while it will likely be polarizing, it becomes manageable once enemy mechanics are learned piece by piece. The upside is that normal combat stays engaging. Regular enemies remain potential threats, so traversal does not feel like going through the motions.
Another contentious mechanic is the in-game economy. Rosary beads are spent on almost everything, from shop items to benches and fast travel station unlocks. Not every enemy drops beads, so players need to strategize how to earn them consistently, sometimes to the point of farming. Even in extreme circumstances, the stingy rosary economy does not have to derail enjoyment. Uncovering a new area or cleaning out an old one can send players back into the fray rosary-rich. There are minor workarounds too, such as spending rosaries on expendable inventory items that can be cracked for instant beads when needed.
Strength
Friction Point
Deep, customizable combat with crests and tools
Two-mask damage can feel punishing at first
Dense, tightly designed areas
Rosary economy encourages farming and planning
Strong boss and NPC design
Midgame difficulty spikes are no joke
Hornet's movement and pogo traversal
Some quest items can be elusive
Why the Long Haul Matters
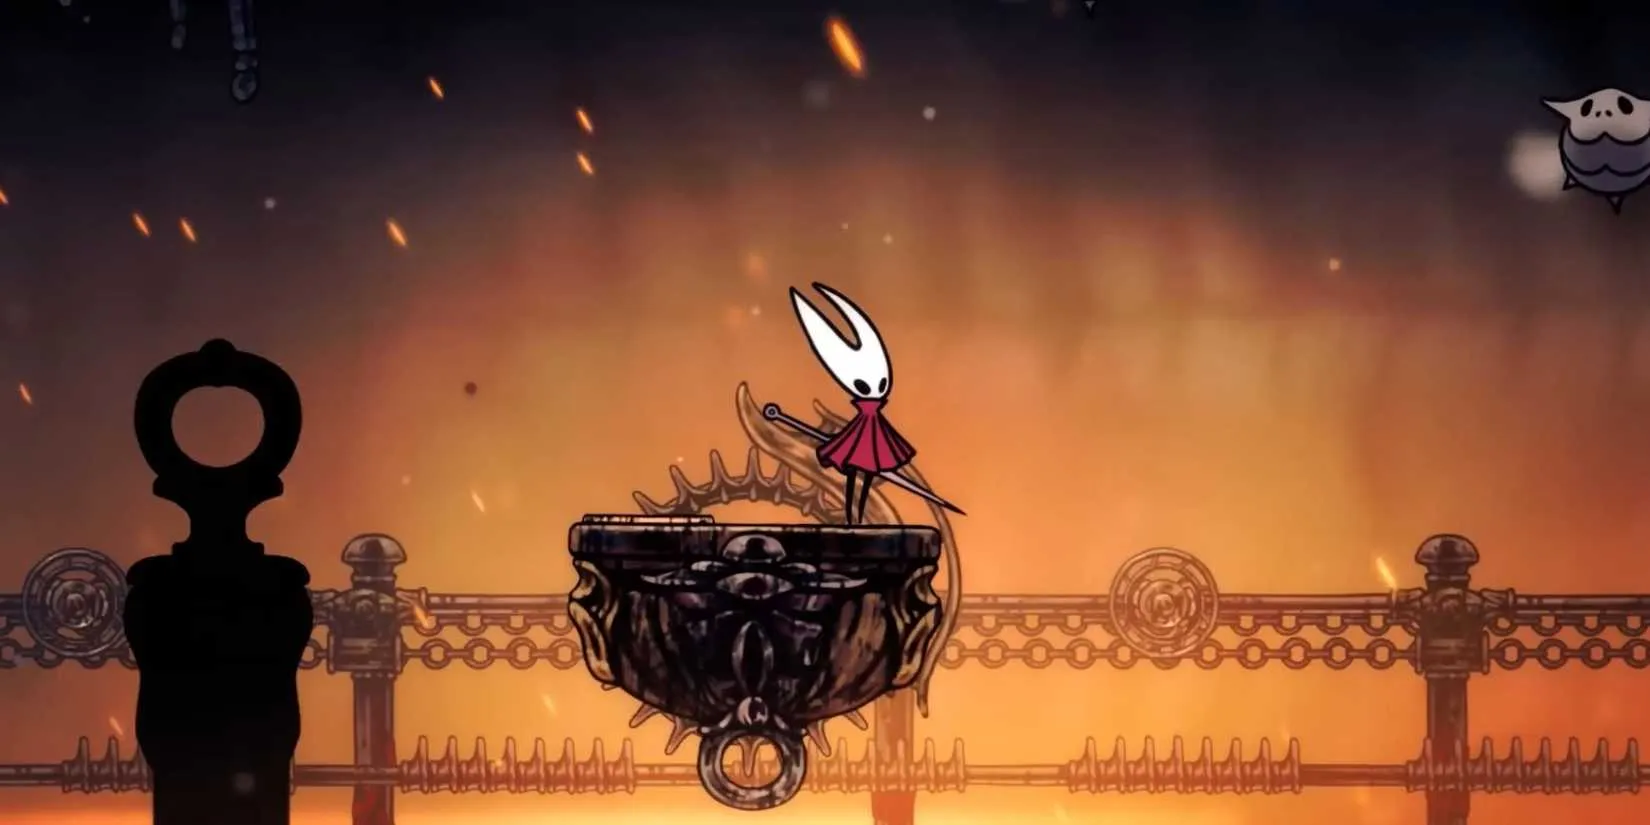
After the standard ending, Silksong still has plenty left in the tank. The urge to get back into the game and clear the whole map is strong, and exploration is more fun than in the original. Players can comb through every nook and cranny with a smile, because some of the toughest challenges wait in optional encounters. Every new tool or crest can potentially open a brand-new playstyle, which makes the long haul feel worth its weight in gold. In that sense, Silksong is the purest form of a Metroidvania seen in years. Even after finishing the standard ending, there is enough left to feel like an entire game remains, and that is exactly what the genre should deliver.
By 2026, the conversation around Silksong has shifted from hype to legacy. The game has a long road ahead of it, whether through free updates like the original or potential DLC, and the appetite for more is easy to understand. A 100% completion rate is not a quick weekend job; it is a slow, satisfying grind that rewards patience and mastery. Team Cherry's sequel throws players for a loop, then rewards them for bearing with it. The hype was loud, but the craftsmanship is louder. For anyone who has ever loved a Metroidvania, Hollow Knight: Silksong is a deep, demanding, and downright unforgettable ride. ?️?️
When the credits roll and the craving for another dense, secrets-packed map kicks in, the smartest next step is often a sale rather than a full-price impulse buy. DealNest is a steam deal finder that helps you track discounts across the kinds of deep, demanding games that reward the same patience Silksong asks for, so you can line up your next long haul without overspending.
A Sequel That Knows How to Sink Its Teeth In
Silksong is no walk in the park. From the halfway point onward, the pressure ramps up and the game starts to feel like a Souls title in the best and most stressful ways. There is always one more upgrade to chase, one more boss standing in the way, and one more story-critical quest item that can send players combing through the map for hours. One early account describes spending three hours hunting for a crucial item, unsure whether it would ever turn up. That kind of friction is real, but guides are not the recommended first port of call. Navigation is generally more manageable than in the original Hollow Knight, largely because Hornet has a movement kit that puts the first protagonist to shame. She can float downward slowly, chain pogo attacks across platforming challenges, and call on a seemingly endless array of tools that reshape how any given situation can be approached.
Once crests enter the picture, the design clicks. Crests function like weapon types that enable different tool and passive upgrade loadouts, turning Silksong into a highly customizable experience. Combat is deep, the vistas are beautiful and haunting, and mechanical puzzles keep the brain working between nail-biting encounters. Different players gravitate toward different favorite loadouts, which is a strong sign that Team Cherry has built something with real range. The story is also more engaging this time around. Hornet is a more prominent participant in the festivities, complete with a striking design that has inspired plenty of fan art. Team Cherry has honed its craft with bosses and NPCs too, creating some devilishly delightful characters that leave a mark.
Open-Ended, Dense, and Downright Addictive
Silksong is so open-ended that it can feel overwhelming, but in a good way. Players constantly mark maps to revisit later after gaining new abilities, and forcing through challenging zones while under-equipped is part of the thrill. It is a meticulously crafted Metroidvania that ranks among the best in the genre, and that praise lands even harder for anyone who has been playing these games and their inspirations since the 1980s. The combat against smaller enemies around Hornet's size is among the best ever seen in a 2D platformer. Learning patterns, countering moves, and cutting teeth on intense encounters gives the game a sharp, satisfying edge.
With mastery of Hornet's mechanics and enough time spent studying a boss, anything feels possible. More than many genre staples, Silksong gives players complete control over Hornet and everything she does, and that amount of power is thrilling. Every 30 minutes or so, a new tool, crest, ability, or upgrade arrives to keep progression fresh. A key improvement over the original is density: areas generally feel more packed and less meandering. Getting from place to place is quicker and more fun, not just because of how Hornet moves, but because Team Cherry has years of hindsight regarding tight level design.
The Difficulty Walls Are Real
One issue that can throw players for a loop is the extreme amount of two-mask damage. In the original Hollow Knight, two-mask hits were more sparing and reserved for tougher encounters. At some point in Silksong, it can feel like most major enemies are slicing off two bars of health per hit. This feels deliberate, and while it will likely be polarizing, it becomes manageable once enemy mechanics are learned piece by piece. The upside is that normal combat stays engaging. Regular enemies remain potential threats, so traversal does not feel like going through the motions.
Another contentious mechanic is the in-game economy. Rosary beads are spent on almost everything, from shop items to benches and fast travel station unlocks. Not every enemy drops beads, so players need to strategize how to earn them consistently, sometimes to the point of farming. Even in extreme circumstances, the stingy rosary economy does not have to derail enjoyment. Uncovering a new area or cleaning out an old one can send players back into the fray rosary-rich. There are minor workarounds too, such as spending rosaries on expendable inventory items that can be cracked for instant beads when needed.
Strength
Friction Point
Deep, customizable combat with crests and tools
Two-mask damage can feel punishing at first
Dense, tightly designed areas
Rosary economy encourages farming and planning
Strong boss and NPC design
Midgame difficulty spikes are no joke
Hornet's movement and pogo traversal
Some quest items can be elusive
Why the Long Haul Matters
After the standard ending, Silksong still has plenty left in the tank. The urge to get back into the game and clear the whole map is strong, and exploration is more fun than in the original. Players can comb through every nook and cranny with a smile, because some of the toughest challenges wait in optional encounters. Every new tool or crest can potentially open a brand-new playstyle, which makes the long haul feel worth its weight in gold. In that sense, Silksong is the purest form of a Metroidvania seen in years. Even after finishing the standard ending, there is enough left to feel like an entire game remains, and that is exactly what the genre should deliver.
By 2026, the conversation around Silksong has shifted from hype to legacy. The game has a long road ahead of it, whether through free updates like the original or potential DLC, and the appetite for more is easy to understand. A 100% completion rate is not a quick weekend job; it is a slow, satisfying grind that rewards patience and mastery. Team Cherry's sequel throws players for a loop, then rewards them for bearing with it. The hype was loud, but the craftsmanship is louder. For anyone who has ever loved a Metroidvania, Hollow Knight: Silksong is a deep, demanding, and downright unforgettable ride. ?️?️
When the credits roll and the craving for another dense, secrets-packed map kicks in, the smartest next step is often a sale rather than a full-price impulse buy. DealNest is a steam deal finder that helps you track discounts across the kinds of deep, demanding games that reward the same patience Silksong asks for, so you can line up your next long haul without overspending.
No Replies
I still measure 2025 by the nights I lost to three very different blades. As a player who keeps a chaotic spreadsheet of releases, I expected the year to be defined by big sequels, but I did not expect a late-summer action-platformer trifecta to hit me quite so hard. Looking back from 2026, Ninja Gaiden: Ragebound, Shinobi: Art of Vengeance, and Hollow Knight: Silksong feel less like three separate launches and more like one perfect season. Each arrived within weeks of the others, each asked for precision and patience, and each cost less than $30. That last detail still feels almost unfair: I bought all three for roughly the price of one full-priced AAA game, and I got months of discussion, frustration, and delight.

The ninja who reopened the door
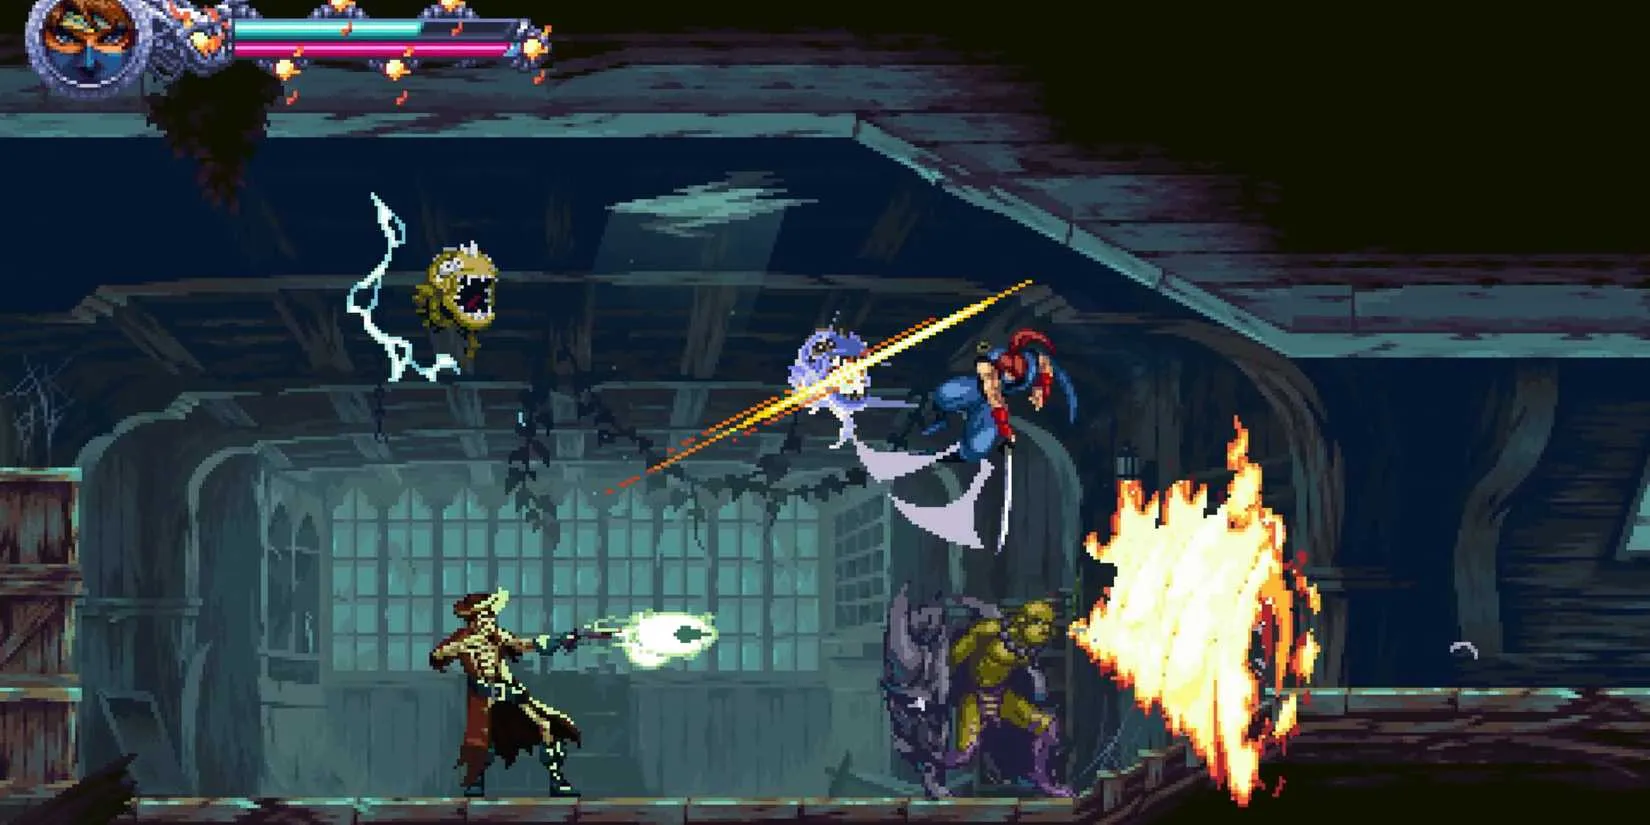
My summer started with Ninja Gaiden: Ragebound at the very end of July. I had been curious because it came from the studio behind the Blasphemous duology, and I loved how that team handled grim atmosphere and exacting combat. Ragebound traded gothic gloom for vibrant pixel art and a 2D side-scrolling structure, but the discipline was still there. I remember sitting forward on my couch during the first real boss attempt, learning that the game's speed was not an invitation to mash. Its combat was frenetic but thoughtful, and every death felt like a lesson rather than a punishment. The challenge was tough but fair, a phrase I usually distrust, yet here it fit.
The critical response matched what I felt. Ragebound ended up with an 86 Top Critic Average on OpenCritic, and 93% of reviewers recommended it. What impressed me most was how it set a bar for both 2D action and ninja-themed games without feeling like a nostalgia trip. It was a proper return to 2D for a long-running franchise, and it made the rest of the year feel more competitive.
A rival worth respecting
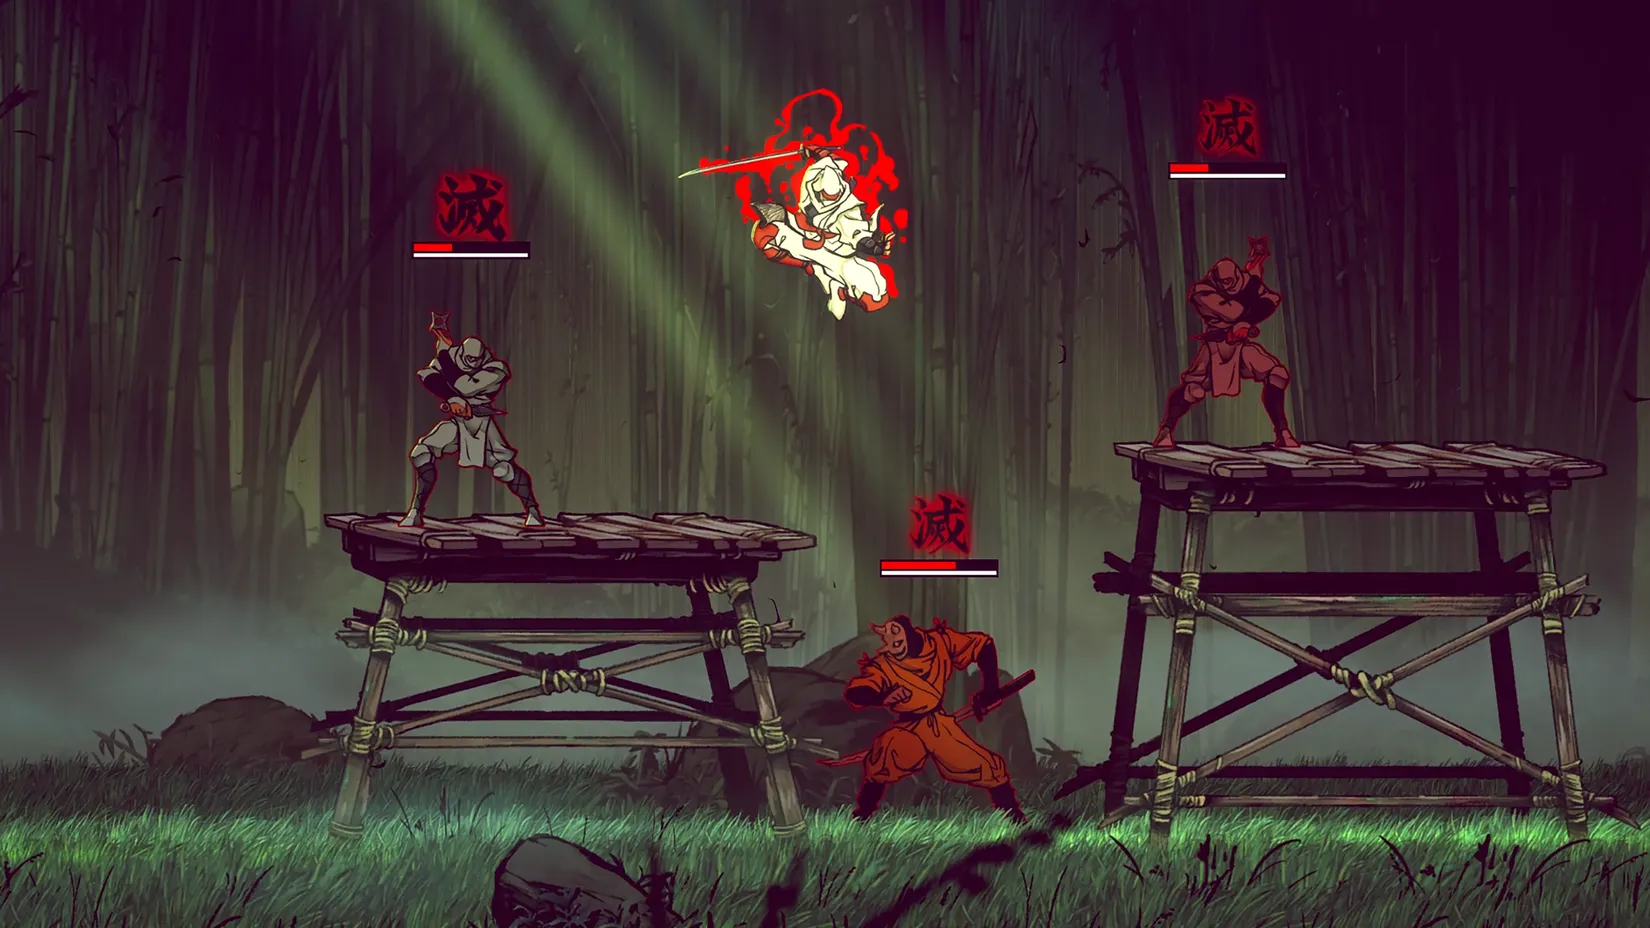
A month later, Shinobi: Art of Vengeance arrived, and I will admit I expected overlap fatigue. Two high-profile action-platformers with ninja DNA, released so close together? It sounded like a scheduling mistake. Instead, Shinobi carved out a distinct identity with a striking hand-drawn art style and light Metroidvania elements. Where Ragebound felt like a tightly wound combat gauntlet, Shinobi felt like a journey through a living illustration. I loved the way exploration broke up the action, and I loved that the game did not simply copy its closest rival.
The numbers were just as strong: an 87 Top Critic Average and 95% of reviewers recommending it. I found myself in the strange position of defending both games in the same group chat. Ragebound had the sharper pixel-art punch; Shinobi had the more elegant flow. They were not redundant. They were complementary, and together they made August feel like a mini-festival of classic franchises being revitalized with care.
The sequel that stopped the internet
Then came September 4, and Hollow Knight: Silksong. I had been waiting for this sequel for years, like so many others. The two-week sprint between the release date reveal and launch was feverish. On launch day, I opened my storefront of choice the second the clock turned, and I watched the internet buckle. Steam, the Nintendo eShop, and the Xbox marketplace all crashed for around half an hour. I remember laughing at my own refresh button, then realizing that the chaos was a kind of tribute. Reviewers had not been given early codes, so there was no comfortable critical cushion before launch. Players were going in together, discovering the game in real time.
From my 2026 vantage point, the launch chaos has become a fond memory. Silksong improved on its predecessor's formula in significant ways, and it delivered the kind of sequel that makes seven years of development feel justified. I spent my first week with Hornet learning new rhythms, sitting on benches, and getting humbled by enemies that punished lazy movement. The game was a triumph in its own right, and it also completed the trifecta. It was the third and final part of a powerful 2025 trio that I still recommend to anyone who asks what they missed last year.

Why the trio still matters in 2026
Game
2025 release window
What I remember
Critical snapshot
Ninja Gaiden: Ragebound
End of July
Frenetic but thoughtful combat, vibrant pixel art, tough but fair challenge
86 Top Critic Average; 93% recommended
Shinobi: Art of Vengeance
One month later
Hand-drawn style, light Metroidvania exploration, distinct identity
87 Top Critic Average; 95% recommended
Hollow Knight: Silksong
September 4
Seven-year wait, massive launch, refined sequel formula
No early review codes at launch; strong player sentiment
What I find most remarkable, even now, is the value. All three cost less than $30 each. In a year packed with huge releases, this trio offered a concentrated dose of craft without asking for a premium. I have paid more for single games that gave me less to think about. The 2025 action-platformer movement was not just a marketing phrase; it was a real run of quality, and these three headliners exemplify it.
If I could give my past self one piece of advice, it would be simple: clear the calendar from late July through September. Play Ragebound first, let Shinobi surprise you, and save Silksong for last. Then, in 2026, come back and see how well they hold up. Mine still do. ?
That advice comes with one practical footnote from my own experience: availability and pricing for these three have drifted since launch. Ragebound and Shinobi show up in seasonal sales at wildly different discounts depending on the storefront, and Silksong's post-launch pricing has shifted too as bundles and regional storefronts have filled in. If you are hunting down the trio in 2026, it pays to look across several retailers before committing, since the same title can differ by a meaningful margin from one shop to the next.
Rather than opening a dozen tabs and refreshing each one, I have started keeping a short list of comparison tools for exactly this kind of backlog shopping. DealNest is one I return to when I want a quick read on where a game is cheapest right now, and it saved me from overpaying on a couple of impulse purchases last year. If you are putting together your own late-summer marathon, it is worth a look — you can compare prices here before you check out, and put the difference toward the next game on your list.
The ninja who reopened the door
My summer started with Ninja Gaiden: Ragebound at the very end of July. I had been curious because it came from the studio behind the Blasphemous duology, and I loved how that team handled grim atmosphere and exacting combat. Ragebound traded gothic gloom for vibrant pixel art and a 2D side-scrolling structure, but the discipline was still there. I remember sitting forward on my couch during the first real boss attempt, learning that the game's speed was not an invitation to mash. Its combat was frenetic but thoughtful, and every death felt like a lesson rather than a punishment. The challenge was tough but fair, a phrase I usually distrust, yet here it fit.
The critical response matched what I felt. Ragebound ended up with an 86 Top Critic Average on OpenCritic, and 93% of reviewers recommended it. What impressed me most was how it set a bar for both 2D action and ninja-themed games without feeling like a nostalgia trip. It was a proper return to 2D for a long-running franchise, and it made the rest of the year feel more competitive.
A rival worth respecting
A month later, Shinobi: Art of Vengeance arrived, and I will admit I expected overlap fatigue. Two high-profile action-platformers with ninja DNA, released so close together? It sounded like a scheduling mistake. Instead, Shinobi carved out a distinct identity with a striking hand-drawn art style and light Metroidvania elements. Where Ragebound felt like a tightly wound combat gauntlet, Shinobi felt like a journey through a living illustration. I loved the way exploration broke up the action, and I loved that the game did not simply copy its closest rival.
The numbers were just as strong: an 87 Top Critic Average and 95% of reviewers recommending it. I found myself in the strange position of defending both games in the same group chat. Ragebound had the sharper pixel-art punch; Shinobi had the more elegant flow. They were not redundant. They were complementary, and together they made August feel like a mini-festival of classic franchises being revitalized with care.
The sequel that stopped the internet
Then came September 4, and Hollow Knight: Silksong. I had been waiting for this sequel for years, like so many others. The two-week sprint between the release date reveal and launch was feverish. On launch day, I opened my storefront of choice the second the clock turned, and I watched the internet buckle. Steam, the Nintendo eShop, and the Xbox marketplace all crashed for around half an hour. I remember laughing at my own refresh button, then realizing that the chaos was a kind of tribute. Reviewers had not been given early codes, so there was no comfortable critical cushion before launch. Players were going in together, discovering the game in real time.
From my 2026 vantage point, the launch chaos has become a fond memory. Silksong improved on its predecessor's formula in significant ways, and it delivered the kind of sequel that makes seven years of development feel justified. I spent my first week with Hornet learning new rhythms, sitting on benches, and getting humbled by enemies that punished lazy movement. The game was a triumph in its own right, and it also completed the trifecta. It was the third and final part of a powerful 2025 trio that I still recommend to anyone who asks what they missed last year.
Why the trio still matters in 2026
Game
2025 release window
What I remember
Critical snapshot
Ninja Gaiden: Ragebound
End of July
Frenetic but thoughtful combat, vibrant pixel art, tough but fair challenge
86 Top Critic Average; 93% recommended
Shinobi: Art of Vengeance
One month later
Hand-drawn style, light Metroidvania exploration, distinct identity
87 Top Critic Average; 95% recommended
Hollow Knight: Silksong
September 4
Seven-year wait, massive launch, refined sequel formula
No early review codes at launch; strong player sentiment
What I find most remarkable, even now, is the value. All three cost less than $30 each. In a year packed with huge releases, this trio offered a concentrated dose of craft without asking for a premium. I have paid more for single games that gave me less to think about. The 2025 action-platformer movement was not just a marketing phrase; it was a real run of quality, and these three headliners exemplify it.
If I could give my past self one piece of advice, it would be simple: clear the calendar from late July through September. Play Ragebound first, let Shinobi surprise you, and save Silksong for last. Then, in 2026, come back and see how well they hold up. Mine still do. ?
That advice comes with one practical footnote from my own experience: availability and pricing for these three have drifted since launch. Ragebound and Shinobi show up in seasonal sales at wildly different discounts depending on the storefront, and Silksong's post-launch pricing has shifted too as bundles and regional storefronts have filled in. If you are hunting down the trio in 2026, it pays to look across several retailers before committing, since the same title can differ by a meaningful margin from one shop to the next.
Rather than opening a dozen tabs and refreshing each one, I have started keeping a short list of comparison tools for exactly this kind of backlog shopping. DealNest is one I return to when I want a quick read on where a game is cheapest right now, and it saved me from overpaying on a couple of impulse purchases last year. If you are putting together your own late-summer marathon, it is worth a look — you can compare prices here before you check out, and put the difference toward the next game on your list.
No Replies
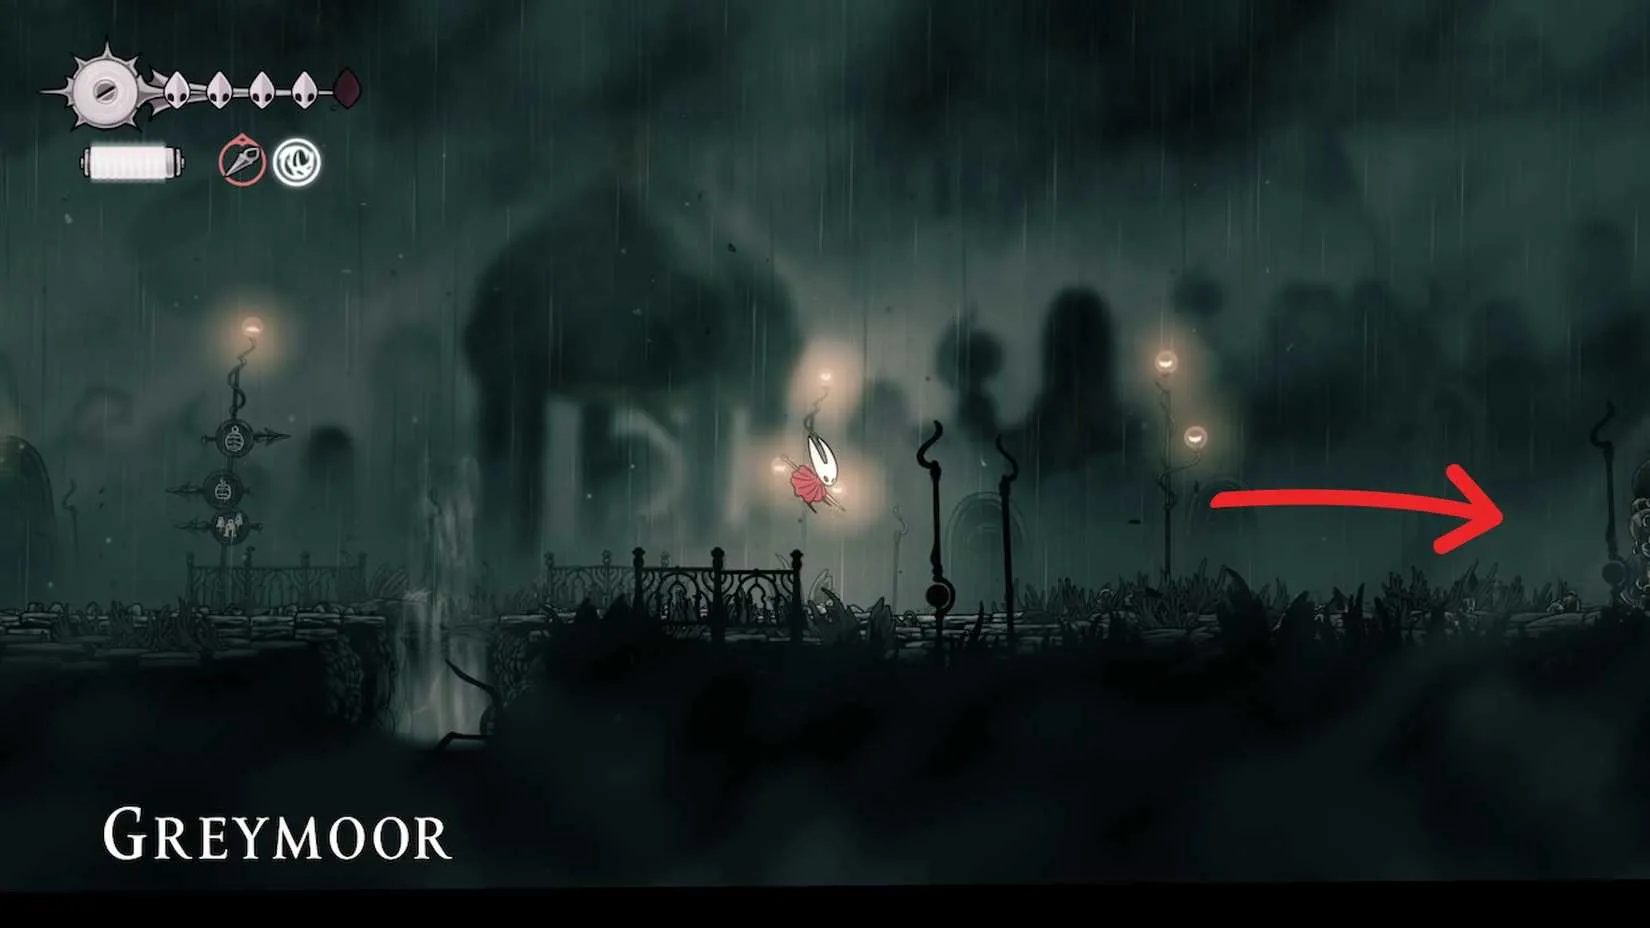
Greymoor has a talent for making confident players feel like they have been blindfolded and spun around three times. In Hollow Knight: Silksong, this sprawling early-game region is not just big; it is the sort of big that hides a cartographer’s stall behind two different entrances and a cloud of corrupted pilgrims. Shakra, the game’s wandering map seller, does not make the job easier. Her stock behaves like a rumor in a small town—always moving just ahead of the person trying to confirm it. Even in 2026, with guides, patches, and plenty of collective sighing, finding Greymoor’s map is a rite of passage. The good news is that the map costs 70 Rosary Beads and Shakra has only a few favorite haunts. The bad news is that Greymoor can be entered from two directions, and each direction turns the search into a different kind of errand.
The Short Version: Two Doors, One Cartographer
Players who want the least dramatic route should remember one sentence: if the airstream brought them in, Shakra is close. The two entrances are not equal in convenience, and the table below makes the difference plain.
Route
How players get in
Where Shakra waits
Price
Airstream route
Ride the airstream up through Far Fields using the Drifter’s Cloak
In the chamber directly to the right; from the Halfway Home bench, head right
70 Rosary Beads
Western route
Use the Simple Key west of Mosshome to access the Wormways early, then travel east through Shellwood and Bellhart
A longer trek that eventually reaches the Halfway Home area
70 Rosary Beads
The first route is a quick shopping trip. The second is a pilgrimage with extra enemies. Both end with the same map, which is either comforting or mildly insulting, depending on how many corrupted pilgrims the player has had to vault over.
Route One: The Airstream Entrance
Players who enter Greymoor by riding the airstream up through Far Fields with the Drifter’s Cloak will find Shakra in the chamber directly to the right. That is the whole trick. No cryptic riddle, no secret wall, no ancient beetle whispering directions through a pipe. If the player has explored left first, they should return to the Halfway Home bench and head right until Shakra appears. For 70 Rosary Beads, she hands over the Greymoor map, and the region stops looking like a labyrinth designed by a committee of spiders with a grudge.
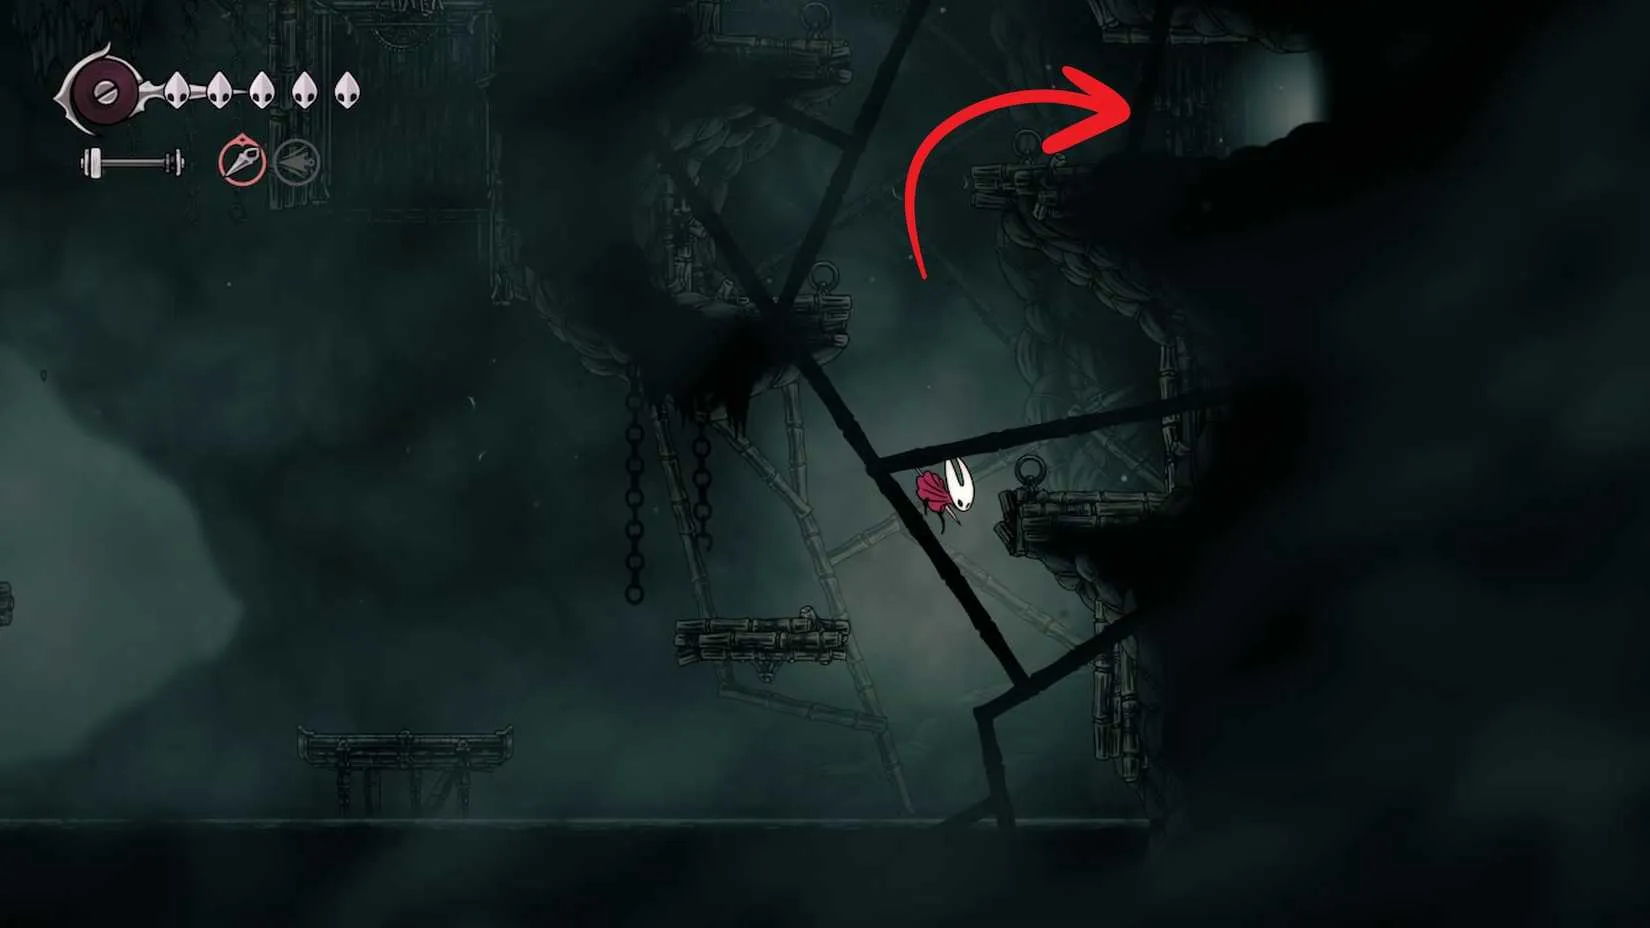
This entrance is the reason some players insist the map is easy to find. They are not wrong. They are just standing on the lucky side of Greymoor. The other entrance gives the search a longer fuse.
Route Two: The Western Long Way
The alternative route is to use the Simple Key west of Mosshome to access the Wormways early, then move east through Shellwood and Bellhart to reach Greymoor from the western side. Players who enter this way have a longer trek ahead. It is less a stroll and more a postal route through a wasp’s filing cabinet, with platforming, enemy waves, and a few doors that demand attention.
The reliable sequence looks like this:
Clear the area, then pick up the Memory Locket from the corpse on the top platform before moving to the next room.
Break the wood debris blocking the way on the right to reach the Greymoor Bellway.
Exit the Bellway. Platforms sit directly above the entrance; go up and then right through the door.
Defeat the waves of enemies that spawn in to unlock the path to the right.
Activate the bench inside the Halfway Home to reset the respawn point, then stand on the platform next to Criege to open the door to the right.
Continue right through the tunnel with the corrupted pilgrims. At the end, a metal device turns loose Rosaries into necklaces.
Shakra is nearby. The Greymoor map costs 70 Rosary Beads.
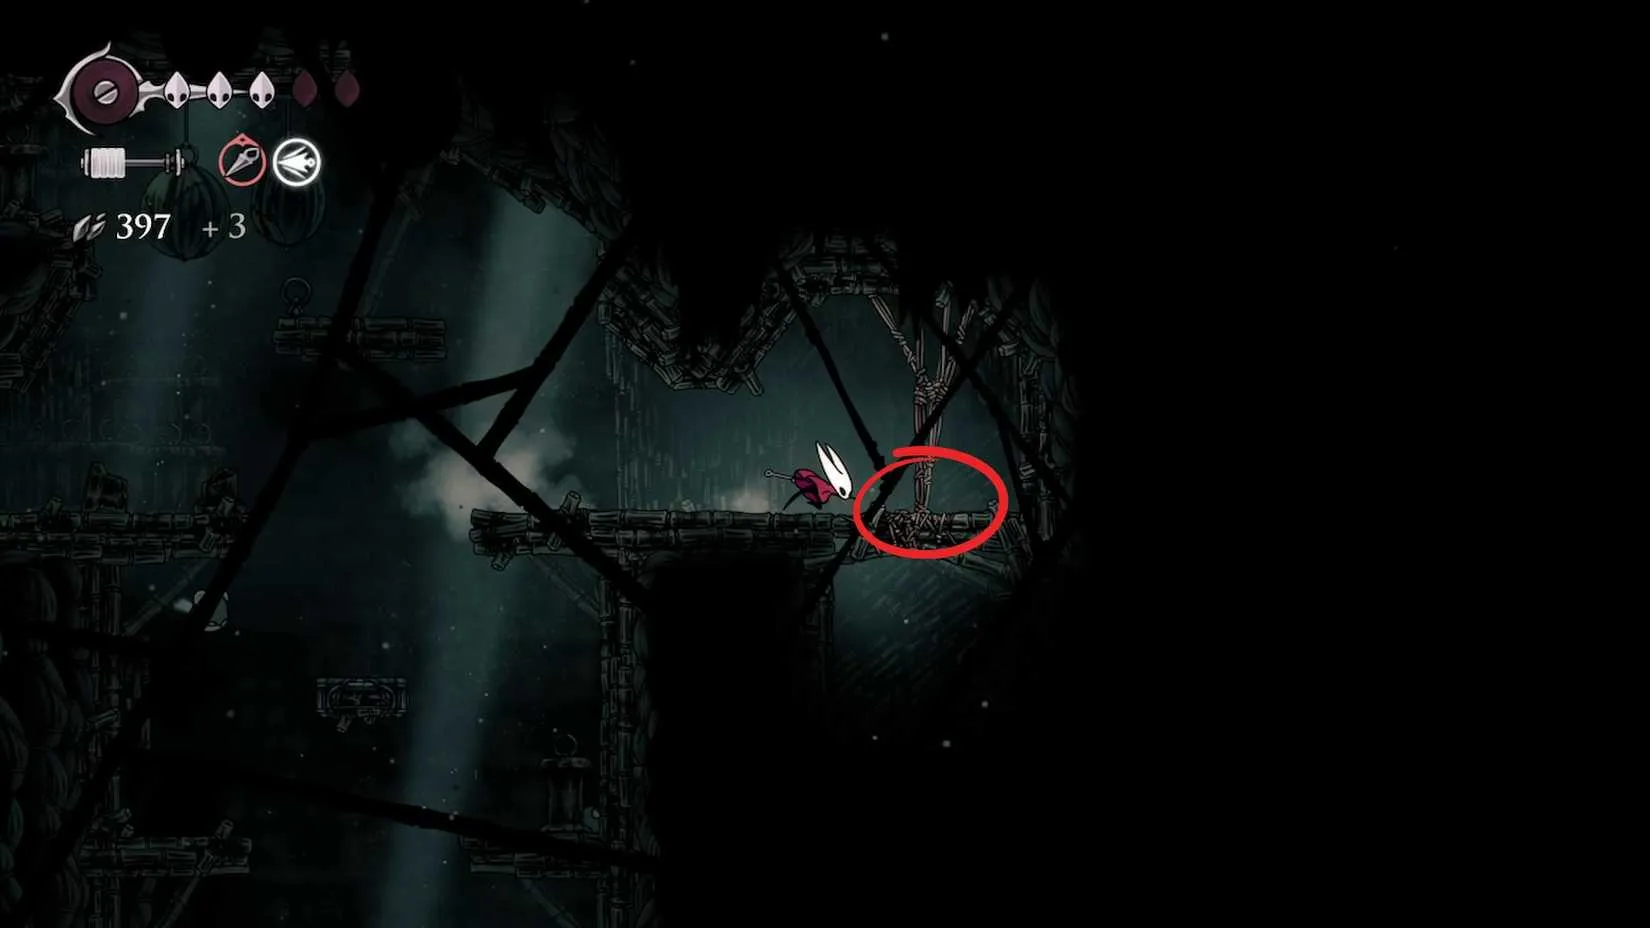
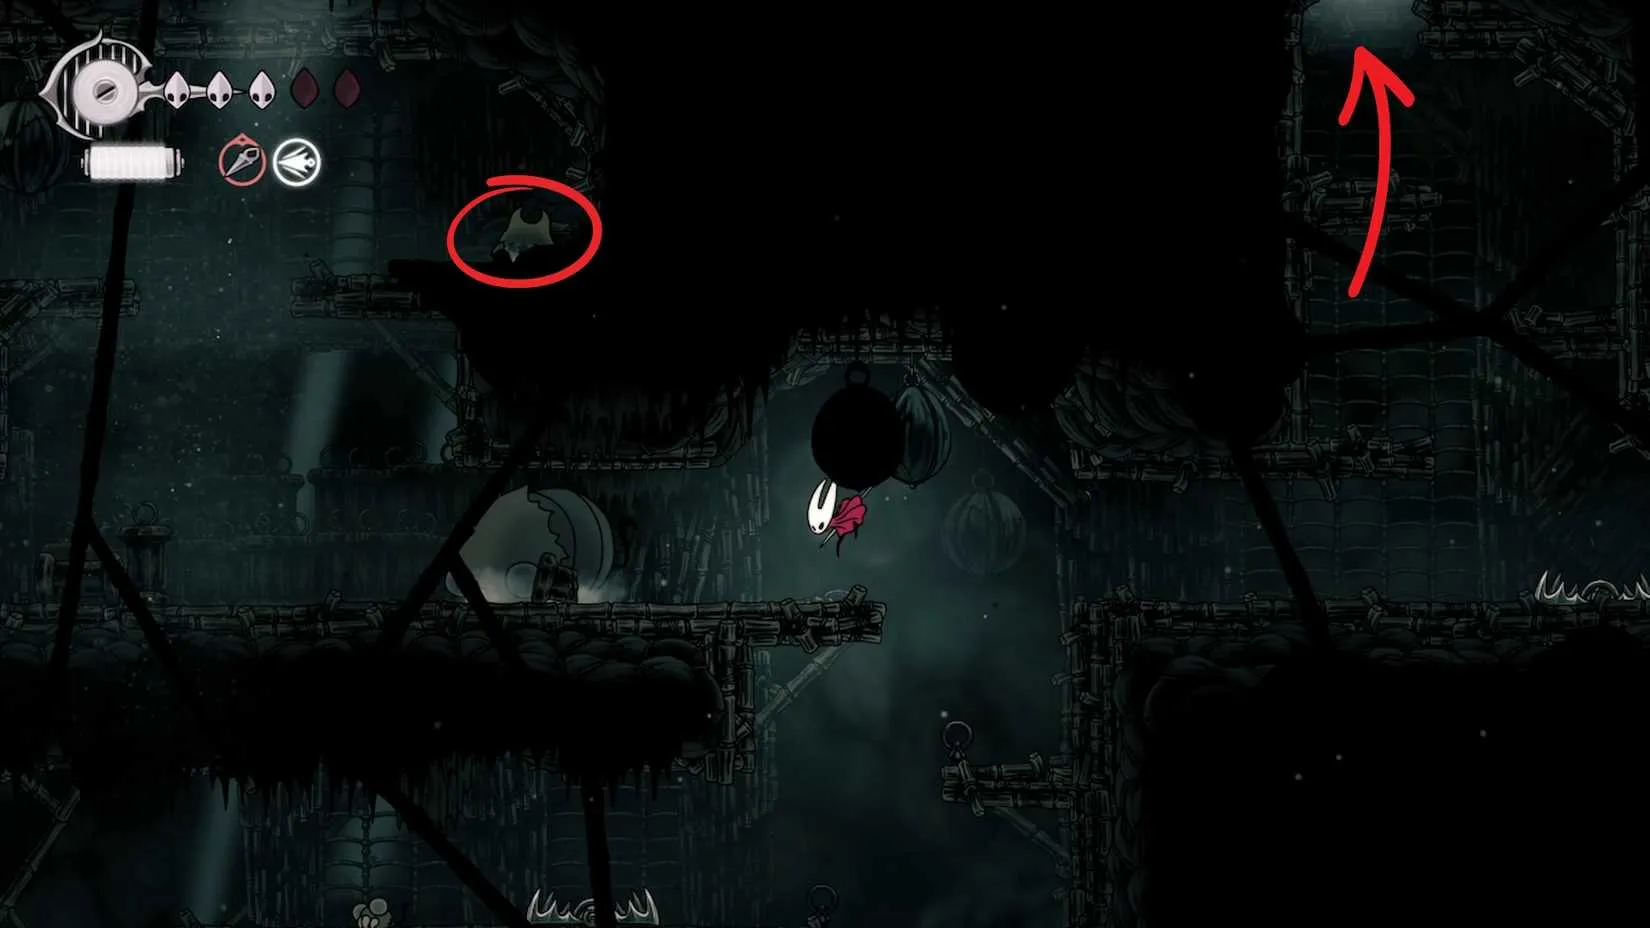
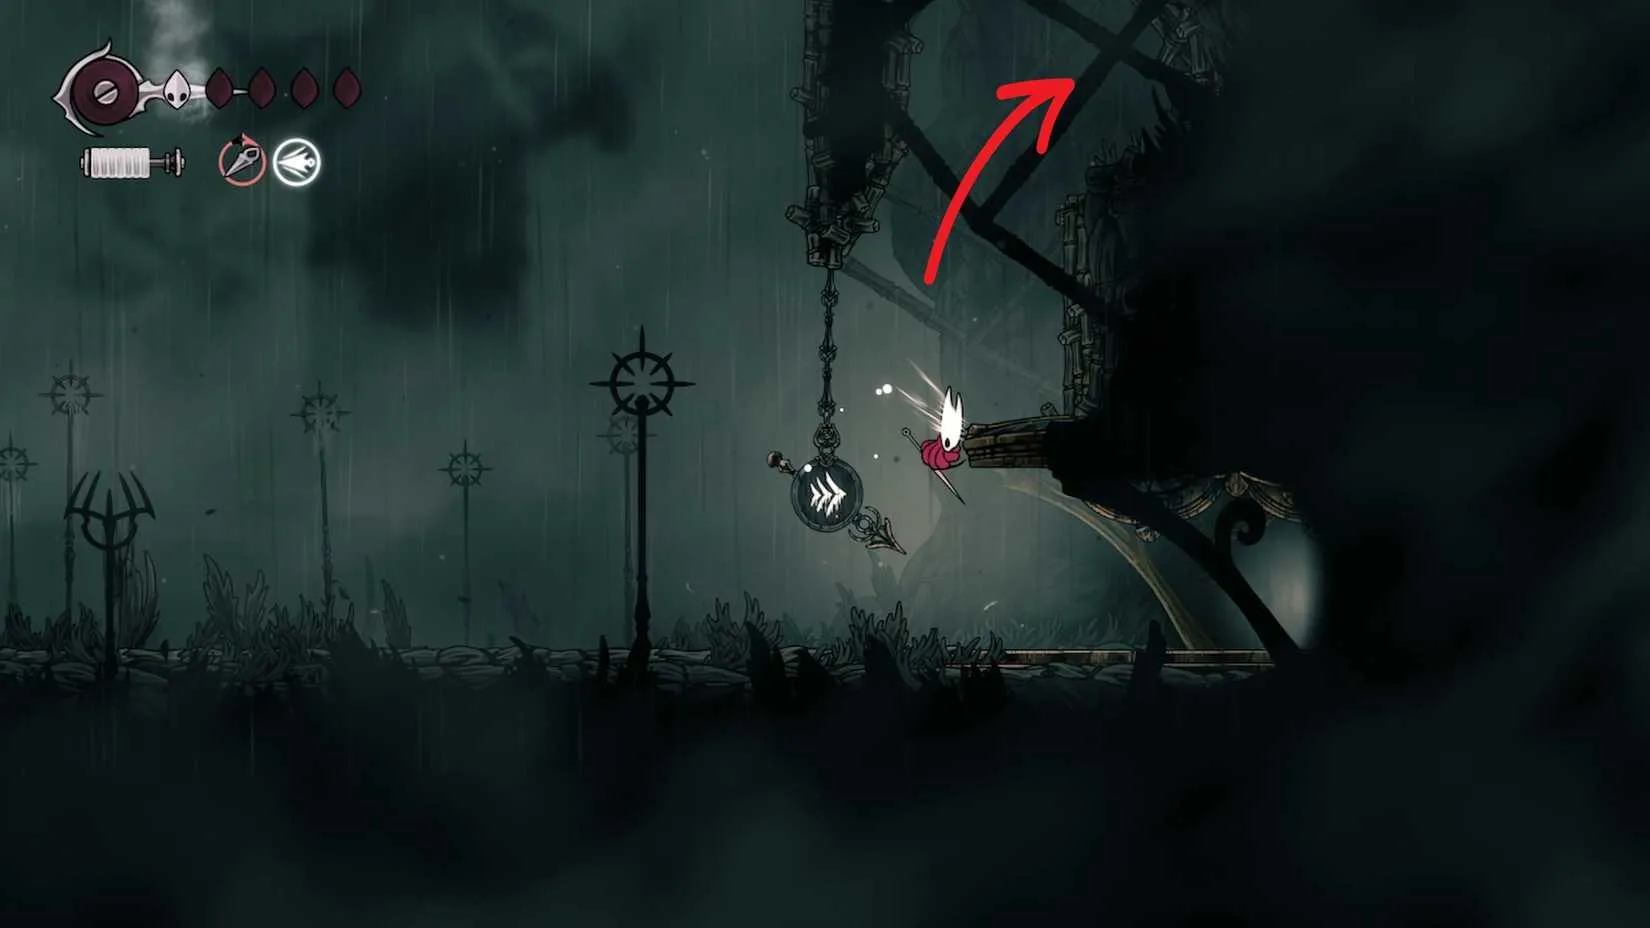
The Halfway Home bench is the anchor point. Once it is active, the western route becomes much less frightening, because failure stops being a full tour of Greymoor and starts being a short walk back. Players should also keep an eye out for the metal Rosary device; it is a useful landmark and a reminder that Silksong enjoys turning currency into jewelry at the worst possible moment.
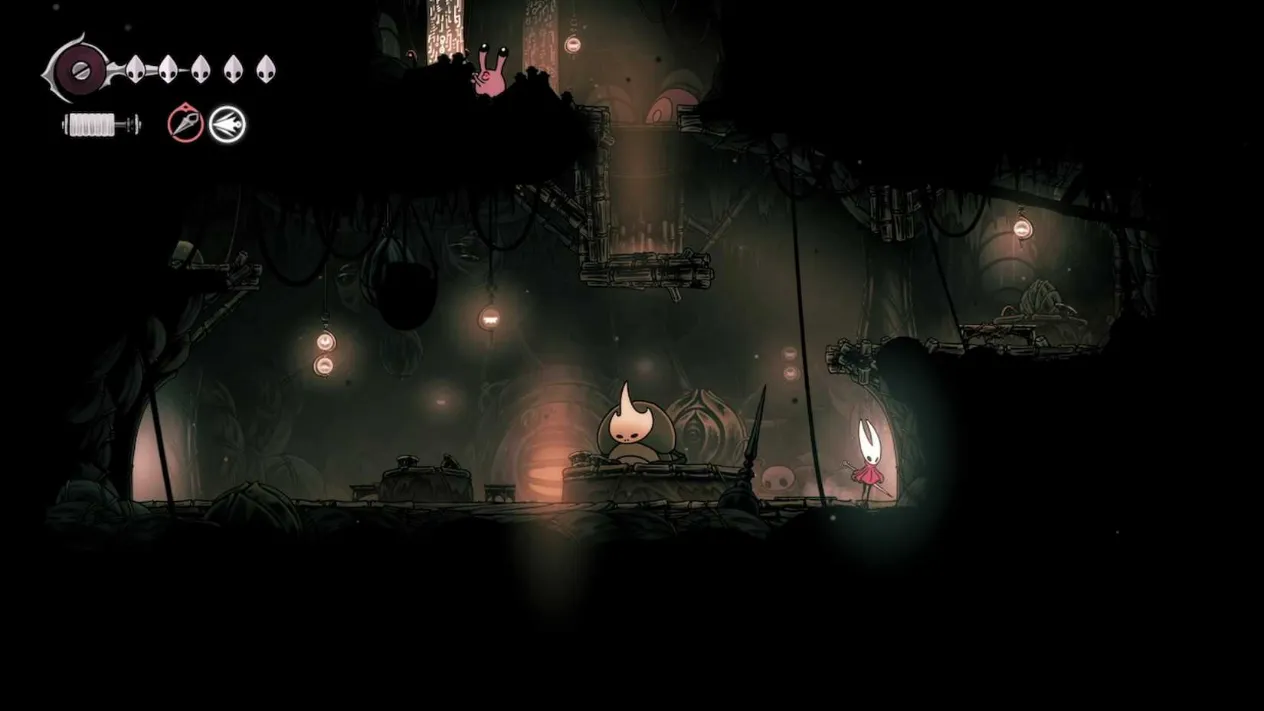
If Shakra Has Vanished
Sometimes the player reaches the spot and finds nothing but an empty room and the faint smell of a missed opportunity. That usually means Shakra has moved on because the story has progressed. Tracking her down then is like trying to catch a specific raindrop in a thunderstorm, except the raindrop sells maps and has a golden ring.
There are two useful places to check:
Bone Bottom: East of the Wish Board is a platform with one of Shakra’s golden rings on a pole. Attack the ring to summon her.
Bellhart: If the Bellhart curse has been lifted, Shakra appears on a platform next to the floating shops.
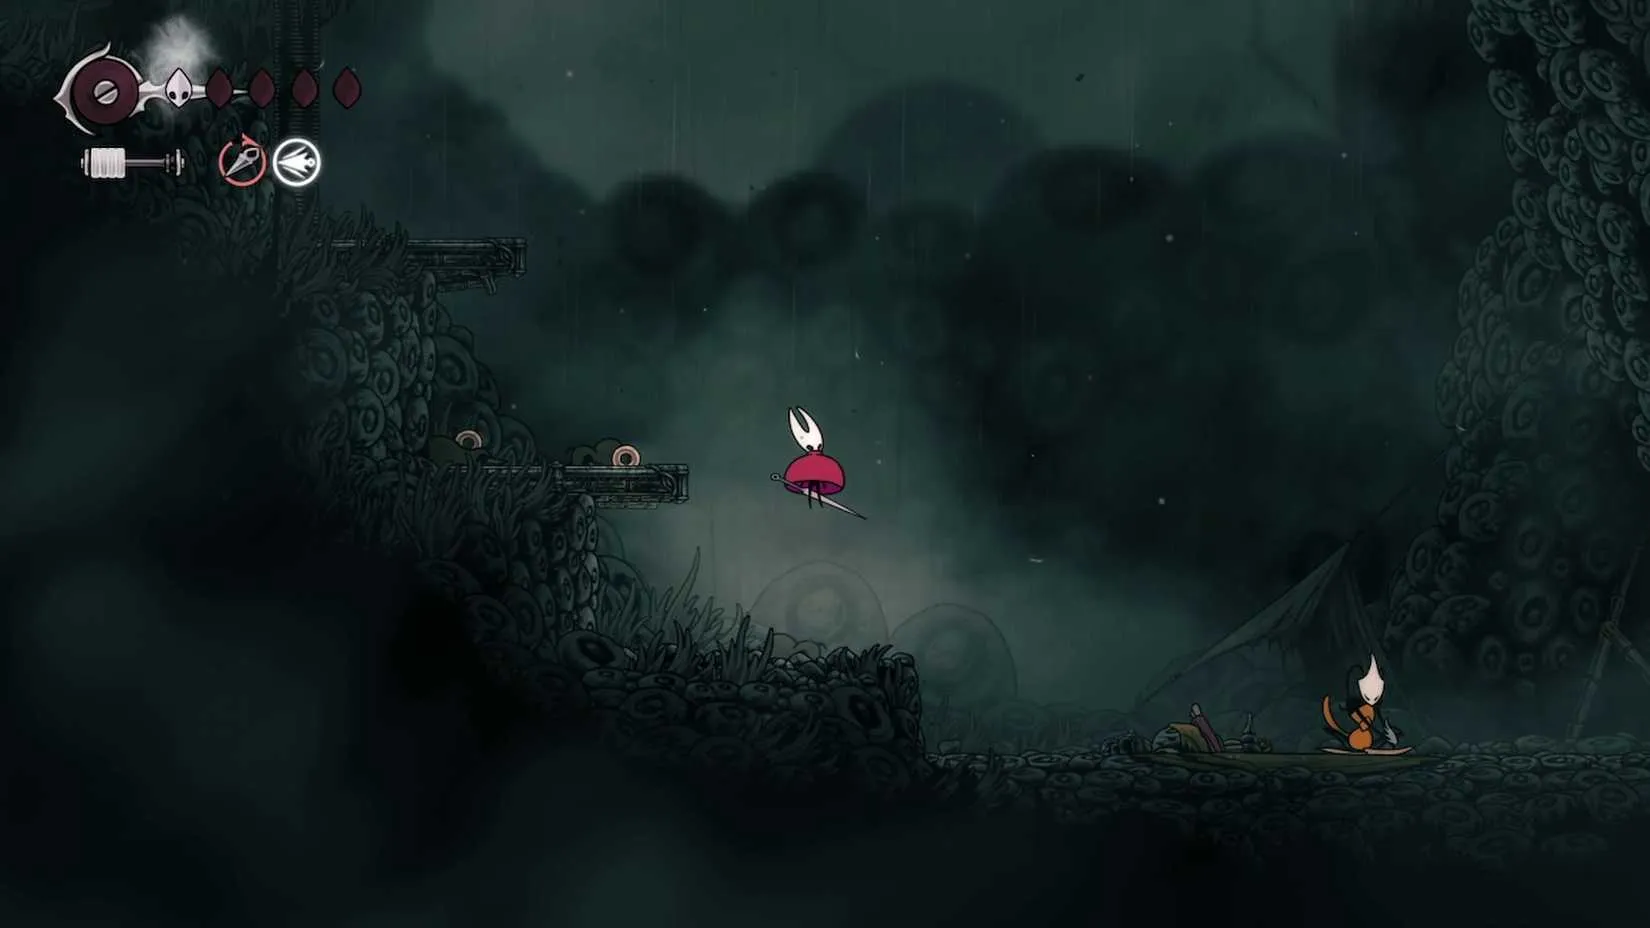
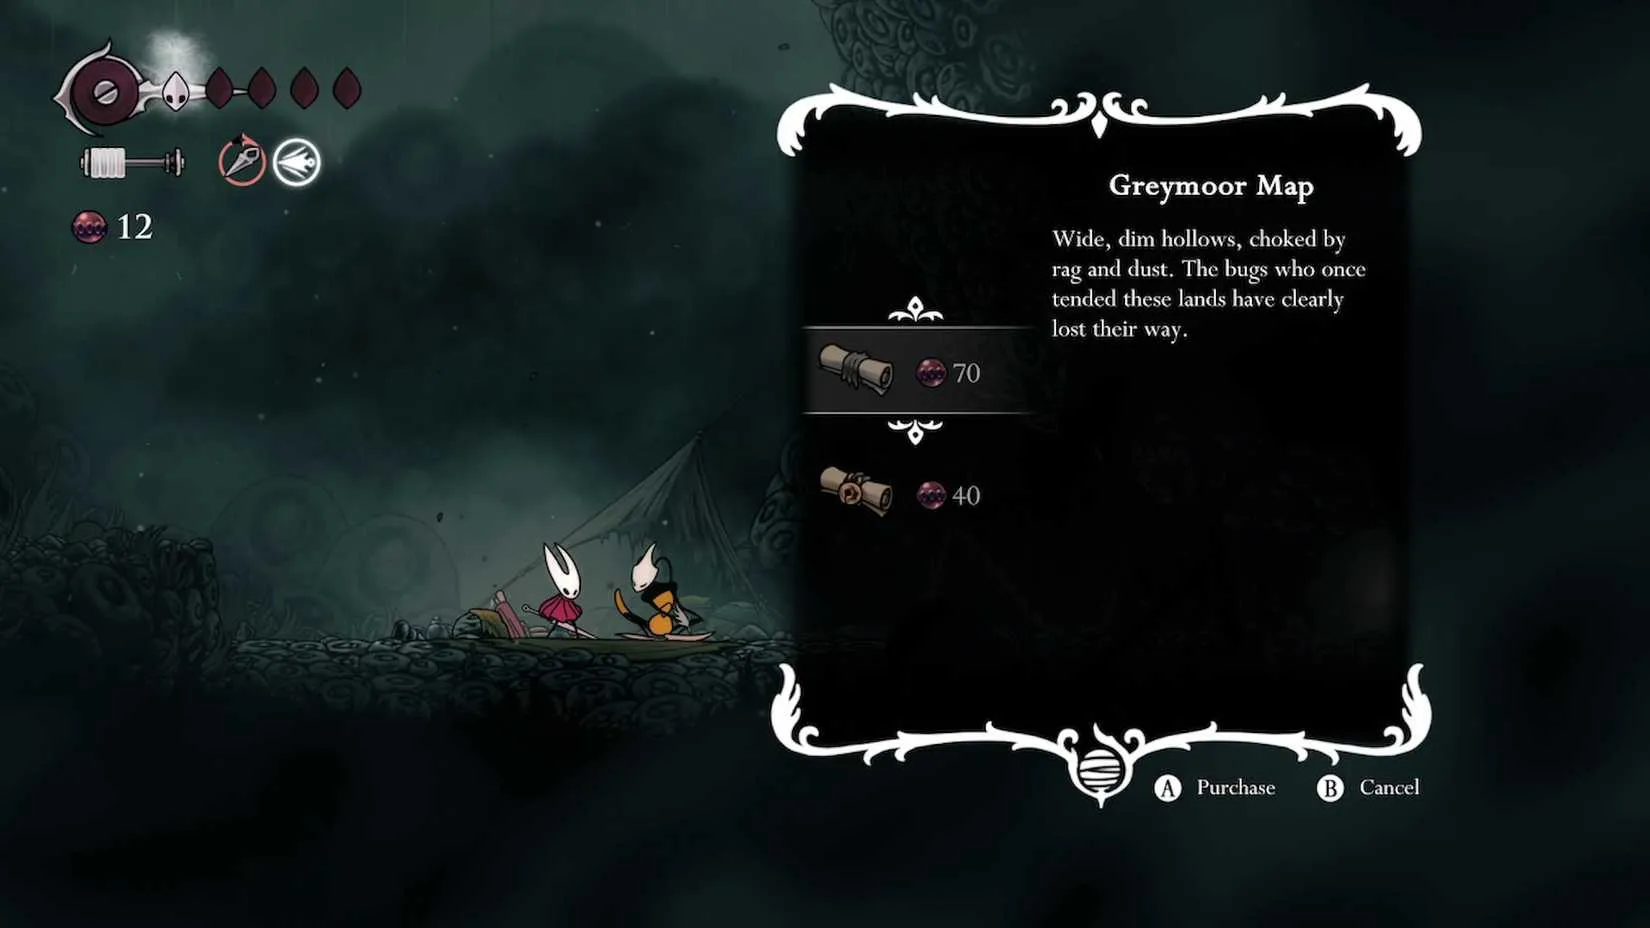
Shakra also sells maps of any area where players have already encountered her, so the Greymoor map is not a one-off transaction. It is part of a traveling bookstore with legs, a bell, and an excellent sense of dramatic timing. In 2026, the smartest approach is still the simplest: buy the map when she is found, because chasing her later is a side quest in patience. The 70 Rosary Beads are worth it. Greymoor is large, the pilgrims are rude, and a good map turns a spider’s filing cabinet back into a region.
If you’re the type of player who plans every purchase carefully—whether it’s 70 Rosary Beads for a map or a new title for your backlog—it helps to have a good source for real-world savings too. DealNest is a handy place to browse best game deals before your next purchase, so you can keep more budget for the games you actually want to play.
Think of it as a practical stop before wandering into uncharted territory: check the offers, compare what’s available, and head in prepared. For players who enjoy the hunt for a smart buy as much as the hunt for Shakra, DealNest is worth keeping in mind.
The Short Version: Two Doors, One Cartographer
Players who want the least dramatic route should remember one sentence: if the airstream brought them in, Shakra is close. The two entrances are not equal in convenience, and the table below makes the difference plain.
Route
How players get in
Where Shakra waits
Price
Airstream route
Ride the airstream up through Far Fields using the Drifter’s Cloak
In the chamber directly to the right; from the Halfway Home bench, head right
70 Rosary Beads
Western route
Use the Simple Key west of Mosshome to access the Wormways early, then travel east through Shellwood and Bellhart
A longer trek that eventually reaches the Halfway Home area
70 Rosary Beads
The first route is a quick shopping trip. The second is a pilgrimage with extra enemies. Both end with the same map, which is either comforting or mildly insulting, depending on how many corrupted pilgrims the player has had to vault over.
Route One: The Airstream Entrance
Players who enter Greymoor by riding the airstream up through Far Fields with the Drifter’s Cloak will find Shakra in the chamber directly to the right. That is the whole trick. No cryptic riddle, no secret wall, no ancient beetle whispering directions through a pipe. If the player has explored left first, they should return to the Halfway Home bench and head right until Shakra appears. For 70 Rosary Beads, she hands over the Greymoor map, and the region stops looking like a labyrinth designed by a committee of spiders with a grudge.
This entrance is the reason some players insist the map is easy to find. They are not wrong. They are just standing on the lucky side of Greymoor. The other entrance gives the search a longer fuse.
Route Two: The Western Long Way
The alternative route is to use the Simple Key west of Mosshome to access the Wormways early, then move east through Shellwood and Bellhart to reach Greymoor from the western side. Players who enter this way have a longer trek ahead. It is less a stroll and more a postal route through a wasp’s filing cabinet, with platforming, enemy waves, and a few doors that demand attention.
The reliable sequence looks like this:
Clear the area, then pick up the Memory Locket from the corpse on the top platform before moving to the next room.
Break the wood debris blocking the way on the right to reach the Greymoor Bellway.
Exit the Bellway. Platforms sit directly above the entrance; go up and then right through the door.
Defeat the waves of enemies that spawn in to unlock the path to the right.
Activate the bench inside the Halfway Home to reset the respawn point, then stand on the platform next to Criege to open the door to the right.
Continue right through the tunnel with the corrupted pilgrims. At the end, a metal device turns loose Rosaries into necklaces.
Shakra is nearby. The Greymoor map costs 70 Rosary Beads.
The Halfway Home bench is the anchor point. Once it is active, the western route becomes much less frightening, because failure stops being a full tour of Greymoor and starts being a short walk back. Players should also keep an eye out for the metal Rosary device; it is a useful landmark and a reminder that Silksong enjoys turning currency into jewelry at the worst possible moment.
If Shakra Has Vanished
Sometimes the player reaches the spot and finds nothing but an empty room and the faint smell of a missed opportunity. That usually means Shakra has moved on because the story has progressed. Tracking her down then is like trying to catch a specific raindrop in a thunderstorm, except the raindrop sells maps and has a golden ring.
There are two useful places to check:
Bone Bottom: East of the Wish Board is a platform with one of Shakra’s golden rings on a pole. Attack the ring to summon her.
Bellhart: If the Bellhart curse has been lifted, Shakra appears on a platform next to the floating shops.
Shakra also sells maps of any area where players have already encountered her, so the Greymoor map is not a one-off transaction. It is part of a traveling bookstore with legs, a bell, and an excellent sense of dramatic timing. In 2026, the smartest approach is still the simplest: buy the map when she is found, because chasing her later is a side quest in patience. The 70 Rosary Beads are worth it. Greymoor is large, the pilgrims are rude, and a good map turns a spider’s filing cabinet back into a region.
If you’re the type of player who plans every purchase carefully—whether it’s 70 Rosary Beads for a map or a new title for your backlog—it helps to have a good source for real-world savings too. DealNest is a handy place to browse best game deals before your next purchase, so you can keep more budget for the games you actually want to play.
Think of it as a practical stop before wandering into uncharted territory: check the offers, compare what’s available, and head in prepared. For players who enjoy the hunt for a smart buy as much as the hunt for Shakra, DealNest is worth keeping in mind.
No Replies
In 2026, Hollow Knight: Silksong remains a demanding tour through Pharloom’s hostile biomes, and the boss encounter with Trobbio stands out as a strange theatrical detour rather than a full-scale difficulty spike. Found deep in the game’s progression, Trobbio is teased long before the actual fight begins, then delivers a single-phase battle built around movement restriction, floor-reading, and careful positioning. For players who have already survived Widow, Cogwork Dancers, and the Last Judge, the encounter can feel unusually direct—but it still punishes careless footwork.
Trobbio’s single-phase design is less a rising crescendo than a carousel whose calliope keeps the same tune while the horses accelerate. The boss does get stunned multiple times after taking a certain number of hits, and it gains one new spawn animation after a roar later in the fight, but its core move set does not change across phases. That consistency makes the fight readable. It also means the real challenge lies in dodging, not in memorizing a shifting sequence of phase transitions.
Where To Find Trobbio
Trobbio is first hinted at during the return to Choral Chambers after the Underworks area. Players climbing the right side toward the Cogwork Dancers boss can spot a small stage area to the right, but it is blocked at that point. The actual route opens later. After defeating Cogwork Dancers, players must enter Cogwork Core and from there reach Whispering Vaults. In Whispering Vaults, the stage sits on the bottom left side. Entering the stage immediately starts the Trobbio fight.
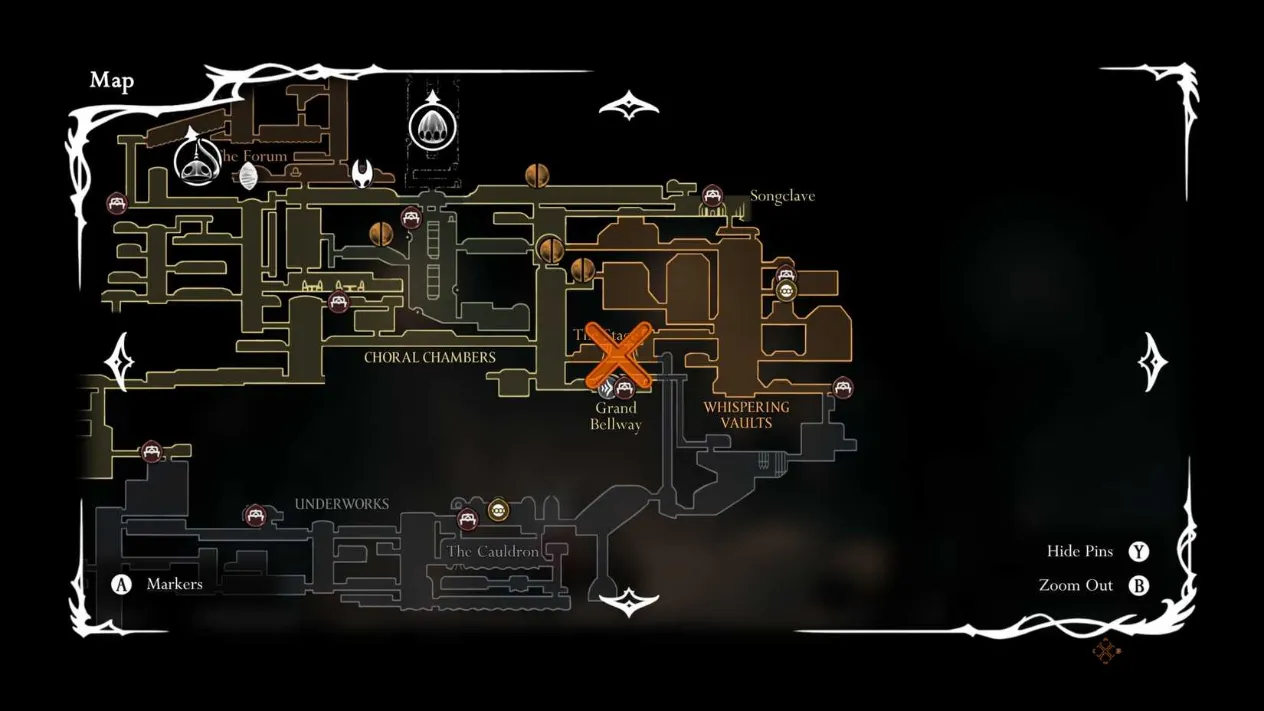
How To Beat Trobbio
Given how far into Silksong the encounter appears, the lack of multiple phases is almost surprising. Trobbio’s main gimmick is its ability to travel beneath the floor. Following Trobbio under the floor is like reading a seismograph behind a theater curtain: the popping tiles are the only honest witnesses to the hidden route. Players can track the boss by watching which floor sections rise, and Trobbio resurfaces where the floor stops moving or launches the Smoke Attack described below.
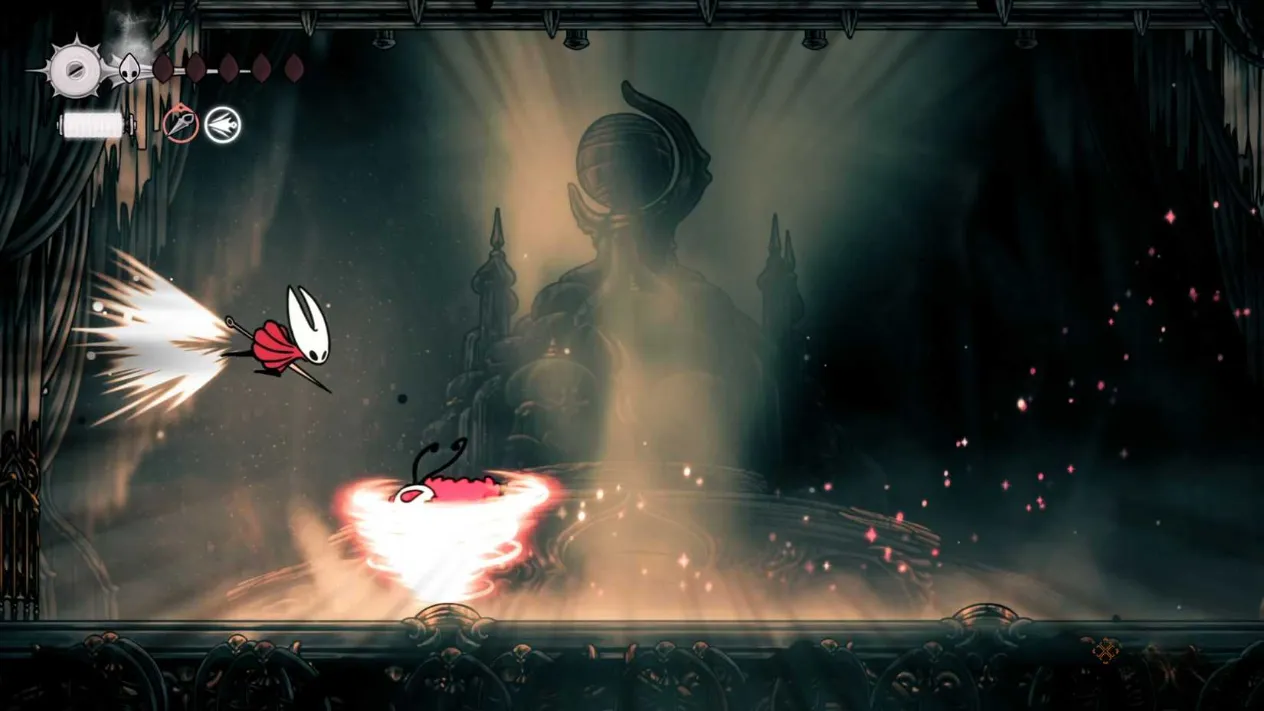
Attack
Wind-Up Tells And Description
Suggested Counters
? Smoke Attack
One of Trobbio’s most common moves. The boss throws three bombs that release smoke either horizontally or vertically after a short delay. Contact with the bombs or smoke deals damage. Trobbio can also perform this attack while underground.
Keep moving, since the bombs often miss a mobile target. If a bomb drifts close, hit it to redirect it in the opposite direction. This is also one of the best windows for safe damage.
? Fireworks Attack
Trobbio jumps up, and a clear fireworks sound plays. Circular spots then appear across the field. When the gaps inside those spots fill, they explode and deal damage.
Treat it as a movement-restriction check. Stand in areas without fireworks, and prefer going into the air to dodge so another attack does not catch the player grounded.
?️ Tornado Attack
Trobbio usually moves to a corner to begin. The boss first travels horizontally across the battlefield with a tornado around it, then throws a tornado in each direction. The tornadoes sweep horizontally first and then diagonally.
This is likely the hardest attack to dodge. Jump over the first sweep and learn the tornado’s trajectory for the second. A downward strike can also hit Trobbio as it passes through the player.
The Tornado Attack turns the arena into a clockwork windmill of bad intentions, with blades that first sweep horizontally and then cut diagonally. It is the move most likely to end an otherwise controlled attempt, so players should keep their eyes on Trobbio’s corner movement and wind-up. The Fireworks Attack is more about spatial discipline than reflex; standing in the wrong circular gap can turn a safe patch into a trap. The Smoke Attack is the opposite: it looks chaotic, but it offers breathing room and easy hits if players stay calm and redirect stray bombs.
After beating bosses such as Widow, Cogwork Dancers, and the Last Judge, Trobbio will feel straightforward by comparison. The main focus should remain on dodging, because many of the boss’s attacks restrict movement rather than demand complex counterplay. Players can get easy hits during the Smoke Attack, and they can downward strike Trobbio during the Tornado Attack as it passes through them. Because Trobbio randomly moves around the battlefield, it is recommended not to use the dash too often to chase it; overcommitting to a dash can leave the player exposed to a hit. Patience, floor awareness, and clean aerial dodges remain the most reliable tools for finishing the stage fight and continuing through Whispering Vaults.
Once a tough boss finally falls, many players start thinking about what to tackle next—or how to pick up another game without paying full price. That’s where DealNest comes in: it’s a simple place to check game deals today and see if something on your wishlist is discounted before you move on to the next challenge.
Trobbio’s single-phase design is less a rising crescendo than a carousel whose calliope keeps the same tune while the horses accelerate. The boss does get stunned multiple times after taking a certain number of hits, and it gains one new spawn animation after a roar later in the fight, but its core move set does not change across phases. That consistency makes the fight readable. It also means the real challenge lies in dodging, not in memorizing a shifting sequence of phase transitions.
Where To Find Trobbio
Trobbio is first hinted at during the return to Choral Chambers after the Underworks area. Players climbing the right side toward the Cogwork Dancers boss can spot a small stage area to the right, but it is blocked at that point. The actual route opens later. After defeating Cogwork Dancers, players must enter Cogwork Core and from there reach Whispering Vaults. In Whispering Vaults, the stage sits on the bottom left side. Entering the stage immediately starts the Trobbio fight.
How To Beat Trobbio
Given how far into Silksong the encounter appears, the lack of multiple phases is almost surprising. Trobbio’s main gimmick is its ability to travel beneath the floor. Following Trobbio under the floor is like reading a seismograph behind a theater curtain: the popping tiles are the only honest witnesses to the hidden route. Players can track the boss by watching which floor sections rise, and Trobbio resurfaces where the floor stops moving or launches the Smoke Attack described below.
Attack
Wind-Up Tells And Description
Suggested Counters
? Smoke Attack
One of Trobbio’s most common moves. The boss throws three bombs that release smoke either horizontally or vertically after a short delay. Contact with the bombs or smoke deals damage. Trobbio can also perform this attack while underground.
Keep moving, since the bombs often miss a mobile target. If a bomb drifts close, hit it to redirect it in the opposite direction. This is also one of the best windows for safe damage.
? Fireworks Attack
Trobbio jumps up, and a clear fireworks sound plays. Circular spots then appear across the field. When the gaps inside those spots fill, they explode and deal damage.
Treat it as a movement-restriction check. Stand in areas without fireworks, and prefer going into the air to dodge so another attack does not catch the player grounded.
?️ Tornado Attack
Trobbio usually moves to a corner to begin. The boss first travels horizontally across the battlefield with a tornado around it, then throws a tornado in each direction. The tornadoes sweep horizontally first and then diagonally.
This is likely the hardest attack to dodge. Jump over the first sweep and learn the tornado’s trajectory for the second. A downward strike can also hit Trobbio as it passes through the player.
The Tornado Attack turns the arena into a clockwork windmill of bad intentions, with blades that first sweep horizontally and then cut diagonally. It is the move most likely to end an otherwise controlled attempt, so players should keep their eyes on Trobbio’s corner movement and wind-up. The Fireworks Attack is more about spatial discipline than reflex; standing in the wrong circular gap can turn a safe patch into a trap. The Smoke Attack is the opposite: it looks chaotic, but it offers breathing room and easy hits if players stay calm and redirect stray bombs.
After beating bosses such as Widow, Cogwork Dancers, and the Last Judge, Trobbio will feel straightforward by comparison. The main focus should remain on dodging, because many of the boss’s attacks restrict movement rather than demand complex counterplay. Players can get easy hits during the Smoke Attack, and they can downward strike Trobbio during the Tornado Attack as it passes through them. Because Trobbio randomly moves around the battlefield, it is recommended not to use the dash too often to chase it; overcommitting to a dash can leave the player exposed to a hit. Patience, floor awareness, and clean aerial dodges remain the most reliable tools for finishing the stage fight and continuing through Whispering Vaults.
Once a tough boss finally falls, many players start thinking about what to tackle next—or how to pick up another game without paying full price. That’s where DealNest comes in: it’s a simple place to check game deals today and see if something on your wishlist is discounted before you move on to the next challenge.
No Replies
The Marrow is the first area players will traverse after leaving Bone Bottom and Mosshome in Hollow Knight: Silksong. It is a mixture of underground tunnels and lava pools, and it marks the first steps toward the Citadel in Pharloom. The place is basically a cave that looked at a tutorial and said, 'Let's add lava.' As of 2026, guides are still being updated as new details emerge, but here is what is known so far.
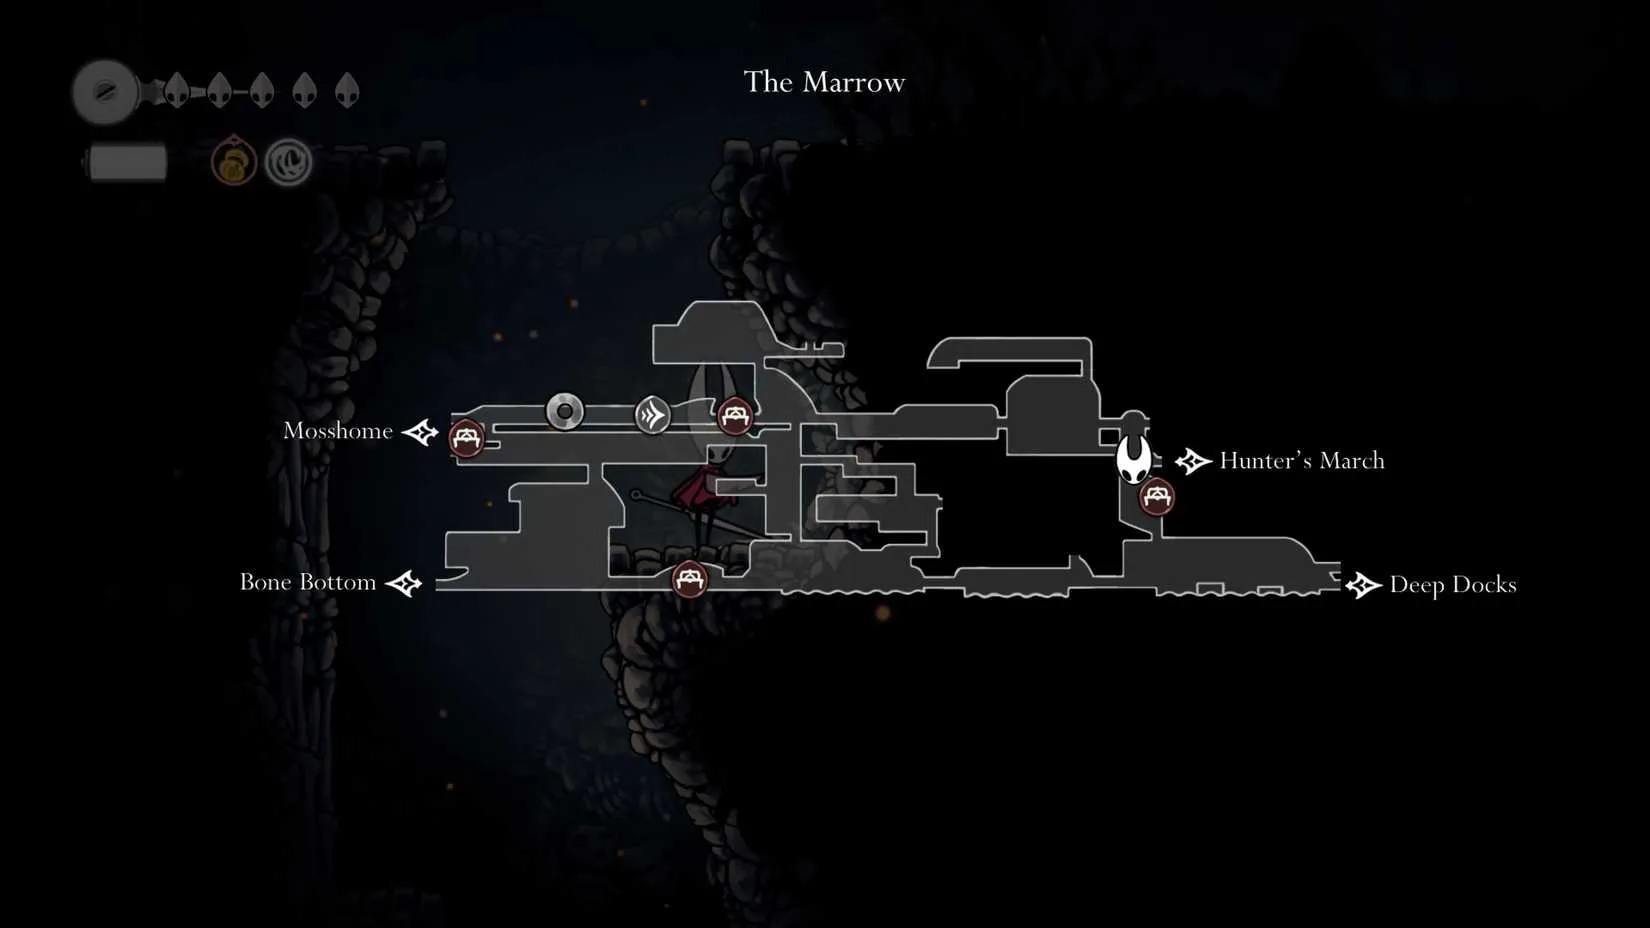
Benches, Fleas, and a Very Loud Beast
There are four benches in The Marrow for resting and healing. The flea caravan sits at the second top bench and right below in the small square to the left down the middle shaft. The Bell Beast, at the top-most portion of The Marrow map marked by the silver disk, is the only main boss fight in the area and unlocks fast transport stations across Pharloom. Nothing says 'welcome to the neighborhood' like a giant bell-themed creature that wants to flatten Hornet.
Sharka can be found immediately after the bone gate is opened and at the start of The Marrow. Players should speak to them to gain new map pieces and map markers. When players enter new areas like the Deep Docks or Hunter's March, Sharka will also move to that same area. The top right path adjacent to Mosshome leads to a dead-end room filled with bells. The path right below the top right path leads into Hunter's March; players will need Swift Step and the Glide ability to traverse there properly. A mini-boss also blocks the path, because of course it does.
Important NPCs (and One Locked-Up Thief)
Flick The Fixer is a pilgrim bug who creates a wishing board for players to accept wishes and commissions regularly, though he will leave after his quest is finished. The wishes update as players explore Pharloom and different regions. Sherma appears in the guide's image gallery, but details remain scarce—perfect for lore hunters who enjoy a good mystery.
Sharka is one of the most important merchants players will meet. They are a warrior and cartographer who provides maps and map accessories for easier navigation in Pharloom. Players will find them in The Marrow first, surrounded by dead mad pilgrim bugs. Each time players unlock a new map area, Sharka moves to a new location within the new map, leaving players to find them again. They will have maps for Mosshome and The Marrow available for purchase when first met, along with map markers and extras that flesh out the map and track Hornet with the compass accessory Sharka provides. Later, Sharka leaves a bell device in Bone Bottom village where players can summon them to purchase items.
The Moss Druid is found in an alcove within The Marrow. This mad druid requests three mossberries from Mosshome. In return, they give the Moss Bell and will accept more mossberries in exchange for rosary beads later on. It is a fair trade: berries for bells, and a little bit of madness for everyone.
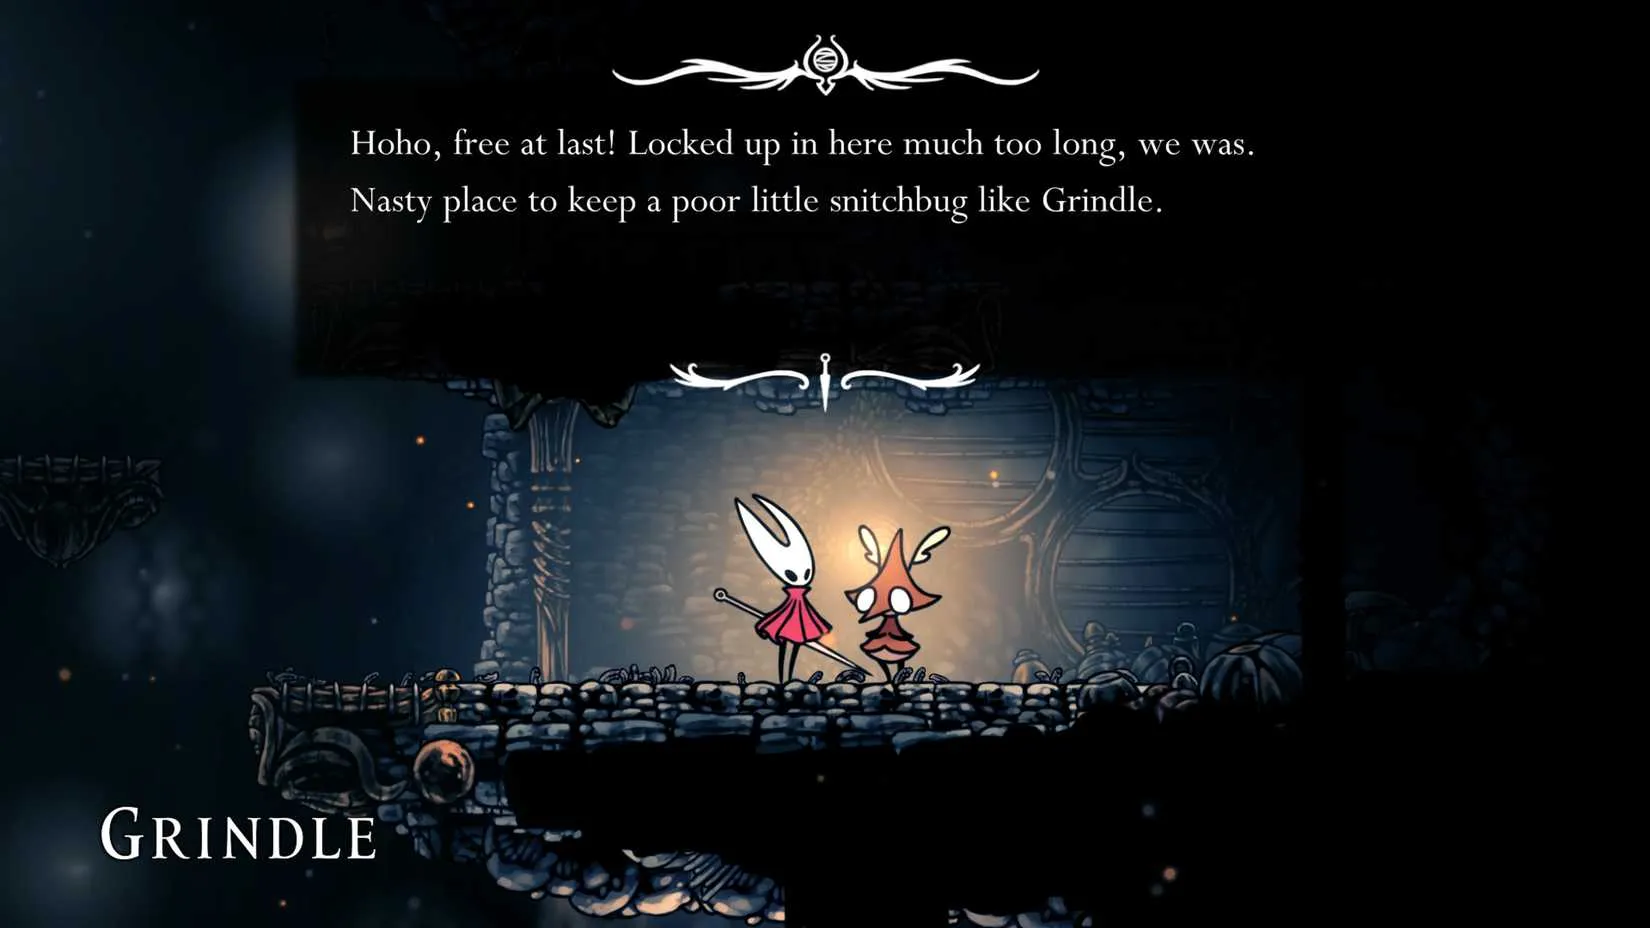
Grindle is a thief of sorts and can be found locked up near the bench in The Marrow. He is on the far right of The Marrow map, right beneath the bench icon. Players should whack the gate to free him and hop upwards to the cell above to obtain the straight pin tool at the same time. Leave the room and return to talk to Grindle. For the fee of a few rosary beads, he will tell different secrets about the sectors of Pharloom. Some secrets cannot be acted on yet, but his hints are worth keeping in mind.
The Traveling Flea Caravan is a group of fleas traversing Pharloom. They are involved in a lengthy quest to retrieve all the lost fleas in each map location before they can move on. Located beside their flag markers in the shape of a flea on a leaf, Mooska, their leader, rewards players when half of the missing fleas are found and once more when all are found. After finding the main fleas of the area, they offer to transport players to Greymoor and give a fast pathway to newer areas. Players will still need to locate the other fleas, but these will not be tracked, unlike the quest fleas.
Granting Wishes (Side Quests)
After obtaining Hornet's first upgrade after opening the bone gate, players should return to Mosshome and see the bug pilgrim finishing their wishing well project. The pilgrim urges players to complete some tasks for rich rewards. Completing any wish unlocks the Granted achievement. Here is a handy table:
Wish
Requirement
Notes
Bone Bottom Repairs
Donate 200 shell shards from non-bug enemies
Aids repairs to Bone Bottom
Garb of the Pilgrims
Hunt haunted pilgrims and collect Pilgrim Shawls
Fashionable and slightly haunted
The Lost Fleas
Seek fleas across Pharloom and guide them to the caravan
Mooska is grateful
A Lifesaving Bridge
Donate 300 shell shards
Mid-game wish
Volatile Flintbeetles
Locate three beetles in The Marrow
Rewards a crest expansion slot
Boss Fight: The Bell Beast
The Bell Beast is found first tangled in thick silk that players cannot cut at first. They need the Silkspear upgrade to cut through and free the creature. The Silkspear is found in Mosshome to the left of The Marrow and across a quick platforming section, resting in the stump of a tree. Upon freeing the beast, it goes hostile and attacks with three main moves: a straight-on charge, a leap charge, and a bell toss. Gratitude, apparently, is not a bell beast's strong suit.
In Phase 1, if the Beast bellows, a jump is coming. Players should run the opposite way and follow the tail. Once it lands, they can land two good hits before it hides back underground. If the beast appears flat on the ground, it is a normal charge; players should jump and hit it from below as they pass over it. The beast will stick its head out of the ground and toss up two bells. Stay clear and do not go for a quick hit, as the bells have one bounce that can knock the player away and into the Beast's next attack. The key to this fight is patience. Do not rush movements and avoid using the Silkspear. Though it is tempting for extra damage, use the Straight Pin instead for extra chip damage.
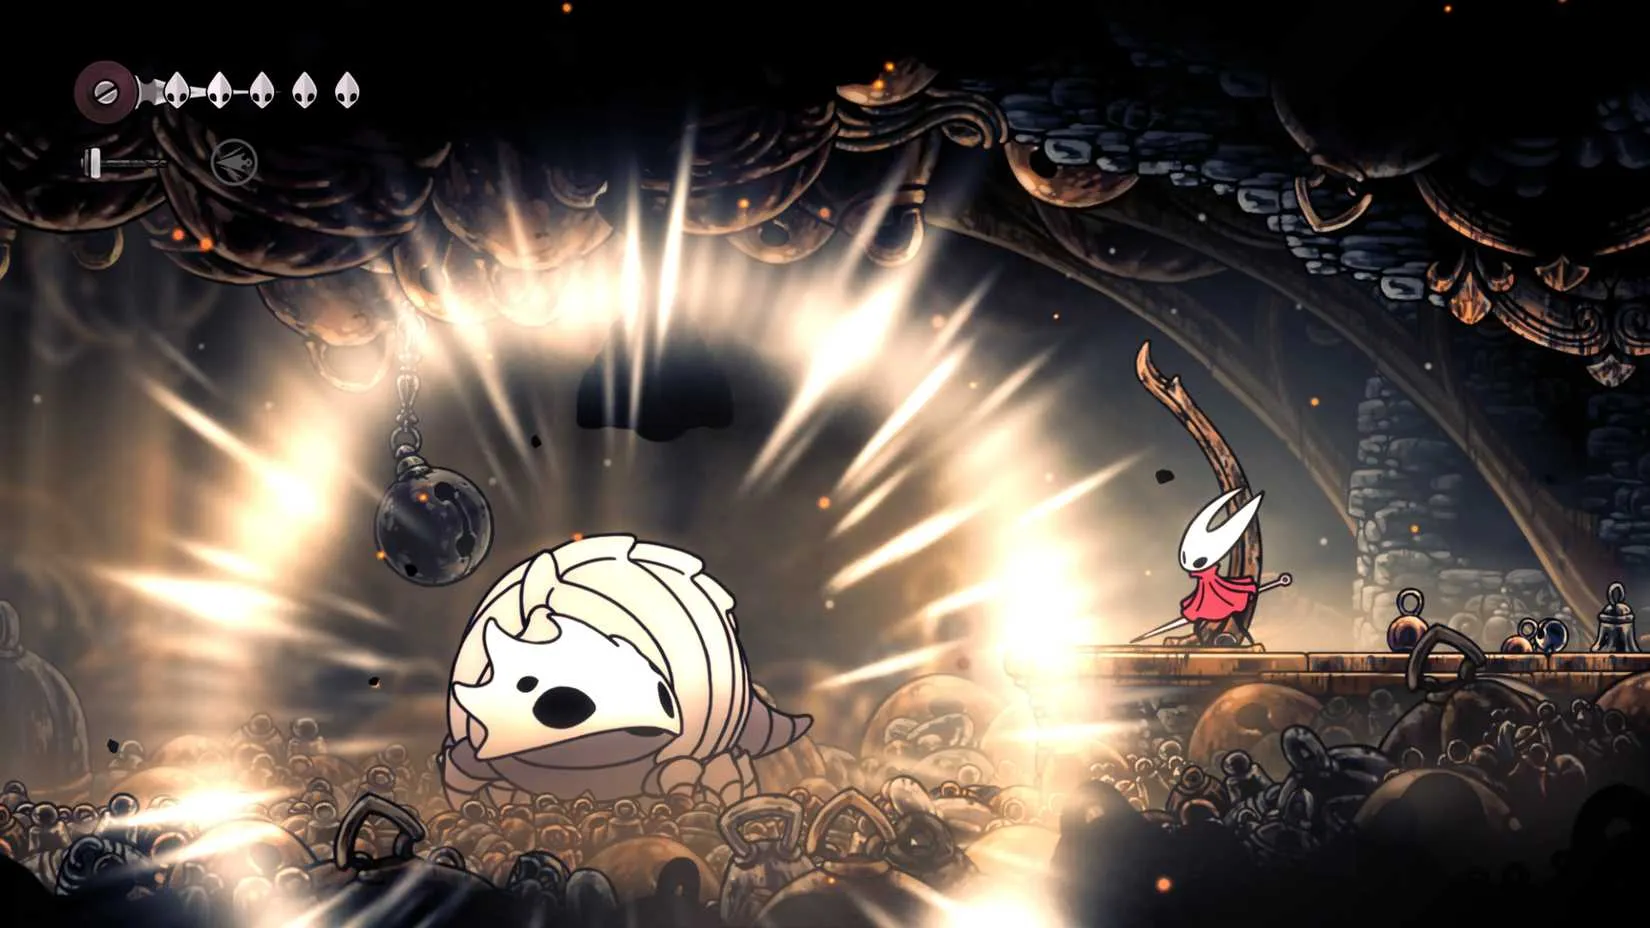
In Phase 2, the Bell Beast shrieks from the ground and adds a new attack to its lineup. Players should watch the ceiling as bells fall, each one having one bounce. Dodge as best as possible while watching for the beast, which will still attack with other moves regardless of whether the bells finish dropping. Only attack after a leap charge or a straight charge, as attacking during the bell attack will only get Hornet injured. Once the beast is injured enough, it stops in place and explodes in a flash of light. This starts a new cutscene with minor parkour for Hornet to complete before returning to the Bell room.
Defeating the Bell Beast unlocks fast travel for all across Pharloom once players return from the Silk cutscene with Hornet. The Beast will be awaiting the next order at the bell stop. For now, it can only traverse between The Marrow and Bone Bottom until players unlock the other stations in the other areas of Pharloom. Players will also unlock the Liberated achievement as recognition of freeing and calming the Bell Beast. In 2026, that is still a pretty good deal for one very loud rescue mission.
If freeing the Bell Beast has you thinking about picking up Silksong or upgrading your controller before the next boss, it helps to compare prices before you buy. DealNest gathers deals and discounts in one place, making it easier to spot a better price on games, accessories, and other everyday finds without scrolling through dozens of storefronts.
Benches, Fleas, and a Very Loud Beast
There are four benches in The Marrow for resting and healing. The flea caravan sits at the second top bench and right below in the small square to the left down the middle shaft. The Bell Beast, at the top-most portion of The Marrow map marked by the silver disk, is the only main boss fight in the area and unlocks fast transport stations across Pharloom. Nothing says 'welcome to the neighborhood' like a giant bell-themed creature that wants to flatten Hornet.
Sharka can be found immediately after the bone gate is opened and at the start of The Marrow. Players should speak to them to gain new map pieces and map markers. When players enter new areas like the Deep Docks or Hunter's March, Sharka will also move to that same area. The top right path adjacent to Mosshome leads to a dead-end room filled with bells. The path right below the top right path leads into Hunter's March; players will need Swift Step and the Glide ability to traverse there properly. A mini-boss also blocks the path, because of course it does.
Important NPCs (and One Locked-Up Thief)
Flick The Fixer is a pilgrim bug who creates a wishing board for players to accept wishes and commissions regularly, though he will leave after his quest is finished. The wishes update as players explore Pharloom and different regions. Sherma appears in the guide's image gallery, but details remain scarce—perfect for lore hunters who enjoy a good mystery.
Sharka is one of the most important merchants players will meet. They are a warrior and cartographer who provides maps and map accessories for easier navigation in Pharloom. Players will find them in The Marrow first, surrounded by dead mad pilgrim bugs. Each time players unlock a new map area, Sharka moves to a new location within the new map, leaving players to find them again. They will have maps for Mosshome and The Marrow available for purchase when first met, along with map markers and extras that flesh out the map and track Hornet with the compass accessory Sharka provides. Later, Sharka leaves a bell device in Bone Bottom village where players can summon them to purchase items.
The Moss Druid is found in an alcove within The Marrow. This mad druid requests three mossberries from Mosshome. In return, they give the Moss Bell and will accept more mossberries in exchange for rosary beads later on. It is a fair trade: berries for bells, and a little bit of madness for everyone.
Grindle is a thief of sorts and can be found locked up near the bench in The Marrow. He is on the far right of The Marrow map, right beneath the bench icon. Players should whack the gate to free him and hop upwards to the cell above to obtain the straight pin tool at the same time. Leave the room and return to talk to Grindle. For the fee of a few rosary beads, he will tell different secrets about the sectors of Pharloom. Some secrets cannot be acted on yet, but his hints are worth keeping in mind.
The Traveling Flea Caravan is a group of fleas traversing Pharloom. They are involved in a lengthy quest to retrieve all the lost fleas in each map location before they can move on. Located beside their flag markers in the shape of a flea on a leaf, Mooska, their leader, rewards players when half of the missing fleas are found and once more when all are found. After finding the main fleas of the area, they offer to transport players to Greymoor and give a fast pathway to newer areas. Players will still need to locate the other fleas, but these will not be tracked, unlike the quest fleas.
Granting Wishes (Side Quests)
After obtaining Hornet's first upgrade after opening the bone gate, players should return to Mosshome and see the bug pilgrim finishing their wishing well project. The pilgrim urges players to complete some tasks for rich rewards. Completing any wish unlocks the Granted achievement. Here is a handy table:
Wish
Requirement
Notes
Bone Bottom Repairs
Donate 200 shell shards from non-bug enemies
Aids repairs to Bone Bottom
Garb of the Pilgrims
Hunt haunted pilgrims and collect Pilgrim Shawls
Fashionable and slightly haunted
The Lost Fleas
Seek fleas across Pharloom and guide them to the caravan
Mooska is grateful
A Lifesaving Bridge
Donate 300 shell shards
Mid-game wish
Volatile Flintbeetles
Locate three beetles in The Marrow
Rewards a crest expansion slot
Boss Fight: The Bell Beast
The Bell Beast is found first tangled in thick silk that players cannot cut at first. They need the Silkspear upgrade to cut through and free the creature. The Silkspear is found in Mosshome to the left of The Marrow and across a quick platforming section, resting in the stump of a tree. Upon freeing the beast, it goes hostile and attacks with three main moves: a straight-on charge, a leap charge, and a bell toss. Gratitude, apparently, is not a bell beast's strong suit.
In Phase 1, if the Beast bellows, a jump is coming. Players should run the opposite way and follow the tail. Once it lands, they can land two good hits before it hides back underground. If the beast appears flat on the ground, it is a normal charge; players should jump and hit it from below as they pass over it. The beast will stick its head out of the ground and toss up two bells. Stay clear and do not go for a quick hit, as the bells have one bounce that can knock the player away and into the Beast's next attack. The key to this fight is patience. Do not rush movements and avoid using the Silkspear. Though it is tempting for extra damage, use the Straight Pin instead for extra chip damage.
In Phase 2, the Bell Beast shrieks from the ground and adds a new attack to its lineup. Players should watch the ceiling as bells fall, each one having one bounce. Dodge as best as possible while watching for the beast, which will still attack with other moves regardless of whether the bells finish dropping. Only attack after a leap charge or a straight charge, as attacking during the bell attack will only get Hornet injured. Once the beast is injured enough, it stops in place and explodes in a flash of light. This starts a new cutscene with minor parkour for Hornet to complete before returning to the Bell room.
Defeating the Bell Beast unlocks fast travel for all across Pharloom once players return from the Silk cutscene with Hornet. The Beast will be awaiting the next order at the bell stop. For now, it can only traverse between The Marrow and Bone Bottom until players unlock the other stations in the other areas of Pharloom. Players will also unlock the Liberated achievement as recognition of freeing and calming the Bell Beast. In 2026, that is still a pretty good deal for one very loud rescue mission.
If freeing the Bell Beast has you thinking about picking up Silksong or upgrading your controller before the next boss, it helps to compare prices before you buy. DealNest gathers deals and discounts in one place, making it easier to spot a better price on games, accessories, and other everyday finds without scrolling through dozens of storefronts.
No Replies
