

I have a confession: I am exactly the kind of player who sees a boss arena and immediately checks whether my will is up to date. So when Hollow Knight: Silksong finally arrived and promptly began folding me like a lawn chair, I did what any reasonable person would do in 2026: I opened the mod page and whispered, hello, accessibility.

The Wait Was Worth It, But My Reflexes Are Not
Let me be clear: Silksong is, for the most part, well worth the wait. Reviews were slowly but surely pouring in, and every early review I saw was full of praise. Guide writers were hard at work on complete walkthroughs, and I was hard at work pretending that my fourth death in a row was tactical reconnaissance. The game is gorgeous, sharp, and confident. It is also about as forgiving as a cat that has just been told no.
That is why the modding conversation around Silksong has been so fascinating. Within days of launch, players were already asking for ways to soften the opening portion, and modders answered with the enthusiasm of people who heard a doorbell and decided to install a whole new door.
The Mods Are Already Here, and They Are Practical
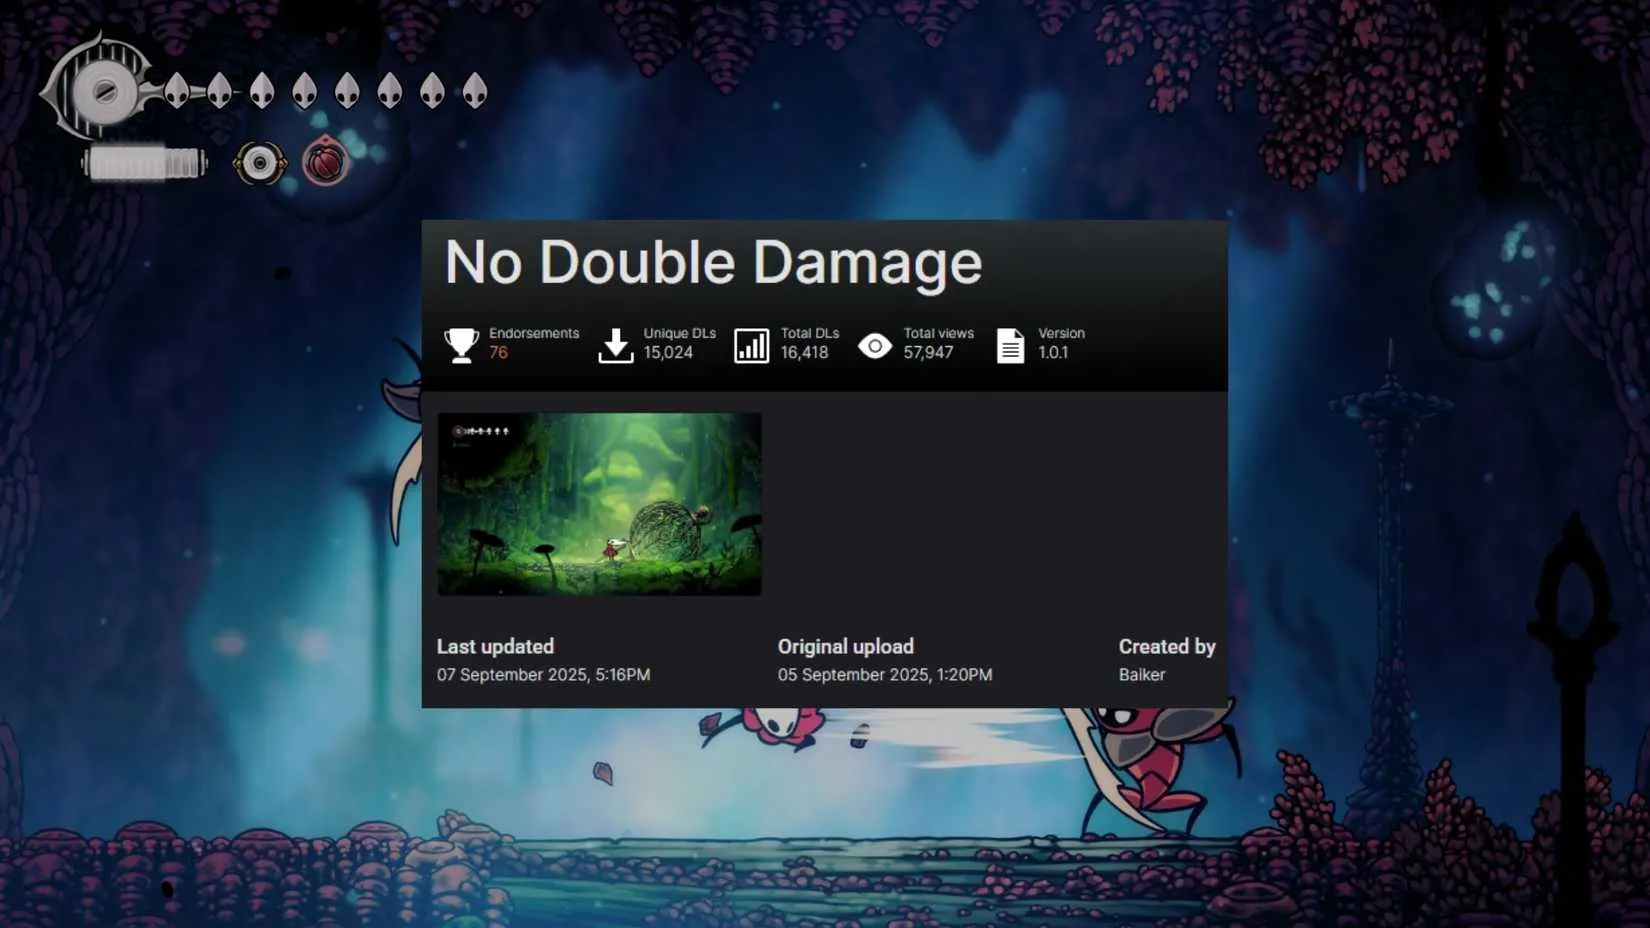
Browsing the Silksong mod page is a bit like visiting a support group where everyone also has a soldering iron. The headline act is No Double Damage, a mod that removes double damage from enemies and normal bosses. It does not turn Hornet into a steamroller; it just stops every stray elbow from deleting a health bar. The first time I used it, I felt like I had slipped a folded napkin under a wobbly table: the furniture was still rickety, but dinner suddenly became possible.
There are other helpful mods too:
?️ A respawn mod that lets you respawn at a scene's entrance instead of backtracking from a bench that is apparently in a different time zone.
? The same mod lets you customize respawn points in scenes, which is the gaming equivalent of leaving a spare key under a ceramic frog: a small mercy, wildly practical.
? Several additional quality-of-life mods that make the experience easier and more accessible without rewriting the whole game.
? Old-fashioned boss cheesing, because sometimes the smartest tactic is to let a terrifying boss walk into a wall while you take notes.
Here is my highly scientific breakdown:
Approach
What it does
My reaction
No Double Damage
Removes double damage from enemies and normal bosses
Less screaming, more learning
Scene entrance respawn
Skips the long bench pilgrimage
My patience returns from war
Custom respawn points
Lets me choose where to reappear
Power without responsibility
Boss cheese
Uses clever tactics against intimidating fights
? Delicious
The Difficulty Debate Has Teeth
Of course, this opens up the usual dialogue about sacrificing intent and vision. Many people argue that Soulslikes such as Hollow Knight and Dark Souls should have one static difficulty. I understand that position. A game's difficulty is part of its voice, and modding it can feel like putting a funny hat on a statue. But in the case of Silksong, people are also pushing back at some of the game's design choices, and I think that pushback deserves a hearing.
One commentator put it well: the game is honestly incredibly difficult. Enemies deal a lot of damage and are often very nimble, and with very few upgrades, the game feels at least three times as difficult as Hollow Knight. That concern has been a common thread. The base difficulty is less a curve and more a corkscrew designed by a caffeinated architect. When players feel like the game is being difficult for the sake of being difficult, and when it fails to give them the tools to properly deal with the challenge, modders step in to fill that void.
I do not think that is a crime against art. A mod is not a review score, and it is not a demand that everyone play the same way. It is a knob on the radio. Some of us want the music louder; some of us want to hear our own thoughts. The No Double Damage mod is not a victory over the game. It is a tiny adjustment that lets a player stay in the conversation long enough to actually learn the dance.
Where Does That Leave Us in 2026?
Looking back from 2026, the whole episode feels like a useful snapshot of how players negotiate difficulty now. Reviews praised Silksong, walkthroughs flourished, and modders built a little side door for anyone who needed it. Whether Team Cherry ultimately addressed those concerns in a future update or not, the void was already filled by people who love the game enough to tinker with it.
So yes, I use mods. I use them because I want to see the rest of the game, not because I want to win an argument. Silksong can keep its fangs. I just prefer to bring a slightly thicker glove. ?
All this tinkering has a way of expanding the backlog, though. Once I started poking around mod folders and load orders again, I found myself browsing for other soulslikes and metroidvanias to test my newly thickened glove against — and my wishlist quietly grew into something resembling a phone book. That is usually the moment when patience stops being a virtue and becomes a waiting game for the next seasonal sale, which is exactly the kind of thing a steam deal finder is built for. It saves you from refreshing store pages and guessing when a price will finally dip.
It is a small quality-of-life upgrade in the same spirit as the mods above: nothing dramatic, just less friction between you and the part you actually enjoy. Whether you are hunting down an older Hollow Knight-style gem or waiting for Silksong's own price to budge, keeping an eye on the discounts means more games in the library and fewer excuses not to play them. ?
The Wait Was Worth It, But My Reflexes Are Not
Let me be clear: Silksong is, for the most part, well worth the wait. Reviews were slowly but surely pouring in, and every early review I saw was full of praise. Guide writers were hard at work on complete walkthroughs, and I was hard at work pretending that my fourth death in a row was tactical reconnaissance. The game is gorgeous, sharp, and confident. It is also about as forgiving as a cat that has just been told no.
That is why the modding conversation around Silksong has been so fascinating. Within days of launch, players were already asking for ways to soften the opening portion, and modders answered with the enthusiasm of people who heard a doorbell and decided to install a whole new door.
The Mods Are Already Here, and They Are Practical
Browsing the Silksong mod page is a bit like visiting a support group where everyone also has a soldering iron. The headline act is No Double Damage, a mod that removes double damage from enemies and normal bosses. It does not turn Hornet into a steamroller; it just stops every stray elbow from deleting a health bar. The first time I used it, I felt like I had slipped a folded napkin under a wobbly table: the furniture was still rickety, but dinner suddenly became possible.
There are other helpful mods too:
?️ A respawn mod that lets you respawn at a scene's entrance instead of backtracking from a bench that is apparently in a different time zone.
? The same mod lets you customize respawn points in scenes, which is the gaming equivalent of leaving a spare key under a ceramic frog: a small mercy, wildly practical.
? Several additional quality-of-life mods that make the experience easier and more accessible without rewriting the whole game.
? Old-fashioned boss cheesing, because sometimes the smartest tactic is to let a terrifying boss walk into a wall while you take notes.
Here is my highly scientific breakdown:
Approach
What it does
My reaction
No Double Damage
Removes double damage from enemies and normal bosses
Less screaming, more learning
Scene entrance respawn
Skips the long bench pilgrimage
My patience returns from war
Custom respawn points
Lets me choose where to reappear
Power without responsibility
Boss cheese
Uses clever tactics against intimidating fights
? Delicious
The Difficulty Debate Has Teeth
Of course, this opens up the usual dialogue about sacrificing intent and vision. Many people argue that Soulslikes such as Hollow Knight and Dark Souls should have one static difficulty. I understand that position. A game's difficulty is part of its voice, and modding it can feel like putting a funny hat on a statue. But in the case of Silksong, people are also pushing back at some of the game's design choices, and I think that pushback deserves a hearing.
One commentator put it well: the game is honestly incredibly difficult. Enemies deal a lot of damage and are often very nimble, and with very few upgrades, the game feels at least three times as difficult as Hollow Knight. That concern has been a common thread. The base difficulty is less a curve and more a corkscrew designed by a caffeinated architect. When players feel like the game is being difficult for the sake of being difficult, and when it fails to give them the tools to properly deal with the challenge, modders step in to fill that void.
I do not think that is a crime against art. A mod is not a review score, and it is not a demand that everyone play the same way. It is a knob on the radio. Some of us want the music louder; some of us want to hear our own thoughts. The No Double Damage mod is not a victory over the game. It is a tiny adjustment that lets a player stay in the conversation long enough to actually learn the dance.
Where Does That Leave Us in 2026?
Looking back from 2026, the whole episode feels like a useful snapshot of how players negotiate difficulty now. Reviews praised Silksong, walkthroughs flourished, and modders built a little side door for anyone who needed it. Whether Team Cherry ultimately addressed those concerns in a future update or not, the void was already filled by people who love the game enough to tinker with it.
So yes, I use mods. I use them because I want to see the rest of the game, not because I want to win an argument. Silksong can keep its fangs. I just prefer to bring a slightly thicker glove. ?
All this tinkering has a way of expanding the backlog, though. Once I started poking around mod folders and load orders again, I found myself browsing for other soulslikes and metroidvanias to test my newly thickened glove against — and my wishlist quietly grew into something resembling a phone book. That is usually the moment when patience stops being a virtue and becomes a waiting game for the next seasonal sale, which is exactly the kind of thing a steam deal finder is built for. It saves you from refreshing store pages and guessing when a price will finally dip.
It is a small quality-of-life upgrade in the same spirit as the mods above: nothing dramatic, just less friction between you and the part you actually enjoy. Whether you are hunting down an older Hollow Knight-style gem or waiting for Silksong's own price to budge, keeping an eye on the discounts means more games in the library and fewer excuses not to play them. ?
No Replies
Introduction About Ewa Pajor
Ewa Pajor is one of Poland’s most accomplished footballers and a highly regarded striker known for her sharp movement, clinical finishing, and tireless work rate. Representing both club and country, she has built a reputation as a forward who can find space in crowded penalty areas and turn chances into goals with impressive consistency.
Born in Uniejów, Poland, Pajor developed into an elite attacker through her determination and technical ability. Her successful spell with VfL Wolfsburg established her among Europe’s leading forwards, where she contributed goals, assists, and decisive performances in major domestic and international competitions.
Now playing for FC Barcelona, Ewa Pajor continues to demonstrate the qualities of a top-class striker: intelligent positioning, pace, composure, and a strong competitive mentality. As a key figure for the Poland national team, she remains an inspiring example of excellence in women’s football.
Ewa Pajor's card
Ewa Pajor’s 89-rated Striker card is built to be a constant scoring threat, combining explosive 93 pace, elite 91 shooting, and silky 89 dribbling. While her 65 passing, 22 defending, and 72 physicality show that her game is focused firmly on attack rather than defensive work, her standout offensive attributes make her exceptionally dangerous in and around the box. As a striker, Pajor can use her speed to burst beyond the back line, her dribbling to create space in tight areas, and her clinical finishing to punish even the smallest defensive mistake, making her an ideal option for breaking open defenses and sealing crucial goals.

How to Obtain Ewa Pajor's Player Card
To obtain Ewa Pajor’s card in FC 27, you can first try purchasing card packs and testing your luck, though the chances of getting the card are relatively low and uncertain; second, you can complete SBC (Squad Building Challenges) tasks, which may reward you with Ewa Pajor’s card, although this depends on the available challenges and their requirements; finally, you can directly purchase the card from the transfer market for around 0.18 million FC 27 Coins, which is a more direct method but quite expensive.

Fastest Ways to Earn FC 27 Coins

Conventional methods to earn fc27 coins include selling player cards from your club, completing weekly objectives, and participating in various game modes for rewards, but these approaches are limited and depend heavily on player skill or luck; if you are targeting a card such as Ewa Pajor, you may spend a lot of time and still come up short.
Fortunately, LootBar.com offers a faster route with cheap fifa coins, a 10% discount for newly registered users, and regular special offers. The purchased coins arrive quickly through a secure trading method that protects your account and will not lead to a ban, so there is no need to wait to buy fc 27 coins and get the Ewa Pajor player card you want right away.
What is the best Gaming Top-Up Platform?
For players seeking reliable, efficient, and better priced gaming top-up, LootBar stands out as the best platform. Its high level of customer satisfaction is evident from a 4.9/5.0 rating on Trustpilot, confirming its status as the go-to choice for gaming top-up.
Ewa Pajor is one of Poland’s most accomplished footballers and a highly regarded striker known for her sharp movement, clinical finishing, and tireless work rate. Representing both club and country, she has built a reputation as a forward who can find space in crowded penalty areas and turn chances into goals with impressive consistency.
Born in Uniejów, Poland, Pajor developed into an elite attacker through her determination and technical ability. Her successful spell with VfL Wolfsburg established her among Europe’s leading forwards, where she contributed goals, assists, and decisive performances in major domestic and international competitions.
Now playing for FC Barcelona, Ewa Pajor continues to demonstrate the qualities of a top-class striker: intelligent positioning, pace, composure, and a strong competitive mentality. As a key figure for the Poland national team, she remains an inspiring example of excellence in women’s football.
Ewa Pajor's card
Ewa Pajor’s 89-rated Striker card is built to be a constant scoring threat, combining explosive 93 pace, elite 91 shooting, and silky 89 dribbling. While her 65 passing, 22 defending, and 72 physicality show that her game is focused firmly on attack rather than defensive work, her standout offensive attributes make her exceptionally dangerous in and around the box. As a striker, Pajor can use her speed to burst beyond the back line, her dribbling to create space in tight areas, and her clinical finishing to punish even the smallest defensive mistake, making her an ideal option for breaking open defenses and sealing crucial goals.
How to Obtain Ewa Pajor's Player Card
To obtain Ewa Pajor’s card in FC 27, you can first try purchasing card packs and testing your luck, though the chances of getting the card are relatively low and uncertain; second, you can complete SBC (Squad Building Challenges) tasks, which may reward you with Ewa Pajor’s card, although this depends on the available challenges and their requirements; finally, you can directly purchase the card from the transfer market for around 0.18 million FC 27 Coins, which is a more direct method but quite expensive.
Fastest Ways to Earn FC 27 Coins
Conventional methods to earn fc27 coins include selling player cards from your club, completing weekly objectives, and participating in various game modes for rewards, but these approaches are limited and depend heavily on player skill or luck; if you are targeting a card such as Ewa Pajor, you may spend a lot of time and still come up short.
Fortunately, LootBar.com offers a faster route with cheap fifa coins, a 10% discount for newly registered users, and regular special offers. The purchased coins arrive quickly through a secure trading method that protects your account and will not lead to a ban, so there is no need to wait to buy fc 27 coins and get the Ewa Pajor player card you want right away.
What is the best Gaming Top-Up Platform?
For players seeking reliable, efficient, and better priced gaming top-up, LootBar stands out as the best platform. Its high level of customer satisfaction is evident from a 4.9/5.0 rating on Trustpilot, confirming its status as the go-to choice for gaming top-up.
No Replies
Creige's Halfway House has a problem with feathers, and Hornet is the one who can solve it. In Act 1 of Hollow Knight: Silksong, the Crawbug Clearing side quest asks players to collect 25 Ragpelts so that Creige can build a scarecrow. The task sounds simple enough—until the local birds start treating the roof like a personal playground. ?

Starting the Crawbug Clearing Quest
The quest does not appear at the very beginning of the journey. Players first need to defeat the Widow boss in Bellhart and free the town's citizens from their web captivity. That fight becomes available after defeating Sister Splinter in Shellwood and acquiring the Cling Grip. Once the Widow falls, the Wish Board beside the shopkeeper in Bellhart quietly offers its requests. Crawbug Clearing sits among them, alongside My Missing Courier and Rite of the Pollip.
Accepting the wish is only the first step. The quest truly begins when Hornet speaks with Creige at the Halfway House in Greymoor. Behind the counter, Creige explains the situation: he needs 25 Ragpelts to build a scarecrow. Without it, the birds will keep swarming his building. Plain and simple, the man needs a feathered deterrent, and Hornet needs to supply the materials.

Finding Ragpelts in Greymoor
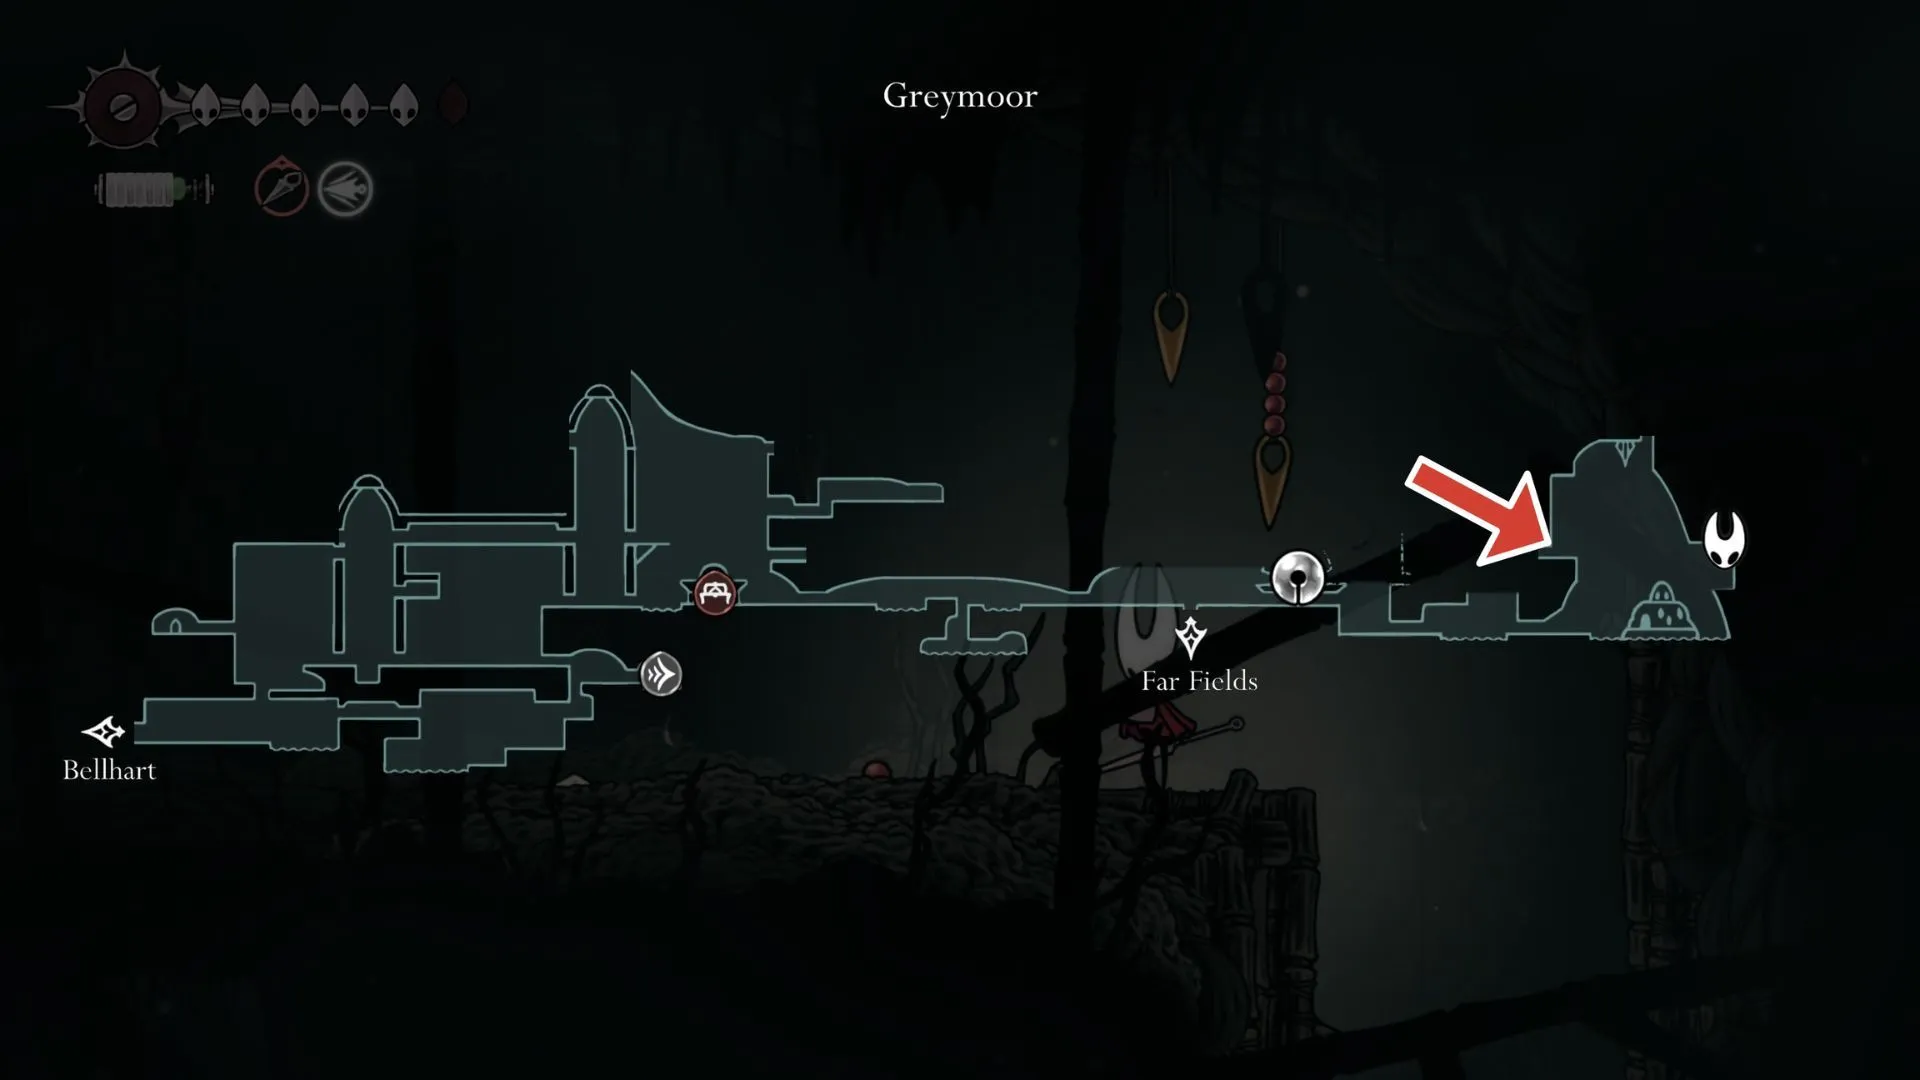
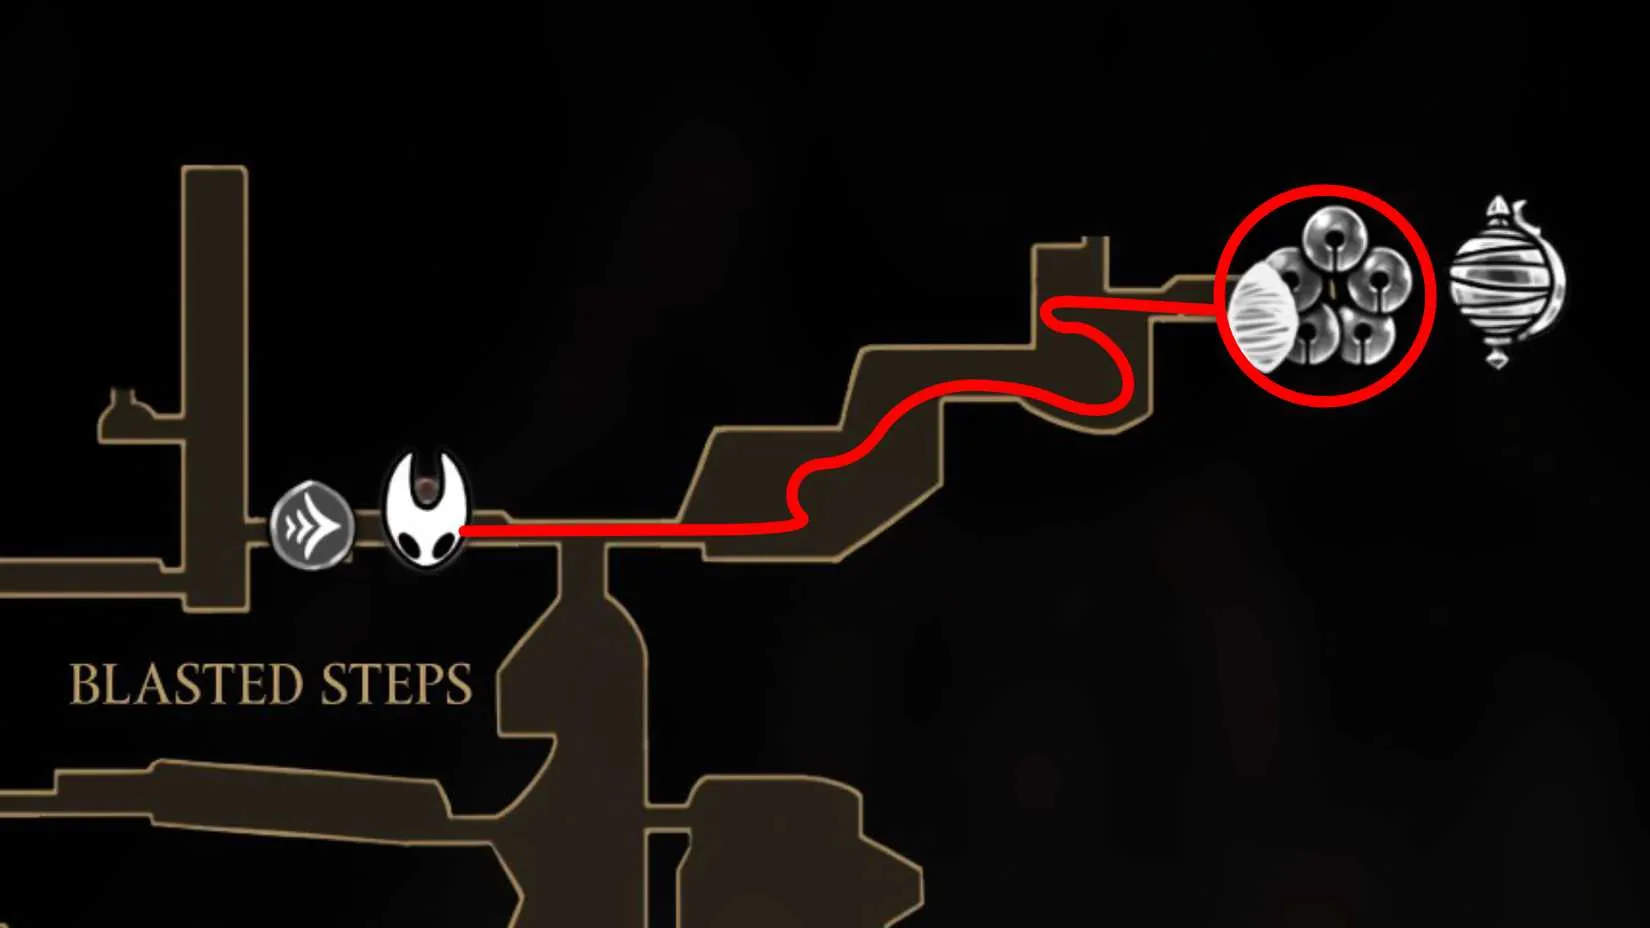
Ragpelts come from the green bird enemies in Greymoor. The small green birds above the Halfway House do drop them, but each tiny bird yields only one Ragpelt. Grinding those little ones and resting at the nearby bench works, yet it is not the fastest route. Truth be told, the better farming spot lies farther east of the Halfway House.
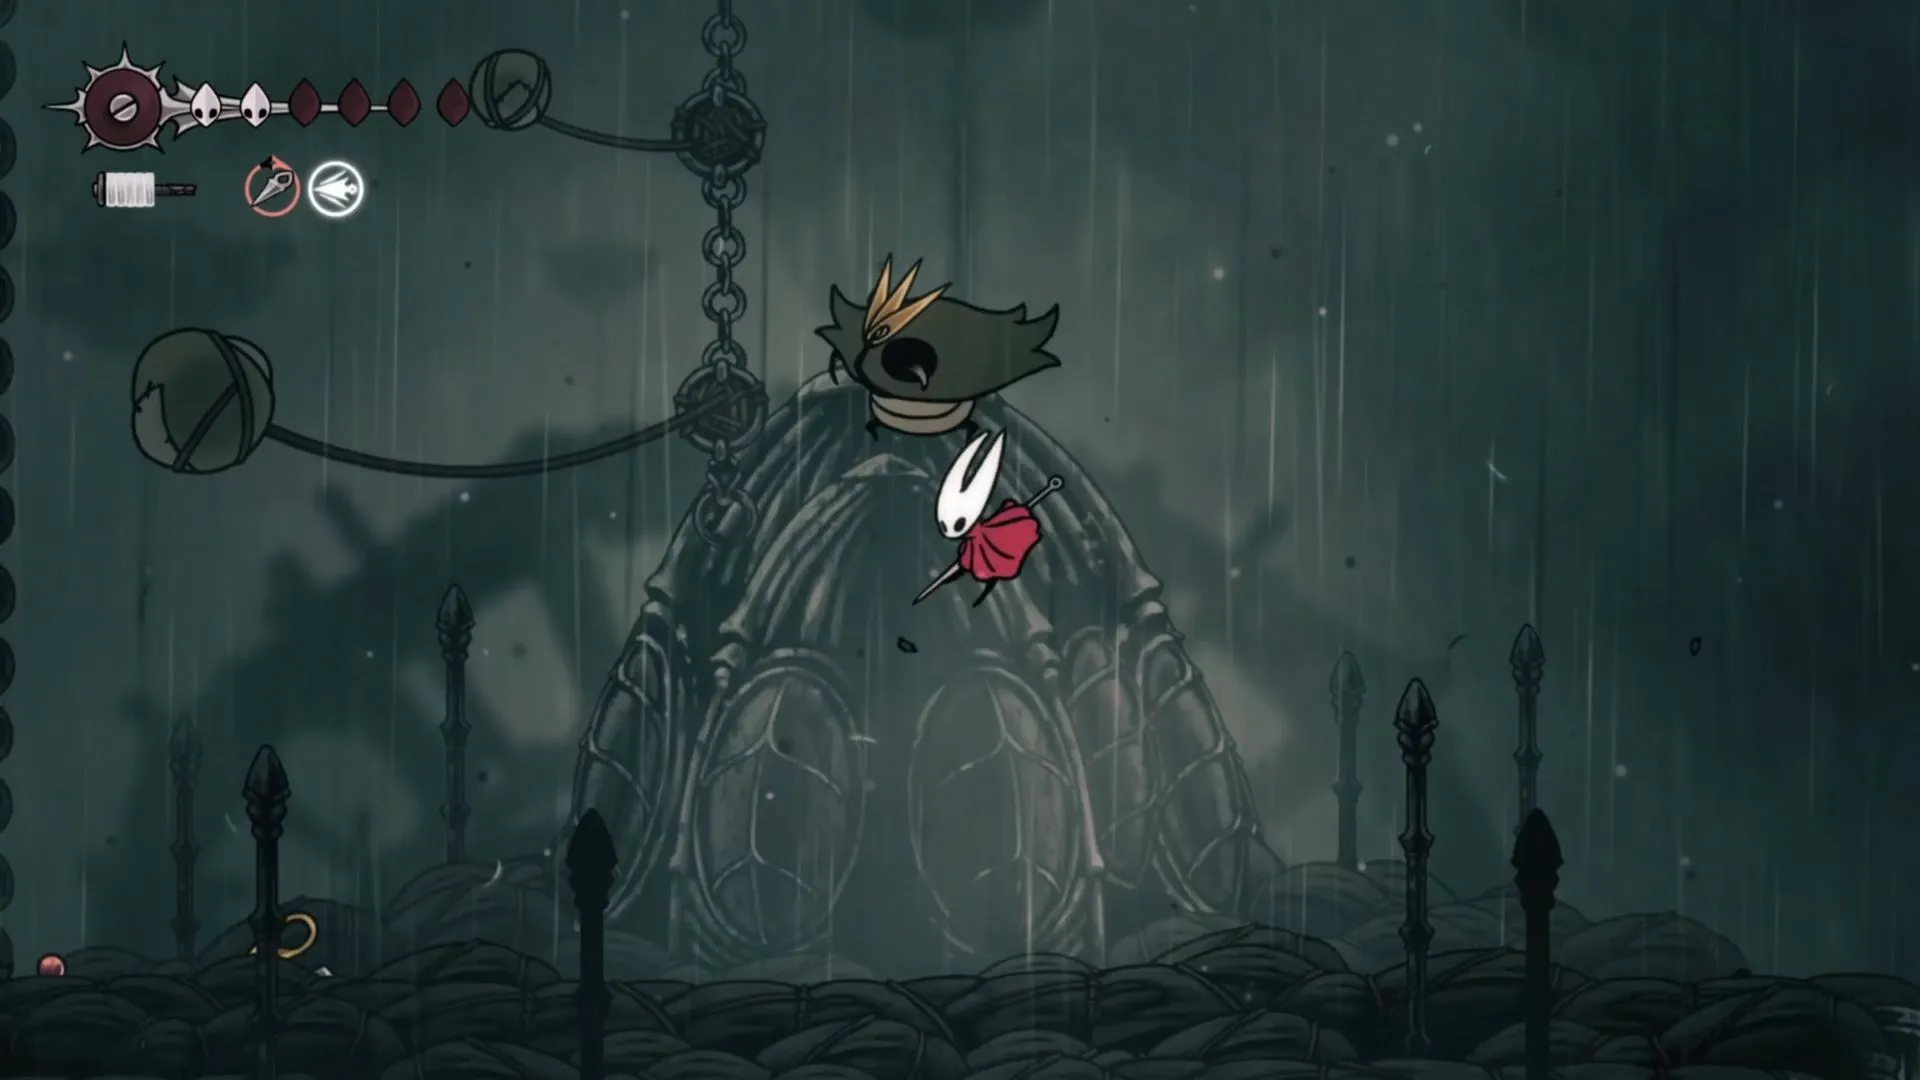
The larger green birds are the real prize. Two types stand out: the fat bird that throws projectiles and the sword-wielding bird. Each of these larger enemies drops up to four Ragpelts when defeated. They also respawn whenever Hornet rests at a save bench, which makes repeated farming comfortable. The birds do not exactly line up politely for harvest, but a steady loop of combat and rest gets the job done.
A practical route is to clear the larger birds east of the Halfway House, rest at the bench, and repeat. With up to four Ragpelts per kill, 25 pieces arrive much faster than nibbling away at the tiny birds. Players should keep an eye on their health and thread supply, especially when the projectile thrower and the sword bird appear together. Fighting them one at a time is safer, and using Tools to soften them up makes the loop smoother.
Enemy Type
Location
Ragpelts per Kill
Notes
Tiny green bird
Above the Halfway House
1
Easy but slow for farming
Fat projectile bird
East of the Halfway House
Up to 4
Keep moving to dodge projectiles
Sword-wielding bird
East of the Halfway House
Up to 4
Watch for quick lunges
Turning In the Quest and Claiming the Reward
Once the counter reaches 25 Ragpelts, Hornet can return to Creige at the Halfway House. Handing over the bundle concludes the Crawbug Clearing quest, and Creige is visibly pleased. His reward is the Crafting Kit Expanded item, a pouch for holding traps and tools along with fine crafting implements that increase their lethality.
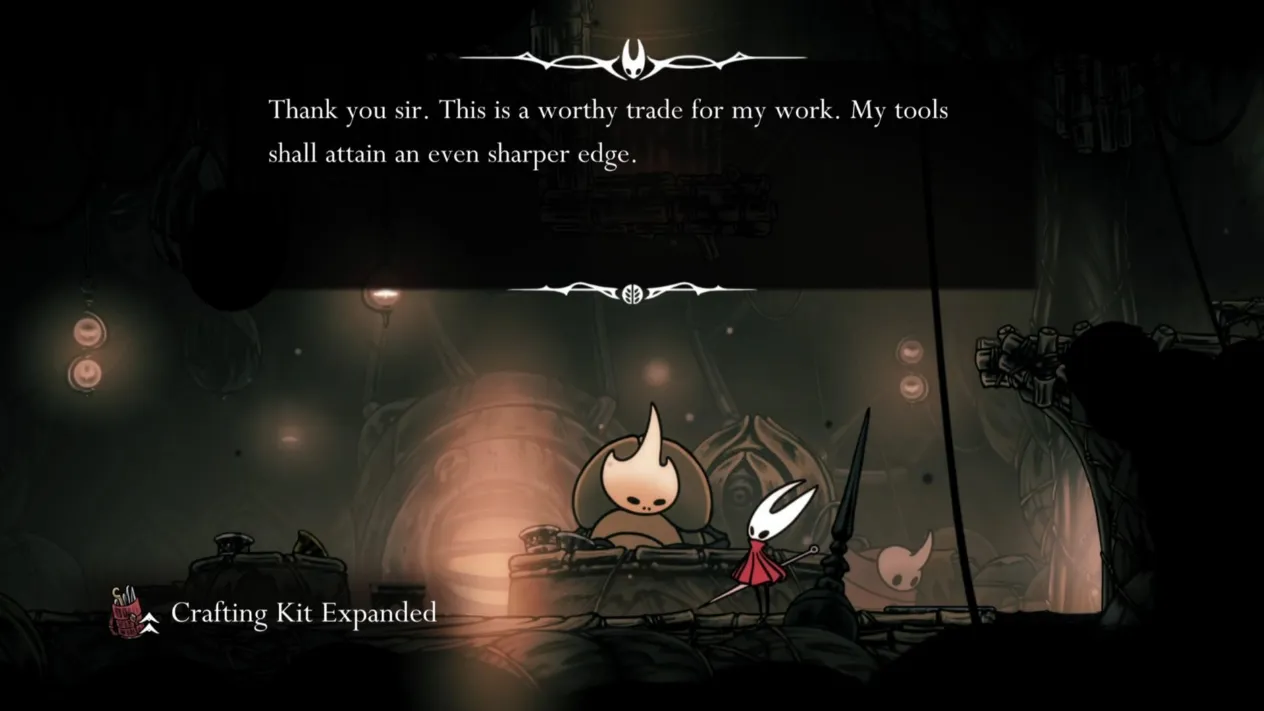
In practical terms, the Crafting Kit Expanded boosts Tool damage. The inventory's Tool Pouch and Crafting Kit screen shows a Tool Damage meter with four circles; this reward raises the meter to two white circles out of four. For players who lean on Tools during boss fights and crowded rooms, that extra damage is no small feat. It helps Hornet kill enemies faster and makes future Act 1 encounters a little less punishing.
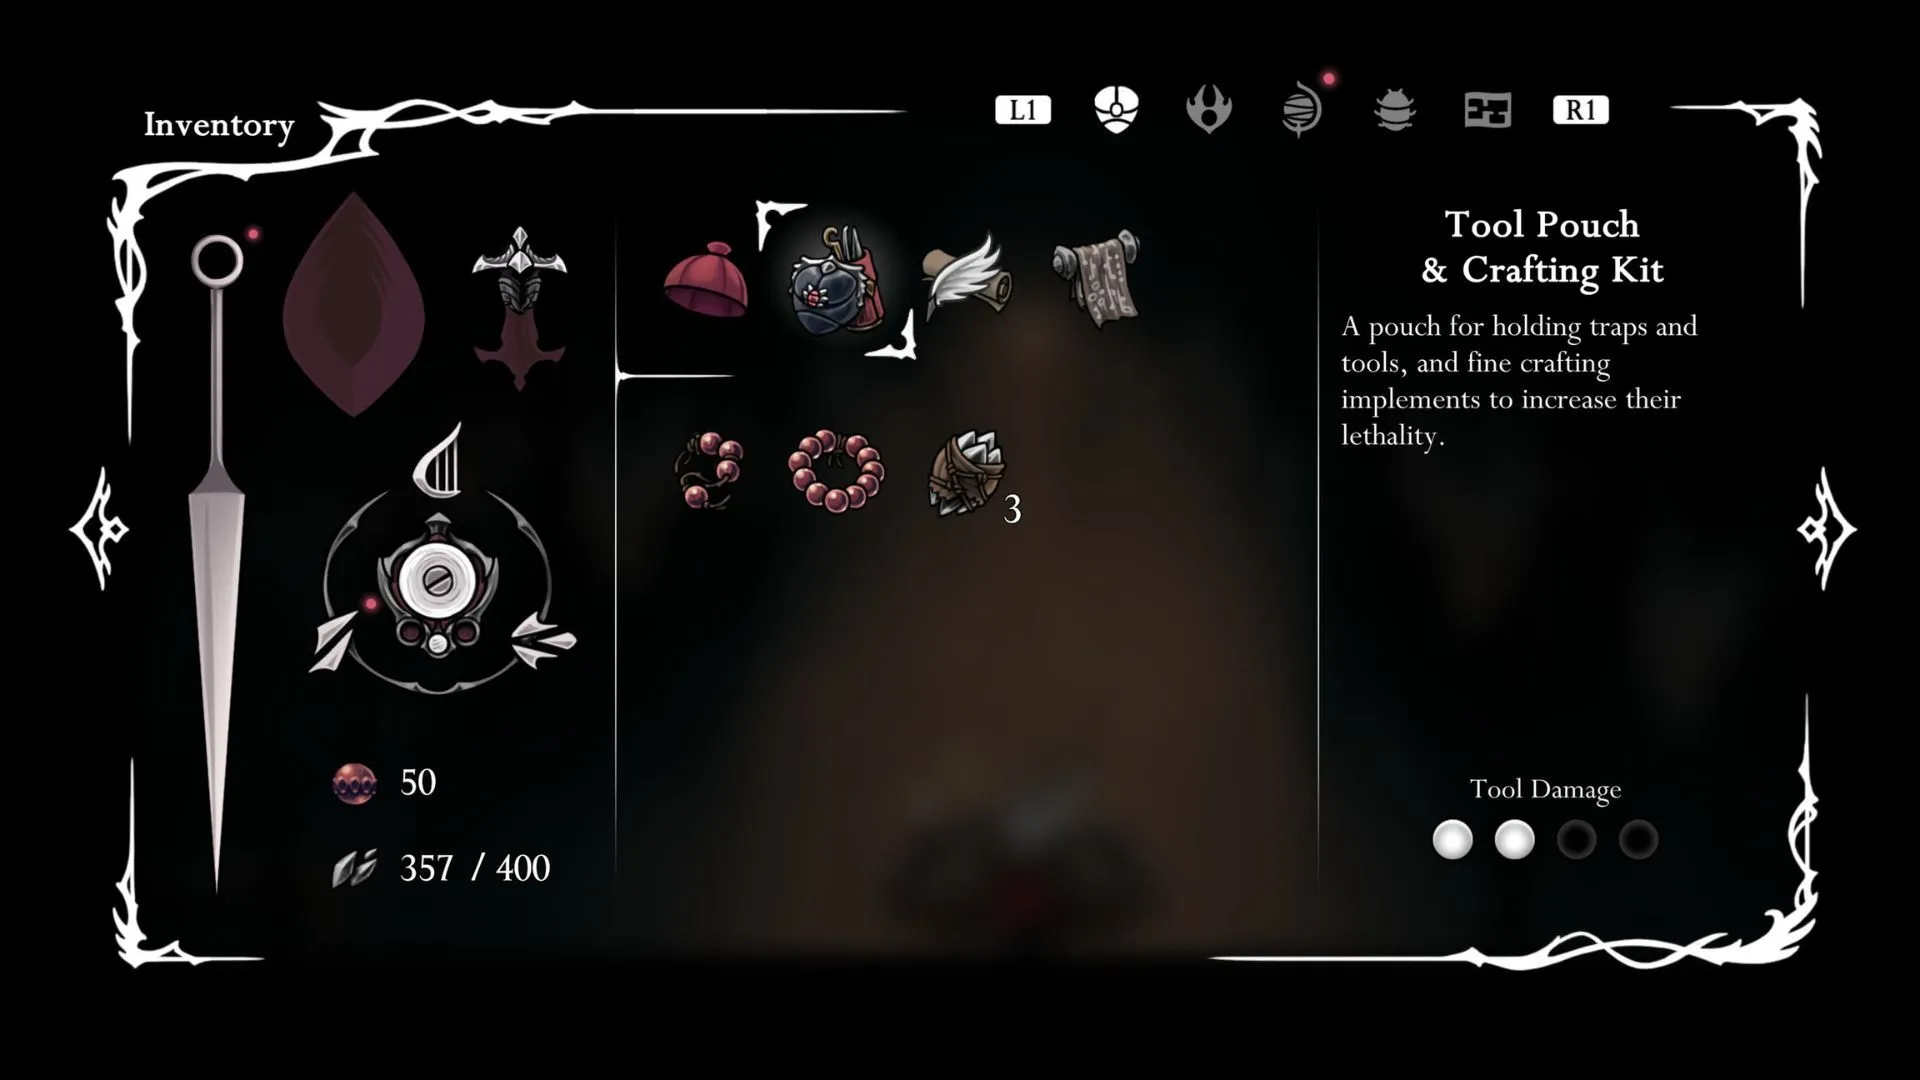
Crawbug Clearing is a short side quest with a clear loop: accept the wish, speak with Creige, farm the larger green birds east of the Halfway House, and return with 25 Ragpelts. The scarecrow may be Creige's victory, but the Crafting Kit Expanded is Hornet's prize. ?️
For players who enjoy chasing optional upgrades like the Crafting Kit Expanded, that same habit often carries over into keeping an eye on what else is worth playing between Silksong sessions. DealNest is a handy place for that kind of browsing, offering a straightforward game price comparison before you commit to a new title.
Starting the Crawbug Clearing Quest
The quest does not appear at the very beginning of the journey. Players first need to defeat the Widow boss in Bellhart and free the town's citizens from their web captivity. That fight becomes available after defeating Sister Splinter in Shellwood and acquiring the Cling Grip. Once the Widow falls, the Wish Board beside the shopkeeper in Bellhart quietly offers its requests. Crawbug Clearing sits among them, alongside My Missing Courier and Rite of the Pollip.
Accepting the wish is only the first step. The quest truly begins when Hornet speaks with Creige at the Halfway House in Greymoor. Behind the counter, Creige explains the situation: he needs 25 Ragpelts to build a scarecrow. Without it, the birds will keep swarming his building. Plain and simple, the man needs a feathered deterrent, and Hornet needs to supply the materials.
Finding Ragpelts in Greymoor
Ragpelts come from the green bird enemies in Greymoor. The small green birds above the Halfway House do drop them, but each tiny bird yields only one Ragpelt. Grinding those little ones and resting at the nearby bench works, yet it is not the fastest route. Truth be told, the better farming spot lies farther east of the Halfway House.
The larger green birds are the real prize. Two types stand out: the fat bird that throws projectiles and the sword-wielding bird. Each of these larger enemies drops up to four Ragpelts when defeated. They also respawn whenever Hornet rests at a save bench, which makes repeated farming comfortable. The birds do not exactly line up politely for harvest, but a steady loop of combat and rest gets the job done.
A practical route is to clear the larger birds east of the Halfway House, rest at the bench, and repeat. With up to four Ragpelts per kill, 25 pieces arrive much faster than nibbling away at the tiny birds. Players should keep an eye on their health and thread supply, especially when the projectile thrower and the sword bird appear together. Fighting them one at a time is safer, and using Tools to soften them up makes the loop smoother.
Enemy Type
Location
Ragpelts per Kill
Notes
Tiny green bird
Above the Halfway House
1
Easy but slow for farming
Fat projectile bird
East of the Halfway House
Up to 4
Keep moving to dodge projectiles
Sword-wielding bird
East of the Halfway House
Up to 4
Watch for quick lunges
Turning In the Quest and Claiming the Reward
Once the counter reaches 25 Ragpelts, Hornet can return to Creige at the Halfway House. Handing over the bundle concludes the Crawbug Clearing quest, and Creige is visibly pleased. His reward is the Crafting Kit Expanded item, a pouch for holding traps and tools along with fine crafting implements that increase their lethality.
In practical terms, the Crafting Kit Expanded boosts Tool damage. The inventory's Tool Pouch and Crafting Kit screen shows a Tool Damage meter with four circles; this reward raises the meter to two white circles out of four. For players who lean on Tools during boss fights and crowded rooms, that extra damage is no small feat. It helps Hornet kill enemies faster and makes future Act 1 encounters a little less punishing.
Crawbug Clearing is a short side quest with a clear loop: accept the wish, speak with Creige, farm the larger green birds east of the Halfway House, and return with 25 Ragpelts. The scarecrow may be Creige's victory, but the Crafting Kit Expanded is Hornet's prize. ?️
For players who enjoy chasing optional upgrades like the Crafting Kit Expanded, that same habit often carries over into keeping an eye on what else is worth playing between Silksong sessions. DealNest is a handy place for that kind of browsing, offering a straightforward game price comparison before you commit to a new title.
No Replies
In 2026, Hollow Knight: Silksong players are still trading notes on Rosaries—the rare, pilgrim-carried currency that can make or break a run. Rosaries are one of two main collectible resources in the game, and while Shell Shards keep consumable tools stocked at benches, Rosaries are the coin of the realm for merchants. They are also exceptionally rare, which is why sharp-eyed players keep a mental map of every reliable farming route.

? What Makes Rosaries So Valuable?
Rosaries are not dropped by run-of-the-mill bugs. They come from very specific enemy types, often tucked away in secluded areas. The easiest targets are pilgrim-type enemies, recognizable by the frayed, beige-colored shawls they wrap around themselves. These pilgrims come in all shapes, sizes, and abilities, so players should not expect a uniform fight. Red ants in Hunter's March can also leave Rosaries behind, but they are much harder to beat—a classic risk-reward trade-off.
Other sources exist, too. Certain Wishes, the game's sidequests, may reward Rosaries. Players can sometimes find them dangling from ropes or other environmental features and attack the rope to release the currency. Selling Relics to Scrounge in Bellhart is another option, as is selling Mossberries to the Moss Druid after completing the associated quest. In a pinch, these alternatives can keep a cash-strapped player from grinding the same loop for too long.
? The Early-Game Pilgrim Loop
For early-game farming, community guides point to the bench at Hornet's location. From there, players head immediately west into a moss-covered chamber full of pilgrims. The route is simple: travel west across the area until hitting a wall, defeating every enemy and collecting their Rosaries along the way. Then jump down to the lower part of the area and head right, doing the same until exiting. Finally, jump back up to the bench, rest to respawn the enemies, and repeat.
This is a fairly low-yield route, but it is quick. With practice, a run can be shaved down to about 30 seconds. It is also conveniently situated next to Shakra's starting location, so players can earn enough Rosaries to afford her vital early-game items and spend them immediately. The upper areas of Mosshome can be cleared for additional Rosaries, though that is more of a slog than a quick cash-in.
Farming Spot
Yield per Run
Speed
Best For
Mosshome pilgrim loop near Hornet's bench
Low but steady
Very fast (~30 seconds with practice)
Early-game purchases and Shakra's stock
Greymoor, east of Halfway Home
About 50 Rosaries
Moderate
Mid-to-late game upgrades
⚔️ Mid-to-Late Game: Greymoor's Halfway Home
When the early-game purchases are out of the way, players may have more luck farming just east of Halfway Home in Greymoor. This run yields 50 Rosaries per attempt, a much better return than the Mosshome loop. It is not a breeze—Greymoor's enemies can punish sloppy movement—but the ballooning costs of late-game accessories make the extra yield worth the effort. Players who want to break the bank on upgrades should keep this route in rotation.
? Spending Smart—and Not Losing Your Shirt
Rosaries are essentially the currency of Hollow Knight: Silksong. That is why corrupted pilgrims carry them instead of the less sapient, more bug-like enemies. Most merchants accept only Rosaries, although some quest-specific NPCs accept other unusual items. Players can buy area maps, mapping tools, Mask Shards, accessories, and more. The smart play is to check back with merchants regularly, especially when they appear in new places, to see if their inventories have updated.

Merchants such as Shakra are worth visiting early and often. Her maps and mapping tools are not cheap, but they pay for themselves by making exploration less of a headache. Mask Shards and accessories can also swing a tough fight, so Rosaries are rarely wasted on permanent upgrades. The key is to avoid spending every last Rosary right before a dangerous boss attempt—players who do that often learn the hard way why a cushion matters.
? Death, Cocoons, and Rosary Strings
Crucially, whenever a player dies in Silksong, they drop all their Rosaries on the spot. The currency can be retrieved by returning to the location of the last death and attacking the silk cocoon, which appears on the map if the player is unsure where it was. If they die again before reaching the cocoon, those Rosaries are lost permanently. That is a harsh penalty, and it is why experienced players treat every death as a potential financial disaster.
There is a safety net. Players can pay certain merchants to create Rosary Strings ?, which stay in the inventory when they die. The exchange rate is not generous—80 Rosaries buy a string worth just 60 once broken—but the cost is worth it when carrying a ton of Rosaries through risky areas. In 2026, the advice remains the same: players should not sleep on Rosary Strings before a long exploration session or a boss run.
With all that in mind, players should be well on their way to collecting piles of Rosaries. Since the currency unlocks so many different purchases, skipping Rosaries early and often is a fool's bargain. Players should farm the pilgrims, cash in the Relics, and keep an eye on the map—because in Silksong, being broke is a fate worse than a bad bench.
That same bargain-hunting mindset—knowing when to grind, when to save, and when to spend—translates well outside the game. Anyone who enjoys stretching resources to their limit tends to appreciate getting more for their money elsewhere, whether that means comparing prices before a purchase or waiting for the right moment to buy.
For players who want to apply that instinct to their library, checking DealNest game deals is a practical place to start, since it gathers discounts and offers in one spot instead of leaving you to hunt them down across a dozen storefronts. It is the same principle as a good farming route: a little preparation up front saves a lot of wasted effort later.
? What Makes Rosaries So Valuable?
Rosaries are not dropped by run-of-the-mill bugs. They come from very specific enemy types, often tucked away in secluded areas. The easiest targets are pilgrim-type enemies, recognizable by the frayed, beige-colored shawls they wrap around themselves. These pilgrims come in all shapes, sizes, and abilities, so players should not expect a uniform fight. Red ants in Hunter's March can also leave Rosaries behind, but they are much harder to beat—a classic risk-reward trade-off.
Other sources exist, too. Certain Wishes, the game's sidequests, may reward Rosaries. Players can sometimes find them dangling from ropes or other environmental features and attack the rope to release the currency. Selling Relics to Scrounge in Bellhart is another option, as is selling Mossberries to the Moss Druid after completing the associated quest. In a pinch, these alternatives can keep a cash-strapped player from grinding the same loop for too long.
? The Early-Game Pilgrim Loop
For early-game farming, community guides point to the bench at Hornet's location. From there, players head immediately west into a moss-covered chamber full of pilgrims. The route is simple: travel west across the area until hitting a wall, defeating every enemy and collecting their Rosaries along the way. Then jump down to the lower part of the area and head right, doing the same until exiting. Finally, jump back up to the bench, rest to respawn the enemies, and repeat.
This is a fairly low-yield route, but it is quick. With practice, a run can be shaved down to about 30 seconds. It is also conveniently situated next to Shakra's starting location, so players can earn enough Rosaries to afford her vital early-game items and spend them immediately. The upper areas of Mosshome can be cleared for additional Rosaries, though that is more of a slog than a quick cash-in.
Farming Spot
Yield per Run
Speed
Best For
Mosshome pilgrim loop near Hornet's bench
Low but steady
Very fast (~30 seconds with practice)
Early-game purchases and Shakra's stock
Greymoor, east of Halfway Home
About 50 Rosaries
Moderate
Mid-to-late game upgrades
⚔️ Mid-to-Late Game: Greymoor's Halfway Home
When the early-game purchases are out of the way, players may have more luck farming just east of Halfway Home in Greymoor. This run yields 50 Rosaries per attempt, a much better return than the Mosshome loop. It is not a breeze—Greymoor's enemies can punish sloppy movement—but the ballooning costs of late-game accessories make the extra yield worth the effort. Players who want to break the bank on upgrades should keep this route in rotation.
? Spending Smart—and Not Losing Your Shirt
Rosaries are essentially the currency of Hollow Knight: Silksong. That is why corrupted pilgrims carry them instead of the less sapient, more bug-like enemies. Most merchants accept only Rosaries, although some quest-specific NPCs accept other unusual items. Players can buy area maps, mapping tools, Mask Shards, accessories, and more. The smart play is to check back with merchants regularly, especially when they appear in new places, to see if their inventories have updated.
Merchants such as Shakra are worth visiting early and often. Her maps and mapping tools are not cheap, but they pay for themselves by making exploration less of a headache. Mask Shards and accessories can also swing a tough fight, so Rosaries are rarely wasted on permanent upgrades. The key is to avoid spending every last Rosary right before a dangerous boss attempt—players who do that often learn the hard way why a cushion matters.
? Death, Cocoons, and Rosary Strings
Crucially, whenever a player dies in Silksong, they drop all their Rosaries on the spot. The currency can be retrieved by returning to the location of the last death and attacking the silk cocoon, which appears on the map if the player is unsure where it was. If they die again before reaching the cocoon, those Rosaries are lost permanently. That is a harsh penalty, and it is why experienced players treat every death as a potential financial disaster.
There is a safety net. Players can pay certain merchants to create Rosary Strings ?, which stay in the inventory when they die. The exchange rate is not generous—80 Rosaries buy a string worth just 60 once broken—but the cost is worth it when carrying a ton of Rosaries through risky areas. In 2026, the advice remains the same: players should not sleep on Rosary Strings before a long exploration session or a boss run.
With all that in mind, players should be well on their way to collecting piles of Rosaries. Since the currency unlocks so many different purchases, skipping Rosaries early and often is a fool's bargain. Players should farm the pilgrims, cash in the Relics, and keep an eye on the map—because in Silksong, being broke is a fate worse than a bad bench.
That same bargain-hunting mindset—knowing when to grind, when to save, and when to spend—translates well outside the game. Anyone who enjoys stretching resources to their limit tends to appreciate getting more for their money elsewhere, whether that means comparing prices before a purchase or waiting for the right moment to buy.
For players who want to apply that instinct to their library, checking DealNest game deals is a practical place to start, since it gathers discounts and offers in one spot instead of leaving you to hunt them down across a dozen storefronts. It is the same principle as a good farming route: a little preparation up front saves a lot of wasted effort later.
No Replies
I’m not a speedrunner, and I’m definitely not the kind of player who memorizes every map on day one. So when Hollow Knight: Silksong dropped me into Act Two and the Great Citadel, I was riding high on those bright, welcoming halls. Then the elevator decided to betray me. One mechanical malfunction later, I was plummeting into the Underworks, a dark, desolate slice of the Citadel’s lower levels that doesn’t exactly roll out a welcome mat. If you’re anything like me, your first thought is probably: where is the map? Here’s how I found the Underworks map, step by step, and what I wish I’d known before I started climbing.
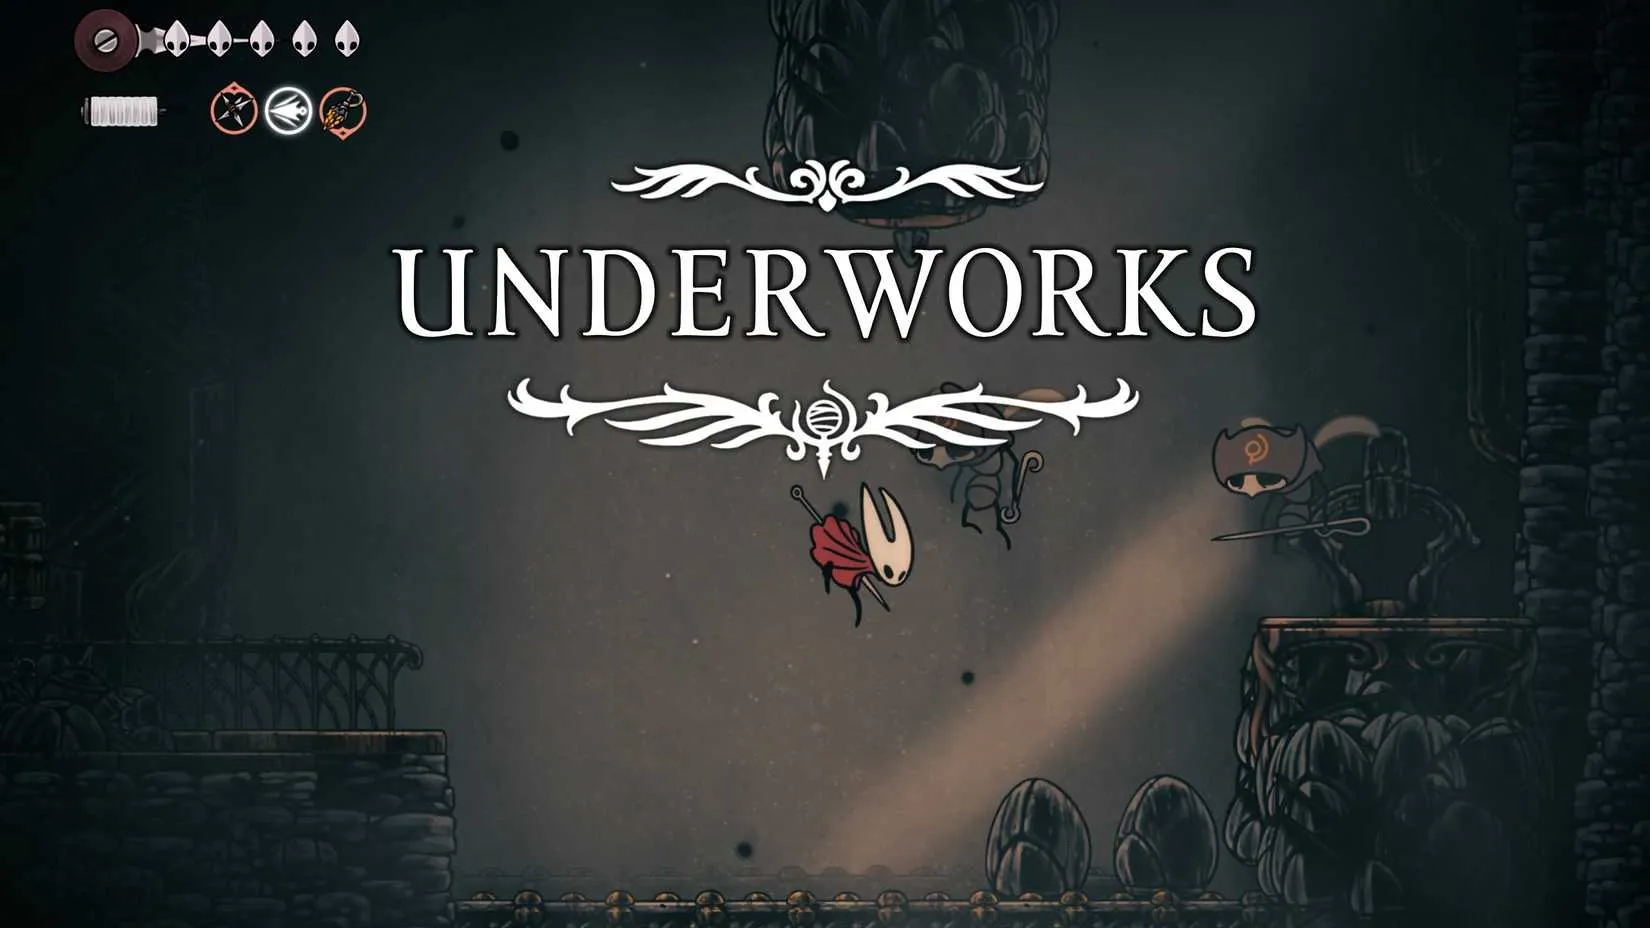
Step 1: Pay the Bench Tax First
Before you go wandering into the dark, deal with the machine near your landing spot. You need to put 15 Rosary Beads into it to release a bench. Do this first. Trust me, you do not want to start the climb with low health and no safe place to rest. The Underworks is gloomy, cramped in places, and full of little surprises that punish impatience. That bench is your anchor.
Once you’ve paid and rested up, exit the chamber to the right. That takes you into the main Underworks area. From here, the real work begins: climbing.
Step 2: Clear the Flyers, Then Climb
As you start scaling the walls, flying enemies will swoop in and try to knock you off. I learned this the hard way. The first time I tried to rush upward, I got bumped mid-cling and had to restart my climb. So take a moment to clear those flyers before you commit to the wall. It saves time, health, and frustration.
You’ll need the Cling Grip ability to climb the walls here. Keep heading upward, and pay attention to the mid-way section. On the left side, you’ll spot a golden lever. Interact with it, and it lowers a boulder on the right. That opens a pathway so Hornet can reach the top without getting blocked.
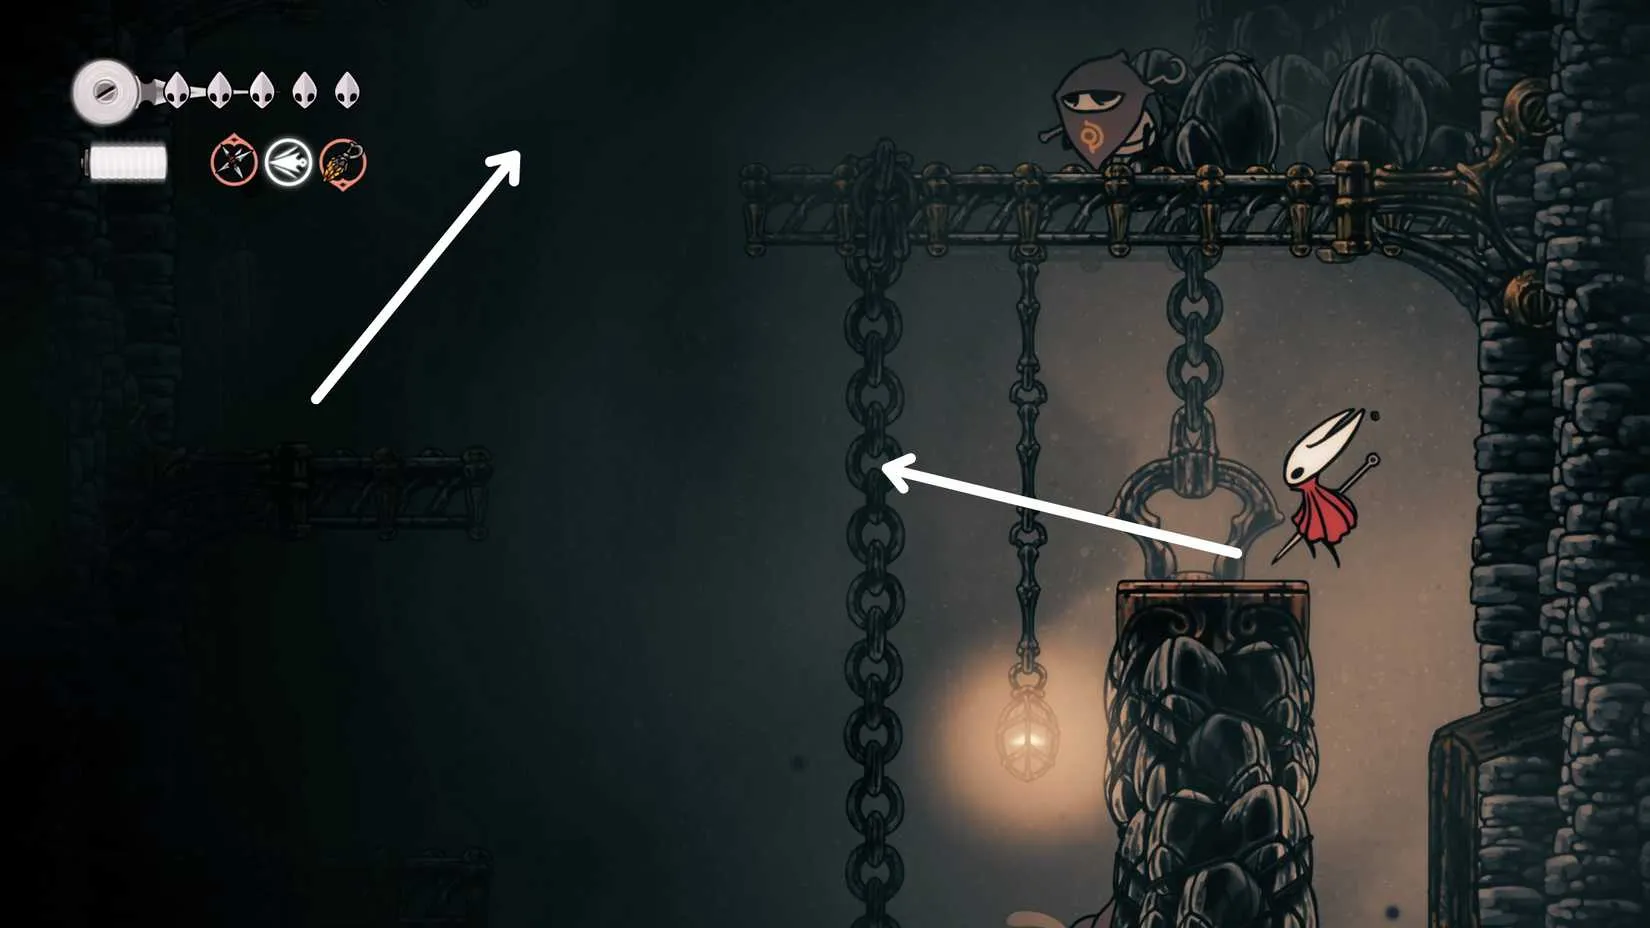
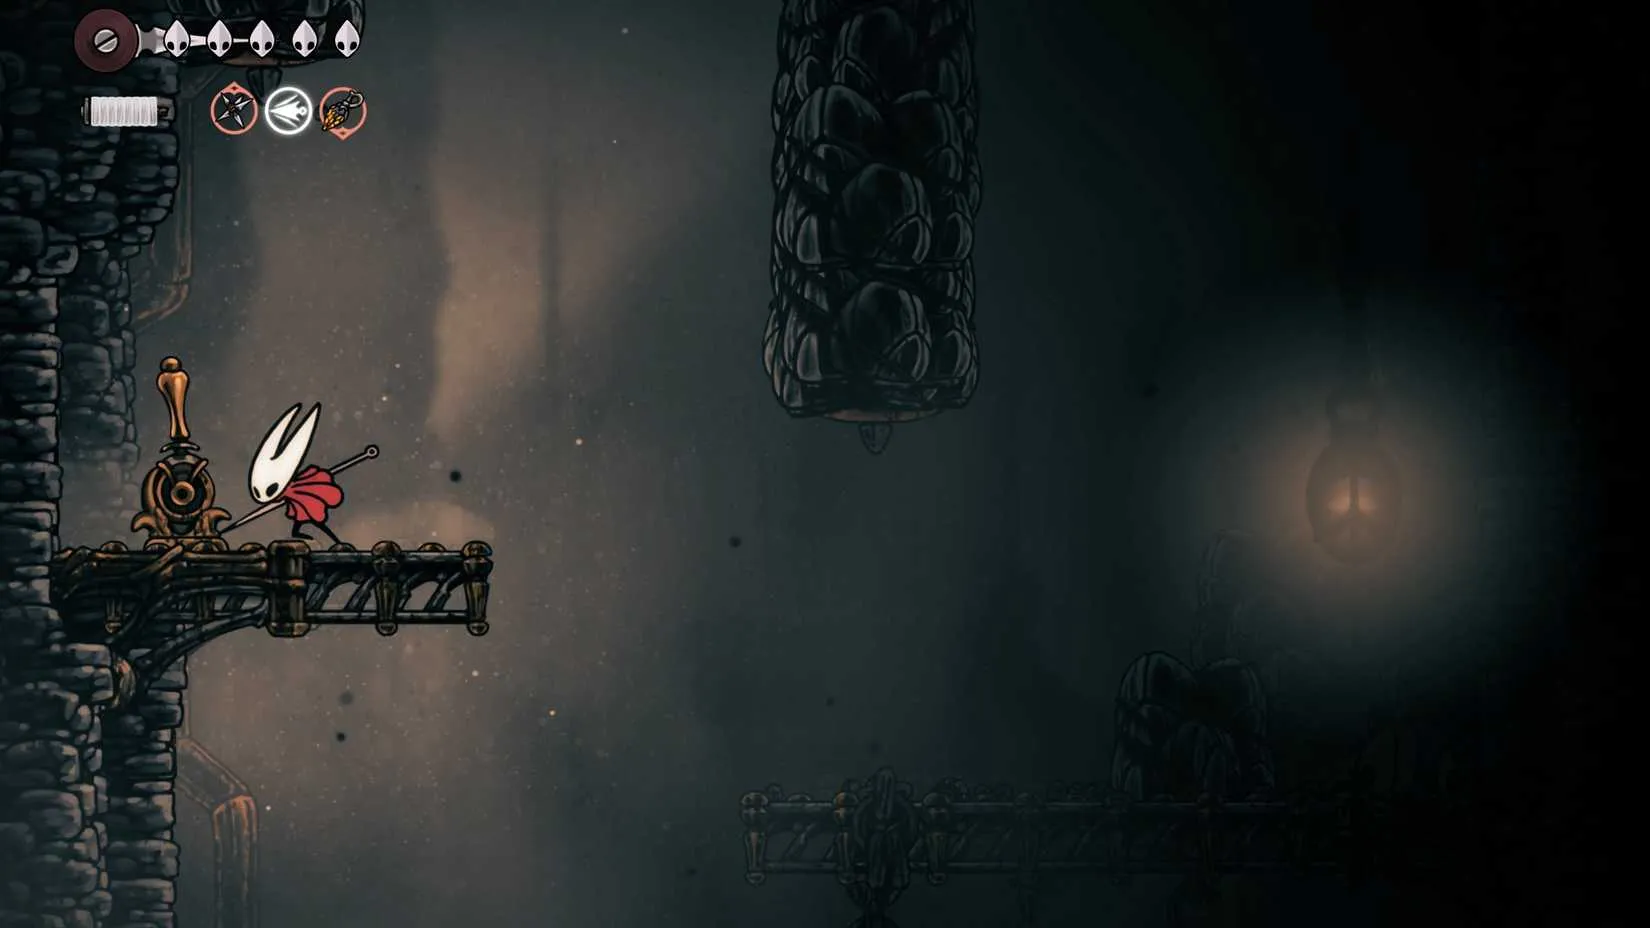
This part is straightforward once you know what to look for. Climb, clear, pull the lever, and keep moving up. No fancy tricks required. Just don’t ignore the lever like I almost did.
Step 3: At the Top, Take the Left Fork
When you finally reach the top, you’ll find two pathways: one on the left and one on the right. The right path takes you further into the Underworks. The left path has a signboard, and that’s the one you want first if you’re after the map.
Enter the area with the signboard on the left. Inside, you’ll find a dimly lit room with an interactable wooden board. Walk up to it and interact. Hornet will receive the map for the Underworks. That’s it. Map acquired. No vendor, no purchase, no haggling. Just a wooden board in a quiet room.
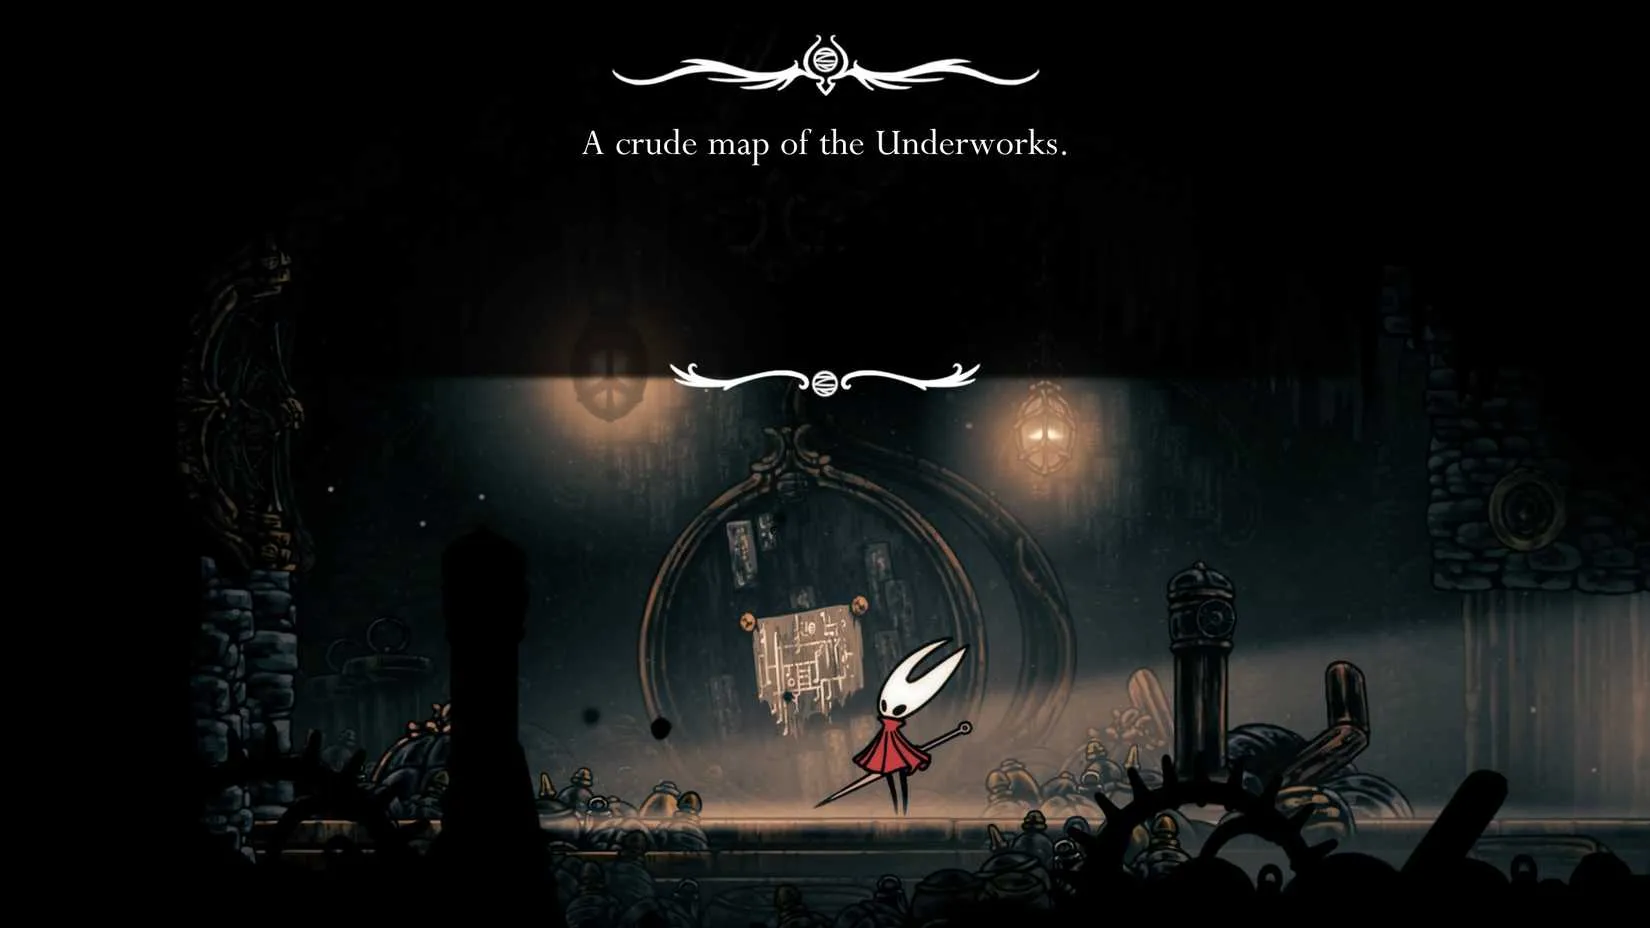
This is a different routine from the usual map-buying flow, where you track down a vendor and pay up. Here, the map is tucked away in the environment. If you skip the left fork and push right, you can absolutely come back later, but the dark rooms start to blur together. Grab the map early and save yourself the headache.
What the Underworks Map Actually Does for You
The Underworks isn’t just a straight corridor. It has branching pathways, hidden corners, and routes that can lead to regions you might otherwise miss. The map makes those connections readable. It helps you spot where you’ve been, where you haven’t, and which climbable wall leads to progress versus a dead end.
For me, the map turned a stressful detour into a manageable exploration zone. I could plan my route, mark my mental checkpoints, and stop second-guessing every dark doorway. If you’re playing in 2026 or later and you’re new to Silksong’s Act Two, this little wooden board is your new best friend.
Quick Checklist
Why It Matters
✅ Have 15 Rosary Beads
Releases the bench so you can rest and heal
✅ Clear flying enemies first
Prevents mid-climb knockoffs
✅ Use Cling Grip
Required for scaling the walls
✅ Pull the golden lever
Drops the boulder and opens the path
✅ Take the left fork at the top
Leads to the signboard room
✅ Interact with the wooden board
Grants the Underworks map
My Honest Take
Okay, lesson learned the hard way: the Underworks doesn’t hand you much. It’s dark, it’s hostile, and the elevator ride in is less than graceful. But the map route is short once you know it. Pay the bench, clear the sky, pull the lever, and take the left fork. Your future self will thank you.
And if you miss the map on your first pass? No big deal. The Underworks will still be there, waiting in the dark. Just don’t wait too long. Those branching paths are a lot friendlier when you can actually see them.
Once the Underworks map is in hand and the route starts making sense, it’s easy to start thinking about what to play next—especially if you’re drawn to atmospheric metroidvanias and exploration-heavy games. That’s where a site like DealNest can be useful: it gathers best game deals in one place, so you can browse discounts without digging through storefront after storefront.
Whether you’re stocking up on indie adventures for later or keeping an eye out for something new after Silksong, DealNest is worth a look if you’d rather spend less time price-hunting and more time playing.
Step 1: Pay the Bench Tax First
Before you go wandering into the dark, deal with the machine near your landing spot. You need to put 15 Rosary Beads into it to release a bench. Do this first. Trust me, you do not want to start the climb with low health and no safe place to rest. The Underworks is gloomy, cramped in places, and full of little surprises that punish impatience. That bench is your anchor.
Once you’ve paid and rested up, exit the chamber to the right. That takes you into the main Underworks area. From here, the real work begins: climbing.
Step 2: Clear the Flyers, Then Climb
As you start scaling the walls, flying enemies will swoop in and try to knock you off. I learned this the hard way. The first time I tried to rush upward, I got bumped mid-cling and had to restart my climb. So take a moment to clear those flyers before you commit to the wall. It saves time, health, and frustration.
You’ll need the Cling Grip ability to climb the walls here. Keep heading upward, and pay attention to the mid-way section. On the left side, you’ll spot a golden lever. Interact with it, and it lowers a boulder on the right. That opens a pathway so Hornet can reach the top without getting blocked.
This part is straightforward once you know what to look for. Climb, clear, pull the lever, and keep moving up. No fancy tricks required. Just don’t ignore the lever like I almost did.
Step 3: At the Top, Take the Left Fork
When you finally reach the top, you’ll find two pathways: one on the left and one on the right. The right path takes you further into the Underworks. The left path has a signboard, and that’s the one you want first if you’re after the map.
Enter the area with the signboard on the left. Inside, you’ll find a dimly lit room with an interactable wooden board. Walk up to it and interact. Hornet will receive the map for the Underworks. That’s it. Map acquired. No vendor, no purchase, no haggling. Just a wooden board in a quiet room.
This is a different routine from the usual map-buying flow, where you track down a vendor and pay up. Here, the map is tucked away in the environment. If you skip the left fork and push right, you can absolutely come back later, but the dark rooms start to blur together. Grab the map early and save yourself the headache.
What the Underworks Map Actually Does for You
The Underworks isn’t just a straight corridor. It has branching pathways, hidden corners, and routes that can lead to regions you might otherwise miss. The map makes those connections readable. It helps you spot where you’ve been, where you haven’t, and which climbable wall leads to progress versus a dead end.
For me, the map turned a stressful detour into a manageable exploration zone. I could plan my route, mark my mental checkpoints, and stop second-guessing every dark doorway. If you’re playing in 2026 or later and you’re new to Silksong’s Act Two, this little wooden board is your new best friend.
Quick Checklist
Why It Matters
✅ Have 15 Rosary Beads
Releases the bench so you can rest and heal
✅ Clear flying enemies first
Prevents mid-climb knockoffs
✅ Use Cling Grip
Required for scaling the walls
✅ Pull the golden lever
Drops the boulder and opens the path
✅ Take the left fork at the top
Leads to the signboard room
✅ Interact with the wooden board
Grants the Underworks map
My Honest Take
Okay, lesson learned the hard way: the Underworks doesn’t hand you much. It’s dark, it’s hostile, and the elevator ride in is less than graceful. But the map route is short once you know it. Pay the bench, clear the sky, pull the lever, and take the left fork. Your future self will thank you.
And if you miss the map on your first pass? No big deal. The Underworks will still be there, waiting in the dark. Just don’t wait too long. Those branching paths are a lot friendlier when you can actually see them.
Once the Underworks map is in hand and the route starts making sense, it’s easy to start thinking about what to play next—especially if you’re drawn to atmospheric metroidvanias and exploration-heavy games. That’s where a site like DealNest can be useful: it gathers best game deals in one place, so you can browse discounts without digging through storefront after storefront.
Whether you’re stocking up on indie adventures for later or keeping an eye out for something new after Silksong, DealNest is worth a look if you’d rather spend less time price-hunting and more time playing.
No Replies
Hollow Knight: Silksong arrived on September 4, 2025, after roughly seven years of development, and promptly became the kind of cultural event that makes storefronts sweat. More than half a million simultaneous players piled onto Steam during its first weekend, while the Xbox Store and Nintendo eShop reportedly wobbled under the traffic. By 2026, the launch hubbub has cooled into the familiar hum of fandom maintenance, but one small, spiky grievance refuses to be swept under the rug: Rosary Beads, those precious little currency morsels, can be destroyed when they touch spikes. Not lost. Not delayed. Destroyed. Deleted from existence with the quiet cruelty of a spreadsheet macro.

The complaint, amplified by a community post that gathered over 3,700 upvotes, is refreshingly specific. Players do not mind earning currency. They do not even mind losing it to a dignified death. What grinds their gears is watching a Rosary Bead drift into a spike and vanish, especially when the player has equipped the item meant to attract beads. In some cases, the auto-collect tool apparently nudges a bead’s trajectory straight into the hazard, turning a helpful accessory into a tiny, enthusiastic accomplice. The whole affair has the emotional texture of dropping a single fry into a car’s footwell and watching it achieve sentience just in time to roll under the seat.
This is not the grandest controversy in Silksong, but it is the kind of detail that sticks in a player’s shoe like a very expensive pebble. The game’s broader difficulty debate has already covered Hornet’s hitboxes feeling too large, double damage showing up often enough to feel like a tax on optimism, and boss runbacks that are as welcome as a mosquito at a meditation retreat. Defenders of the game have fired back with a fair point: Hornet moves like a caffeinated calligrapher, fast and precise, and her responsiveness makes the challenge feel less like cruelty and more like a very sharp dance lesson.
Grievance
Community Mood
Practical Effect
Rosary Beads destroyed by spikes
? Quietly furious
Currency vanishes even with collection help
Hornet’s hitboxes feel too big
? Suspicious
Players swear they were nowhere near that claw
Double damage
? Ouch
Small mistakes become expensive lessons
Boss runbacks
?♂️ Weary
The walk back becomes its own mini-boss
No difficulty options
? Divided
Mods become the unofficial accessibility menu

Fortunately for PC players, modders have already begun acting like a pit crew staffed entirely by nocturnal tinkerers. Popular Silksong mods remove annoyances such as bosses dealing double damage, while others add more benches so that runbacks sting a little less. This matters because Team Cherry did not include difficulty options in Hollow Knight: Silksong, leaving mods as a pressure-release valve for players who love the world but would prefer fewer spike-flavored surprises. It is a very 2026 arrangement: the developers build the mountain, and the community quietly installs a chairlift.

None of this has stopped Silksong from being a major hit, and none of it needs to. The Rosary Bead issue is less a grand design flaw and more a paper cut on the fingertip of an otherwise gripping adventure. Still, in a game where every bead can feel hard-won, watching one get deleted by a floor spike is enough to make even the most stoic bug warrior mutter something unkind. The community’s message is simple: keep the challenge, keep the speed, keep the glorious insect chaos, but perhaps let the currency survive a pointy floor. In 2026, that remains a small request with a very sharp edge. ??️
PC players who enjoy fine-tuning a difficult game with mods tend to be the same crowd that keeps an eye on a good bargain. After all, the ideal time to try a demanding new title is often when it costs a little less, and DealNest is a straightforward place to browse PC game discounts before adding another game to the backlog.
That small bit of price-checking won’t make a boss fight any easier, but it does make the decision to jump in feel a little lighter—and leaves more room to appreciate the parts of a game that are supposed to be punishing, not the receipt.
The complaint, amplified by a community post that gathered over 3,700 upvotes, is refreshingly specific. Players do not mind earning currency. They do not even mind losing it to a dignified death. What grinds their gears is watching a Rosary Bead drift into a spike and vanish, especially when the player has equipped the item meant to attract beads. In some cases, the auto-collect tool apparently nudges a bead’s trajectory straight into the hazard, turning a helpful accessory into a tiny, enthusiastic accomplice. The whole affair has the emotional texture of dropping a single fry into a car’s footwell and watching it achieve sentience just in time to roll under the seat.
This is not the grandest controversy in Silksong, but it is the kind of detail that sticks in a player’s shoe like a very expensive pebble. The game’s broader difficulty debate has already covered Hornet’s hitboxes feeling too large, double damage showing up often enough to feel like a tax on optimism, and boss runbacks that are as welcome as a mosquito at a meditation retreat. Defenders of the game have fired back with a fair point: Hornet moves like a caffeinated calligrapher, fast and precise, and her responsiveness makes the challenge feel less like cruelty and more like a very sharp dance lesson.
Grievance
Community Mood
Practical Effect
Rosary Beads destroyed by spikes
? Quietly furious
Currency vanishes even with collection help
Hornet’s hitboxes feel too big
? Suspicious
Players swear they were nowhere near that claw
Double damage
? Ouch
Small mistakes become expensive lessons
Boss runbacks
?♂️ Weary
The walk back becomes its own mini-boss
No difficulty options
? Divided
Mods become the unofficial accessibility menu
Fortunately for PC players, modders have already begun acting like a pit crew staffed entirely by nocturnal tinkerers. Popular Silksong mods remove annoyances such as bosses dealing double damage, while others add more benches so that runbacks sting a little less. This matters because Team Cherry did not include difficulty options in Hollow Knight: Silksong, leaving mods as a pressure-release valve for players who love the world but would prefer fewer spike-flavored surprises. It is a very 2026 arrangement: the developers build the mountain, and the community quietly installs a chairlift.
None of this has stopped Silksong from being a major hit, and none of it needs to. The Rosary Bead issue is less a grand design flaw and more a paper cut on the fingertip of an otherwise gripping adventure. Still, in a game where every bead can feel hard-won, watching one get deleted by a floor spike is enough to make even the most stoic bug warrior mutter something unkind. The community’s message is simple: keep the challenge, keep the speed, keep the glorious insect chaos, but perhaps let the currency survive a pointy floor. In 2026, that remains a small request with a very sharp edge. ??️
PC players who enjoy fine-tuning a difficult game with mods tend to be the same crowd that keeps an eye on a good bargain. After all, the ideal time to try a demanding new title is often when it costs a little less, and DealNest is a straightforward place to browse PC game discounts before adding another game to the backlog.
That small bit of price-checking won’t make a boss fight any easier, but it does make the decision to jump in feel a little lighter—and leaves more room to appreciate the parts of a game that are supposed to be punishing, not the receipt.
No Replies
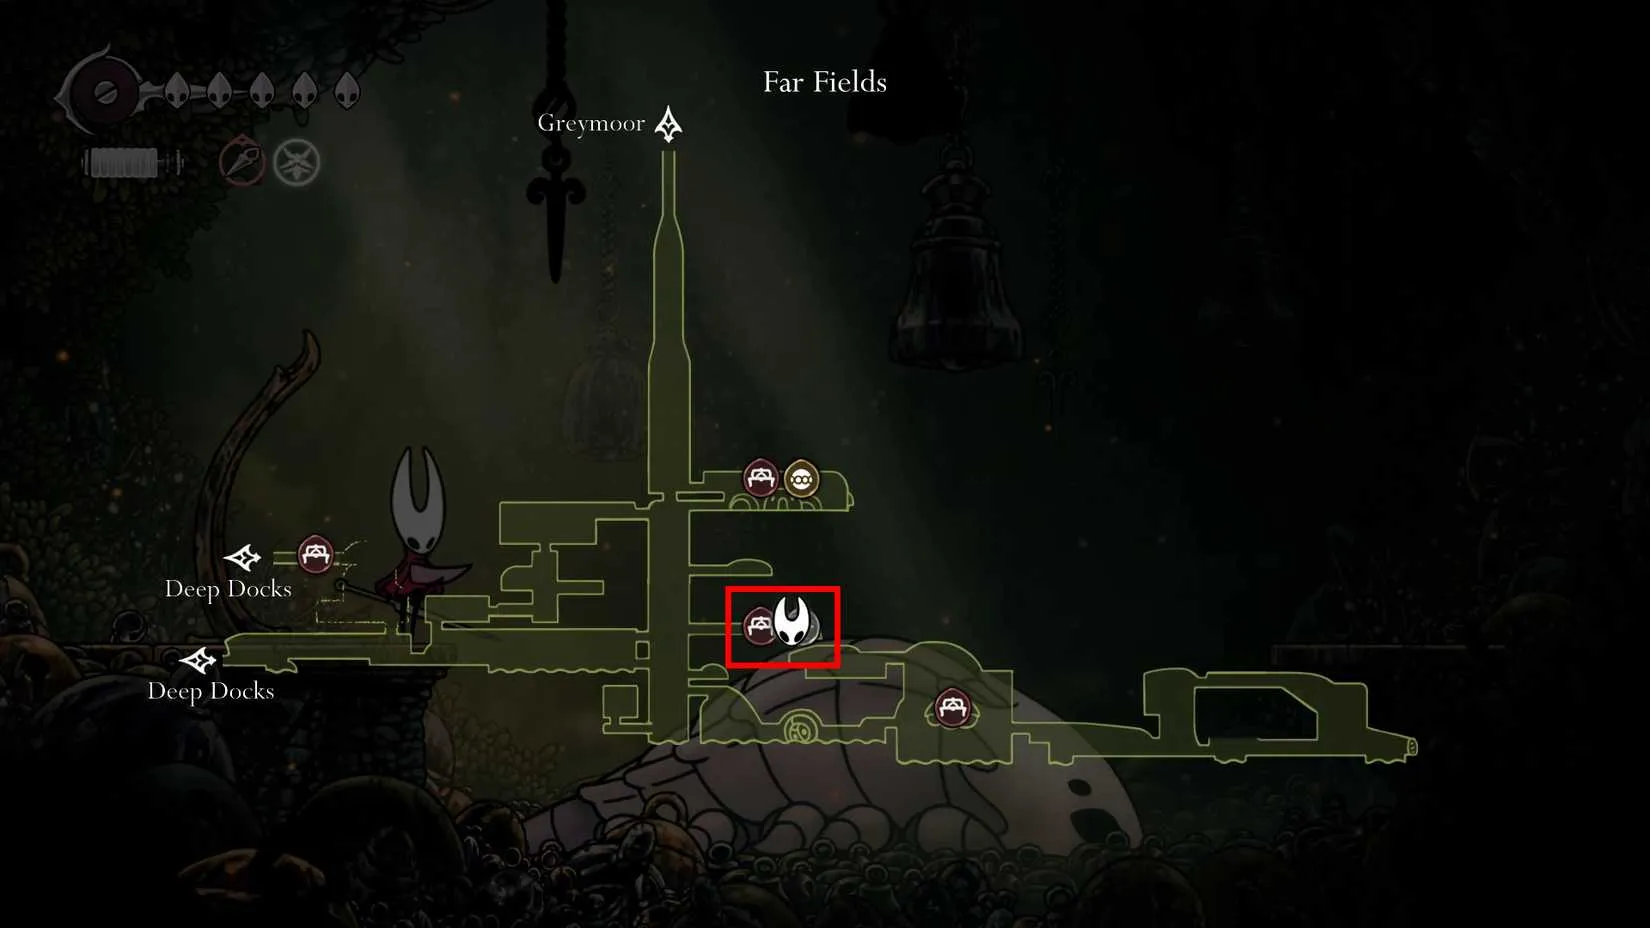
The banging behind the metal door in Pilgrim's Rest is one of Far Fields' most provocative pieces of environmental storytelling in Hollow Knight: Silksong. The room sits inside Far Fields, and its sealed door suggests something angry is waiting on the other side. In 2026, the puzzle remains a common stumbling block for players who hear the impact but cannot see an obvious latch, lever, or prompt. Is the door merely a decorative tease, or is there a real route hidden nearby? The answer is the latter, and it begins not at the door itself but in the vertical chamber outside it.
Start at the left exit, not the door
Players who want to open the Pilgrim's Rest door should first leave the room through its left entrance. From there, they descend to the midpoint of the vertical room. The critical step is to enter the room on the right that contains a bench and the Bell Beast. This detour is easy to overlook because the sealed door dominates attention, but the Bell Beast room is the true starting point for the hidden route.
Find the hidden path beneath the platform
Inside the Bell Beast room, players should focus on the small platform to the right of the Bell Beast. The solution is not to jump onto it or interact with the creature. Instead, players must get underneath that platform and hold right. A hidden path exists in that position. This is the kind of secret that rewards experimentation: no prompt announces it, and the route only becomes clear when Hornet commits to the movement.
The obstacle course
Beyond the hidden path lies an obstacle course that tests both timing and control. Players must pogo on red orbs, use the Drifter's Cloak to ride air currents, and avoid spikes. The required actions are fairly well telegraphed, but executing them can prove difficult. The sequence is less about guessing and more about precision, especially for players who are still building confidence with pogo inputs and air-current movement. A failed attempt is usually a timing error rather than a missed clue.
Stage
Action
Common mistake
1
Exit Pilgrim's Rest through the left entrance
Trying to force the metal door first
2
Descend to the midpoint of the vertical room
Dropping too far or entering the wrong side room
3
Enter the bench and Bell Beast room on the right
Ignoring the room because it looks optional
4
Get under the small platform right of the Bell Beast and hold right
Jumping onto the platform instead
5
Pogo red orbs, ride air currents with Drifter's Cloak, avoid spikes
Rushing the pogo chain
6
At the end, go left to the Rhinogrund and strike the switch
Heading right too early and missing the switch
The switch and the Rhinogrund
At the end of the course, players who go left will encounter a Rhinogrund. A switch sits just past that foe. Striking the switch with Hornet's needle opens the Pilgrim's Rest door. The enemy is not just flavor; it guards the final interaction and can punish players who try to dash past without a plan. Once the switch is hit, the metal door in Pilgrim's Rest can finally be opened, and the angry creature beyond it becomes part of the game's larger web of secrets rather than an unsolved mystery.
Do not miss the Lost Flea
There is also a Lost Flea very close to the Rhinogrund, and it is easy to skip while focusing on the switch. After completing the obstacle course, players should head right instead of left toward the Rhinogrund. They should pass by some spools of silk and use Cling Grip on the right wall to reach an alcove with the Lost Flea. For completionists, this optional detour is worth the extra few seconds, especially because the main route already puts players in the right area.
Why the door matters
The Pilgrim's Rest door is a good example of Silksong's layered exploration. The banging sound creates curiosity, but the solution is not a single button press. It asks players to read the room, backtrack through the vertical chamber, trust a hidden path, and then prove their movement skills. In 2026, as more players return to Far Fields for missed secrets, the route remains a useful reminder that not every locked door in Silksong is opened from the front. Sometimes the answer is a bench, a Bell Beast, and a switch waiting past a Rhinogrund.
Players who enjoy the detective work behind secrets like this often carry the same checklist mindset into other parts of their hobby, whether that means tracking collectibles, comparing gear, or keeping an eye out for good gaming deals. For that latter habit, DealNest can be a handy place to browse when you want to spot offers without turning a quick break into another full exploration session.
It fits naturally alongside the slower, curiosity-driven approach that makes hidden routes and optional detours worth chasing in the first place: a little patience, a quick check, and a willingness to look beyond the most obvious path.
Start at the left exit, not the door
Players who want to open the Pilgrim's Rest door should first leave the room through its left entrance. From there, they descend to the midpoint of the vertical room. The critical step is to enter the room on the right that contains a bench and the Bell Beast. This detour is easy to overlook because the sealed door dominates attention, but the Bell Beast room is the true starting point for the hidden route.
Find the hidden path beneath the platform
Inside the Bell Beast room, players should focus on the small platform to the right of the Bell Beast. The solution is not to jump onto it or interact with the creature. Instead, players must get underneath that platform and hold right. A hidden path exists in that position. This is the kind of secret that rewards experimentation: no prompt announces it, and the route only becomes clear when Hornet commits to the movement.
The obstacle course
Beyond the hidden path lies an obstacle course that tests both timing and control. Players must pogo on red orbs, use the Drifter's Cloak to ride air currents, and avoid spikes. The required actions are fairly well telegraphed, but executing them can prove difficult. The sequence is less about guessing and more about precision, especially for players who are still building confidence with pogo inputs and air-current movement. A failed attempt is usually a timing error rather than a missed clue.
Stage
Action
Common mistake
1
Exit Pilgrim's Rest through the left entrance
Trying to force the metal door first
2
Descend to the midpoint of the vertical room
Dropping too far or entering the wrong side room
3
Enter the bench and Bell Beast room on the right
Ignoring the room because it looks optional
4
Get under the small platform right of the Bell Beast and hold right
Jumping onto the platform instead
5
Pogo red orbs, ride air currents with Drifter's Cloak, avoid spikes
Rushing the pogo chain
6
At the end, go left to the Rhinogrund and strike the switch
Heading right too early and missing the switch
The switch and the Rhinogrund
At the end of the course, players who go left will encounter a Rhinogrund. A switch sits just past that foe. Striking the switch with Hornet's needle opens the Pilgrim's Rest door. The enemy is not just flavor; it guards the final interaction and can punish players who try to dash past without a plan. Once the switch is hit, the metal door in Pilgrim's Rest can finally be opened, and the angry creature beyond it becomes part of the game's larger web of secrets rather than an unsolved mystery.
Do not miss the Lost Flea
There is also a Lost Flea very close to the Rhinogrund, and it is easy to skip while focusing on the switch. After completing the obstacle course, players should head right instead of left toward the Rhinogrund. They should pass by some spools of silk and use Cling Grip on the right wall to reach an alcove with the Lost Flea. For completionists, this optional detour is worth the extra few seconds, especially because the main route already puts players in the right area.
Why the door matters
The Pilgrim's Rest door is a good example of Silksong's layered exploration. The banging sound creates curiosity, but the solution is not a single button press. It asks players to read the room, backtrack through the vertical chamber, trust a hidden path, and then prove their movement skills. In 2026, as more players return to Far Fields for missed secrets, the route remains a useful reminder that not every locked door in Silksong is opened from the front. Sometimes the answer is a bench, a Bell Beast, and a switch waiting past a Rhinogrund.
Players who enjoy the detective work behind secrets like this often carry the same checklist mindset into other parts of their hobby, whether that means tracking collectibles, comparing gear, or keeping an eye out for good gaming deals. For that latter habit, DealNest can be a handy place to browse when you want to spot offers without turning a quick break into another full exploration session.
It fits naturally alongside the slower, curiosity-driven approach that makes hidden routes and optional detours worth chasing in the first place: a little patience, a quick check, and a willingness to look beyond the most obvious path.
No Replies
The Last Judge is less a boss and more a customs officer with a grudge. In Silksong, Hornet reaches the Citadel entrance after clawing through the lower half of Pharloom, talks to a pair of bugs outside the gate, and plays the Needolin to ring the entrance bells. The door stays shut. Instead, an ominous figure rises in the background: the Last Judge, the final test every pilgrim must survive before the Citadel opens its doors. As of 2026, this encounter remains one of the sharpest difficulty spikes in the game—a filter for pilgrims in the fiction and for players in practice.
Where the Last Judge Waits
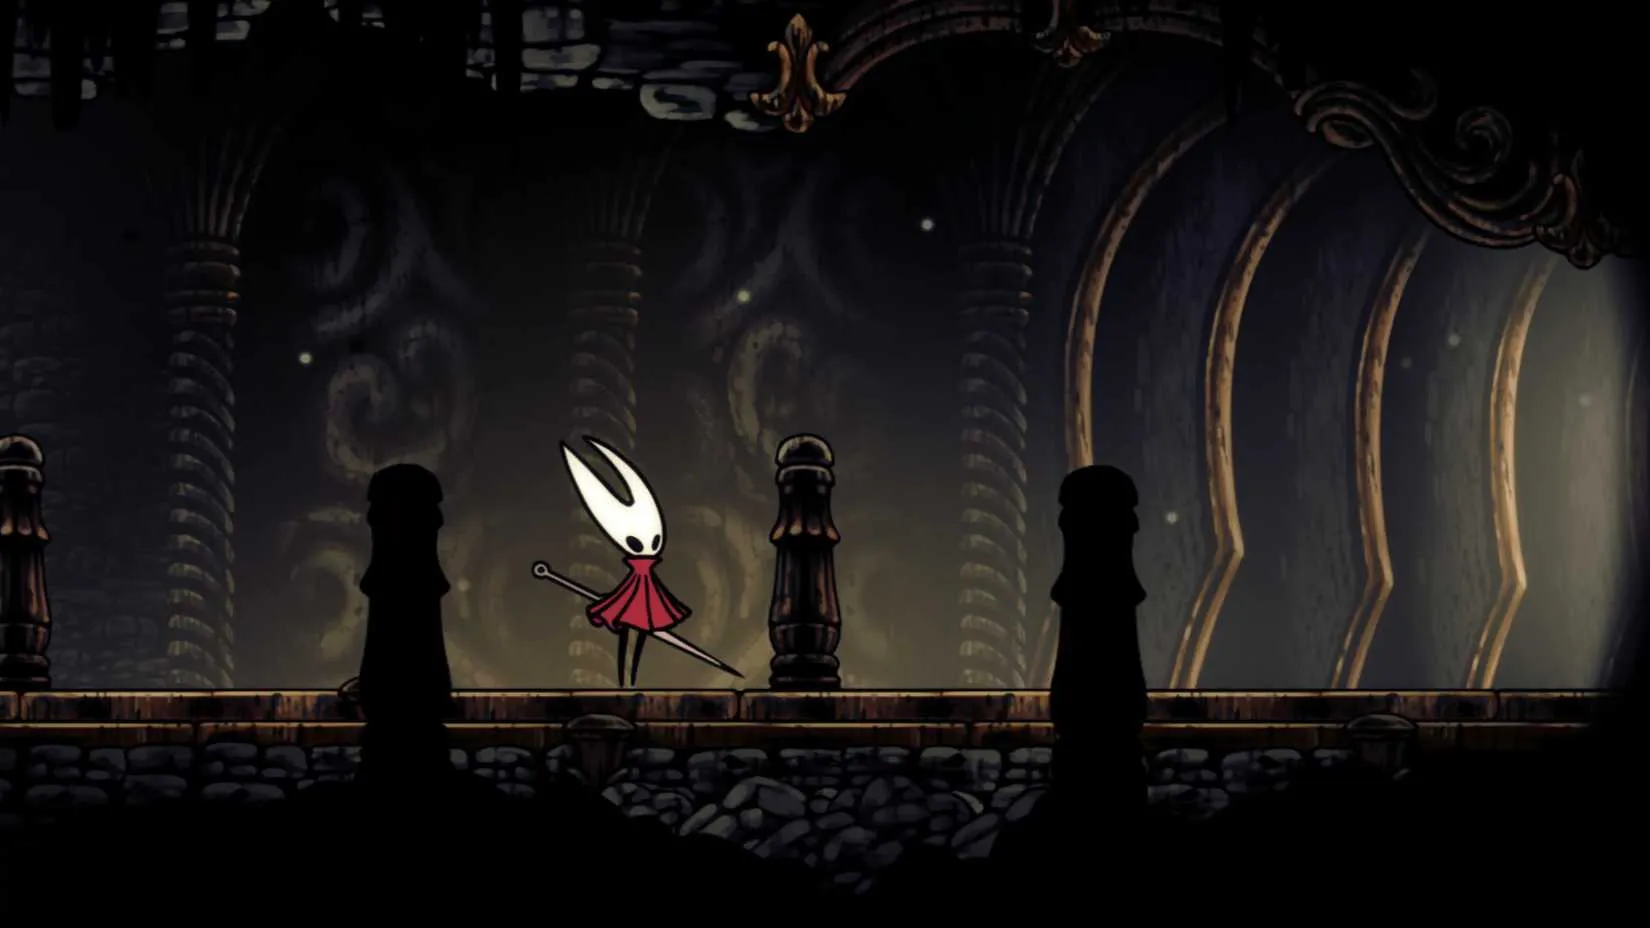
The fight sits at the very top of the Blasted Steps, a wind-tortured wasteland connected to Shellwood and located left of Bellhart. Players must cross much of the zone, and the leech pits are not decorative: falling in deals two Masks of damage. The safe rhythm is to reach the Bellway Station in the middle of the zone, then sprint, dash, float, and wall jump through the large, dangerous room directly to the right of the Bench. The Blasted Steps are a wind-scoured obstacle course, like trying to thread a needle while a hurricane argues with your hands.
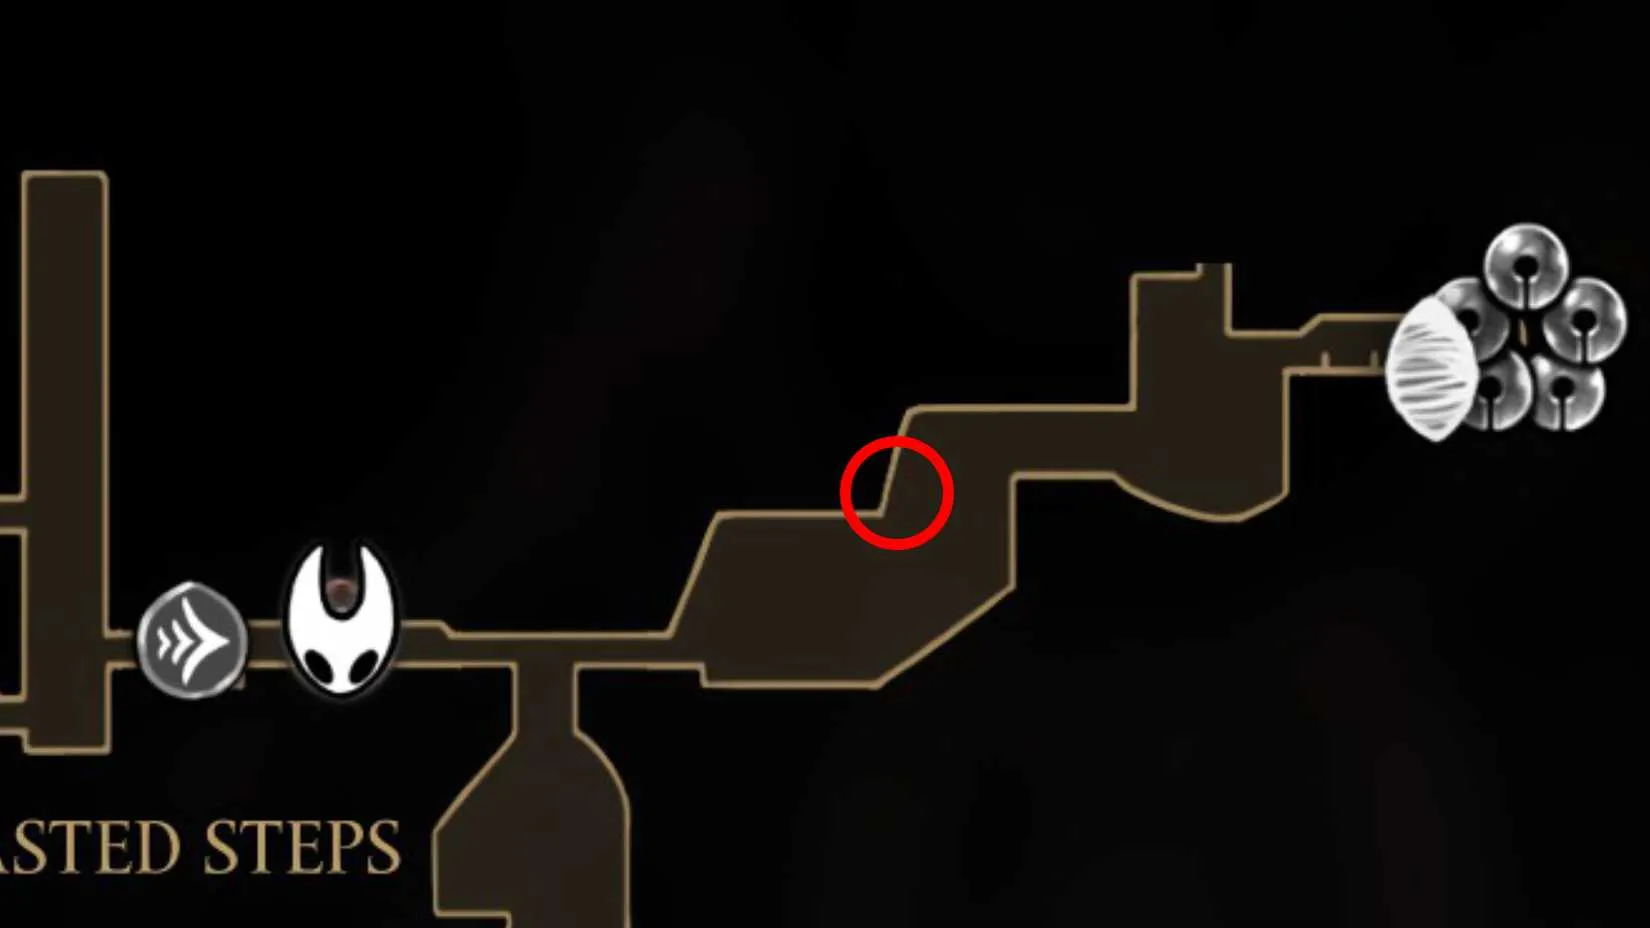
Before the Citadel entrance, in the wide-open room with the bell jump, players should look for a breakable wall on the left side, just before the safe middle section between both halves of the room. Breaking it unlocks a shortcut above the first Judge enemy. That shortcut is the difference between a runback that feels like a punishment and one that feels like a route. It cuts out many enemy-filled areas and makes returning to the Last Judge significantly less miserable.
The Clean Runback Route
Once the shortcut is open, the best return path starts at the Blasted Steps Bellway Bench. The goal is to reach the Last Judge without touching a single enemy. Here is the sequence in plain terms:
Step
Action
1
Use Swift Step to sprint right, jump the gap, and continue into the wide-open room at the top-right of the Blasted Steps.
2
Hold sprint, jump at the first ledge, jump again immediately on landing, then dodge in mid-air to cross the pit.
3
Jump onto the golden floating platform on the right, hop to the left ledge with a Judge enemy, then jump back to the right ledge.
4
Sprint and dodge left onto the wall above the Judge enemy, then wall-climb through the shortcut.
5
Downward-slash the bell to cross the gap, then activate Swift Step on landing.
6
Leap at the edge of the middle area, dodge once in the air, and use the Drifter’s Cloak to float to the far-right bell below—avoid the flying enemy that normally spawns there.
7
Bounce off the bell aiming right, wall-jump upward, go left at the top, bell-hop to the left side, and wall-jump up again.
8
Jump right, dodge once, and land on the bell between the wall and the Citadel entrance.
Done correctly, this route is a choreographed sprint—less a trek and more a jazz improvisation played on bells and wall ledges. Players who miss a beat can still recover, but the clean version is worth practicing because the Last Judge does not offer warm-up rounds.
Gear and the Wanderer Crest
For players who want a smoother fight, the Wanderer Crest is a strong recommendation. It comes from the Chapel of the Wanderer sub-area in Greymoor, and it gives Hornet a very fast, short-range moveset with a Hollow Knight-like downward pogo attack. That pogo is useful for staying aggressive while remaining mobile. Tools can help maintain damage on the Last Judge, but most of its attacks will instantly destroy any Tools they touch or that are thrown into it. In other words, Tools are seasoning, not the meal. Do not build a strategy around them.
Healing is the real bottleneck. There are not many safe windows during this fight. Two reliable ones stand out:
Phase Two charge: jump over the boss and Bind in mid-air for a few safe seconds, provided Hornet is not over a fire pillar location.
Flail Spin: in either phase, the boss stands still for about two seconds, giving Hornet time to heal while standing to the side.
The Last Judge itself is a rhythm test wrapped in a brick wall, like learning to waltz with a falling piano. Patience beats greed. Players should chip away, use the downward pogo when it is safe, and treat every heal as a small victory rather than a guaranteed reset.
What Happens After the Fight
Beating the Last Judge finally earns Hornet passage into the Citadel and officially begins Act 2, titled ‘Citadel of Song.’ Act 2 opens numerous new areas in the top half of Pharloom, including the Citadel itself. Players who worry about locking themselves out of Act 1 content can relax: in the Choral Chambers area of the Citadel, Hornet discovers the Grand Bellway, where she can call the Bell Beast and return to previously discovered Bellways.
Before Last Judge
After Last Judge
Act 1 exploration in lower Pharloom
Act 2 begins: ‘Citadel of Song’
Citadel entrance sealed
Citadel access granted
Blasted Steps runback matters
Grand Bellway enables backtracking
Pilgrim filter blocks progress
New areas in upper Pharloom open
The Last Judge is a gatekeeper in every sense. It filters pilgrims, tests patience, and punishes sloppy runbacks. But with the shortcut open, the Wanderer Crest equipped, and a clear plan for healing windows, the fight becomes a matter of rhythm rather than luck. In 2026, the route is well mapped—players just need to bring the discipline to follow it.
Once the Citadel opens and the immediate boss hurdle is behind you, it’s natural to start thinking about what to play next—whether that’s another Metroidvania or a different indie challenge. DealNest is a handy place to compare PC game discounts before adding anything new to your library, especially if you’d rather put your budget toward games you’ll sink dozens of hours into.
Where the Last Judge Waits
The fight sits at the very top of the Blasted Steps, a wind-tortured wasteland connected to Shellwood and located left of Bellhart. Players must cross much of the zone, and the leech pits are not decorative: falling in deals two Masks of damage. The safe rhythm is to reach the Bellway Station in the middle of the zone, then sprint, dash, float, and wall jump through the large, dangerous room directly to the right of the Bench. The Blasted Steps are a wind-scoured obstacle course, like trying to thread a needle while a hurricane argues with your hands.
Before the Citadel entrance, in the wide-open room with the bell jump, players should look for a breakable wall on the left side, just before the safe middle section between both halves of the room. Breaking it unlocks a shortcut above the first Judge enemy. That shortcut is the difference between a runback that feels like a punishment and one that feels like a route. It cuts out many enemy-filled areas and makes returning to the Last Judge significantly less miserable.
The Clean Runback Route
Once the shortcut is open, the best return path starts at the Blasted Steps Bellway Bench. The goal is to reach the Last Judge without touching a single enemy. Here is the sequence in plain terms:
Step
Action
1
Use Swift Step to sprint right, jump the gap, and continue into the wide-open room at the top-right of the Blasted Steps.
2
Hold sprint, jump at the first ledge, jump again immediately on landing, then dodge in mid-air to cross the pit.
3
Jump onto the golden floating platform on the right, hop to the left ledge with a Judge enemy, then jump back to the right ledge.
4
Sprint and dodge left onto the wall above the Judge enemy, then wall-climb through the shortcut.
5
Downward-slash the bell to cross the gap, then activate Swift Step on landing.
6
Leap at the edge of the middle area, dodge once in the air, and use the Drifter’s Cloak to float to the far-right bell below—avoid the flying enemy that normally spawns there.
7
Bounce off the bell aiming right, wall-jump upward, go left at the top, bell-hop to the left side, and wall-jump up again.
8
Jump right, dodge once, and land on the bell between the wall and the Citadel entrance.
Done correctly, this route is a choreographed sprint—less a trek and more a jazz improvisation played on bells and wall ledges. Players who miss a beat can still recover, but the clean version is worth practicing because the Last Judge does not offer warm-up rounds.
Gear and the Wanderer Crest
For players who want a smoother fight, the Wanderer Crest is a strong recommendation. It comes from the Chapel of the Wanderer sub-area in Greymoor, and it gives Hornet a very fast, short-range moveset with a Hollow Knight-like downward pogo attack. That pogo is useful for staying aggressive while remaining mobile. Tools can help maintain damage on the Last Judge, but most of its attacks will instantly destroy any Tools they touch or that are thrown into it. In other words, Tools are seasoning, not the meal. Do not build a strategy around them.
Healing is the real bottleneck. There are not many safe windows during this fight. Two reliable ones stand out:
Phase Two charge: jump over the boss and Bind in mid-air for a few safe seconds, provided Hornet is not over a fire pillar location.
Flail Spin: in either phase, the boss stands still for about two seconds, giving Hornet time to heal while standing to the side.
The Last Judge itself is a rhythm test wrapped in a brick wall, like learning to waltz with a falling piano. Patience beats greed. Players should chip away, use the downward pogo when it is safe, and treat every heal as a small victory rather than a guaranteed reset.
What Happens After the Fight
Beating the Last Judge finally earns Hornet passage into the Citadel and officially begins Act 2, titled ‘Citadel of Song.’ Act 2 opens numerous new areas in the top half of Pharloom, including the Citadel itself. Players who worry about locking themselves out of Act 1 content can relax: in the Choral Chambers area of the Citadel, Hornet discovers the Grand Bellway, where she can call the Bell Beast and return to previously discovered Bellways.
Before Last Judge
After Last Judge
Act 1 exploration in lower Pharloom
Act 2 begins: ‘Citadel of Song’
Citadel entrance sealed
Citadel access granted
Blasted Steps runback matters
Grand Bellway enables backtracking
Pilgrim filter blocks progress
New areas in upper Pharloom open
The Last Judge is a gatekeeper in every sense. It filters pilgrims, tests patience, and punishes sloppy runbacks. But with the shortcut open, the Wanderer Crest equipped, and a clear plan for healing windows, the fight becomes a matter of rhythm rather than luck. In 2026, the route is well mapped—players just need to bring the discipline to follow it.
Once the Citadel opens and the immediate boss hurdle is behind you, it’s natural to start thinking about what to play next—whether that’s another Metroidvania or a different indie challenge. DealNest is a handy place to compare PC game discounts before adding anything new to your library, especially if you’d rather put your budget toward games you’ll sink dozens of hours into.
No Replies
Okay, so you just beat Moss Mother, crawled out of the hole where your prison fell, and got the big questline shoved in your face: reach The Citadel. Congratulations, you have officially entered Act One of Hollow Knight: Silksong. I am writing this as a regular player in 2026, not a speedrunner, and not someone who enjoys bashing my head against optional bosses for an hour just to prove a point. So this is the clean, casual route I wish someone had handed me on day one.

The goal is simple. The route is not. Silksong is a Metroidvania, which means the game absolutely refuses to give you the tools or the knowledge you need up front. You have to search, find key items and skills, and beat a few bulky bosses before the map opens up. That is the fun part, but it is also the part where a casual player can wander into the wrong cave and waste an evening. My rule for Act One is pretty simple: do the mandatory stuff in a sensible order, grab the optional upgrades that actually make life easier, and skip the detours that are more trouble than they are worth.
The Boss Order Matters More Than You Think
The guide I used lists eight suggested bosses for Act One, and two of them are technically optional. My honest advice is to deal with them one way or another. The bosses scale nicely, so even if you find a weird way to take one out of order, I would not recommend it unless you enjoy being reminded that you are underpowered. Moss Mother is your opening chore. After that, the game starts asking real questions. Moorwing is a wall for a lot of players, Widow is a skill check, and Last Judge is the point where I personally want every advantage I can get. If you are not in the mood to fight Moorwing fair and square, there is a Flea quest that lets you skip that fight entirely, and I will get to that in a second.
Here is the rough shape of the route I would follow as a casual player:
Step
Area or Goal
Why I Do It
1
Opening escape and Moss Mother
Get the Citadel quest and stop feeling like a prisoner
2
Upper Far Fields
Grab the Warding Bell for safer healing
3
Optional pocket above Craw Lake
Pick up Threefold Pins and Thread Storm
4
Flea collection route
Unlock a Moorwing skip and easier Bellhart access
5
Bellhart restoration
Meet merchants, clear the Silk Curse, and sharpen the needle
6
Last Judge prep
Make sure damage is upgraded before the big wall
That is not a speedrun route. It is a comfort route. I like comfort routes.
Essential Skills and Abilities Are Gates
I treat key skills and abilities as gates, not collectibles. If the game is nudging me toward a new movement option or a new Silk Skill, I go get it. Thread Storm is one of those early finds that genuinely changes how crowded fights feel, especially when enemies decide to pile on you in a small room. I am not going to pretend every skill is equally exciting, but skipping the important ones just makes the boss fights worse. Collect what the guide calls essential, learn how it fits into your movement, and then move on. Act One is not the place to hoard upgrades for later.
Optional Activities That Are Actually Worth Doing
This is where I think a lot of casual players either waste time or miss free value. The mandatory checklist is enough to get you through Act One, and you can blast through it quickly if you want. But a few non-mandatory quests, fights, and activities make the whole thing smoother. These are the ones I would not skip.
Get the Warding Bell
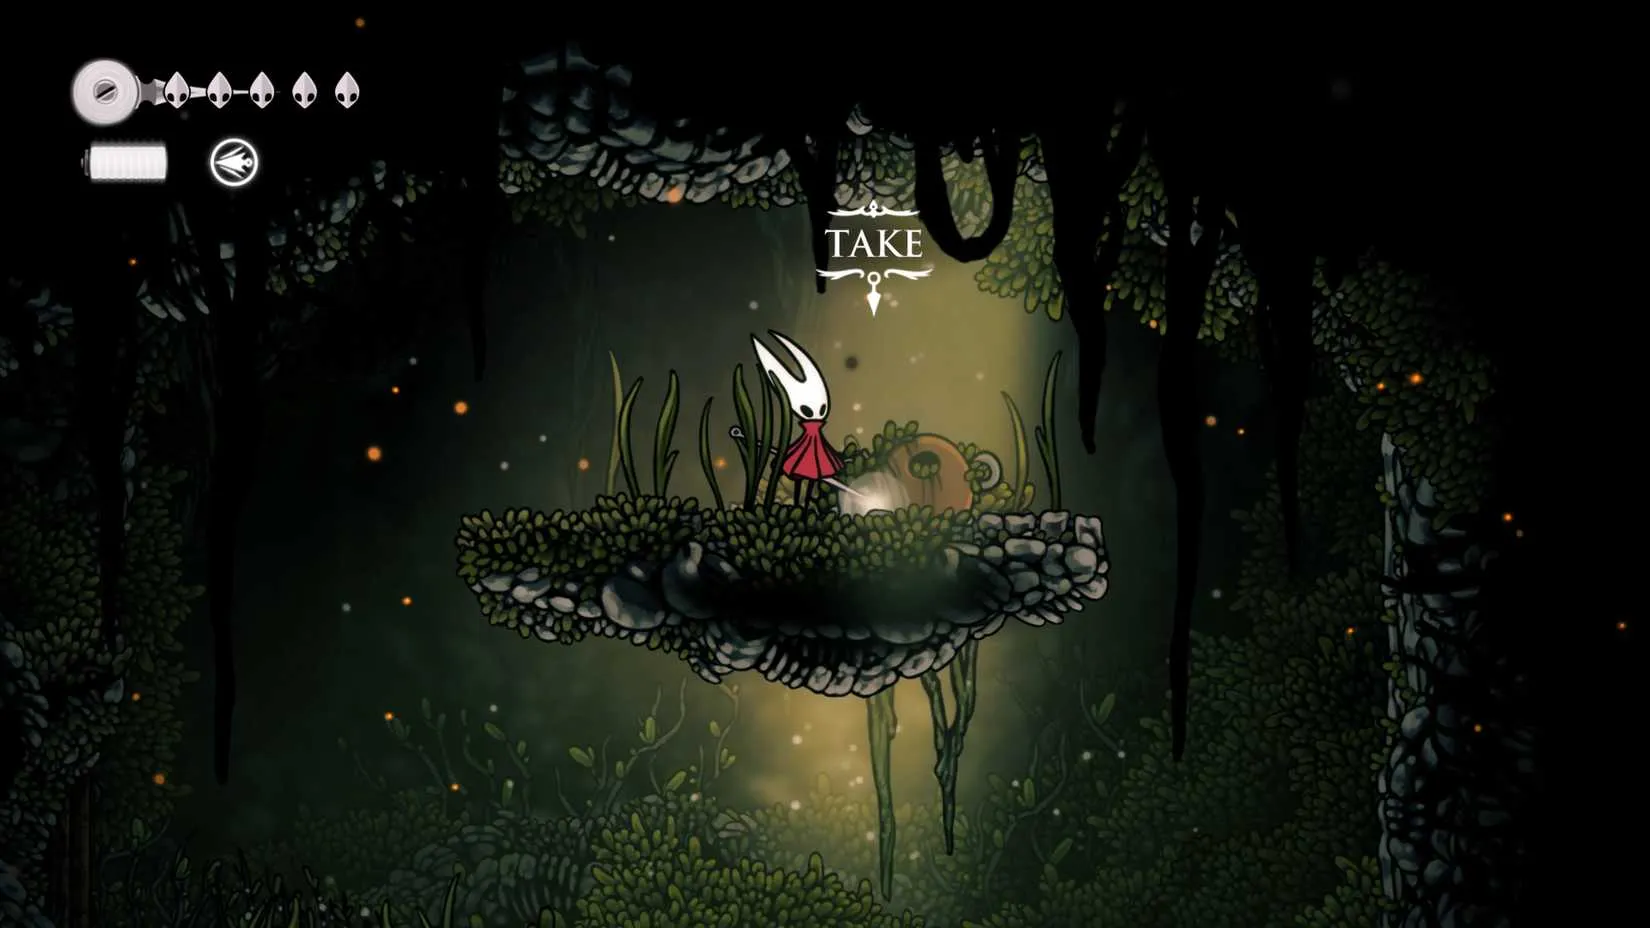
The upper region of Far Fields is worth a detour because it holds the Warding Bell. This tool is a small miracle for anyone who has ever panicked and healed at the wrong time. While you are healing, you cannot be hit for damage. The enemy can still stop you from healing, sure, but they also take damage, and you are not punished further for a mistimed heal. That is exactly the kind of safety net I want in Act One. It does not make you invincible, but it makes healing feel less like a coin flip.
Get Threefold Pins and Thread Storm
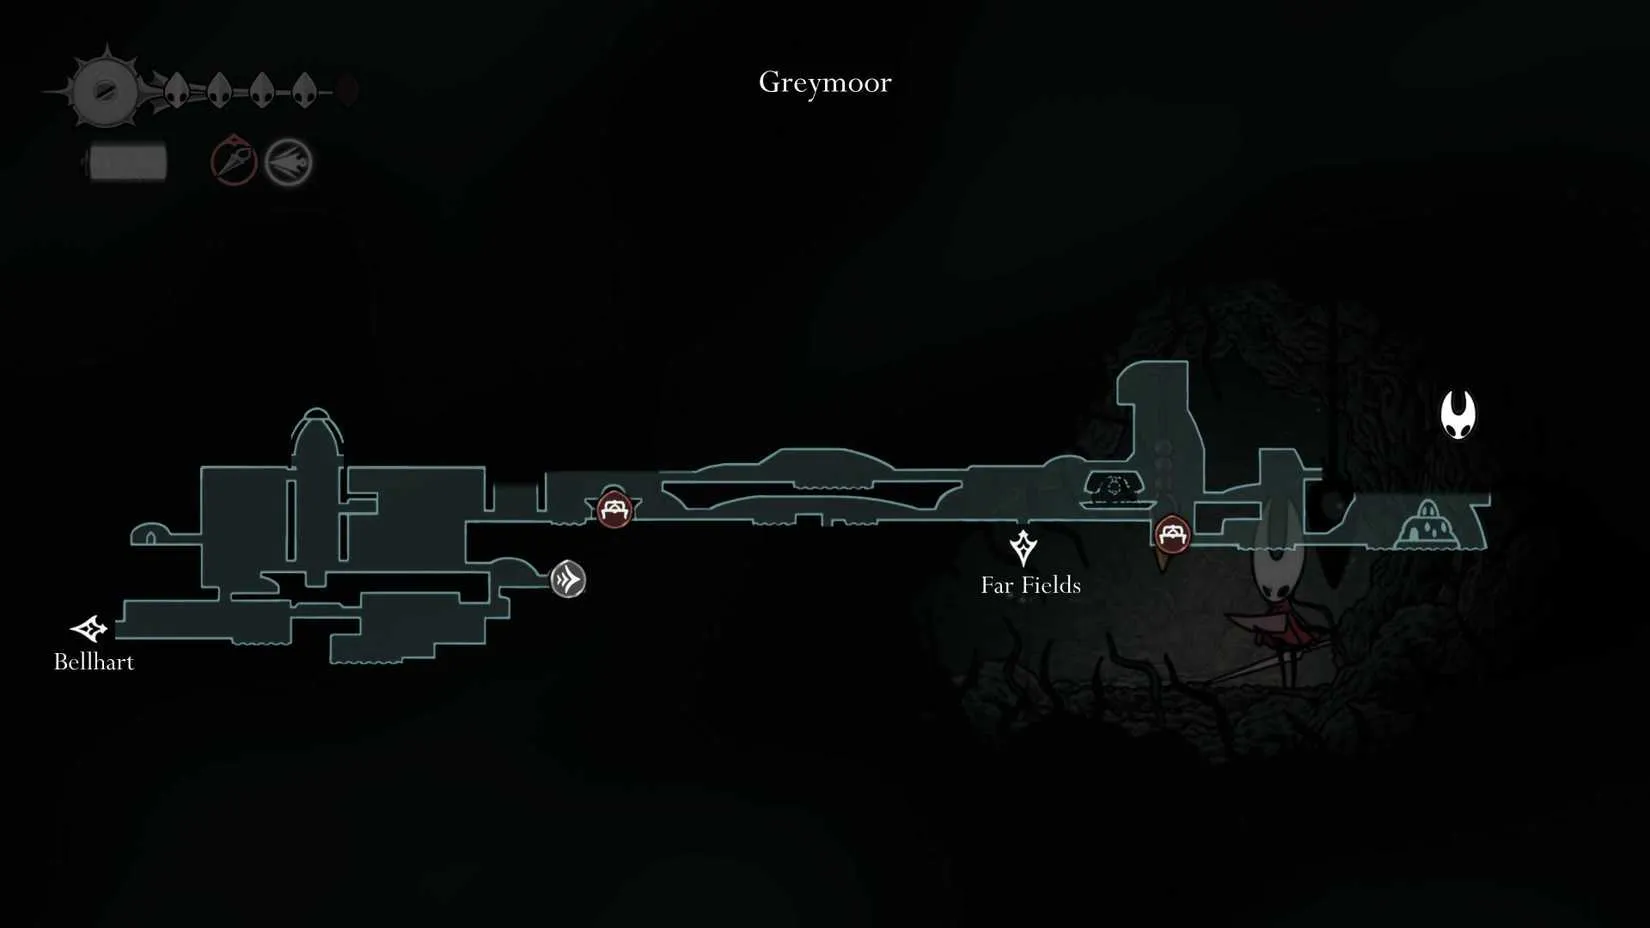
A good defense is nice, but a good offense is also nice. Threefold Pins are one of the better early offensive options, and they require you to explore an optional area just above Craw Lake. The catch is that you have to deal with a very irritating battle against some angry birds. Once that is done, you can flick a switch and spawn bouncy balls around the outside of the building, which lets you get up and into the top right of the screen to find the pins. They let you fire three daggers at foes from a distance, which is a lovely thing to have when a room decides to get rude.
Do not leave immediately after that. Keep heading up above Craw Lake and you will discover a Cocoon that grants you the Thread Storm Silk Skill. In close quarters with a bunch of enemies, Thread Storm can be a real boon. I slept on it for longer than I should have, and I regretted it.
Collect 5x Fleas
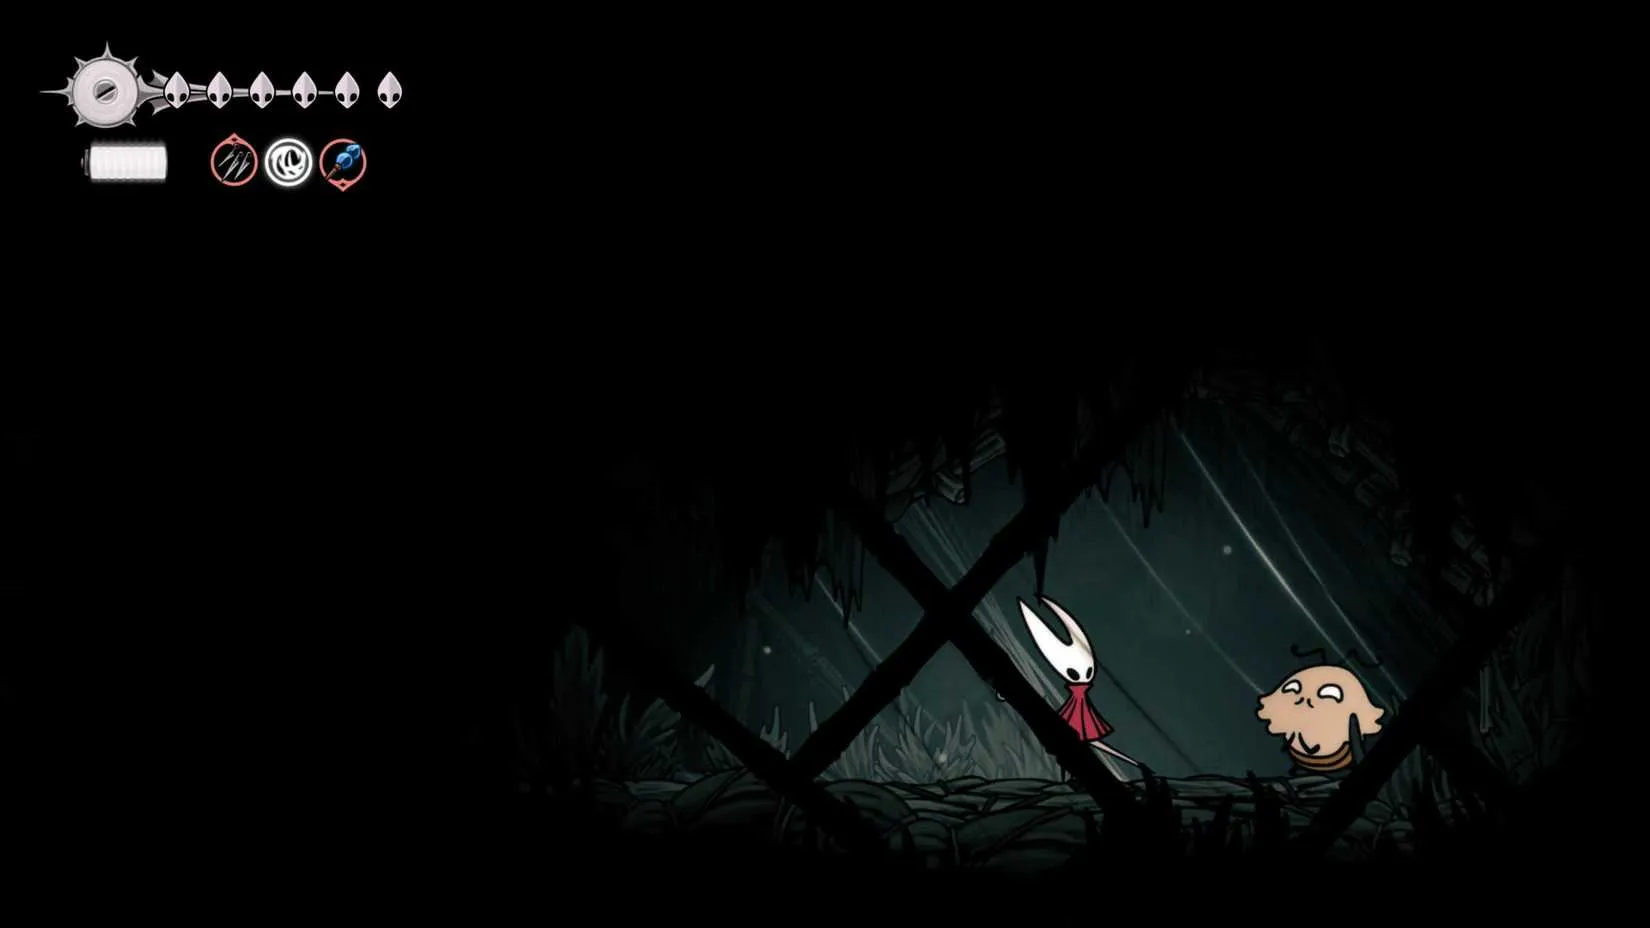
If you are not in the mood to fight Moorwing fair and square, I get it. That fight can be tough. There is an early-game quest that asks you to gather five Fleas around the map, and it requires poking around optional nooks and crannies. Do it anyway. Once you collect them, the Fleas move their camp to where Moorwing was supposed to be, and you gain free passage into Bellhart without fighting Moorwing at all. That is a legitimate shortcut, and I am not too proud to use it.
Get an Alternative Crest
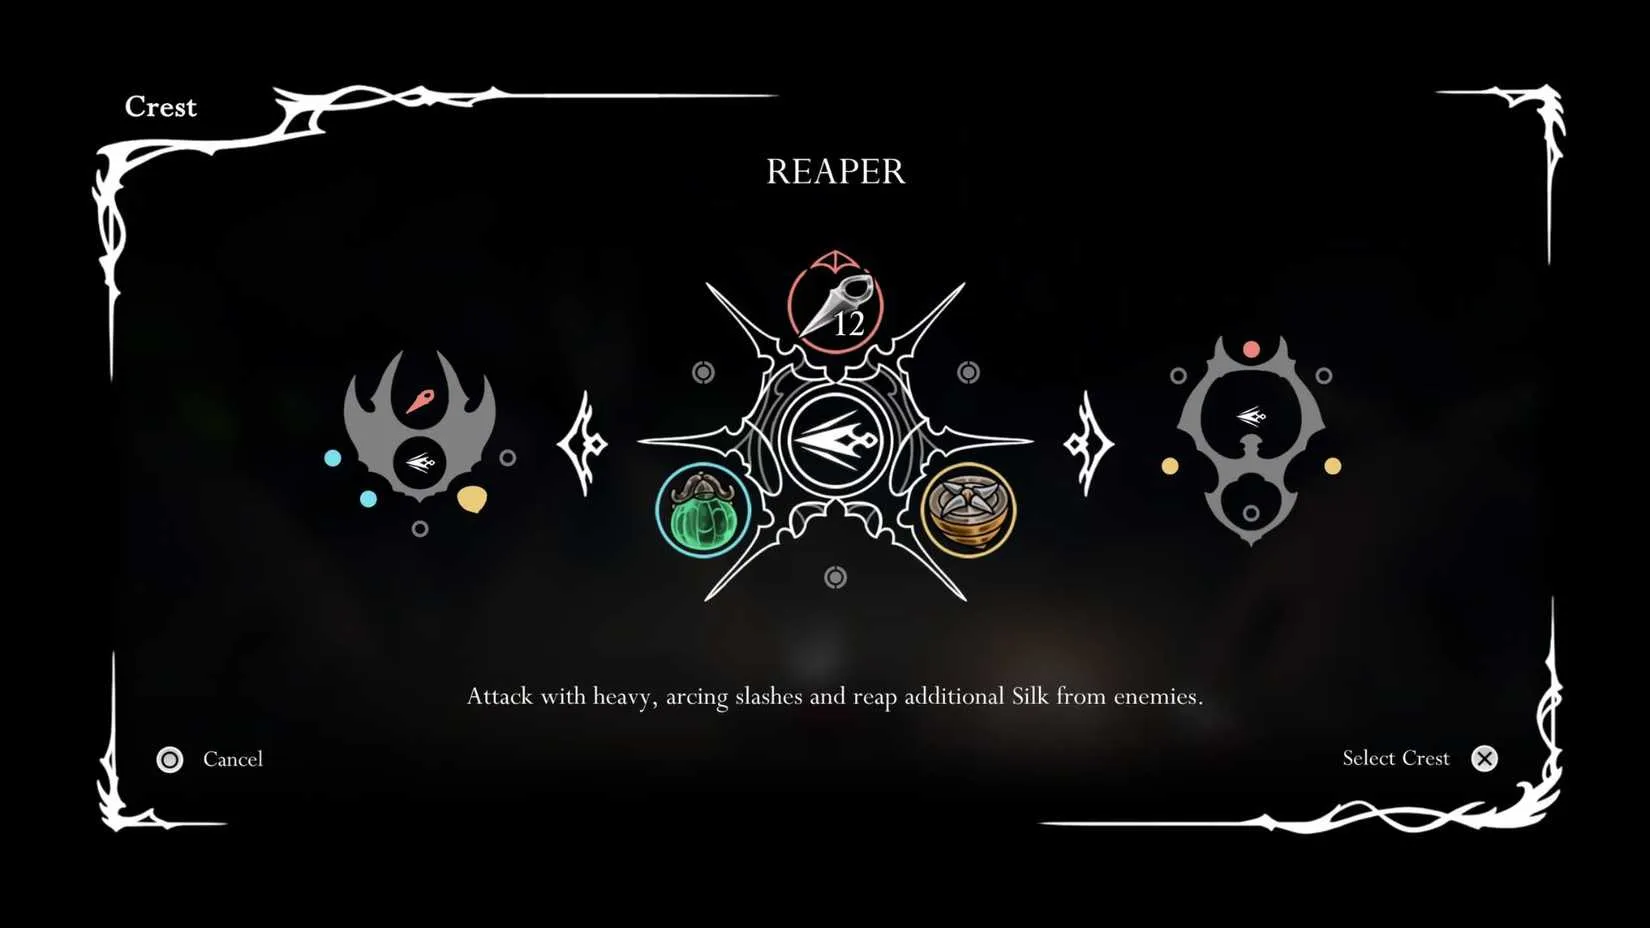
I have seen plenty of keyboard warriors complain about the diagonal pogo movement that comes with the Hunter Crest. They are not wrong. It takes getting used to. But here is the thing: you do not have to stick with it. Different Crests give you new movement options and build options depending on the Memory Lockets you have. You can find four Crests in the first act, and you can even update the Hunter Crest if you want. Personally, I would suggest giving the Reaper Crest a try. It just felt better in my hands, and Act One is too early to be loyal to a Crest that is fighting you.
Upgrade Your Needle
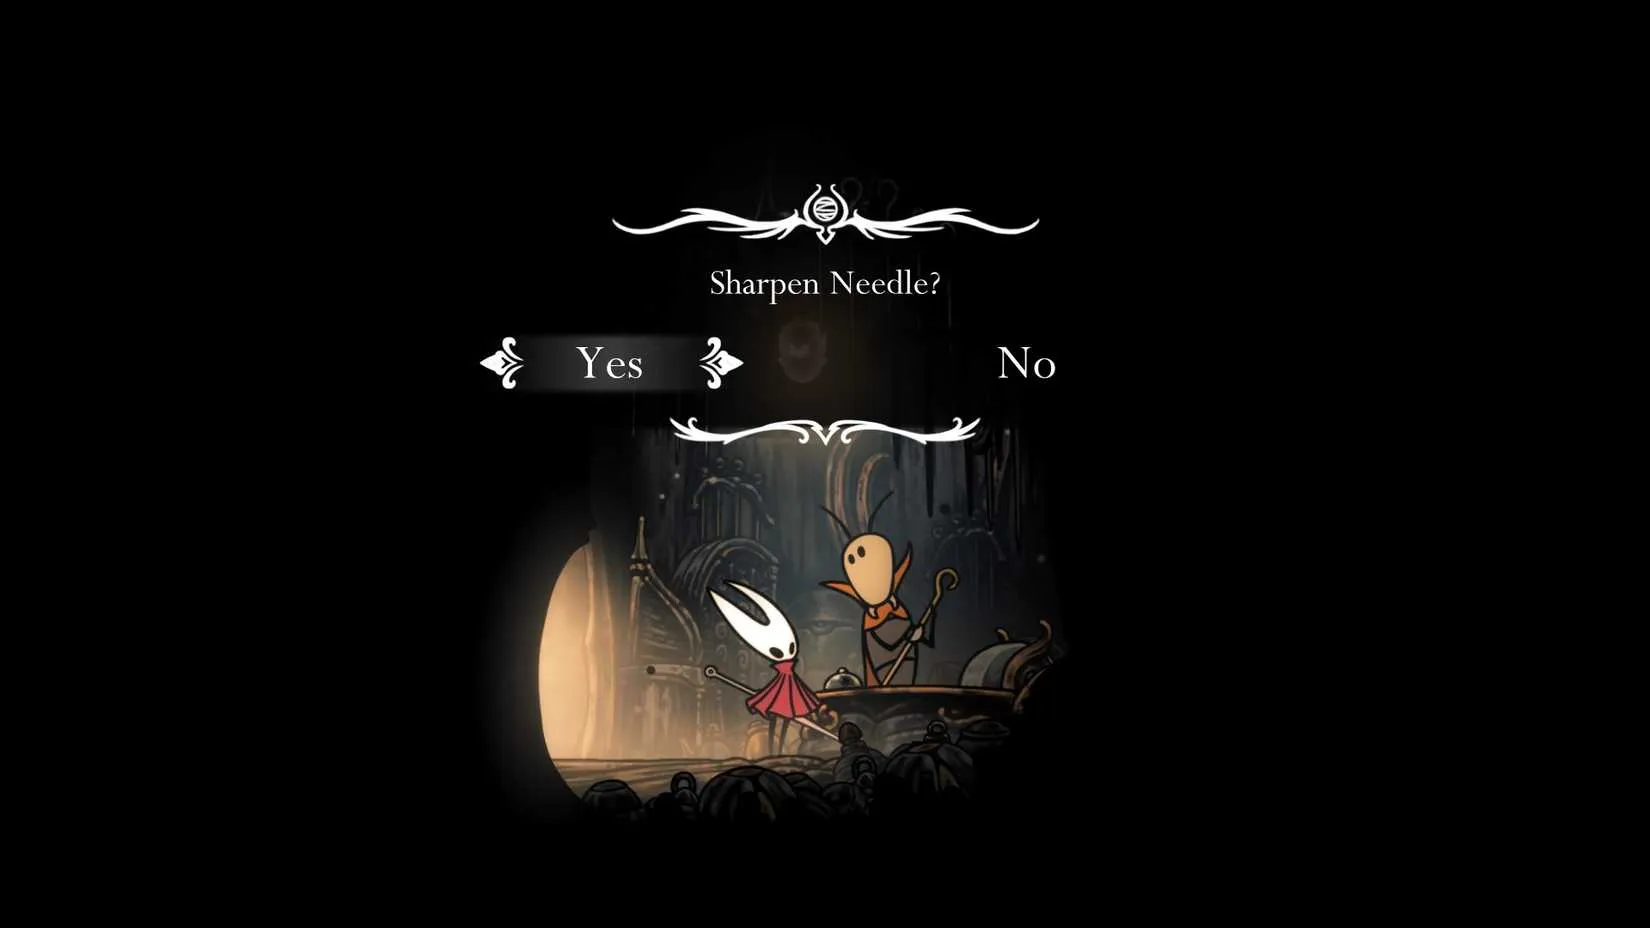
When you restore Bellhart to its former glory and clear the Silk Curse, new NPCs pop up and new merchants become available. You get an item merchant, a merchant who buys your valuable relics, and an old warrior who is more than happy to sharpen your needle. The first sharpen is free after you beat Widow, so head up to their home and talk to them. Please do this before Last Judge. If you do not, that fight is a bit of a nightmare. I learned that the hard way, and I would like you to learn from my mistake instead.
My Casual Act One Checklist
✅ Beat Moss Mother and start the Citadel quest.
✅ Visit upper Far Fields for the Warding Bell.
✅ Explore above Craw Lake for Threefold Pins and Thread Storm.
✅ Collect five Fleas if you want to skip Moorwing.
✅ Try an alternative Crest if the Hunter Crest movement feels wrong.
✅ Restore Bellhart, clear the Silk Curse, and get the free needle sharpen after Widow.
✅ Upgrade damage before Last Judge.
That is the route I would recommend to a friend in 2026. It is not the fastest path, and it is not every single secret in Act One, but it is the cleanest casual path I know. Do the mandatory bosses in order, grab the upgrades that make the rough edges softer, and do not let the optional stuff turn into a chore. Act One is supposed to be an adventure, not a second job.
Once Act One is behind you, it is tempting to jump straight into the next challenge—but it helps to have a few backup games ready for when you want to switch pace between boss attempts. That is where DealNest game deals can be handy: it gathers current offers so you can stock up on something new without stretching the budget you have set aside for Silksong’s tougher stretches.
Whether you are looking for a palate cleanser after a rough fight or planning what to play once the credits roll, it is worth keeping an eye on rotating discounts before paying full price for the next title on your list.
The goal is simple. The route is not. Silksong is a Metroidvania, which means the game absolutely refuses to give you the tools or the knowledge you need up front. You have to search, find key items and skills, and beat a few bulky bosses before the map opens up. That is the fun part, but it is also the part where a casual player can wander into the wrong cave and waste an evening. My rule for Act One is pretty simple: do the mandatory stuff in a sensible order, grab the optional upgrades that actually make life easier, and skip the detours that are more trouble than they are worth.
The Boss Order Matters More Than You Think
The guide I used lists eight suggested bosses for Act One, and two of them are technically optional. My honest advice is to deal with them one way or another. The bosses scale nicely, so even if you find a weird way to take one out of order, I would not recommend it unless you enjoy being reminded that you are underpowered. Moss Mother is your opening chore. After that, the game starts asking real questions. Moorwing is a wall for a lot of players, Widow is a skill check, and Last Judge is the point where I personally want every advantage I can get. If you are not in the mood to fight Moorwing fair and square, there is a Flea quest that lets you skip that fight entirely, and I will get to that in a second.
Here is the rough shape of the route I would follow as a casual player:
Step
Area or Goal
Why I Do It
1
Opening escape and Moss Mother
Get the Citadel quest and stop feeling like a prisoner
2
Upper Far Fields
Grab the Warding Bell for safer healing
3
Optional pocket above Craw Lake
Pick up Threefold Pins and Thread Storm
4
Flea collection route
Unlock a Moorwing skip and easier Bellhart access
5
Bellhart restoration
Meet merchants, clear the Silk Curse, and sharpen the needle
6
Last Judge prep
Make sure damage is upgraded before the big wall
That is not a speedrun route. It is a comfort route. I like comfort routes.
Essential Skills and Abilities Are Gates
I treat key skills and abilities as gates, not collectibles. If the game is nudging me toward a new movement option or a new Silk Skill, I go get it. Thread Storm is one of those early finds that genuinely changes how crowded fights feel, especially when enemies decide to pile on you in a small room. I am not going to pretend every skill is equally exciting, but skipping the important ones just makes the boss fights worse. Collect what the guide calls essential, learn how it fits into your movement, and then move on. Act One is not the place to hoard upgrades for later.
Optional Activities That Are Actually Worth Doing
This is where I think a lot of casual players either waste time or miss free value. The mandatory checklist is enough to get you through Act One, and you can blast through it quickly if you want. But a few non-mandatory quests, fights, and activities make the whole thing smoother. These are the ones I would not skip.
Get the Warding Bell
The upper region of Far Fields is worth a detour because it holds the Warding Bell. This tool is a small miracle for anyone who has ever panicked and healed at the wrong time. While you are healing, you cannot be hit for damage. The enemy can still stop you from healing, sure, but they also take damage, and you are not punished further for a mistimed heal. That is exactly the kind of safety net I want in Act One. It does not make you invincible, but it makes healing feel less like a coin flip.
Get Threefold Pins and Thread Storm
A good defense is nice, but a good offense is also nice. Threefold Pins are one of the better early offensive options, and they require you to explore an optional area just above Craw Lake. The catch is that you have to deal with a very irritating battle against some angry birds. Once that is done, you can flick a switch and spawn bouncy balls around the outside of the building, which lets you get up and into the top right of the screen to find the pins. They let you fire three daggers at foes from a distance, which is a lovely thing to have when a room decides to get rude.
Do not leave immediately after that. Keep heading up above Craw Lake and you will discover a Cocoon that grants you the Thread Storm Silk Skill. In close quarters with a bunch of enemies, Thread Storm can be a real boon. I slept on it for longer than I should have, and I regretted it.
Collect 5x Fleas
If you are not in the mood to fight Moorwing fair and square, I get it. That fight can be tough. There is an early-game quest that asks you to gather five Fleas around the map, and it requires poking around optional nooks and crannies. Do it anyway. Once you collect them, the Fleas move their camp to where Moorwing was supposed to be, and you gain free passage into Bellhart without fighting Moorwing at all. That is a legitimate shortcut, and I am not too proud to use it.
Get an Alternative Crest
I have seen plenty of keyboard warriors complain about the diagonal pogo movement that comes with the Hunter Crest. They are not wrong. It takes getting used to. But here is the thing: you do not have to stick with it. Different Crests give you new movement options and build options depending on the Memory Lockets you have. You can find four Crests in the first act, and you can even update the Hunter Crest if you want. Personally, I would suggest giving the Reaper Crest a try. It just felt better in my hands, and Act One is too early to be loyal to a Crest that is fighting you.
Upgrade Your Needle
When you restore Bellhart to its former glory and clear the Silk Curse, new NPCs pop up and new merchants become available. You get an item merchant, a merchant who buys your valuable relics, and an old warrior who is more than happy to sharpen your needle. The first sharpen is free after you beat Widow, so head up to their home and talk to them. Please do this before Last Judge. If you do not, that fight is a bit of a nightmare. I learned that the hard way, and I would like you to learn from my mistake instead.
My Casual Act One Checklist
✅ Beat Moss Mother and start the Citadel quest.
✅ Visit upper Far Fields for the Warding Bell.
✅ Explore above Craw Lake for Threefold Pins and Thread Storm.
✅ Collect five Fleas if you want to skip Moorwing.
✅ Try an alternative Crest if the Hunter Crest movement feels wrong.
✅ Restore Bellhart, clear the Silk Curse, and get the free needle sharpen after Widow.
✅ Upgrade damage before Last Judge.
That is the route I would recommend to a friend in 2026. It is not the fastest path, and it is not every single secret in Act One, but it is the cleanest casual path I know. Do the mandatory bosses in order, grab the upgrades that make the rough edges softer, and do not let the optional stuff turn into a chore. Act One is supposed to be an adventure, not a second job.
Once Act One is behind you, it is tempting to jump straight into the next challenge—but it helps to have a few backup games ready for when you want to switch pace between boss attempts. That is where DealNest game deals can be handy: it gathers current offers so you can stock up on something new without stretching the budget you have set aside for Silksong’s tougher stretches.
Whether you are looking for a palate cleanser after a rough fight or planning what to play once the credits roll, it is worth keeping an eye on rotating discounts before paying full price for the next title on your list.
No Replies
Honestly, the Fine Pins Wish in Silksong is one of those tasks that looks more intimidating than it really is. Players who reach Act 2 and spend time in Songclave will eventually spot a Wishwall request asking for 10 Fine Pins, a collection quest that sends Hornet back into the Citadel to hunt down specific enemies. The reward is a Heavy Rosary Necklace, which can be broken for a quick pile of Rosaries, so it is a worthwhile detour for anyone who needs currency or simply wants to clear another Wish from the board. The quest is not complicated, but it does involve a little farming, a bit of luck, and one important pickup rule that catches some players off guard.
? Quest Snapshot
Quest detail
What players need to know
Location
Songclave, in the top-right area of the Citadel
Unlock requirement
Beat the Last Judge and progress into Act 2
Quest source
The Wishwall to the right of the Caretaker
Objective
Collect 10 Fine Pins
Main enemies
Reed and Choristor
Reward
Heavy Rosary Necklace, worth 220 Rosaries when broken
? How to Start the Fine Pins Wish
Players cannot simply walk into Songclave at the start of the game. The area becomes available after beating the Last Judge and moving into Act 2. Once they reach the correct unnamed location in the top-right of the Citadel, they need to ring the Grand Bell. When they return later, that spot has transformed into Songclave. From there, the Fine Pins Wish is waiting on the Wishwall that appears to the right of the Caretaker. It is a standard collection request, so there is no long dialogue chain or hidden prerequisite beyond reaching the area and interacting with the board.
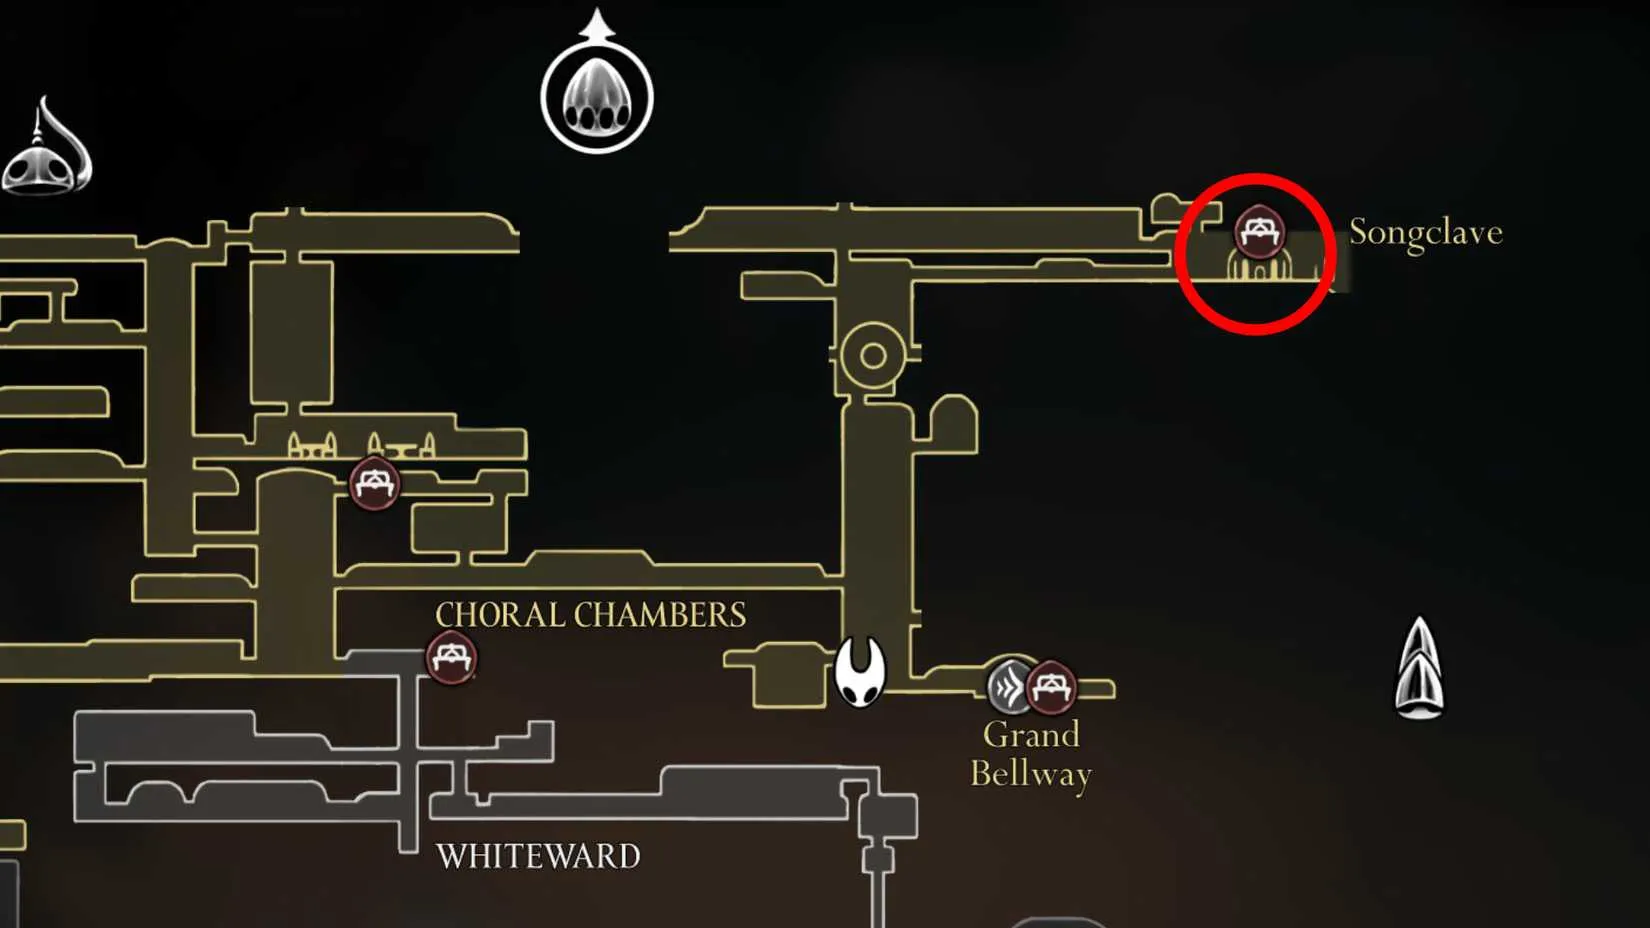
⚔️ What Fine Pins Are and Who Drops Them
Fine Pins are thin, silver-colored items, and they are not lying around in chests or hidden in side rooms. Instead, they drop from two enemy types in the Citadel: Reed and Choristor. Both enemies wield these pin-like weapons, which makes them the obvious targets for the Wish. Players who try to search every corner of the Citadel may waste time, because the quest is really about enemy farming rather than exploration. The key is to find a reliable spawn area and settle into a short combat loop.
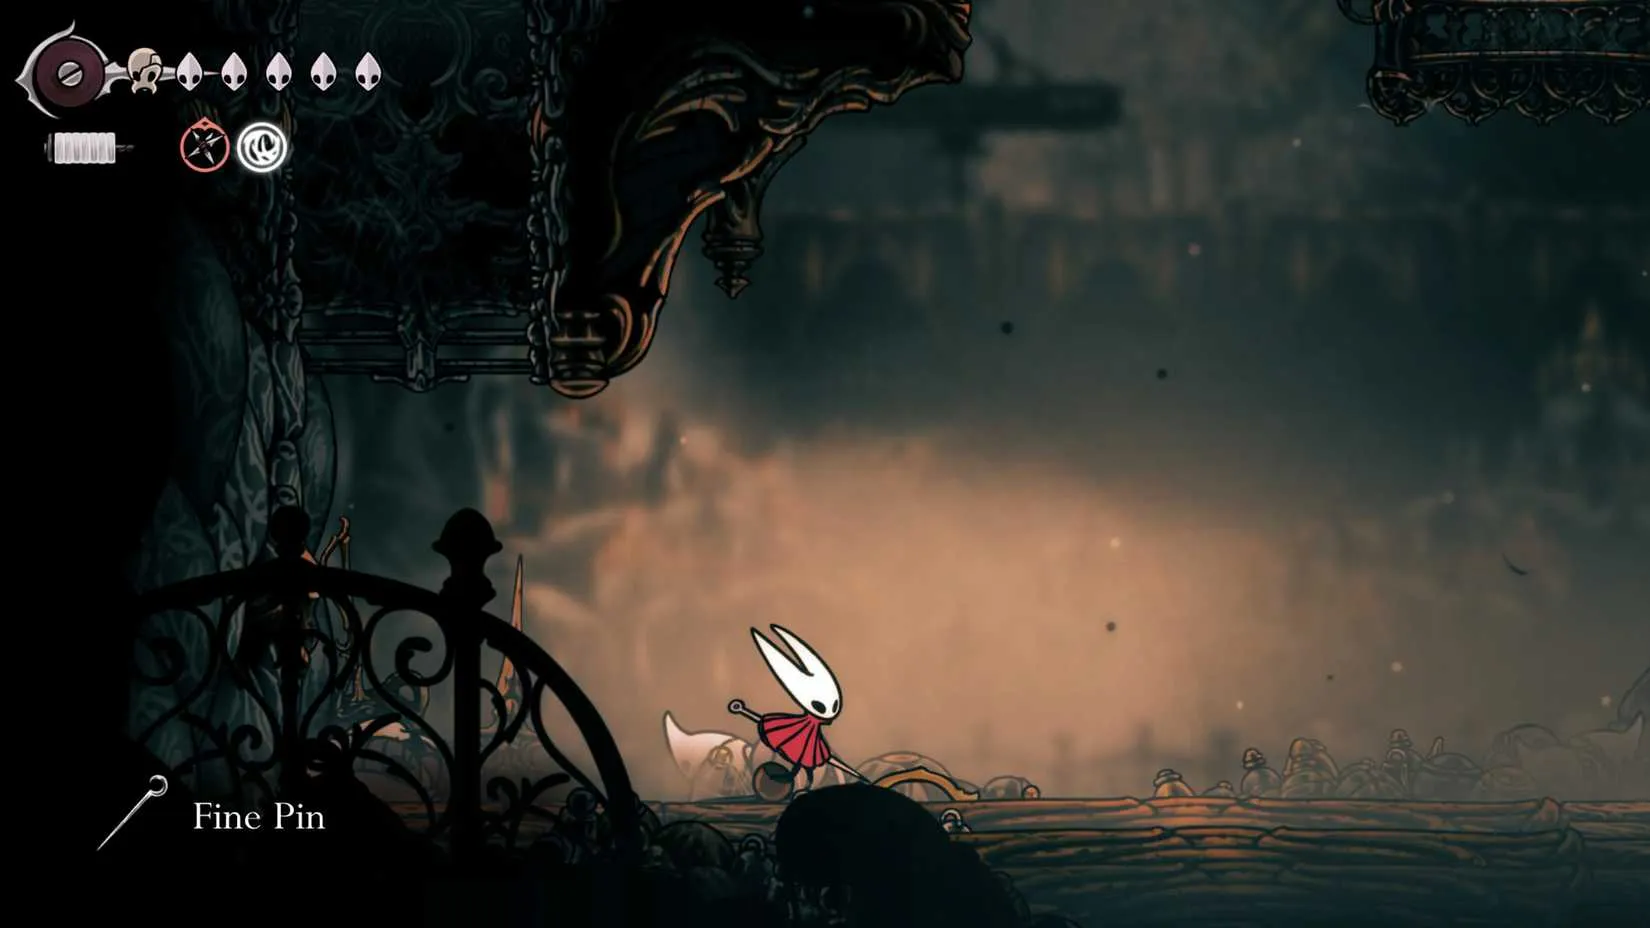
?️ The Best Fine Pin Farming Spot
The most convenient place to farm Fine Pins is the tall room to the left of the Grand Bellway in the Choral Chambers sub-zone of the Citadel. This room is popular because both required enemies are close together. A Choristor spawns on the bottom floor right next to the Bell Beast Station exit, while a Reed enemy flies not too far above. That means players can defeat one enemy, move upward, defeat the second, and then reset the room by leaving and re-entering or by using the nearby station route. The whole loop is short, which matters because Fine Pins are not guaranteed drops.
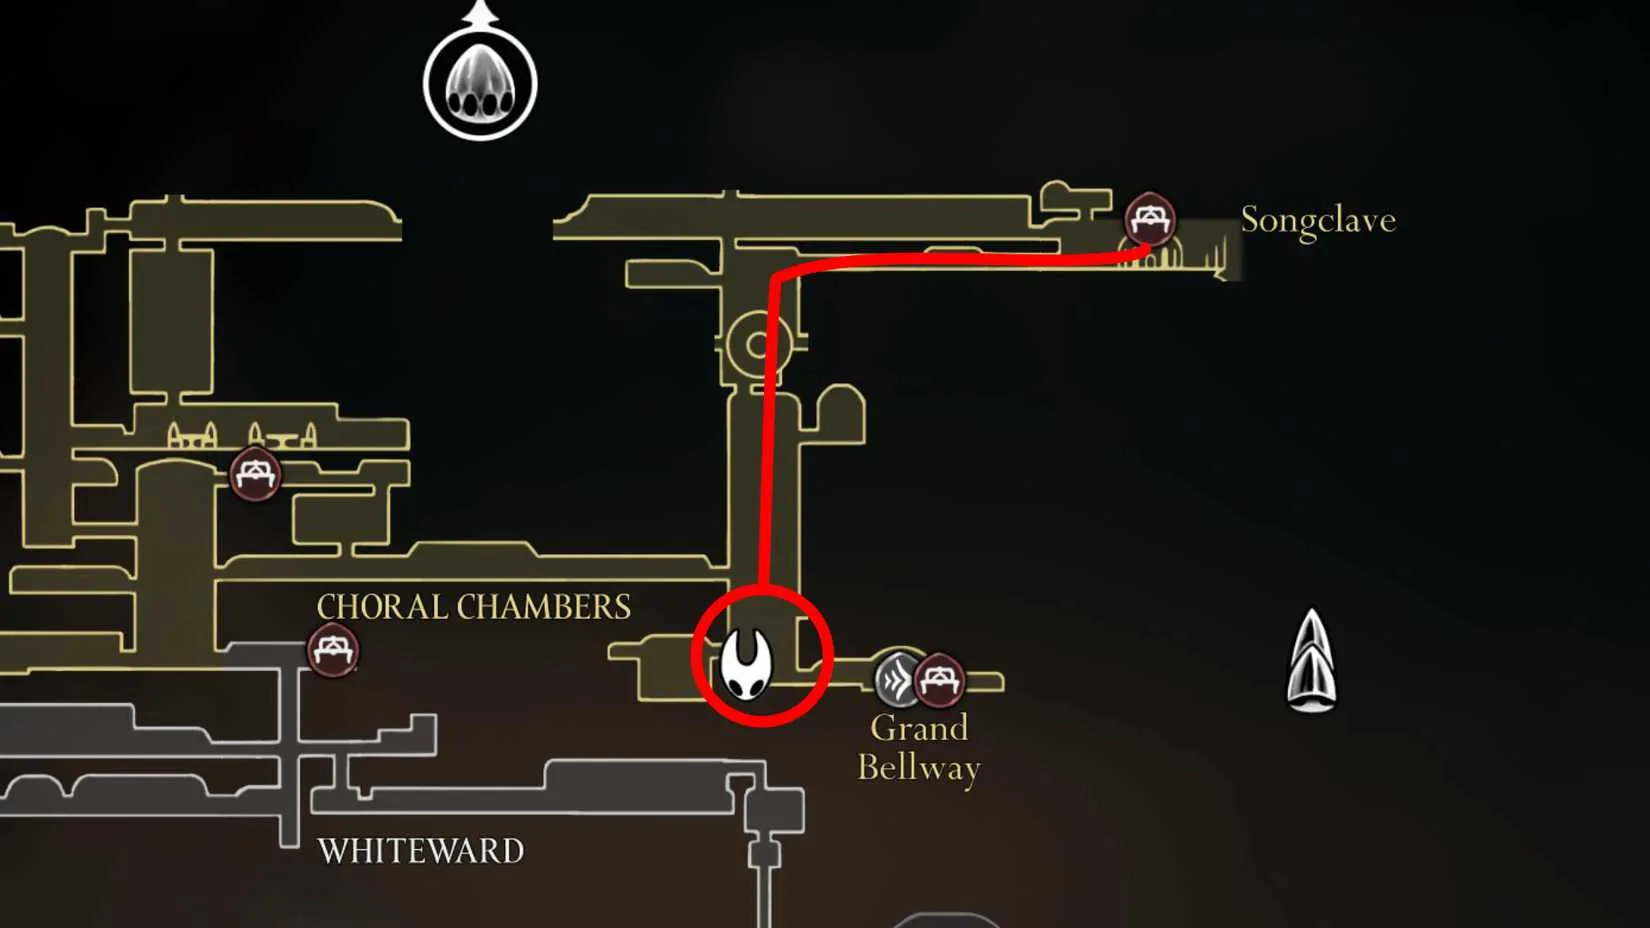
? Drop Rates and Pickup Rules
Here is the part that surprises some players: Fine Pins are not a guaranteed drop. The chance appears to be roughly 50/50, so a player may need to kill more than 10 Reed and Choristor enemies before the Wish is complete. Patience helps, but the nearby spawn point keeps the farm from becoming a long grind. Another important detail is that Fine Pins do not get added to the inventory automatically. Players must stand next to a dropped Fine Pin and interact with it to pick it up. Running through the room too quickly can leave pins on the floor, so it is worth slowing down after each kill to check for the silver item.
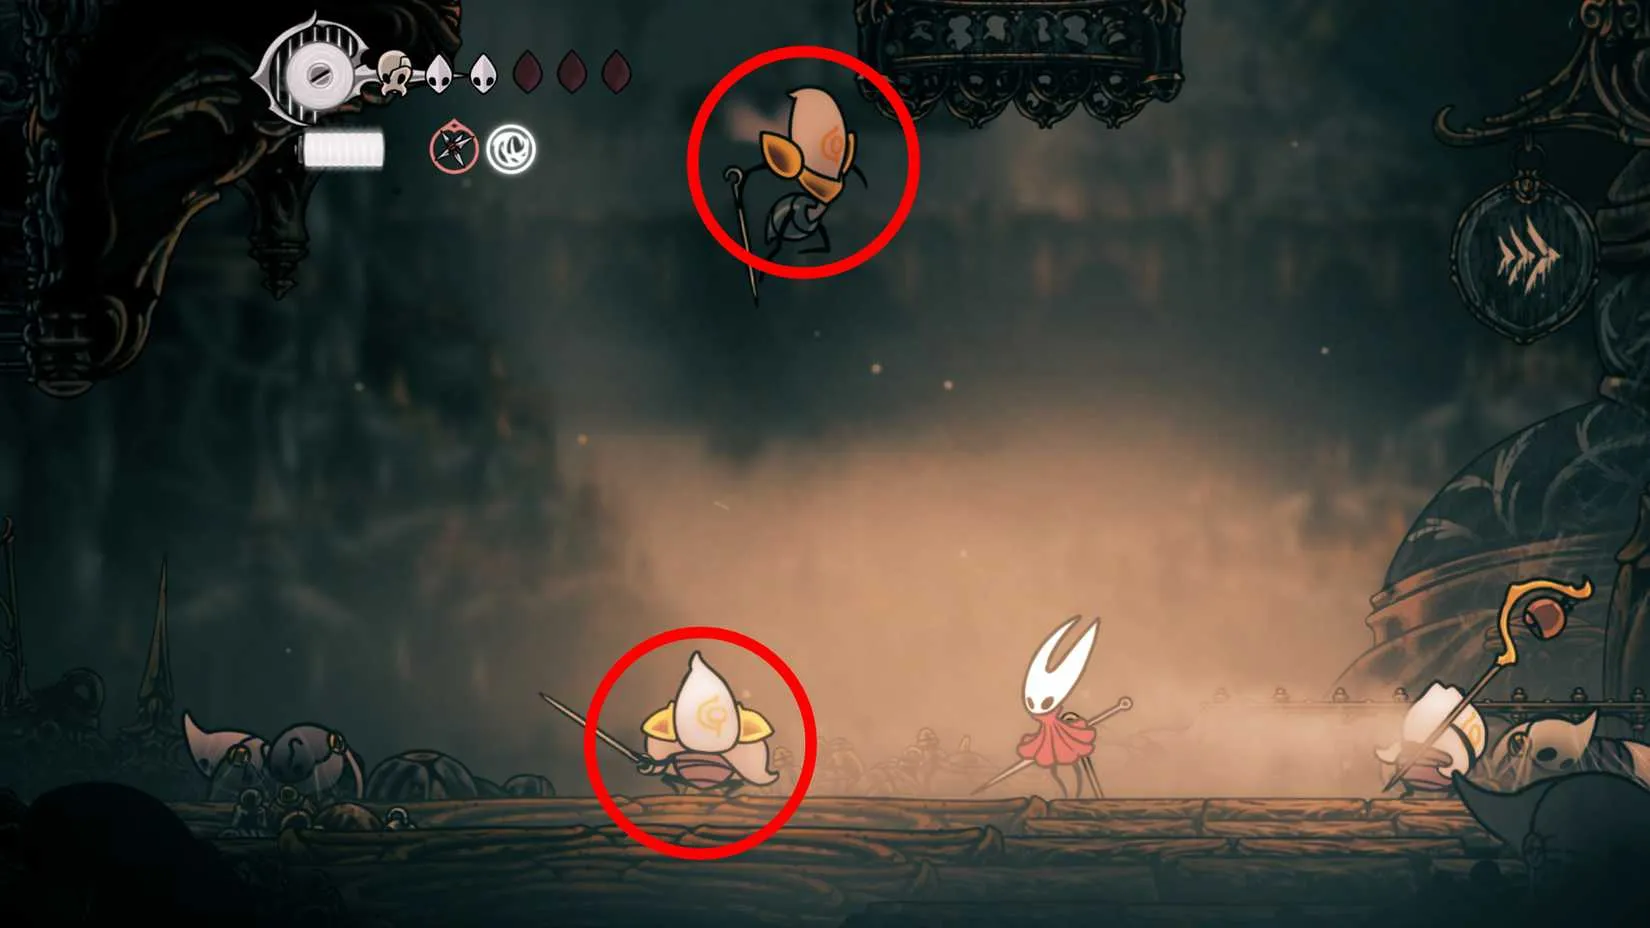
A few practical habits make the farm smoother:
? Defeat the bottom Choristor first, then move up for the Reed.
? Check the floor after every kill instead of assuming the drop was collected.
? Reset the room often; the enemies are close enough that long detours are unnecessary.
?️ Use quick area attacks or ranged options if the flying Reed is annoying to chase.
? Expect a few extra kills; 10 pins does not always mean 10 enemies.
? Turning In the Wish and Claiming the Reward
After collecting the tenth Fine Pin, players should return to Songclave and interact with the Wishwell. The Wish Fulfilled screen will appear, and Hornet receives a Heavy Rosary Necklace. This item is more than a trophy. It can be broken to receive 220 Rosaries instantly, which is a solid payout for a relatively short farming session. As an inventory item, the Heavy Rosary Necklace is also safe: it will not be lost upon death. That makes it a flexible reward for players who want to save it for a shopping trip or break it immediately when currency is tight.

? Is the Fine Pins Wish Worth Doing?
As of 2026, the Fine Pins Wish remains a straightforward Act 2 task with a clean route and a useful reward. It is not the most dramatic quest in Silksong, and the random drop rate means it can take a little longer than expected, but the Choral Chambers farming spot keeps the downtime low. Players who are already exploring the Citadel can fold this Wish into their route without much trouble. For anyone short on Rosaries, the Heavy Rosary Necklace alone makes the detour worthwhile. It is a small chore, but a profitable one, and that is exactly the kind of quest many Silksong players appreciate.
For players who like to make every reward count, that same bargain-hunting mindset can carry over to real-world gaming purchases. Whether you are looking for a new controller, a comfortable headset for long farming sessions, or Silksong-themed merchandise, it is worth checking multiple retailers before committing. DealNest gathers deals in one place so you can compare prices here and avoid overpaying for the gear that supports your play.
? Quest Snapshot
Quest detail
What players need to know
Location
Songclave, in the top-right area of the Citadel
Unlock requirement
Beat the Last Judge and progress into Act 2
Quest source
The Wishwall to the right of the Caretaker
Objective
Collect 10 Fine Pins
Main enemies
Reed and Choristor
Reward
Heavy Rosary Necklace, worth 220 Rosaries when broken
? How to Start the Fine Pins Wish
Players cannot simply walk into Songclave at the start of the game. The area becomes available after beating the Last Judge and moving into Act 2. Once they reach the correct unnamed location in the top-right of the Citadel, they need to ring the Grand Bell. When they return later, that spot has transformed into Songclave. From there, the Fine Pins Wish is waiting on the Wishwall that appears to the right of the Caretaker. It is a standard collection request, so there is no long dialogue chain or hidden prerequisite beyond reaching the area and interacting with the board.
⚔️ What Fine Pins Are and Who Drops Them
Fine Pins are thin, silver-colored items, and they are not lying around in chests or hidden in side rooms. Instead, they drop from two enemy types in the Citadel: Reed and Choristor. Both enemies wield these pin-like weapons, which makes them the obvious targets for the Wish. Players who try to search every corner of the Citadel may waste time, because the quest is really about enemy farming rather than exploration. The key is to find a reliable spawn area and settle into a short combat loop.
?️ The Best Fine Pin Farming Spot
The most convenient place to farm Fine Pins is the tall room to the left of the Grand Bellway in the Choral Chambers sub-zone of the Citadel. This room is popular because both required enemies are close together. A Choristor spawns on the bottom floor right next to the Bell Beast Station exit, while a Reed enemy flies not too far above. That means players can defeat one enemy, move upward, defeat the second, and then reset the room by leaving and re-entering or by using the nearby station route. The whole loop is short, which matters because Fine Pins are not guaranteed drops.
? Drop Rates and Pickup Rules
Here is the part that surprises some players: Fine Pins are not a guaranteed drop. The chance appears to be roughly 50/50, so a player may need to kill more than 10 Reed and Choristor enemies before the Wish is complete. Patience helps, but the nearby spawn point keeps the farm from becoming a long grind. Another important detail is that Fine Pins do not get added to the inventory automatically. Players must stand next to a dropped Fine Pin and interact with it to pick it up. Running through the room too quickly can leave pins on the floor, so it is worth slowing down after each kill to check for the silver item.
A few practical habits make the farm smoother:
? Defeat the bottom Choristor first, then move up for the Reed.
? Check the floor after every kill instead of assuming the drop was collected.
? Reset the room often; the enemies are close enough that long detours are unnecessary.
?️ Use quick area attacks or ranged options if the flying Reed is annoying to chase.
? Expect a few extra kills; 10 pins does not always mean 10 enemies.
? Turning In the Wish and Claiming the Reward
After collecting the tenth Fine Pin, players should return to Songclave and interact with the Wishwell. The Wish Fulfilled screen will appear, and Hornet receives a Heavy Rosary Necklace. This item is more than a trophy. It can be broken to receive 220 Rosaries instantly, which is a solid payout for a relatively short farming session. As an inventory item, the Heavy Rosary Necklace is also safe: it will not be lost upon death. That makes it a flexible reward for players who want to save it for a shopping trip or break it immediately when currency is tight.
? Is the Fine Pins Wish Worth Doing?
As of 2026, the Fine Pins Wish remains a straightforward Act 2 task with a clean route and a useful reward. It is not the most dramatic quest in Silksong, and the random drop rate means it can take a little longer than expected, but the Choral Chambers farming spot keeps the downtime low. Players who are already exploring the Citadel can fold this Wish into their route without much trouble. For anyone short on Rosaries, the Heavy Rosary Necklace alone makes the detour worthwhile. It is a small chore, but a profitable one, and that is exactly the kind of quest many Silksong players appreciate.
For players who like to make every reward count, that same bargain-hunting mindset can carry over to real-world gaming purchases. Whether you are looking for a new controller, a comfortable headset for long farming sessions, or Silksong-themed merchandise, it is worth checking multiple retailers before committing. DealNest gathers deals in one place so you can compare prices here and avoid overpaying for the gear that supports your play.
No Replies
