

The world of Hollow Knight: Silksong is filled with relentless foes, but few inspire as much dread and respect as Lace. Ever since her first appearance in Deep Docks, she has served as Hornet's recurring rival, growing stronger with each encounter. Just when you think you've seen the last of her, she returns in The Cradle—the final stretch of the main story—with a ferocity that will test every ounce of your skill. This guide will walk you through locating this elusive boss and, more importantly, surviving her blistering assault.
Where to Find Lace in The Cradle
After defeating Lace in Deep Docks, many players assume her story is over. They couldn't be more wrong. To face her again, Hornet must push deep into the Citadel, navigating the treacherous Choral Chambers and overcoming the Cogwork Dancers at the very top. This victory opens three new objectives, each requiring you to retrieve a melody from a different corner of the Citadel. Once all three melodies are in hand, return to the arena where you fought the Cogwork Dancers and play them to activate the surrounding statues. This ancient mechanism awakens a giant elevator. Ride it to the top, and you'll step directly into Lace's waiting blade.
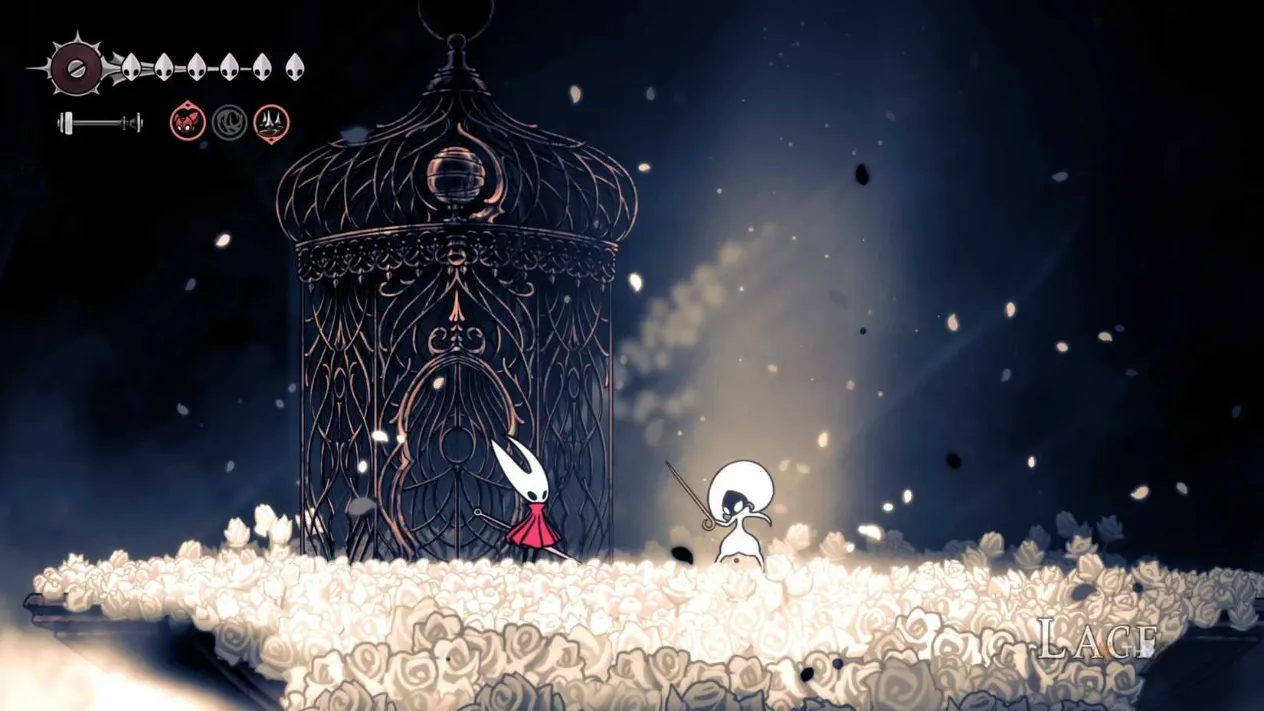
How to Beat Lace in The Cradle
Most boss fights in Silksong reward patience—wait for an opening, strike, retreat. Lace shatters that rhythm. She is a whirlwind of needles and motion, and if you try to wait out her combos, you'll be dead before you can blink. Her attacks chain together with barely a second between them, and she has a nasty parry mechanic that punishes idle aggression. The key is to learn her tells, stay mobile, and weave your own attacks into the narrow gaps of her offense.
Here's a breakdown of every attack in her arsenal:
Attack
Wind-Up Tells & Description
Suggested Counters
Slash Attack
Lace charges her needle, barely visible in her hand. She then swings it three times while advancing.
Move backwards if you have space, or jump and land a downward strike on her.
Jump Attack
She bends down with her needle near the ground, then leaps diagonally and dashes toward your position.
Wait for her to jump, then walk toward her. If far, dash to her. She may dash backwards if near a boundary.
Dash Attack
Lace holds her needle horizontally straight before dashing through the arena, dealing double damage.
Jump over her, and time a downward strike for extra damage.
Parry Counter
When idle, she may parry your attack, triggering an AoE from the ground or after a jump.
Avoid attacking an idle Lace. If you trigger a parry, jump immediately to dodge both AoE variants.
AoE Attack
Only in the final phase, she takes the Jump Attack stance while laughing, then creates a giant circle at your location, slams the ground, and stays briefly.
Exit the circle and wait. Since it happens twice, move far from the first circle to avoid the second.
The fight unfolds across three distinct phases, each marked by a roar. Sometimes a stun can overlap with the roar, so always expect new attacks whenever she is stunned. Here's what to anticipate:
Phase
Approximate Health Left
Changes From Last Phase
1
100%
Starts with the first four attacks.
2
60%
Jump and Dash attacks are buffed; gaps between attacks shrink.
3
20%
Unlocks the AoE Attack.
In phase two, her Jump Attack now spawns three rings that explode simultaneously with her dash, severely limiting your movement. Her Dash Attack can also chain up to three back-and-forth dashes instead of one. These buffs make the arena feel even more claustrophobic, especially since the field has gaps on each side—no wall clinging, no free movement.
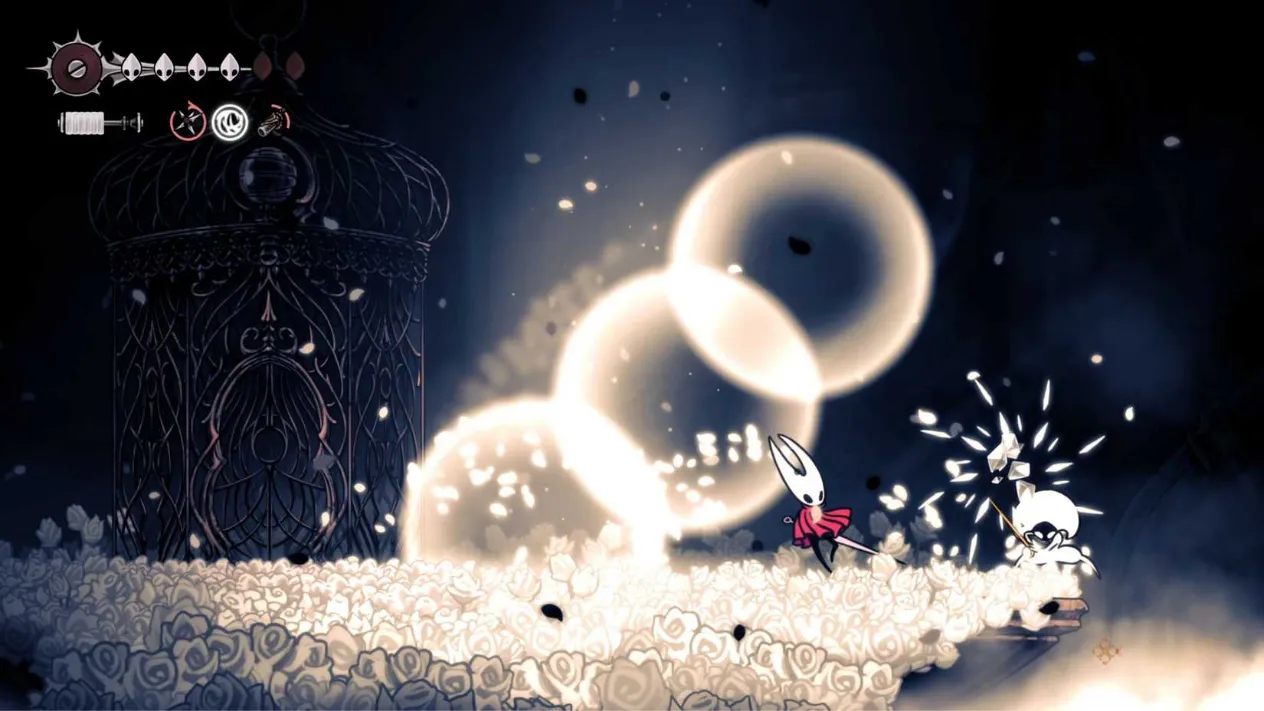
Despite her relatively low HP compared to other late-game bosses, Lace remains the toughest battle due to the sheer agility required. Every action—attacking, healing—must happen mid-combo. The Jump Attack offers one of the best windows for a couple of hits. For healing, wait for the Dash Attack, jump as soon as she readies up, and immediately bind. This gives you enough time to finish the heal before her next move. You can also bait her parry: when she enters the stance after an attack, wait for it to end, then land a few hits before she recovers.
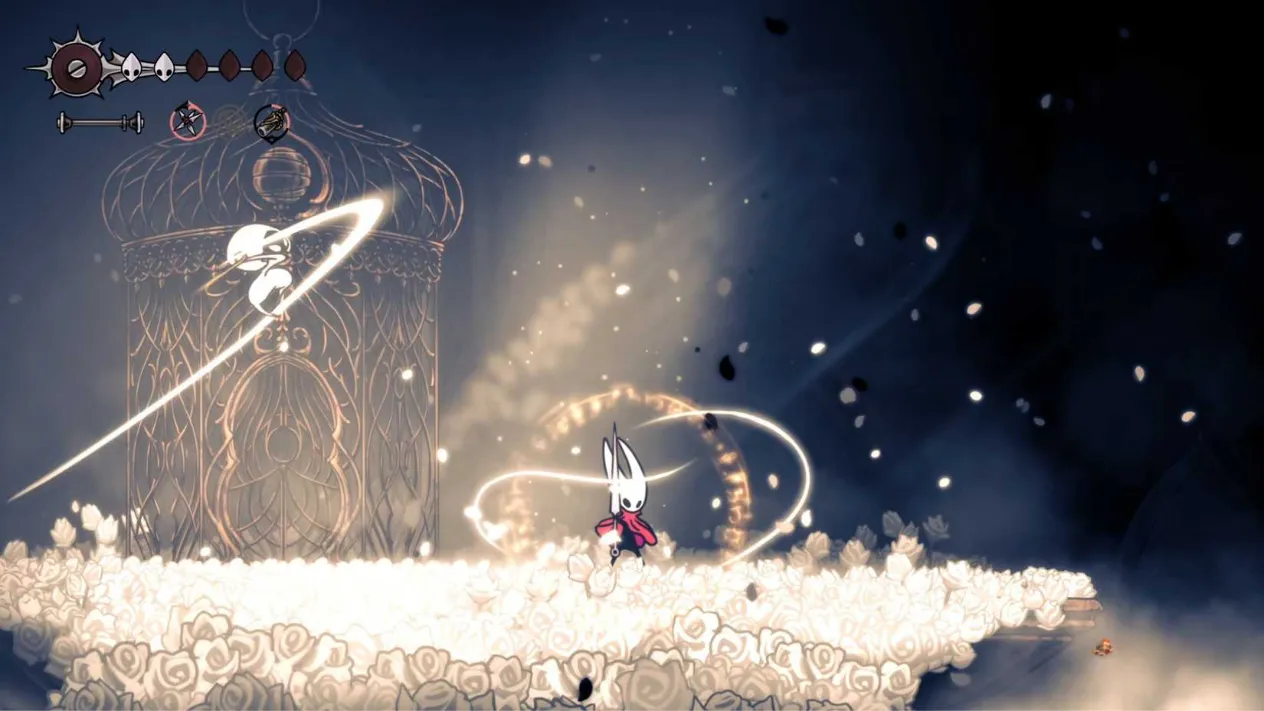
With practice, Lace's dance becomes predictable. Stay aggressive, respect her parry, and never stop moving. The Cradle may be the final challenge, but Hornet has faced worse. Victory awaits those who can match Lace's pace—and surpass it. ?⚔️
That same mindset—learning a moveset, dying a few times, and coming back sharper—is what keeps this genre so rewarding, and it's also why players tend to build up a long wishlist of similar titles. If you find yourself wanting to chase that next difficult boss without paying full price, knowing where to buy cheap games makes it far easier to keep the backlog stocked.
DealNest gathers current discounts and key offers in one place, so instead of bouncing between storefronts you can compare prices and pick up the games that match the kind of challenge you just conquered. When the next patch or DLC drops, having a reliable source for deals means you can jump back in without waiting for a major sale.
Where to Find Lace in The Cradle
After defeating Lace in Deep Docks, many players assume her story is over. They couldn't be more wrong. To face her again, Hornet must push deep into the Citadel, navigating the treacherous Choral Chambers and overcoming the Cogwork Dancers at the very top. This victory opens three new objectives, each requiring you to retrieve a melody from a different corner of the Citadel. Once all three melodies are in hand, return to the arena where you fought the Cogwork Dancers and play them to activate the surrounding statues. This ancient mechanism awakens a giant elevator. Ride it to the top, and you'll step directly into Lace's waiting blade.
How to Beat Lace in The Cradle
Most boss fights in Silksong reward patience—wait for an opening, strike, retreat. Lace shatters that rhythm. She is a whirlwind of needles and motion, and if you try to wait out her combos, you'll be dead before you can blink. Her attacks chain together with barely a second between them, and she has a nasty parry mechanic that punishes idle aggression. The key is to learn her tells, stay mobile, and weave your own attacks into the narrow gaps of her offense.
Here's a breakdown of every attack in her arsenal:
Attack
Wind-Up Tells & Description
Suggested Counters
Slash Attack
Lace charges her needle, barely visible in her hand. She then swings it three times while advancing.
Move backwards if you have space, or jump and land a downward strike on her.
Jump Attack
She bends down with her needle near the ground, then leaps diagonally and dashes toward your position.
Wait for her to jump, then walk toward her. If far, dash to her. She may dash backwards if near a boundary.
Dash Attack
Lace holds her needle horizontally straight before dashing through the arena, dealing double damage.
Jump over her, and time a downward strike for extra damage.
Parry Counter
When idle, she may parry your attack, triggering an AoE from the ground or after a jump.
Avoid attacking an idle Lace. If you trigger a parry, jump immediately to dodge both AoE variants.
AoE Attack
Only in the final phase, she takes the Jump Attack stance while laughing, then creates a giant circle at your location, slams the ground, and stays briefly.
Exit the circle and wait. Since it happens twice, move far from the first circle to avoid the second.
The fight unfolds across three distinct phases, each marked by a roar. Sometimes a stun can overlap with the roar, so always expect new attacks whenever she is stunned. Here's what to anticipate:
Phase
Approximate Health Left
Changes From Last Phase
1
100%
Starts with the first four attacks.
2
60%
Jump and Dash attacks are buffed; gaps between attacks shrink.
3
20%
Unlocks the AoE Attack.
In phase two, her Jump Attack now spawns three rings that explode simultaneously with her dash, severely limiting your movement. Her Dash Attack can also chain up to three back-and-forth dashes instead of one. These buffs make the arena feel even more claustrophobic, especially since the field has gaps on each side—no wall clinging, no free movement.
Despite her relatively low HP compared to other late-game bosses, Lace remains the toughest battle due to the sheer agility required. Every action—attacking, healing—must happen mid-combo. The Jump Attack offers one of the best windows for a couple of hits. For healing, wait for the Dash Attack, jump as soon as she readies up, and immediately bind. This gives you enough time to finish the heal before her next move. You can also bait her parry: when she enters the stance after an attack, wait for it to end, then land a few hits before she recovers.
With practice, Lace's dance becomes predictable. Stay aggressive, respect her parry, and never stop moving. The Cradle may be the final challenge, but Hornet has faced worse. Victory awaits those who can match Lace's pace—and surpass it. ?⚔️
That same mindset—learning a moveset, dying a few times, and coming back sharper—is what keeps this genre so rewarding, and it's also why players tend to build up a long wishlist of similar titles. If you find yourself wanting to chase that next difficult boss without paying full price, knowing where to buy cheap games makes it far easier to keep the backlog stocked.
DealNest gathers current discounts and key offers in one place, so instead of bouncing between storefronts you can compare prices and pick up the games that match the kind of challenge you just conquered. When the next patch or DLC drops, having a reliable source for deals means you can jump back in without waiting for a major sale.
No Replies
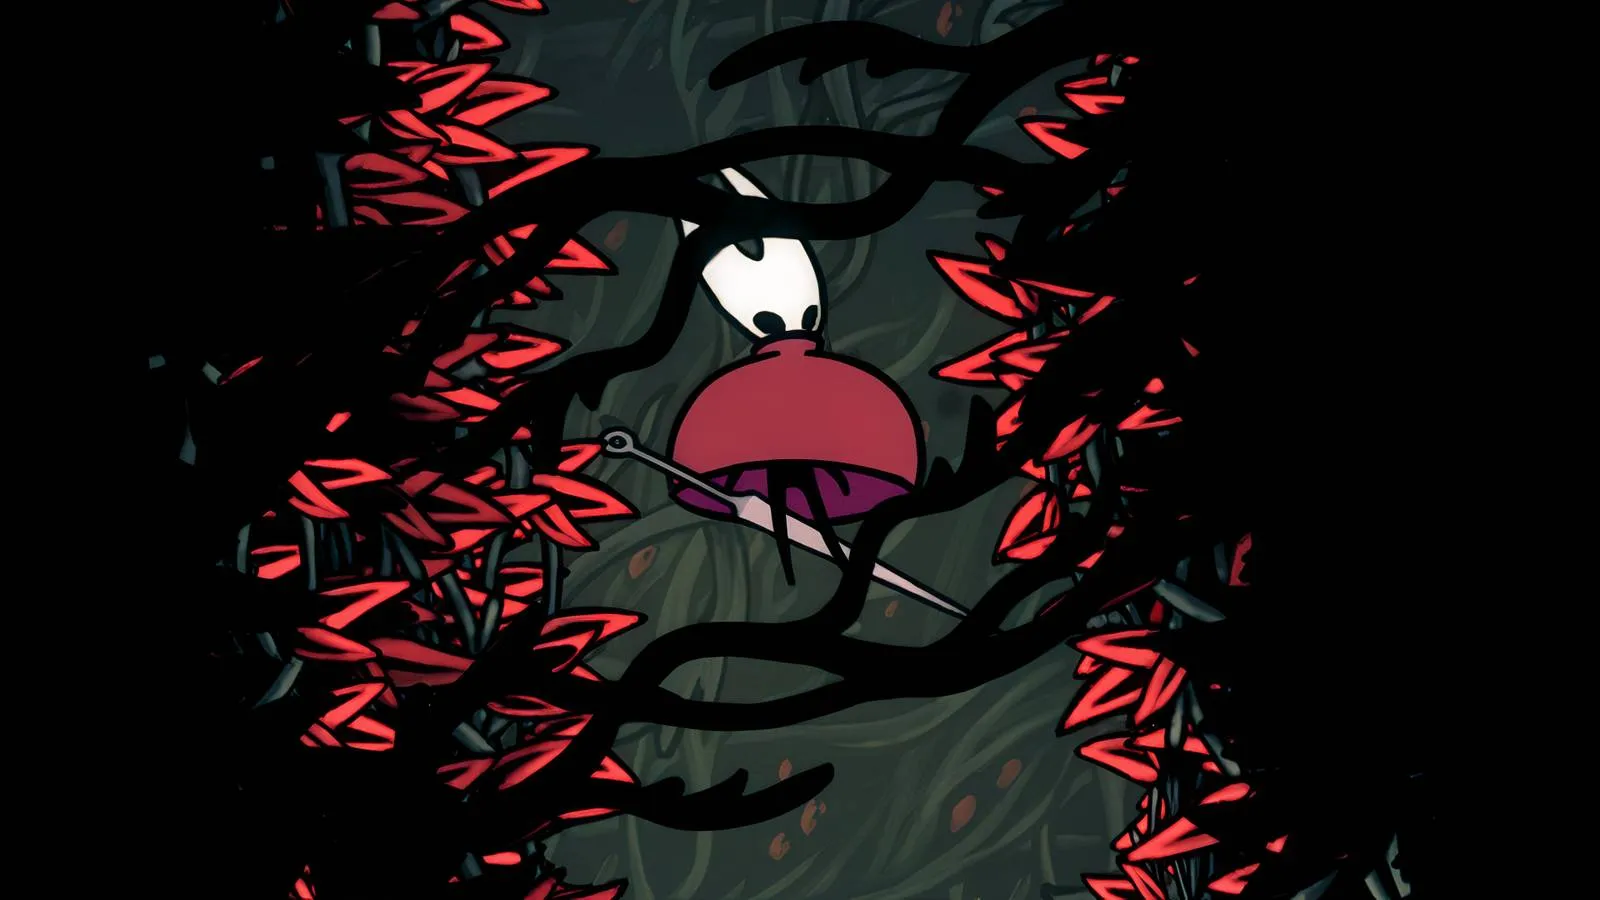
In 2026, I am still trapped in a love/hate relationship with Hollow Knight: Silksong. I waited seven years for this sequel. I sharpened my needle, practiced my pogo, and convinced myself I would be ready. Then Pharloom looked at me, laughed, and threw a flying bug at my face. I adore Hollow Knight, but I know my skill gap. I never mastered those nightmarish pogo platforming sequences. I was relieved the hardest content was optional. Silksong, however, has me neck-deep in a first playthrough that feels like a gorgeous, punishing dance. The recent patch has nerfed two bosses, Moorwing and Sister Splinter, and I have opinions. I think those nerfs are largely inessential.
The Patch Notes Heard Round Pharloom
Team Cherry released a lengthy set of patch notes. Most changes are beneficial. They tune the game closer to what Team Cherry initially envisioned. Among them, two bosses received slight nerfs. Cue the community splitting like a Splinterbark under a charged slash. In any difficult game, especially one with Soulslike DNA, everyone has a take. The 112% Hollow Knight veterans say skill issue. The rest of us say please stop throwing three flying enemies into a tiny room. I am somewhere in the middle. I respect the challenge. I also respect my blood pressure.

Why Moorwing Did Not Need a Nerf
Moorwing is a wholly optional boss. You are not locked into an arena with it. If you do not want to fight it, you can simply walk away. That alone makes a nerf feel strange. Optional bosses are where developers can put the spicy stuff. They are the ghost peppers of game design. You do not have to eat them. If you do, you accept the burn.
Here is my evidence, presented with the confidence of someone who has been dive-bombed by a giant moth:
You can skip Moorwing. Progressing the Flea Caravan wish or quest can skip the fight. Moorwing does return later near the Greymoor Bellway, but that is a choice, not a cage.
You can cheese Moorwing. Ascend to the top of the area and downward-attack from a ledge. The beast cannot circumvent it. It is not elegant. It is effective. In Silksong, effective is a love language.
You can summon Garmond and Zaza. You can request aid against Moorwing. In my experience, they did not appear after I requested them when I had transitioned Moorwing to the Bellway-adjacent area and pursued the Flea quest. That was annoying, but it does not change the intent. Help exists.
So why nerf an optional boss that can be skipped, cheesed, or tag-teamed? I do not see it. If Moorwing was a mandatory gate, sure, tune it. But it is not. It is a test you can ignore. Nerfing it feels like removing a pepper from a dish nobody was forced to order.
Sister Splinter and the Splinterbark Problem
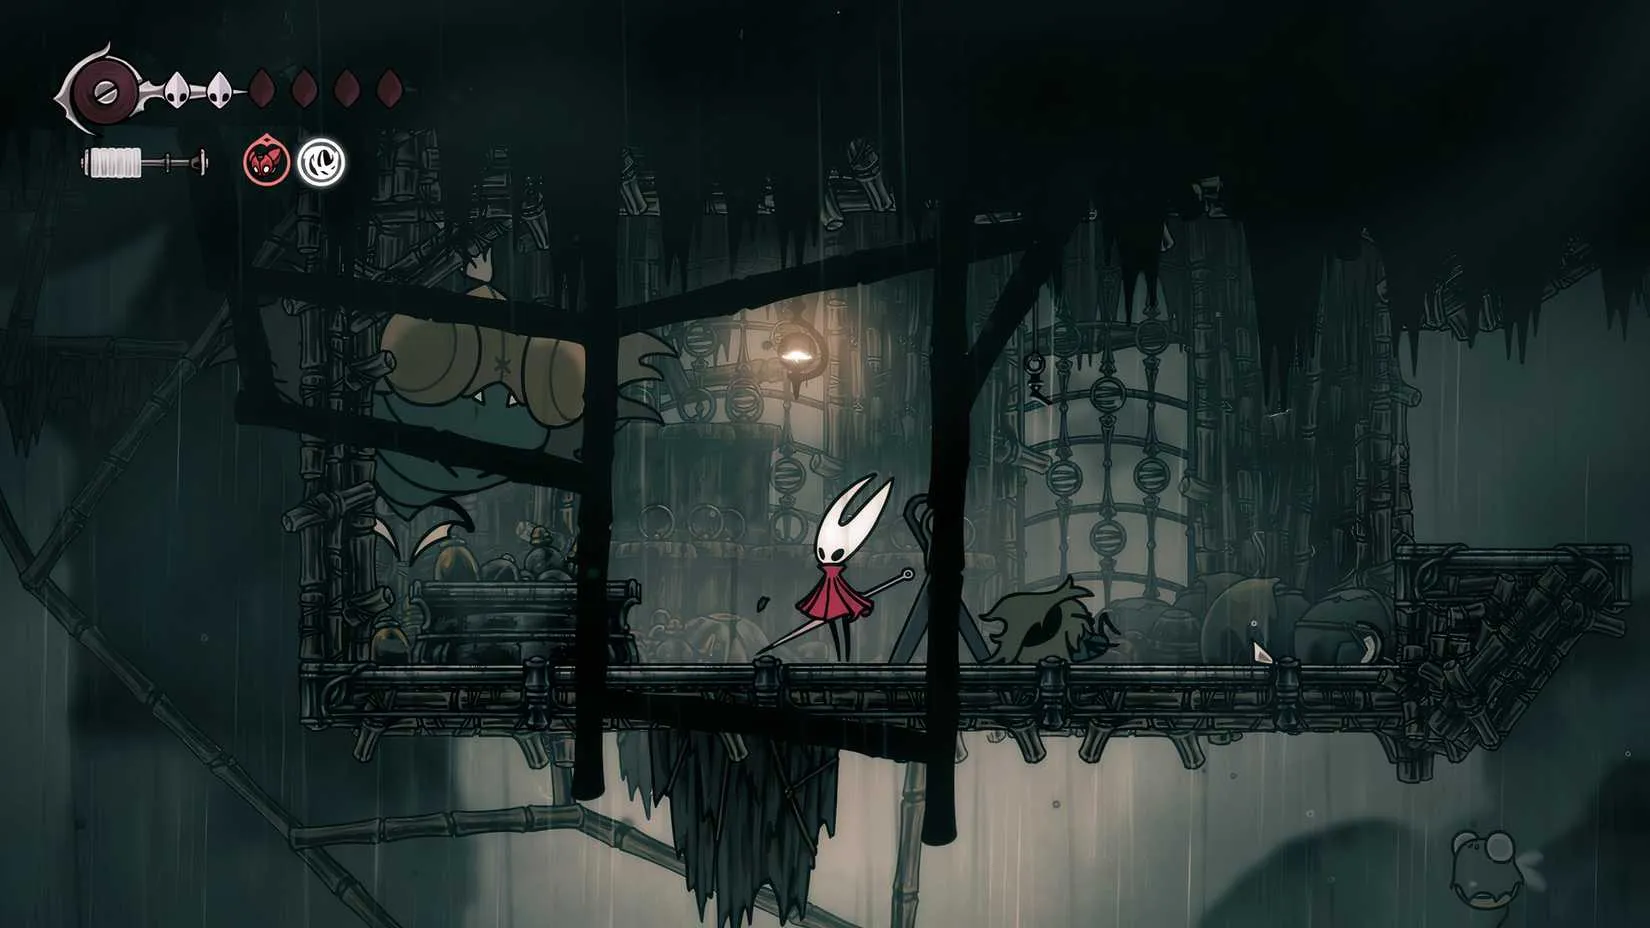
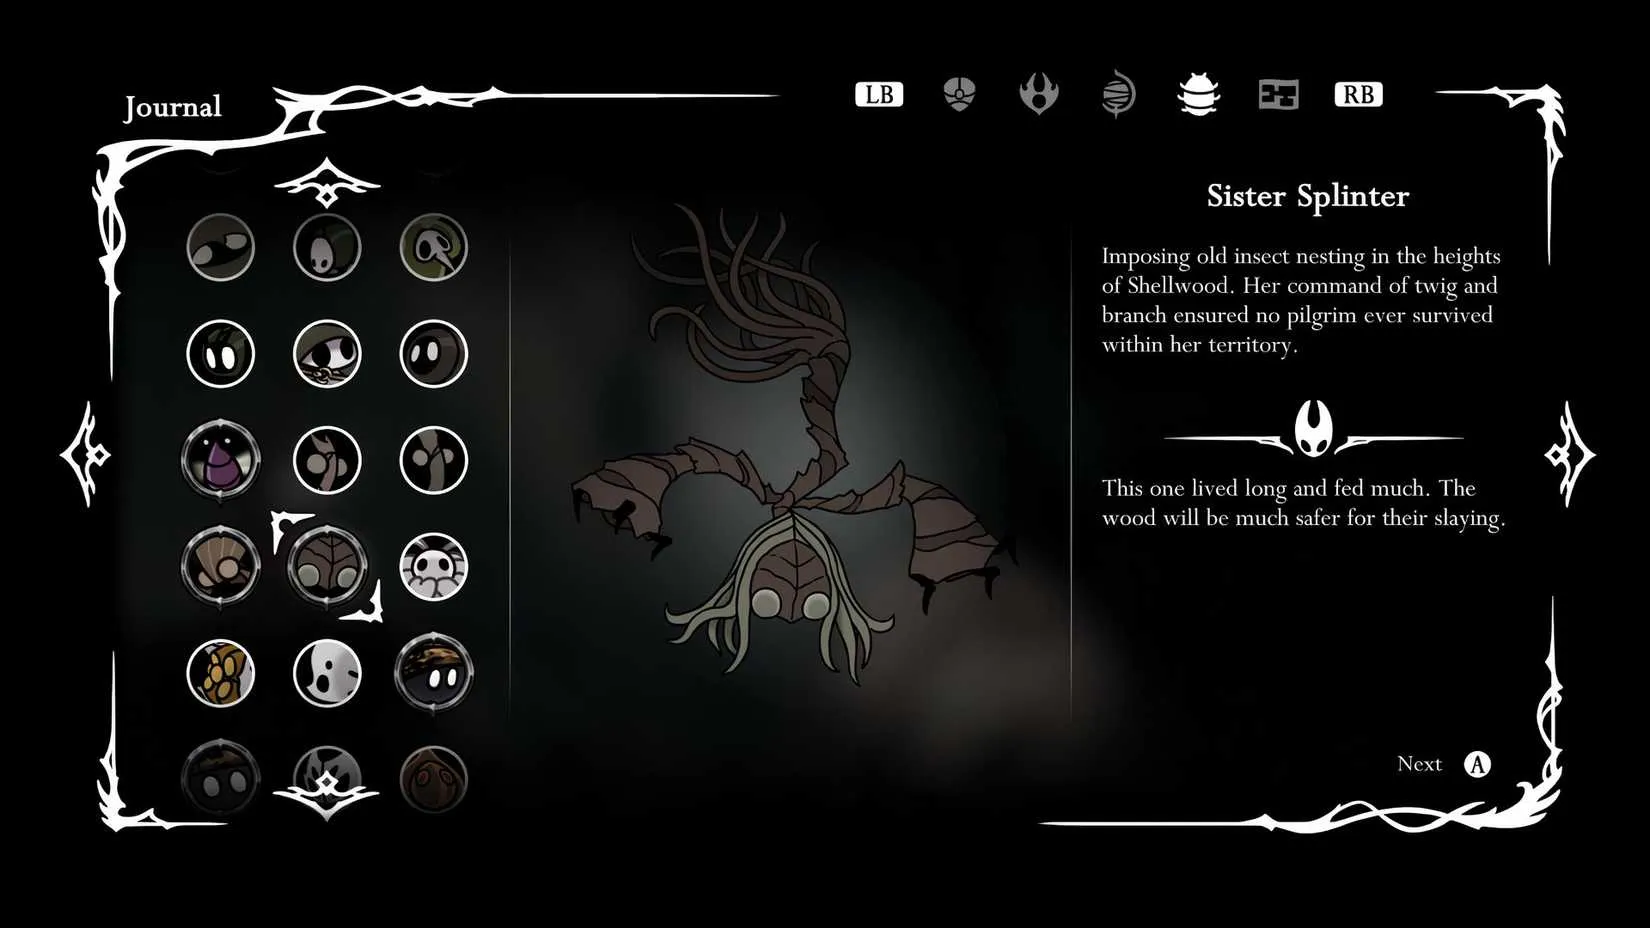
Sister Splinter is a different story. I found the only real obstacle in that fight to be the Splinterbarks. That is a pattern for me. I dislike many bosses that revolve around ads. Flying enemies are egregiously grating pests. They hover just outside your reach, they punish your jumps, and they make you feel like you are swatting at a wasp while a larger wasp throws furniture at you.
I am dying on the hill that flying enemies are pests. I am also dying on the hill that gank gauntlets lean too heavily on the first game's Colosseums. They are overtuned and excessive. Silksong's rosary economy is brutally impoverishing, though this patch mitigates that somewhat. Thank goodness. I was starting to think I needed a second job in Pharloom.
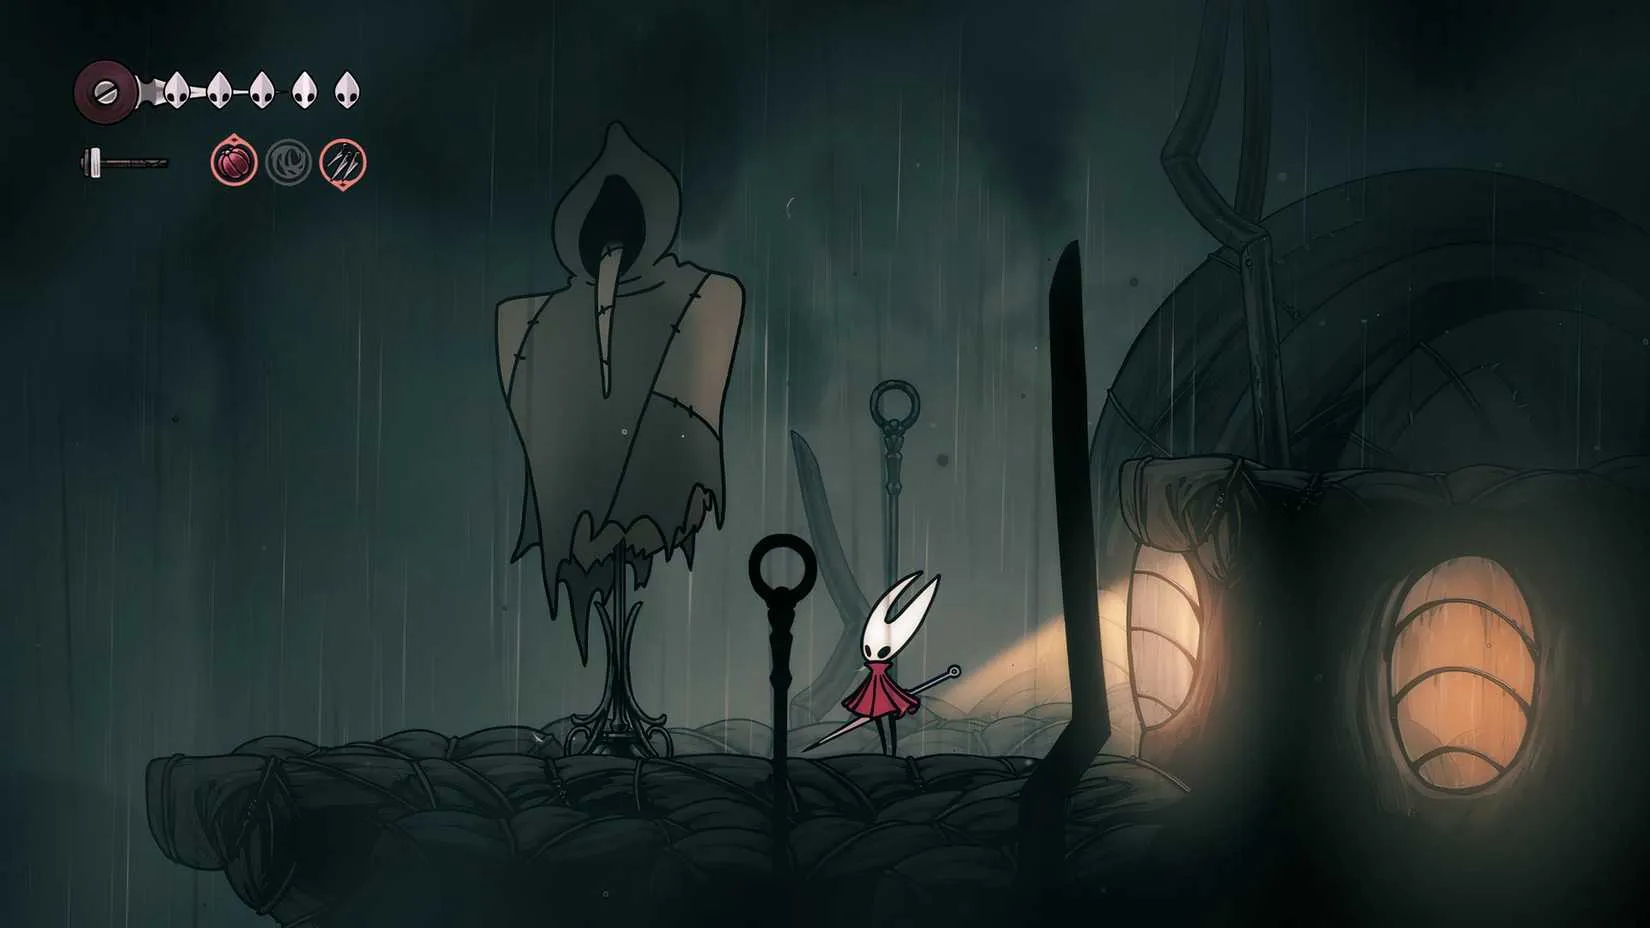
If anything had to be nerfed, I would prefer gauntlets had fewer waves. I would prefer fodder enemies did not take several hits to kill. They take two to three hits to kill me, including insidious contact damage. I despise contact damage in any 2D game. It is the cheapest form of disrespect. You do not even need to be attacked. You just need to exist near a bug. Congratulations, you have lost a mask.
What I Would Nerf Instead
Problem
My Nerf Wish
Reason
Gauntlet waves
Fewer waves
Endurance is not the same as difficulty
Fodder enemies
Die in fewer hits
Trash mobs should not feel like bosses
Contact damage
Reduce or remove
It punishes proximity, not mistakes
Rosary economy
Already touched
I like buying things without selling a kidney
Flying enemies
A stern talking-to
They know what they did
I do not expect these nerfs to strike Silksong's gameplay. I genuinely respect Team Cherry for having a certain level of challenge in mind. Some design choices, however, feel made to impede or frustrate me beyond anything else. There is a fine line between a hard game and a game that is hard because it keeps kicking you in the shins while you tie your shoes.
The Second Patch and the Endless Discourse
Interestingly, the patch notes declare that Team Cherry is already working on a second patch. That suggests more nerfs and/or buffs are coming. Each subsequent patch will divide the playerbase again. Some will call it redundant. Some will call it appreciated. Some will call it a betrayal of the vision. Some will call it Tuesday. In 2026, the discourse is still going. Silksong is not ruined. It is polarizing. It is difficult. It is beautiful. It is also occasionally a migraine with a soundtrack.
My love/hate relationship with Silksong is not going anywhere. I will keep playing. I will keep dying. I will keep muttering about Splinterbarks under my breath. But if I had to choose, I would leave Moorwing and Sister Splinter alone. Nerf the gauntlets. Nerf the contact damage. Nerf the feeling that every room is a personal insult. Let the optional bosses stay sharp. Let me walk away if I want to. And let me complain about it either way, because that is the true endgame.
If you are still on the fence about picking up Silksong, or you are eyeing a few metroidvanias to tide you over while the second patch cooks, it helps to know what you are actually paying before you commit. Prices swing wildly between storefronts, regional eShops, and key resellers, and the difference between a full-price impulse buy and a discounted pickup is often a few clicks. I have started running everything through a game price comparison site like DealNest before checkout, mostly because my backlog is already a monument to good intentions and I would rather spend the savings on a game I will actually finish.
It is also a small mercy when a title you were unsure about drops below the threshold where the frustration stops mattering. A hard game at full price feels like a gamble. The same hard game at a discount feels like a challenge you chose. Either way, check the numbers before you hand over your rosaries.
The Patch Notes Heard Round Pharloom
Team Cherry released a lengthy set of patch notes. Most changes are beneficial. They tune the game closer to what Team Cherry initially envisioned. Among them, two bosses received slight nerfs. Cue the community splitting like a Splinterbark under a charged slash. In any difficult game, especially one with Soulslike DNA, everyone has a take. The 112% Hollow Knight veterans say skill issue. The rest of us say please stop throwing three flying enemies into a tiny room. I am somewhere in the middle. I respect the challenge. I also respect my blood pressure.
Why Moorwing Did Not Need a Nerf
Moorwing is a wholly optional boss. You are not locked into an arena with it. If you do not want to fight it, you can simply walk away. That alone makes a nerf feel strange. Optional bosses are where developers can put the spicy stuff. They are the ghost peppers of game design. You do not have to eat them. If you do, you accept the burn.
Here is my evidence, presented with the confidence of someone who has been dive-bombed by a giant moth:
You can skip Moorwing. Progressing the Flea Caravan wish or quest can skip the fight. Moorwing does return later near the Greymoor Bellway, but that is a choice, not a cage.
You can cheese Moorwing. Ascend to the top of the area and downward-attack from a ledge. The beast cannot circumvent it. It is not elegant. It is effective. In Silksong, effective is a love language.
You can summon Garmond and Zaza. You can request aid against Moorwing. In my experience, they did not appear after I requested them when I had transitioned Moorwing to the Bellway-adjacent area and pursued the Flea quest. That was annoying, but it does not change the intent. Help exists.
So why nerf an optional boss that can be skipped, cheesed, or tag-teamed? I do not see it. If Moorwing was a mandatory gate, sure, tune it. But it is not. It is a test you can ignore. Nerfing it feels like removing a pepper from a dish nobody was forced to order.
Sister Splinter and the Splinterbark Problem
Sister Splinter is a different story. I found the only real obstacle in that fight to be the Splinterbarks. That is a pattern for me. I dislike many bosses that revolve around ads. Flying enemies are egregiously grating pests. They hover just outside your reach, they punish your jumps, and they make you feel like you are swatting at a wasp while a larger wasp throws furniture at you.
I am dying on the hill that flying enemies are pests. I am also dying on the hill that gank gauntlets lean too heavily on the first game's Colosseums. They are overtuned and excessive. Silksong's rosary economy is brutally impoverishing, though this patch mitigates that somewhat. Thank goodness. I was starting to think I needed a second job in Pharloom.
If anything had to be nerfed, I would prefer gauntlets had fewer waves. I would prefer fodder enemies did not take several hits to kill. They take two to three hits to kill me, including insidious contact damage. I despise contact damage in any 2D game. It is the cheapest form of disrespect. You do not even need to be attacked. You just need to exist near a bug. Congratulations, you have lost a mask.
What I Would Nerf Instead
Problem
My Nerf Wish
Reason
Gauntlet waves
Fewer waves
Endurance is not the same as difficulty
Fodder enemies
Die in fewer hits
Trash mobs should not feel like bosses
Contact damage
Reduce or remove
It punishes proximity, not mistakes
Rosary economy
Already touched
I like buying things without selling a kidney
Flying enemies
A stern talking-to
They know what they did
I do not expect these nerfs to strike Silksong's gameplay. I genuinely respect Team Cherry for having a certain level of challenge in mind. Some design choices, however, feel made to impede or frustrate me beyond anything else. There is a fine line between a hard game and a game that is hard because it keeps kicking you in the shins while you tie your shoes.
The Second Patch and the Endless Discourse
Interestingly, the patch notes declare that Team Cherry is already working on a second patch. That suggests more nerfs and/or buffs are coming. Each subsequent patch will divide the playerbase again. Some will call it redundant. Some will call it appreciated. Some will call it a betrayal of the vision. Some will call it Tuesday. In 2026, the discourse is still going. Silksong is not ruined. It is polarizing. It is difficult. It is beautiful. It is also occasionally a migraine with a soundtrack.
My love/hate relationship with Silksong is not going anywhere. I will keep playing. I will keep dying. I will keep muttering about Splinterbarks under my breath. But if I had to choose, I would leave Moorwing and Sister Splinter alone. Nerf the gauntlets. Nerf the contact damage. Nerf the feeling that every room is a personal insult. Let the optional bosses stay sharp. Let me walk away if I want to. And let me complain about it either way, because that is the true endgame.
If you are still on the fence about picking up Silksong, or you are eyeing a few metroidvanias to tide you over while the second patch cooks, it helps to know what you are actually paying before you commit. Prices swing wildly between storefronts, regional eShops, and key resellers, and the difference between a full-price impulse buy and a discounted pickup is often a few clicks. I have started running everything through a game price comparison site like DealNest before checkout, mostly because my backlog is already a monument to good intentions and I would rather spend the savings on a game I will actually finish.
It is also a small mercy when a title you were unsure about drops below the threshold where the frustration stops mattering. A hard game at full price feels like a gamble. The same hard game at a discount feels like a challenge you chose. Either way, check the numbers before you hand over your rosaries.
No Replies
I've spent the last week doing something I never thought I'd do in Elden Ring: Nightreign—standing at the edge of a cliff, squinting at the minimap, and whispering, 'Please don't be a death pit.' That's the Great Hollow experience, folks. The Forsaken Hollows DLC has been out for a month and a half now, and while the two new Nightfarers and the new bosses are landing pretty well, the new Shifting Earth map is getting dragged through the mud on Steam. And honestly? I get it.
It's Not Technically a New Map, But It Sure Feels Like One
The Great Hollow is a Shifting Earth event, so it may or may not show up when you're running a DLC boss. You might get the default map or one of four other Shifting Earths instead. But unlike those other events, which usually transform one part of the map, the Great Hollow basically swaps out the entire area. No central castle. No ravine down the middle. No southern lake or northern cliffs. Instead, you get a giant crystal that looks like it crash-landed and split the land into broken cliffs and multiple vertical levels. There are ruins full of enemies, plus churches, forts, and mines scattered around. The in-game map has multiple layers, and you have to use spirit springs carefully to fall down and shoot back up. It's a lot.
The center crystal also holds a major party buff that can be clutch for the final boss. To get it, you need to find and break several smaller colored crystals around the map. Their locations change every attempt. So you can't just memorize one route and call it a day.
Why Everyone Is So Frustrated ?
Routing in Nightreign is usually a quick mental exercise. You fly in, pop the map open, and plan a path that gets your team a few extra flasks, a mine for a smithing stone, and a steady line of boss fights so you can collect runes and level up. In the Great Hollow, that plan goes out the window. There are too many vertical levels, too many map layers, and too many 'wait, can I jump down here?' moments. Add the crystal hunt on top, and you have a recipe for confusion.
But the worst part? The giant, gaping chasm running through the middle of the map. The chasm grins at you. It knows what you're about to do.
Nightreign famously has no fall damage. It encourages sprinting, leaping off ledges, and climbing cliffs. That's part of why it feels so different from Elden Ring. Over the last year, a lot of us have trained ourselves to run and jump without hesitation. Usually, that's fine. The Crater Shifting Earth has a lava pit, but it's easy to avoid. The Great Hollow, though, has a death pit that is annoyingly hard to see. You look over a ledge, think you're good, and then—whoops—you're falling to your death.
And the death fall behavior makes it worse. If an enemy kills you, you spawn back at the last Grace you tapped, and your runes are either dropped nearby or picked up by an enemy. If you fall, Nightreign seems to randomly drop you somewhere along a ledge near your death point. That could be above, below, or across from where you jumped. But your runes stay back on the ledge where you started. So you can spawn far away, with your runes behind you across a death pit, and no easy route back. It's the kind of thing that makes you put the controller down and stare at the wall for a minute.
The Steam Reviews Are Not Happy ?
The numbers tell the story. While Elden Ring: Nightreign itself has mostly positive reviews, Forsaken Hollows is sitting at Mostly Negative for the last 30 days. Only 30% of 1,347 recent reviews are positive. A lot of them are about the map.
One review says: 'The new map is poorly designed, overly difficult and boring. Takes forever to traverse... boss battle tower is a damage-sponge time-wasting chore.' Another says: 'The characters and bosses are great but the new map is absolutely horrible and is ruining the experience of the game as a whole.' A third: 'Love the bosses and new classes but the new map is just trash. There was zero NEED to add gaps in the map to kill YOU. You might as well add fall damage to the game.'
I also saw a positive review that summed it up perfectly: 'The new map is [expletive] terrible but everything's so good.'
Is It a Skill Issue, or a Design Issue?
Not everyone hates the Great Hollow. A recent Reddit thread about the Steam reviews said, 'The more I play, the more I feel like it was fantastically designed.' The replies were divided. Some players acknowledge the flaws but love the challenge. Others call it a skill issue. And honestly, I see both sides. The map is beautiful and unique. It demands a different gameplay flow and much better team coordination so you don't all end up separated and confused. But it's also hard to learn, and the only way to learn is to fail a lot. After 100+ hours in Nightreign, I'm not having the best time trying to learn new bosses, two new characters, and a new map all at once. Though, to be fair, that's kind of the FromSoftware experience.
What Works
What Hurts
Gorgeous crystal wasteland aesthetic
Multi-level routing chaos
Crystal buff is a cool risk-reward idea
Random crystal locations
Encourages tight team coordination
Hidden death pits
New bosses and Nightfarers are great
Fall death spawn/Rune loss feels unfair
What Could Fix It?
I don't think FromSoftware needs to delete the map. But a few changes would go a long way. First, fix where the game places you after a fall. If I die in a chasm, don't strand me on a random ledge with my runes across the void. Second, add a little more clarity to the minimap so I can see levels and death pits before I leap. Third, maybe make the colored crystals show up on the map after day one, so the crystal hunt feels less like a YouTube memory test. That's not dumbing it down; that's respecting my time.
The Great Hollow is a beautiful bully. It's thematically cool, visually striking, and genuinely rewarding when a team clicks. But right now, it's also a freaking chore, and the Steam reviews are trying to send a message. I'm hoping a 2026 patch smooths out the rough edges. Until then, I'll be over here, practicing, falling, and muttering, 'Please don't be a death pit.'
If the current state of the Great Hollow has you holding off on picking up Nightreign, or waiting to see whether a future patch makes the DLC worth the asking price, it helps to know when that price actually moves. FromSoftware releases and their expansions go on sale at fairly predictable intervals, but the discounts themselves are rarely advertised in advance, and bundle pricing between the base game and expansions can shift overnight without any fanfare.
Rather than refreshing storefront pages every few days on the off chance, this price tracking tool does the watching for you. DealNest monitors listings across major retailers and notifies you the moment something you're eyeing drops to a price you'd actually pay — which means you can spend your evenings practicing the new Nightfarers instead of babysitting a checkout page.
It's Not Technically a New Map, But It Sure Feels Like One
The Great Hollow is a Shifting Earth event, so it may or may not show up when you're running a DLC boss. You might get the default map or one of four other Shifting Earths instead. But unlike those other events, which usually transform one part of the map, the Great Hollow basically swaps out the entire area. No central castle. No ravine down the middle. No southern lake or northern cliffs. Instead, you get a giant crystal that looks like it crash-landed and split the land into broken cliffs and multiple vertical levels. There are ruins full of enemies, plus churches, forts, and mines scattered around. The in-game map has multiple layers, and you have to use spirit springs carefully to fall down and shoot back up. It's a lot.
The center crystal also holds a major party buff that can be clutch for the final boss. To get it, you need to find and break several smaller colored crystals around the map. Their locations change every attempt. So you can't just memorize one route and call it a day.
Why Everyone Is So Frustrated ?
Routing in Nightreign is usually a quick mental exercise. You fly in, pop the map open, and plan a path that gets your team a few extra flasks, a mine for a smithing stone, and a steady line of boss fights so you can collect runes and level up. In the Great Hollow, that plan goes out the window. There are too many vertical levels, too many map layers, and too many 'wait, can I jump down here?' moments. Add the crystal hunt on top, and you have a recipe for confusion.
But the worst part? The giant, gaping chasm running through the middle of the map. The chasm grins at you. It knows what you're about to do.
Nightreign famously has no fall damage. It encourages sprinting, leaping off ledges, and climbing cliffs. That's part of why it feels so different from Elden Ring. Over the last year, a lot of us have trained ourselves to run and jump without hesitation. Usually, that's fine. The Crater Shifting Earth has a lava pit, but it's easy to avoid. The Great Hollow, though, has a death pit that is annoyingly hard to see. You look over a ledge, think you're good, and then—whoops—you're falling to your death.
And the death fall behavior makes it worse. If an enemy kills you, you spawn back at the last Grace you tapped, and your runes are either dropped nearby or picked up by an enemy. If you fall, Nightreign seems to randomly drop you somewhere along a ledge near your death point. That could be above, below, or across from where you jumped. But your runes stay back on the ledge where you started. So you can spawn far away, with your runes behind you across a death pit, and no easy route back. It's the kind of thing that makes you put the controller down and stare at the wall for a minute.
The Steam Reviews Are Not Happy ?
The numbers tell the story. While Elden Ring: Nightreign itself has mostly positive reviews, Forsaken Hollows is sitting at Mostly Negative for the last 30 days. Only 30% of 1,347 recent reviews are positive. A lot of them are about the map.
One review says: 'The new map is poorly designed, overly difficult and boring. Takes forever to traverse... boss battle tower is a damage-sponge time-wasting chore.' Another says: 'The characters and bosses are great but the new map is absolutely horrible and is ruining the experience of the game as a whole.' A third: 'Love the bosses and new classes but the new map is just trash. There was zero NEED to add gaps in the map to kill YOU. You might as well add fall damage to the game.'
I also saw a positive review that summed it up perfectly: 'The new map is [expletive] terrible but everything's so good.'
Is It a Skill Issue, or a Design Issue?
Not everyone hates the Great Hollow. A recent Reddit thread about the Steam reviews said, 'The more I play, the more I feel like it was fantastically designed.' The replies were divided. Some players acknowledge the flaws but love the challenge. Others call it a skill issue. And honestly, I see both sides. The map is beautiful and unique. It demands a different gameplay flow and much better team coordination so you don't all end up separated and confused. But it's also hard to learn, and the only way to learn is to fail a lot. After 100+ hours in Nightreign, I'm not having the best time trying to learn new bosses, two new characters, and a new map all at once. Though, to be fair, that's kind of the FromSoftware experience.
What Works
What Hurts
Gorgeous crystal wasteland aesthetic
Multi-level routing chaos
Crystal buff is a cool risk-reward idea
Random crystal locations
Encourages tight team coordination
Hidden death pits
New bosses and Nightfarers are great
Fall death spawn/Rune loss feels unfair
What Could Fix It?
I don't think FromSoftware needs to delete the map. But a few changes would go a long way. First, fix where the game places you after a fall. If I die in a chasm, don't strand me on a random ledge with my runes across the void. Second, add a little more clarity to the minimap so I can see levels and death pits before I leap. Third, maybe make the colored crystals show up on the map after day one, so the crystal hunt feels less like a YouTube memory test. That's not dumbing it down; that's respecting my time.
The Great Hollow is a beautiful bully. It's thematically cool, visually striking, and genuinely rewarding when a team clicks. But right now, it's also a freaking chore, and the Steam reviews are trying to send a message. I'm hoping a 2026 patch smooths out the rough edges. Until then, I'll be over here, practicing, falling, and muttering, 'Please don't be a death pit.'
If the current state of the Great Hollow has you holding off on picking up Nightreign, or waiting to see whether a future patch makes the DLC worth the asking price, it helps to know when that price actually moves. FromSoftware releases and their expansions go on sale at fairly predictable intervals, but the discounts themselves are rarely advertised in advance, and bundle pricing between the base game and expansions can shift overnight without any fanfare.
Rather than refreshing storefront pages every few days on the off chance, this price tracking tool does the watching for you. DealNest monitors listings across major retailers and notifies you the moment something you're eyeing drops to a price you'd actually pay — which means you can spend your evenings practicing the new Nightfarers instead of babysitting a checkout page.
No Replies
As a longtime Nightfarer, I booted up Elden Ring: Nightreign the moment I saw FromSoftware had deployed patch 1.03.1 across all platforms. The update is not just a routine maintenance drop. For anyone who owns The Forsaken Hollows DLC, it pours fresh content into the ultra-hard Deep of Night mode. For everyone else, it delivers a massive list of balance changes, quality-of-life features, and bug fixes that touch nearly every corner of the game. In 2026, with the DLC now boasting an impressive 2 million players, this patch feels like a clear signal that FromSoftware is still actively shaping the Nightreign experience.
Deep of Night Gets More Dangerous for DLC Owners ?
If you own The Forsaken Hollows, the headline is simple: Deep of Night now has new targets, Landmarks, raid events, and Shifting Earth encounters. I love that these additions only appear when I am matched with other players who also own the DLC. It keeps the expansion content feeling special and avoids confusing newer players who have not bought in yet. The Great Hollow Shifting Earth also received focused adjustments. Curse effects related to Fire, Magic, Lightning, and Holy are now stronger when they appear on weapons and items in the temples. FromSoftware also tweaked the Continuous HP Loss and Continuous HP Recovery curses.
The Night Aspect fight can now feature additional attack types if every Nightfarer in the party owns The Forsaken Hollows. That change alone makes me want to assemble a full DLC squad. I also noticed that when the Night's Tide engulfs you in the Great Hollow, your character's feet now appear to be burning. It is a small visual touch, but it sells the danger.
Feature
What Changed
New DLC content
New targets, Landmarks, raid events, and Shifting Earth in Deep of Night
Matchmaking
DLC additions only appear with other DLC owners
Great Hollow curses
Increased elemental curse effects and adjusted HP loss/recovery curses
Night Aspect
Extra attack types when all Nightfarers own the DLC
Balance Tweaks and Quality-of-Life Wins ?️
The wolves summoned during the Tricephalos raid event have had their attack power decreased. As someone who has been ambushed by those wolves more than once, I say thank you. Scholar players will appreciate the new stack count display for the damage negation reduction icon that appears when hitting enemies with level 3 Dart-type items via the Bagcraft skill.
Scholar's Ultimate Art Communion no longer breaks when transforming with the Executor's Ultimate Art Aspects of the Crucible: Beast. There is also a new near-death animation when reviving with the Power to Balance the World special effect. Identical consumables now combine according to their stack limit when swapped in the Equipment Menu. The status menu now shows icons and explanations for active effects, pinned items display rarity color in the You indicated equipment message, and map clues in the Great Hollow Shifting Earth have an expanded discovery range. I can also remap the Map Display key in the keyboard/mouse settings. These are the kinds of changes that make long expeditions feel smoother.
A Mountain of Bug Fixes ?
The patch notes are enormous, and I cannot list every single fix without turning this into a novel. But several categories stand out. Scholar received a long list of repairs: Communion no longer applies when no other targets are affected, linked damage and healing now propagate correctly during Near Death, Analyze gauge gain is fixed at maximum charge, analyzed target counts no longer reset when someone opens the Spirit Tree shelter door, Bagcraft duration and Fan Dagger hit application are corrected, level 3 Holy Water Pot now damages the Royal Revenant, Crystal Tear counts display properly, and Frozen Needle attack motions are fixed.
Revenant players will be glad that Immortal March's immortality is no longer overwritten by other visual effects. Bows got attention too: Black Flame Blade and Bloodflame Blade now remove frostbite from enemies, Improved Rolling Attacks applies to Bows, and Partial HP Restoration upon Post-Damage Attacks triggers on critical hits. The Chilling Mist and Holy Ground interaction no longer causes self-frostbite. Black Flame Blade also now works correctly with Frenzyflame Thrust, and no longer incorrectly applies to Wave of Gold and Thundercloud Form hitboxes. Golden Retaliation and Carian Retaliation can now rescue allies from near-death states more reliably. Regal Beastclaw and Wave of Gold receive attack power enhancements. Ancient Death Rancor and Beast Claw can be charged properly, and Beast Claw's post-cast delay can be canceled by chaining.
Other notable fixes include Cold Mirage applying to Executor's Aspects of the Crucible: Beast, solo expedition revival with Power to Balance the World, Totem Stela kills counting for relic effects, Evergaol prisoner attack power stacking, relic stack loss after death, rune acquisition sharing after revival, Great Bow of the Erdtree appearing as intended, near-death gauge carryover from day two bosses, and lock-on for near-death allies.
Boss and Raid Event Repairs ⚔️
Boss fights received extensive attention. Gaping Jaw ground attacks have better hit detection and effect positions. Everdark Sovereign Equilibrious Beast no longer spawns enemy Raiders because of a specific Revenant costume. The Dancer of the Boreal Valley can now be damaged by other players during critical hits. The Dreglord fight fixes incorrect spell aiming, enemy attacks targeting the wrong players, players getting stuck inside objects, and music timing in multiplayer. The Balancers grab attack sound effect now plays. Demon in Pain and Demon from Below now have defeat animations when killed simultaneously, and arrows to their heads deal increased damage. Several Night bosses, Curseblade timings, Great Hollows summoned enemies, Tree Guard, Omenkillers in Blacksmith Village, and DLC enemy drops have all been corrected.
Raid events also got cleaned up. Augur water bombs no longer turn invisible for rejoining players. Tricephalos wolves disappear immediately after clearing, have intended HP in 2-3 player expeditions, and correct damage reduction. Fissure in the Fog blizzard and fog display issues are fixed, multiple bosses no longer appear for rejoining players, and runes are awarded properly. Balancer raid event spawn issues are addressed.
Great Hollow Shifting Earth, Menus, and More ?️
The Great Hollow Shifting Earth received dozens of fixes: full HP restoration after Crystal Curse death, site of grace and blacksmithing table consistency, Crystal Curse immunity exploits, temple progression blockers, extra enemies during boss fights, treasure chest stuck spots, Spiritstream usability after rejoin, Totem Stela spawning underground, rune acquisition, map icons, and more. Blacksmith Village Cataclysm Nightfarer enemies now appear, Combat Art workbench skill assignment is fixed, and Sparring Grounds effects no longer persist after character changes. Undertaker's Loathsome Hex can no longer reach unintended locations. Relic Rite menus display effects correctly, item help works in the Visual Codex, and map menu depth icons behave.
FromSoftware also addressed the Unity Technologies security vulnerability announced on October 3, though the developer insists the main game was not impacted. Pre-order bonuses like artwork and soundtrack were updated. The version numbers are App Ver. 1.03.1 and Regulation Ver. 1.03.2. On PS4, PS5, Xbox One, and Xbox Series X|S, I need to log in to download the regulation file. If the lower right corner does not show 1.03.2, I must select LOGIN and apply the latest regulation. Online play requires this update, so I cannot play at all online until it is applied. After downloading, I need to restart the game.
As a player, I am impressed by the scope. Patch 1.03.1 is not just a fix list. It is a statement that Nightreign's hardest mode will keep evolving. With 2 million DLC players and a mountain of repairs, now is a good time to return to the Night. I know I will. ?
With so much of Nightreign's toughest content finally behaving as intended, plenty of players who drifted away are probably weighing a return — and that usually means checking whether the base game or the DLC has dipped in price before committing. If you fall into that camp, keeping an eye on a steam sale tracker like DealNest saves you from refreshing store pages endlessly or missing a brief discount window between major seasonal events.
DealNest collects current and historical pricing so you can see whether a title is genuinely at its lowest point or just dressed up as a bargain, which matters when a purchase decision hinges on a single DLC drop. Whether you are grabbing the expansion for the first time or finally convincing a friend to join your expedition, a quick price check before checkout is rarely wasted effort.
Deep of Night Gets More Dangerous for DLC Owners ?
If you own The Forsaken Hollows, the headline is simple: Deep of Night now has new targets, Landmarks, raid events, and Shifting Earth encounters. I love that these additions only appear when I am matched with other players who also own the DLC. It keeps the expansion content feeling special and avoids confusing newer players who have not bought in yet. The Great Hollow Shifting Earth also received focused adjustments. Curse effects related to Fire, Magic, Lightning, and Holy are now stronger when they appear on weapons and items in the temples. FromSoftware also tweaked the Continuous HP Loss and Continuous HP Recovery curses.
The Night Aspect fight can now feature additional attack types if every Nightfarer in the party owns The Forsaken Hollows. That change alone makes me want to assemble a full DLC squad. I also noticed that when the Night's Tide engulfs you in the Great Hollow, your character's feet now appear to be burning. It is a small visual touch, but it sells the danger.
Feature
What Changed
New DLC content
New targets, Landmarks, raid events, and Shifting Earth in Deep of Night
Matchmaking
DLC additions only appear with other DLC owners
Great Hollow curses
Increased elemental curse effects and adjusted HP loss/recovery curses
Night Aspect
Extra attack types when all Nightfarers own the DLC
Balance Tweaks and Quality-of-Life Wins ?️
The wolves summoned during the Tricephalos raid event have had their attack power decreased. As someone who has been ambushed by those wolves more than once, I say thank you. Scholar players will appreciate the new stack count display for the damage negation reduction icon that appears when hitting enemies with level 3 Dart-type items via the Bagcraft skill.
Scholar's Ultimate Art Communion no longer breaks when transforming with the Executor's Ultimate Art Aspects of the Crucible: Beast. There is also a new near-death animation when reviving with the Power to Balance the World special effect. Identical consumables now combine according to their stack limit when swapped in the Equipment Menu. The status menu now shows icons and explanations for active effects, pinned items display rarity color in the You indicated equipment message, and map clues in the Great Hollow Shifting Earth have an expanded discovery range. I can also remap the Map Display key in the keyboard/mouse settings. These are the kinds of changes that make long expeditions feel smoother.
A Mountain of Bug Fixes ?
The patch notes are enormous, and I cannot list every single fix without turning this into a novel. But several categories stand out. Scholar received a long list of repairs: Communion no longer applies when no other targets are affected, linked damage and healing now propagate correctly during Near Death, Analyze gauge gain is fixed at maximum charge, analyzed target counts no longer reset when someone opens the Spirit Tree shelter door, Bagcraft duration and Fan Dagger hit application are corrected, level 3 Holy Water Pot now damages the Royal Revenant, Crystal Tear counts display properly, and Frozen Needle attack motions are fixed.
Revenant players will be glad that Immortal March's immortality is no longer overwritten by other visual effects. Bows got attention too: Black Flame Blade and Bloodflame Blade now remove frostbite from enemies, Improved Rolling Attacks applies to Bows, and Partial HP Restoration upon Post-Damage Attacks triggers on critical hits. The Chilling Mist and Holy Ground interaction no longer causes self-frostbite. Black Flame Blade also now works correctly with Frenzyflame Thrust, and no longer incorrectly applies to Wave of Gold and Thundercloud Form hitboxes. Golden Retaliation and Carian Retaliation can now rescue allies from near-death states more reliably. Regal Beastclaw and Wave of Gold receive attack power enhancements. Ancient Death Rancor and Beast Claw can be charged properly, and Beast Claw's post-cast delay can be canceled by chaining.
Other notable fixes include Cold Mirage applying to Executor's Aspects of the Crucible: Beast, solo expedition revival with Power to Balance the World, Totem Stela kills counting for relic effects, Evergaol prisoner attack power stacking, relic stack loss after death, rune acquisition sharing after revival, Great Bow of the Erdtree appearing as intended, near-death gauge carryover from day two bosses, and lock-on for near-death allies.
Boss and Raid Event Repairs ⚔️
Boss fights received extensive attention. Gaping Jaw ground attacks have better hit detection and effect positions. Everdark Sovereign Equilibrious Beast no longer spawns enemy Raiders because of a specific Revenant costume. The Dancer of the Boreal Valley can now be damaged by other players during critical hits. The Dreglord fight fixes incorrect spell aiming, enemy attacks targeting the wrong players, players getting stuck inside objects, and music timing in multiplayer. The Balancers grab attack sound effect now plays. Demon in Pain and Demon from Below now have defeat animations when killed simultaneously, and arrows to their heads deal increased damage. Several Night bosses, Curseblade timings, Great Hollows summoned enemies, Tree Guard, Omenkillers in Blacksmith Village, and DLC enemy drops have all been corrected.
Raid events also got cleaned up. Augur water bombs no longer turn invisible for rejoining players. Tricephalos wolves disappear immediately after clearing, have intended HP in 2-3 player expeditions, and correct damage reduction. Fissure in the Fog blizzard and fog display issues are fixed, multiple bosses no longer appear for rejoining players, and runes are awarded properly. Balancer raid event spawn issues are addressed.
Great Hollow Shifting Earth, Menus, and More ?️
The Great Hollow Shifting Earth received dozens of fixes: full HP restoration after Crystal Curse death, site of grace and blacksmithing table consistency, Crystal Curse immunity exploits, temple progression blockers, extra enemies during boss fights, treasure chest stuck spots, Spiritstream usability after rejoin, Totem Stela spawning underground, rune acquisition, map icons, and more. Blacksmith Village Cataclysm Nightfarer enemies now appear, Combat Art workbench skill assignment is fixed, and Sparring Grounds effects no longer persist after character changes. Undertaker's Loathsome Hex can no longer reach unintended locations. Relic Rite menus display effects correctly, item help works in the Visual Codex, and map menu depth icons behave.
FromSoftware also addressed the Unity Technologies security vulnerability announced on October 3, though the developer insists the main game was not impacted. Pre-order bonuses like artwork and soundtrack were updated. The version numbers are App Ver. 1.03.1 and Regulation Ver. 1.03.2. On PS4, PS5, Xbox One, and Xbox Series X|S, I need to log in to download the regulation file. If the lower right corner does not show 1.03.2, I must select LOGIN and apply the latest regulation. Online play requires this update, so I cannot play at all online until it is applied. After downloading, I need to restart the game.
As a player, I am impressed by the scope. Patch 1.03.1 is not just a fix list. It is a statement that Nightreign's hardest mode will keep evolving. With 2 million DLC players and a mountain of repairs, now is a good time to return to the Night. I know I will. ?
With so much of Nightreign's toughest content finally behaving as intended, plenty of players who drifted away are probably weighing a return — and that usually means checking whether the base game or the DLC has dipped in price before committing. If you fall into that camp, keeping an eye on a steam sale tracker like DealNest saves you from refreshing store pages endlessly or missing a brief discount window between major seasonal events.
DealNest collects current and historical pricing so you can see whether a title is genuinely at its lowest point or just dressed up as a bargain, which matters when a purchase decision hinges on a single DLC drop. Whether you are grabbing the expansion for the first time or finally convincing a friend to join your expedition, a quick price check before checkout is rarely wasted effort.
No Replies
In the sprawling, insectoid world of Hollow Knight, a small, silent knight once captured the hearts of millions. But now, in 2026, the spotlight has shifted to a different hero: Hornet, the princess-protector of Hallownest, who takes center stage in Hollow Knight: Silksong. With her taller frame, sharper cloak, and deadly needle, Hornet is undeniably a different beast. But does that make her a better protagonist than The Knight? Not necessarily—yet she possesses a suite of abilities that The Knight could only dream of. From chatting with NPCs to gliding through the air, Hornet proves that being a short king isn't the only way to rule.
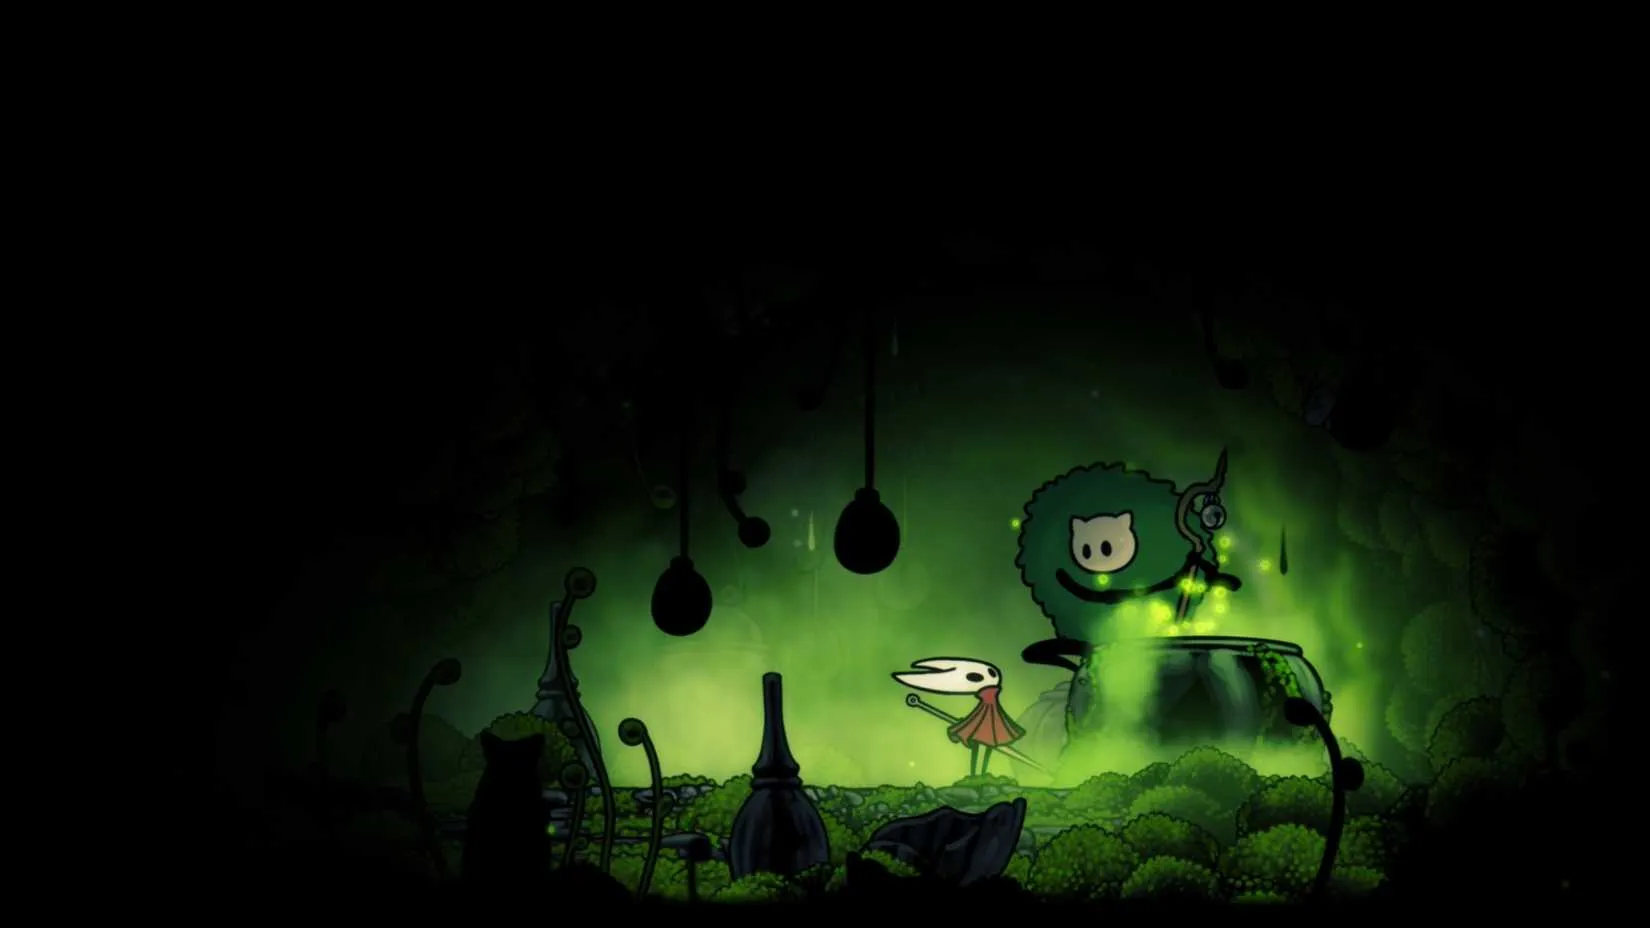
The Gift of Gab ?️
One of the most striking differences between the two protagonists is Hornet's ability to speak. The Knight was a silent vessel, reacting to the world with nothing more than a blank stare and the occasional grunt. Hornet, however, engages in full conversations with the bugs of Pharloom. This narrative shift makes the story more engaging, as players can finally hear their hero's thoughts and respond to the quirky cast of characters. Have you ever wondered what it would be like to actually talk back to a cryptic NPC? Hornet does it with grace and wit, turning every interaction into a memorable exchange. This change echoes other sequels like Dead Space 2 and Jak 2, where a talking protagonist added depth to the narrative.
Death Becomes Her ?
When The Knight died in Hollow Knight, they left behind a Shade—a ghostly remnant that players had to defeat to reclaim their Geo. It was a classic corpse run, but a punishing one. Hornet, in contrast, handles death with far more finesse. Instead of leaving a Shade, she seals her valuables in a silk cocoon and retreats to fight another day. This ability, born from her mastery of Silk, demonstrates her grace and cunning. It's a headcanon-friendly explanation for how she survives countless battles: she doesn't die, she simply withdraws. The Knight could never boast such elegance.
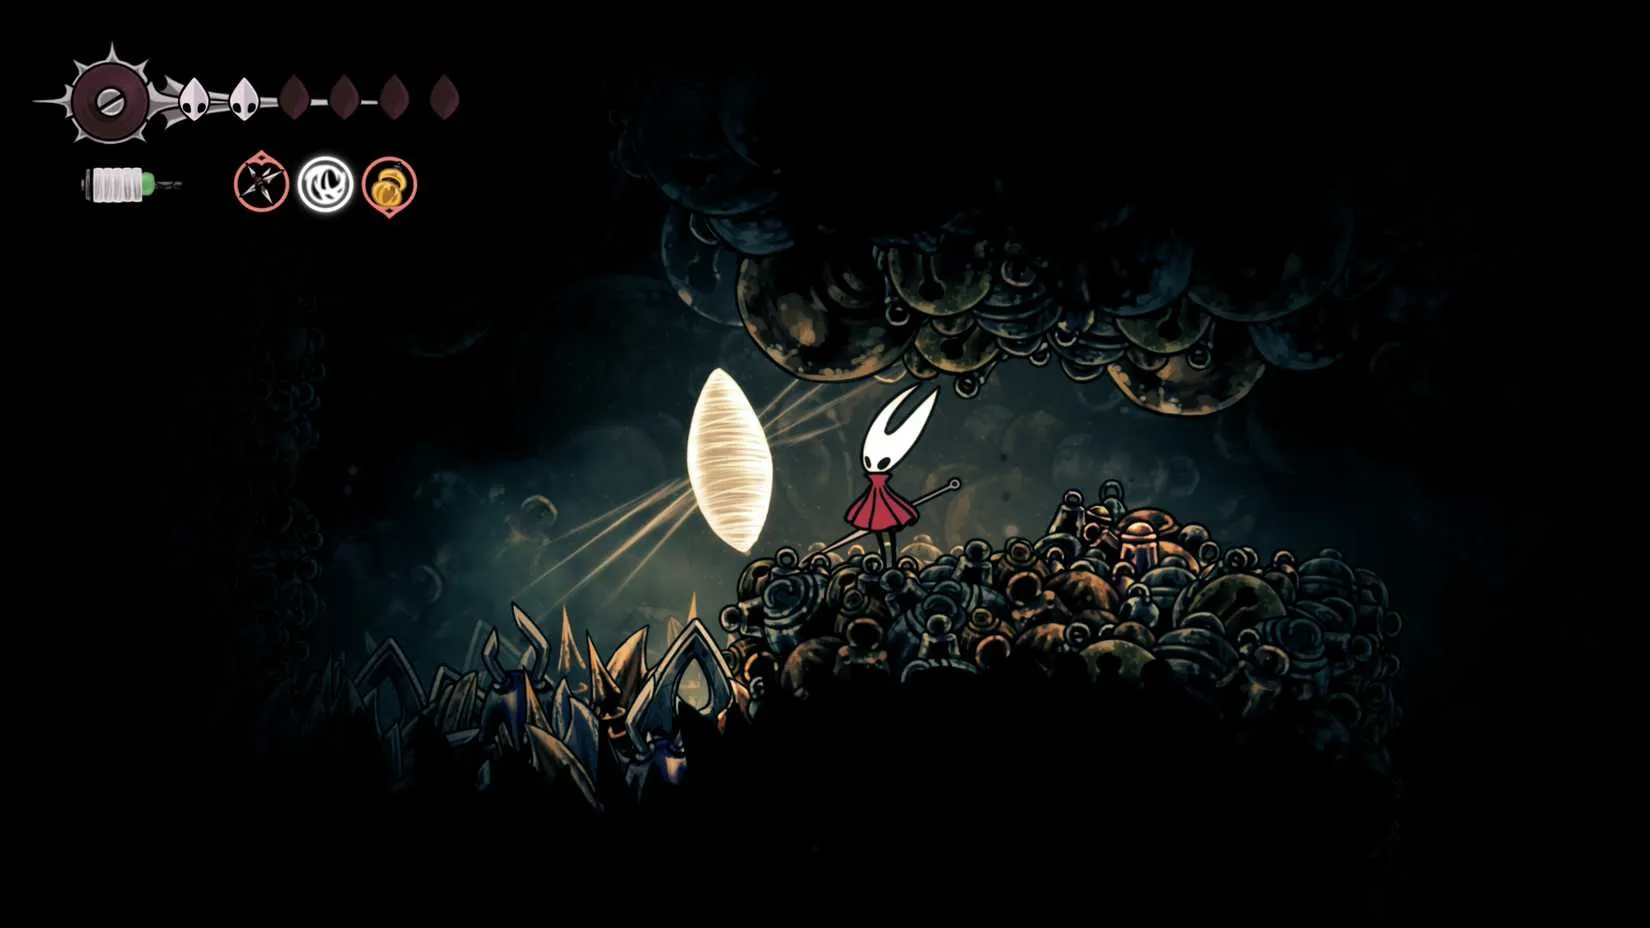
Run, Hornet, Run! ?♀️
Traversal is a staple of the Metroidvania genre, and both games excel at it. The Knight can dash, but he never learns to run. Hornet, however, unlocks the Swift Step skill, and if players hold down the dash button, she breaks into a full sprint. There are even Trinkets to boost her running speed. In a foot race between the two, Hornet would leave The Knight in the dust. It's a small but significant upgrade that makes exploring Pharloom a breeze.
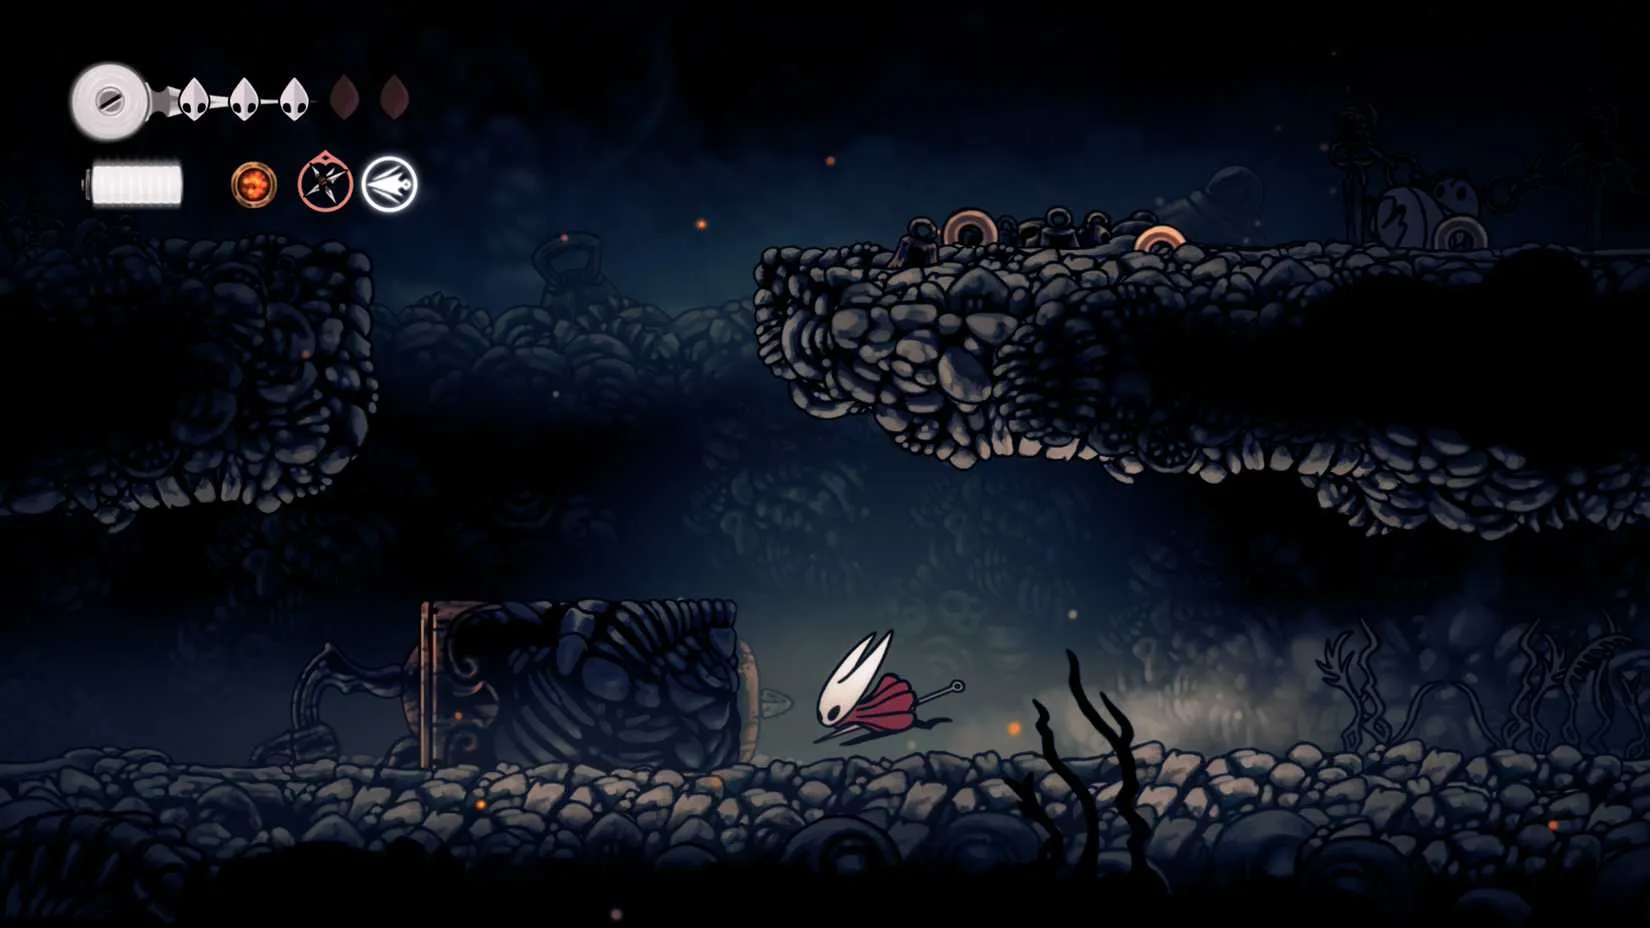
Gliding on Air ?️
Remember Princess Peach's float in Super Mario Bros. 2? Hornet has a similar trick. In the Far Fields, she can obtain the Drifter's Cloak, which lets her float indefinitely and catch air streams to rocket upward. The Knight's closest equivalent is the Crystal Heart, a jet-like dash that propels him forward. While both are cool, Hornet's gliding feels more graceful and opens up new exploration possibilities. Wouldn't it have been amazing if The Knight could glide through Hallownest? Alas, that was not to be.
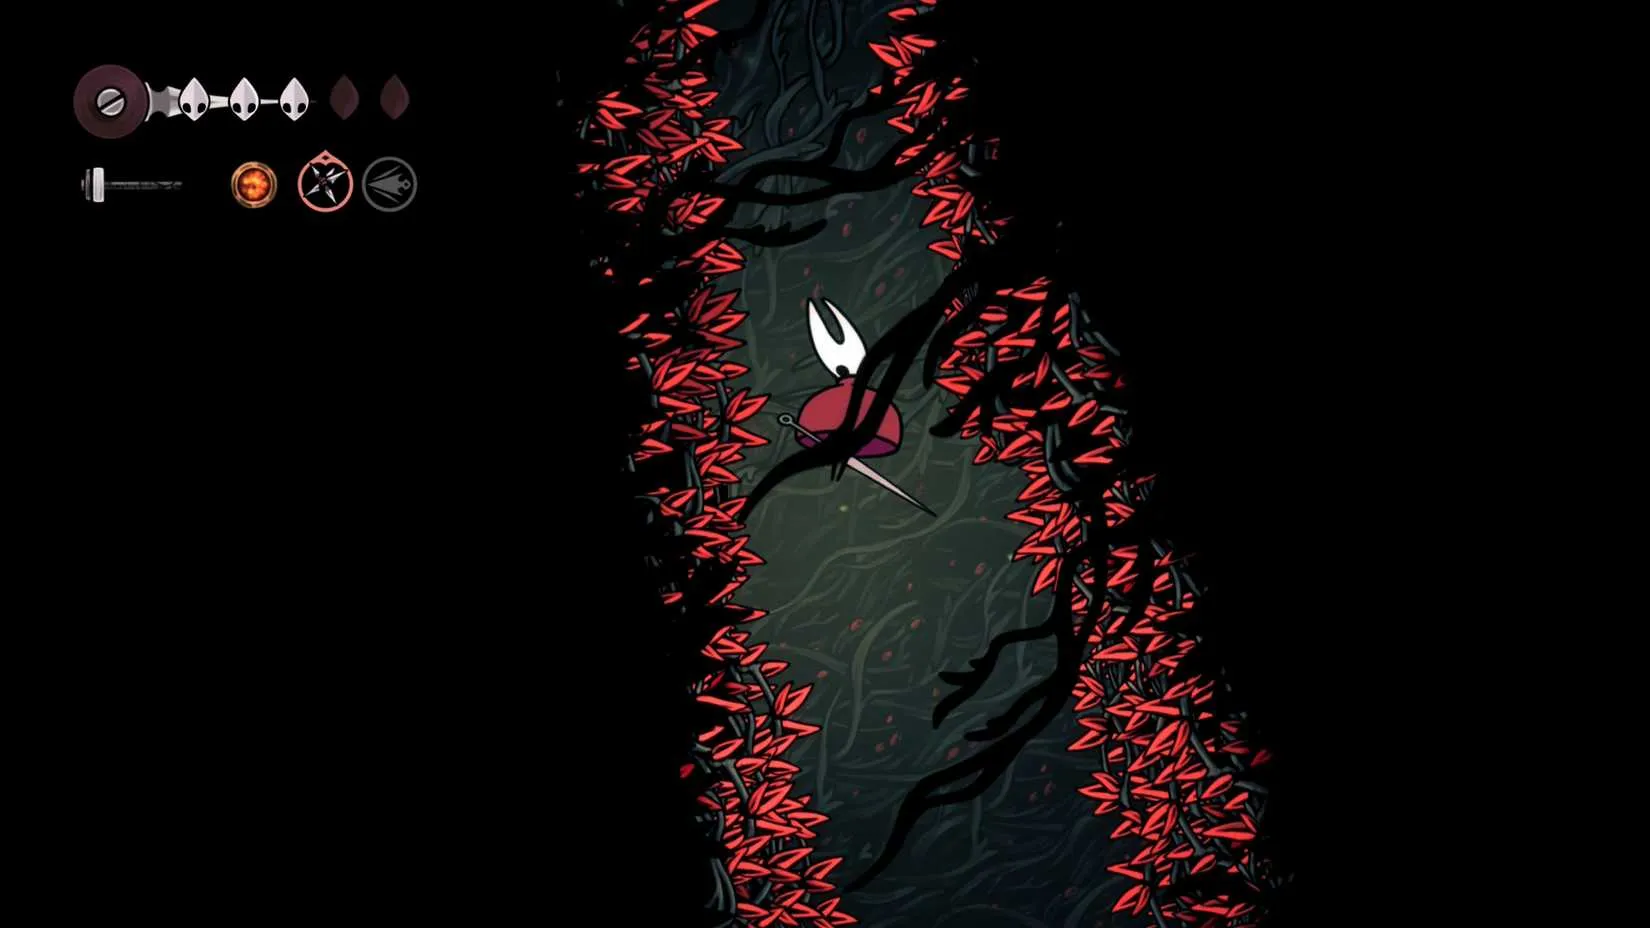
The Needolin: Music to Your Ears ?
The Knight's Nail is a tool for combat, pure and simple. Hornet's Needle, on the other hand, becomes a musical instrument. With the Needolin upgrade, she can play her Needle like a harp to open song-sealed doors. But that's not all—certain NPCs will sing along, and even corpses can reveal ghosts through melody. The Knight could communicate with dreams, but he could never turn his weapon into a guitar. This creative twist adds a layer of charm and mystery to Silksong's world.
Taunt Like You Mean It ?
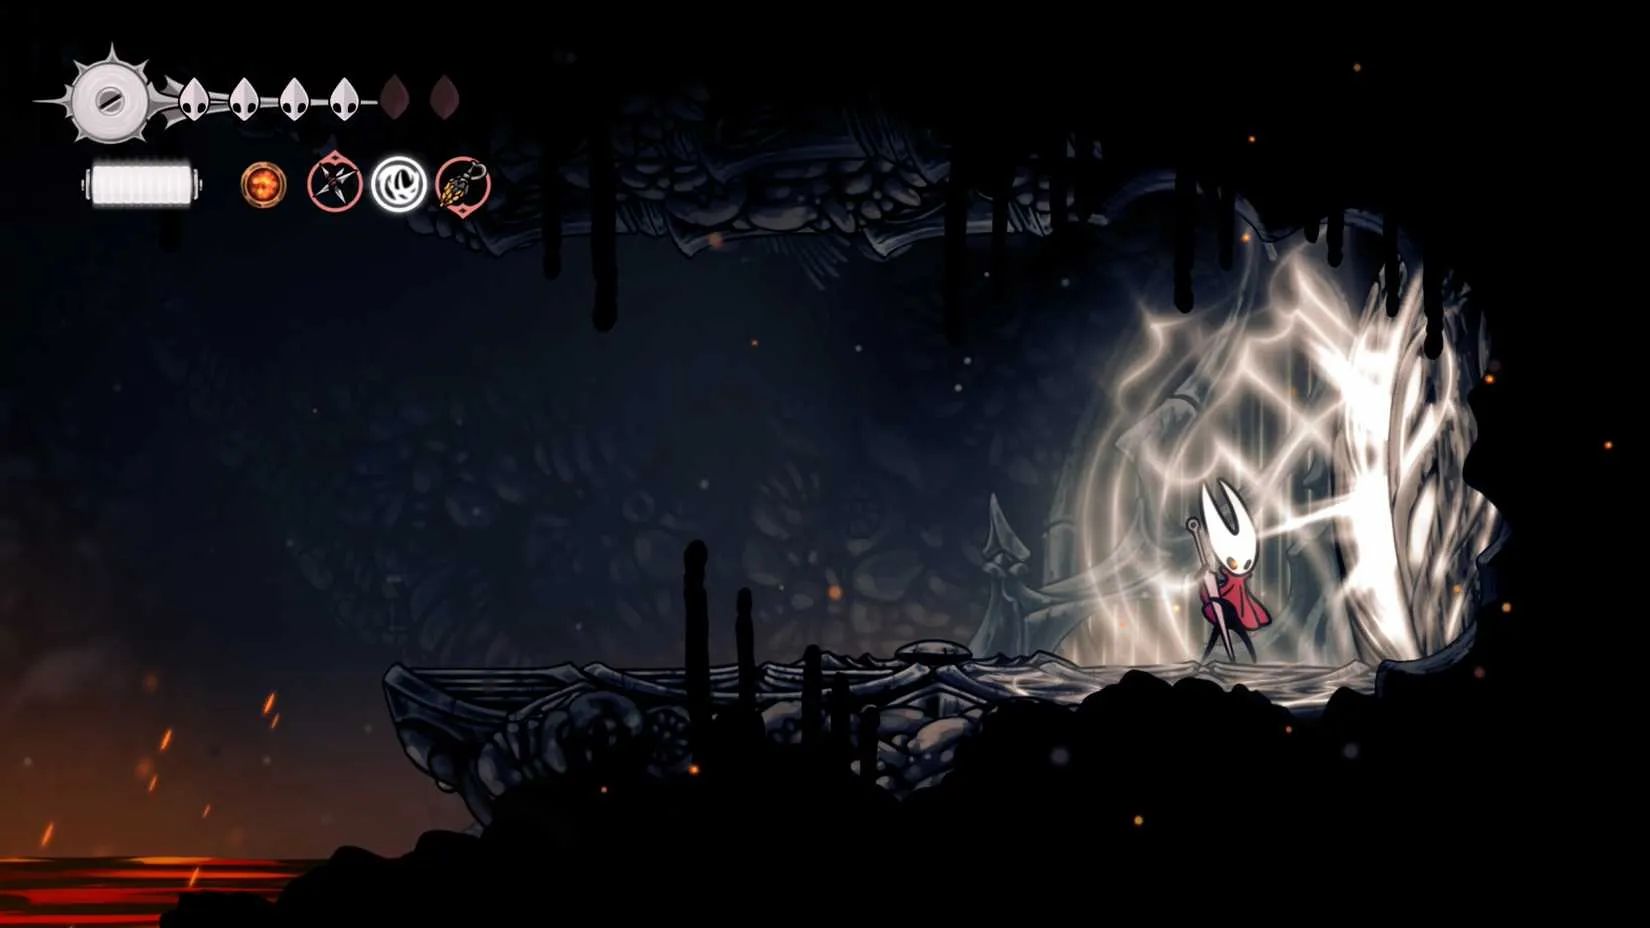
Here's a secret that many players miss: Hornet can taunt enemies by clicking the right thumbstick (on Switch 2, for example). This uses a bit of Silk, but in return, enemies are drawn toward her. This aggro-drawing ability is perfect for luring foes into traps, a tactic The Knight could never employ. Taunting adds a strategic layer to combat, and it's a technique more games should adopt.
Clawline: Grappling with Greatness ?
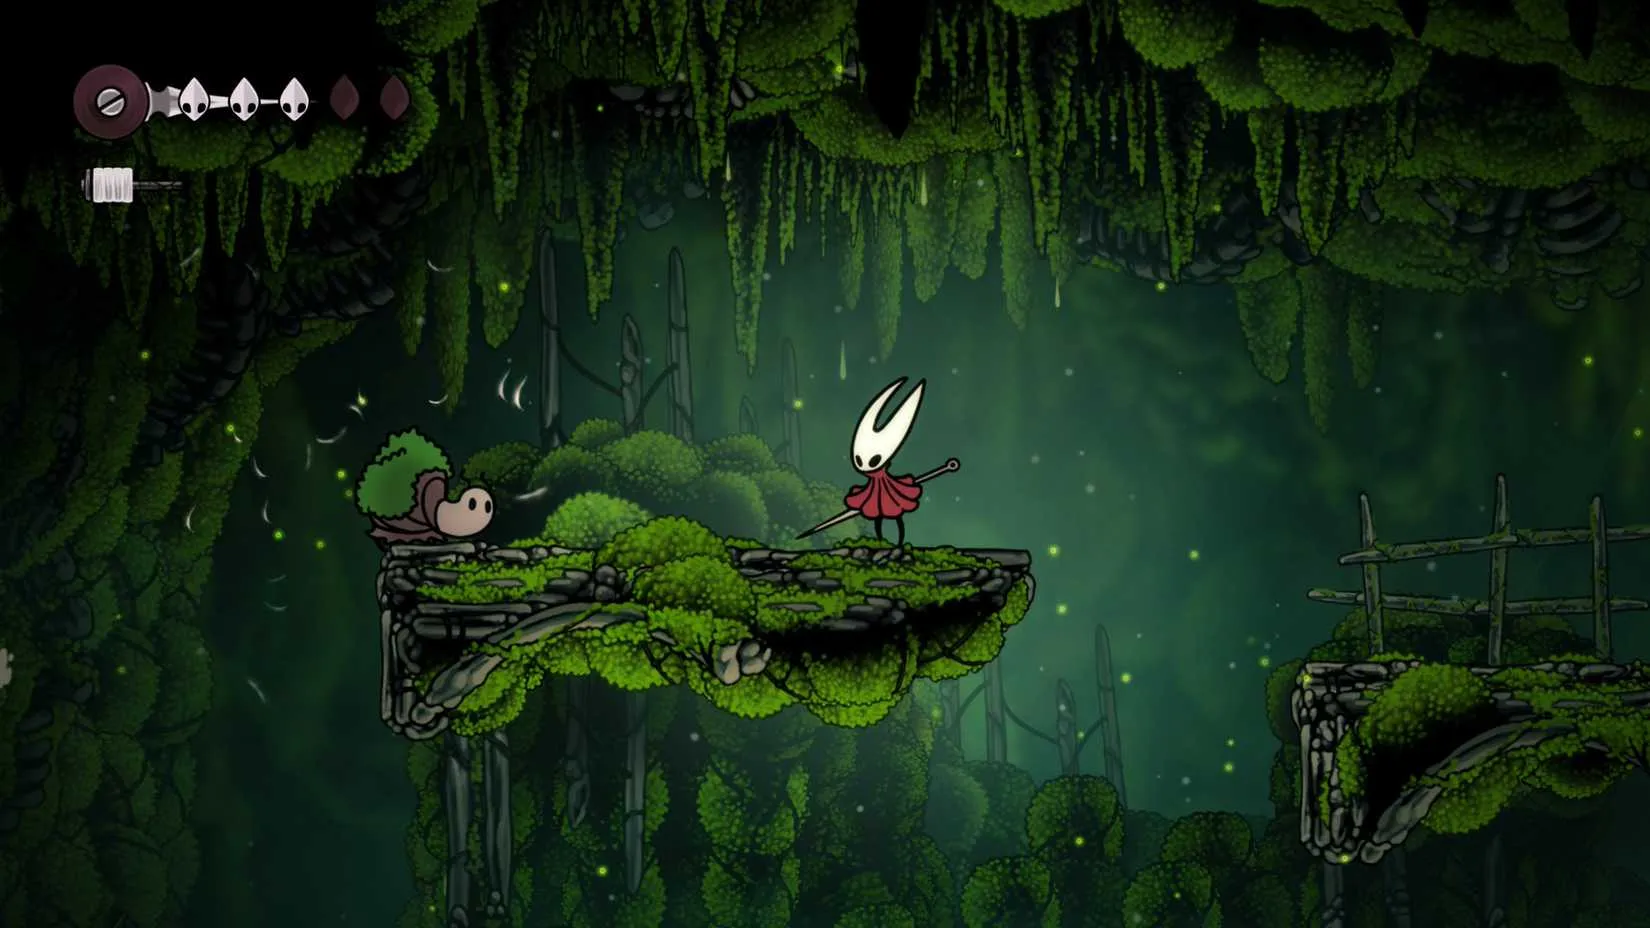
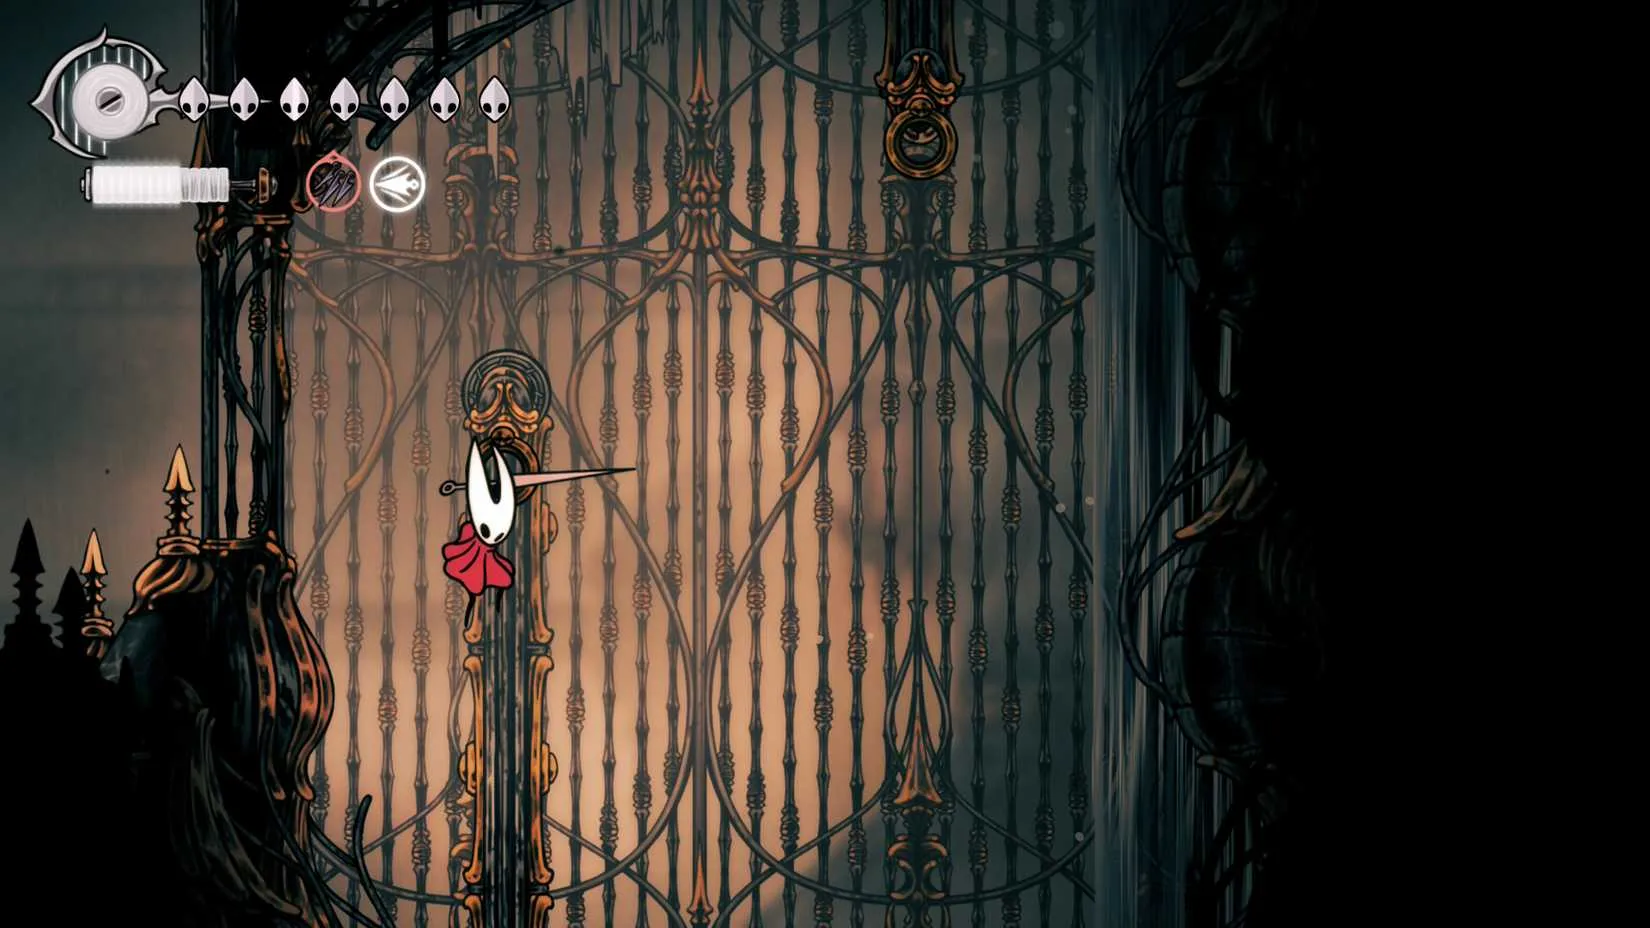
Finally, the Clawline is one of Hornet's most versatile upgrades. It propels her forward like an extra dash and lets her cling to ring-shaped ornaments in the environment. The Knight has no grappling hook of any kind. This ability alone gives Hornet a significant edge in mobility, allowing her to reach areas and escape dangers that would leave The Knight stumped.
The Verdict: Who Wins? ?
Even though The Knight emerged victorious in their original encounter (he was the protagonist, after all), the tables might turn if they fought without player input. Hornet's new talents—talking, cocooning, running, gliding, music-making, taunting, and grappling—could finally give her the strength to best The Knight in all his silent glory. But does that mean she's a better character? That's for players to decide. One thing is certain: Hornet has proven that she's more than just a side character. She's a force of nature, and Hollow Knight: Silksong is her time to shine.
Here's a quick comparison of their abilities:
Ability
The Knight
Hornet
Speech
Silent
Conversational
Death Mechanic
Leaves Shade
Seals cocoon
Running
No
Yes (Swift Step)
Gliding
No (Crystal Heart dash)
Yes (Drifter's Cloak)
Musical Weapon
No
Yes (Needolin)
Taunt
No
Yes (Silk taunt)
Grappling Hook
No
Yes (Clawline)
So, who do you think is the ultimate protagonist? The silent knight who started it all, or the graceful huntress who took up the mantle? In 2026, as players continue to explore Pharloom, Hornet's legend only grows. And perhaps, just perhaps, she has finally earned the title of "short king" in her own right—though she's not so short anymore.
Debates like this one have a way of spilling out of the game and into group chats, forums, and late-night Discord threads—which is part of the fun. If you're the type of player who likes to back up your hot takes with first-hand experience, it helps to actually own the games being argued about. The original Hollow Knight and Silksong both go on sale fairly often, and other metroidvanias like Ori, Blasphemous, and Prince of Persia: The Lost Crown regularly see deep discounts too, making it easy to build a library without paying full price.
That's where a deal-tracking site comes in handy. Instead of refreshing store pages or hoping a sale notification shows up in your feed, DealNest gathers discounts and price drops across games, tech, and everyday products in one place, so you can spot a bargain the moment it appears. Whether you're hunting for a cheap copy of Silksong or just keeping an eye out for the next big sale, it's a handy bookmark to keep alongside your favorite gaming communities.
The Gift of Gab ?️
One of the most striking differences between the two protagonists is Hornet's ability to speak. The Knight was a silent vessel, reacting to the world with nothing more than a blank stare and the occasional grunt. Hornet, however, engages in full conversations with the bugs of Pharloom. This narrative shift makes the story more engaging, as players can finally hear their hero's thoughts and respond to the quirky cast of characters. Have you ever wondered what it would be like to actually talk back to a cryptic NPC? Hornet does it with grace and wit, turning every interaction into a memorable exchange. This change echoes other sequels like Dead Space 2 and Jak 2, where a talking protagonist added depth to the narrative.
Death Becomes Her ?
When The Knight died in Hollow Knight, they left behind a Shade—a ghostly remnant that players had to defeat to reclaim their Geo. It was a classic corpse run, but a punishing one. Hornet, in contrast, handles death with far more finesse. Instead of leaving a Shade, she seals her valuables in a silk cocoon and retreats to fight another day. This ability, born from her mastery of Silk, demonstrates her grace and cunning. It's a headcanon-friendly explanation for how she survives countless battles: she doesn't die, she simply withdraws. The Knight could never boast such elegance.
Run, Hornet, Run! ?♀️
Traversal is a staple of the Metroidvania genre, and both games excel at it. The Knight can dash, but he never learns to run. Hornet, however, unlocks the Swift Step skill, and if players hold down the dash button, she breaks into a full sprint. There are even Trinkets to boost her running speed. In a foot race between the two, Hornet would leave The Knight in the dust. It's a small but significant upgrade that makes exploring Pharloom a breeze.
Gliding on Air ?️
Remember Princess Peach's float in Super Mario Bros. 2? Hornet has a similar trick. In the Far Fields, she can obtain the Drifter's Cloak, which lets her float indefinitely and catch air streams to rocket upward. The Knight's closest equivalent is the Crystal Heart, a jet-like dash that propels him forward. While both are cool, Hornet's gliding feels more graceful and opens up new exploration possibilities. Wouldn't it have been amazing if The Knight could glide through Hallownest? Alas, that was not to be.
The Needolin: Music to Your Ears ?
The Knight's Nail is a tool for combat, pure and simple. Hornet's Needle, on the other hand, becomes a musical instrument. With the Needolin upgrade, she can play her Needle like a harp to open song-sealed doors. But that's not all—certain NPCs will sing along, and even corpses can reveal ghosts through melody. The Knight could communicate with dreams, but he could never turn his weapon into a guitar. This creative twist adds a layer of charm and mystery to Silksong's world.
Taunt Like You Mean It ?
Here's a secret that many players miss: Hornet can taunt enemies by clicking the right thumbstick (on Switch 2, for example). This uses a bit of Silk, but in return, enemies are drawn toward her. This aggro-drawing ability is perfect for luring foes into traps, a tactic The Knight could never employ. Taunting adds a strategic layer to combat, and it's a technique more games should adopt.
Clawline: Grappling with Greatness ?
Finally, the Clawline is one of Hornet's most versatile upgrades. It propels her forward like an extra dash and lets her cling to ring-shaped ornaments in the environment. The Knight has no grappling hook of any kind. This ability alone gives Hornet a significant edge in mobility, allowing her to reach areas and escape dangers that would leave The Knight stumped.
The Verdict: Who Wins? ?
Even though The Knight emerged victorious in their original encounter (he was the protagonist, after all), the tables might turn if they fought without player input. Hornet's new talents—talking, cocooning, running, gliding, music-making, taunting, and grappling—could finally give her the strength to best The Knight in all his silent glory. But does that mean she's a better character? That's for players to decide. One thing is certain: Hornet has proven that she's more than just a side character. She's a force of nature, and Hollow Knight: Silksong is her time to shine.
Here's a quick comparison of their abilities:
Ability
The Knight
Hornet
Speech
Silent
Conversational
Death Mechanic
Leaves Shade
Seals cocoon
Running
No
Yes (Swift Step)
Gliding
No (Crystal Heart dash)
Yes (Drifter's Cloak)
Musical Weapon
No
Yes (Needolin)
Taunt
No
Yes (Silk taunt)
Grappling Hook
No
Yes (Clawline)
So, who do you think is the ultimate protagonist? The silent knight who started it all, or the graceful huntress who took up the mantle? In 2026, as players continue to explore Pharloom, Hornet's legend only grows. And perhaps, just perhaps, she has finally earned the title of "short king" in her own right—though she's not so short anymore.
Debates like this one have a way of spilling out of the game and into group chats, forums, and late-night Discord threads—which is part of the fun. If you're the type of player who likes to back up your hot takes with first-hand experience, it helps to actually own the games being argued about. The original Hollow Knight and Silksong both go on sale fairly often, and other metroidvanias like Ori, Blasphemous, and Prince of Persia: The Lost Crown regularly see deep discounts too, making it easy to build a library without paying full price.
That's where a deal-tracking site comes in handy. Instead of refreshing store pages or hoping a sale notification shows up in your feed, DealNest gathers discounts and price drops across games, tech, and everyday products in one place, so you can spot a bargain the moment it appears. Whether you're hunting for a cheap copy of Silksong or just keeping an eye out for the next big sale, it's a handy bookmark to keep alongside your favorite gaming communities.
No Replies
In the expansive world of Hollow Knight: Silksong, players must explore every corner to find powerful tools that aid Hornet in her journey. One such tool, the Scuttlebrace, is a unique yellow tool that grants a rapid retreat ability, mimicking the movement of a spider. Available in the second Act, this tool can be a game-changer for those who master its mechanics. As of 2026, this guide remains accurate for players diving into Silksong's second Act. Here is a comprehensive breakdown of how to obtain the Scuttlebrace and what it does.

? Location and Acquisition
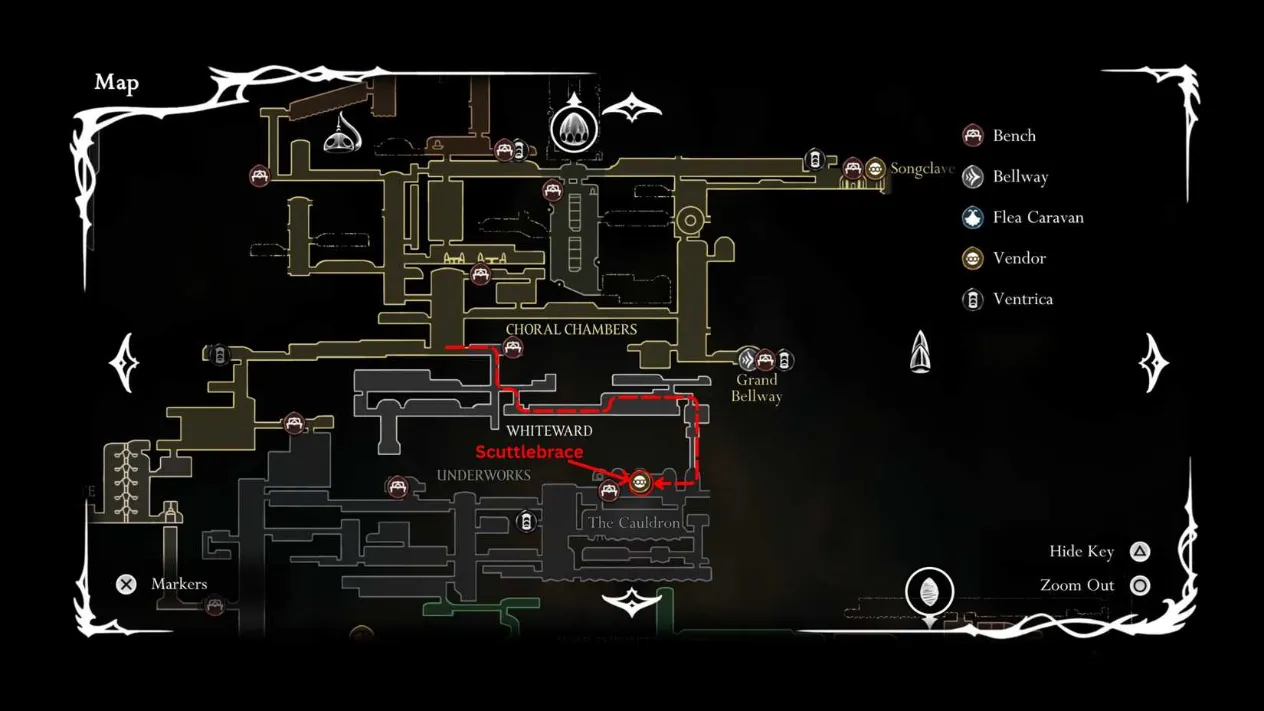
The Scuttlebrace is found in the Twelfth Architect's Workshop, located in the Underworks. To reach it, players must first progress through the second Act and obtain the Clawline ability. Here is a step-by-step breakdown:
Reach the Citadel: After making your way through the Underworks, you will arrive in the Citadel. Head towards the left side of the map.
Find the Elevator: Locate the elevator that requires the White Key. Before using it, make your way to the top right part of the map, called Songclave.
Get the White Key: In Songclave, you will find the White Key and can ring the bell inside the First Shrine. This turns Songclave into a hub for NPCs and quest givers.
Descend to Whiteward: Return to the elevator and go down to reach Whiteward. Follow the main story path, which leads you to the eastern side of the Underworks to find the Clawline ability.
Return to the Underworks Bench: Once you have Clawline, make your way back to the bench in the Underworks. There, you will hear an NPC talking.
Reach the Workshop: Jump up and harpoon the grapple point, then dash right to enter the Twelfth Architect's Workshop.
Purchase the Tool: Talk to the NPC inside and purchase the Scuttlebrace for 140 Rosaries and 1 Craftmetal.
?️ What Does the Scuttlebrace Do?
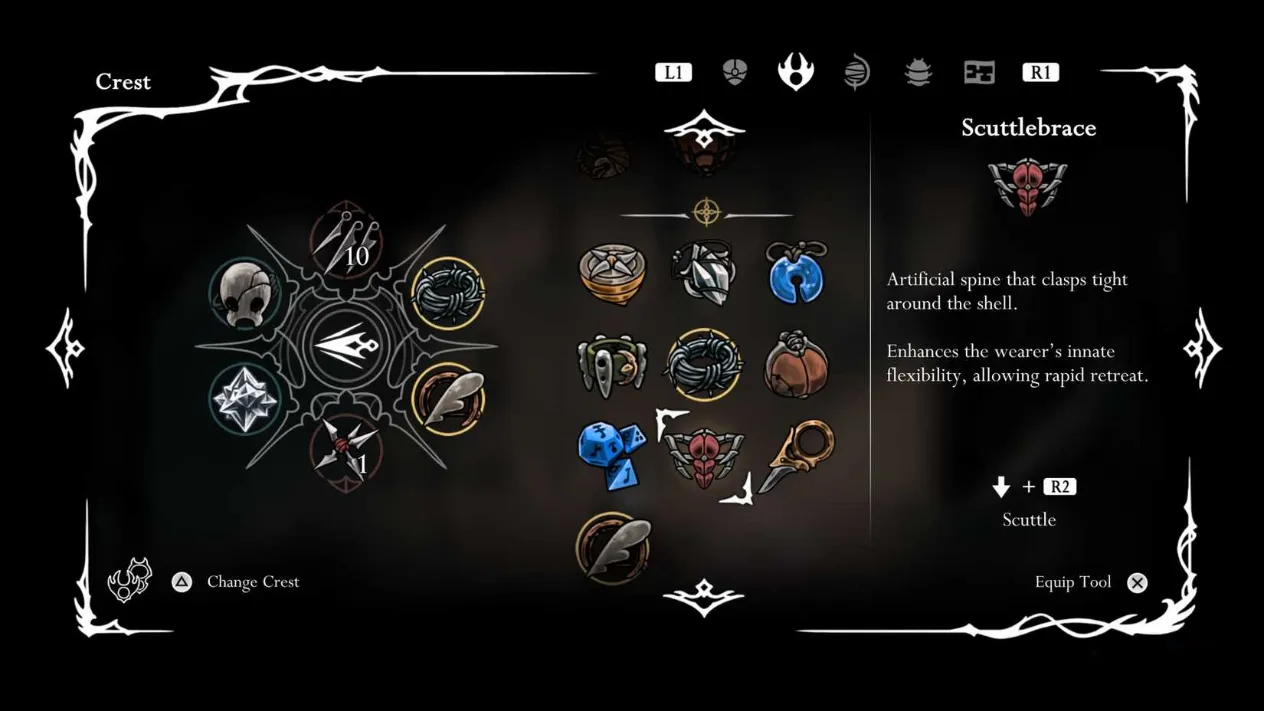
The Scuttlebrace is a yellow tool that enables Hornet to perform a rapid retreat, similar to a spider's scuttle. This maneuver is not just a simple dodge; it offers significant mobility advantages. When activated, Hornet can quickly move backward or in the direction she is facing, covering a considerable distance. Moreover, by holding down the button, Hornet can even walk on walls in this stance, allowing access to otherwise unreachable areas.
Controls:
Controller: Press RT/R2.
Keyboard: Press Down + C.
? Tips for Using the Scuttlebrace
Exploration: Use the Scuttlebrace to reach hidden ledges and secret areas by scuttling up walls.
Combat: Quickly retreat from enemy attacks, especially bosses with fast lunges.
Platforming: Combine with Clawline and other movement abilities for advanced traversal.
Stamina Management: The Scuttlebrace does not consume Silk, so it can be used liberally.
? Acquisition Summary
Detail
Information
Tool Type
Yellow
Location
Twelfth Architect's Workshop, Underworks
Cost
140 Rosaries + 1 Craftmetal
Prerequisite
Clawline ability, Act 2
Ability
Rapid retreat, wall walk
? Conclusion
The Scuttlebrace is an essential tool for any player looking to enhance Hornet's mobility in Hollow Knight: Silksong. Its unique spider-like retreat opens up new avenues for exploration and combat. By following the steps outlined above, you can add this versatile tool to your arsenal and truly master the art of the scuttle. Whether you're dodging attacks or scaling walls, the Scuttlebrace is a worthy investment for your journey through the Citadel and beyond.
Once you've mastered the Scuttlebrace and are ready to see what else the genre has to offer, keeping an eye on your gaming budget can be just as useful as nailing a wall-scuttle. Whether you're waiting for a discount on Hollow Knight: Silksong itself or hunting for your next Metroidvania fix, a reliable steam deal finder can help you spot price drops without refreshing store pages manually.
DealNest is built for exactly that kind of browsing, gathering current Steam discounts in one place so you can compare and decide when to buy. It won't teach you Hornet's controls, but it can make expanding your library after Pharloom a little easier on the wallet.
? Location and Acquisition
The Scuttlebrace is found in the Twelfth Architect's Workshop, located in the Underworks. To reach it, players must first progress through the second Act and obtain the Clawline ability. Here is a step-by-step breakdown:
Reach the Citadel: After making your way through the Underworks, you will arrive in the Citadel. Head towards the left side of the map.
Find the Elevator: Locate the elevator that requires the White Key. Before using it, make your way to the top right part of the map, called Songclave.
Get the White Key: In Songclave, you will find the White Key and can ring the bell inside the First Shrine. This turns Songclave into a hub for NPCs and quest givers.
Descend to Whiteward: Return to the elevator and go down to reach Whiteward. Follow the main story path, which leads you to the eastern side of the Underworks to find the Clawline ability.
Return to the Underworks Bench: Once you have Clawline, make your way back to the bench in the Underworks. There, you will hear an NPC talking.
Reach the Workshop: Jump up and harpoon the grapple point, then dash right to enter the Twelfth Architect's Workshop.
Purchase the Tool: Talk to the NPC inside and purchase the Scuttlebrace for 140 Rosaries and 1 Craftmetal.
?️ What Does the Scuttlebrace Do?
The Scuttlebrace is a yellow tool that enables Hornet to perform a rapid retreat, similar to a spider's scuttle. This maneuver is not just a simple dodge; it offers significant mobility advantages. When activated, Hornet can quickly move backward or in the direction she is facing, covering a considerable distance. Moreover, by holding down the button, Hornet can even walk on walls in this stance, allowing access to otherwise unreachable areas.
Controls:
Controller: Press RT/R2.
Keyboard: Press Down + C.
? Tips for Using the Scuttlebrace
Exploration: Use the Scuttlebrace to reach hidden ledges and secret areas by scuttling up walls.
Combat: Quickly retreat from enemy attacks, especially bosses with fast lunges.
Platforming: Combine with Clawline and other movement abilities for advanced traversal.
Stamina Management: The Scuttlebrace does not consume Silk, so it can be used liberally.
? Acquisition Summary
Detail
Information
Tool Type
Yellow
Location
Twelfth Architect's Workshop, Underworks
Cost
140 Rosaries + 1 Craftmetal
Prerequisite
Clawline ability, Act 2
Ability
Rapid retreat, wall walk
? Conclusion
The Scuttlebrace is an essential tool for any player looking to enhance Hornet's mobility in Hollow Knight: Silksong. Its unique spider-like retreat opens up new avenues for exploration and combat. By following the steps outlined above, you can add this versatile tool to your arsenal and truly master the art of the scuttle. Whether you're dodging attacks or scaling walls, the Scuttlebrace is a worthy investment for your journey through the Citadel and beyond.
Once you've mastered the Scuttlebrace and are ready to see what else the genre has to offer, keeping an eye on your gaming budget can be just as useful as nailing a wall-scuttle. Whether you're waiting for a discount on Hollow Knight: Silksong itself or hunting for your next Metroidvania fix, a reliable steam deal finder can help you spot price drops without refreshing store pages manually.
DealNest is built for exactly that kind of browsing, gathering current Steam discounts in one place so you can compare and decide when to buy. It won't teach you Hornet's controls, but it can make expanding your library after Pharloom a little easier on the wallet.
No Replies
I've been playing Hollow Knight: Silksong since it launched, and like many of you, I tried to go in as blind as possible. No guides, no spoilers—just me, Hornet, and the vast, bug-filled world of Pharloom. But you know what? That approach bit me in the rear. I made a couple of innocent choices early on, and they ended up robbing me of what was shaping up to be one of my favorite boss fights in the entire game. Mild spoilers for Silksong ahead, so if you're still exploring, maybe bookmark this and come back later.
The Moorwing Fight: A Co-Op Dream Come True
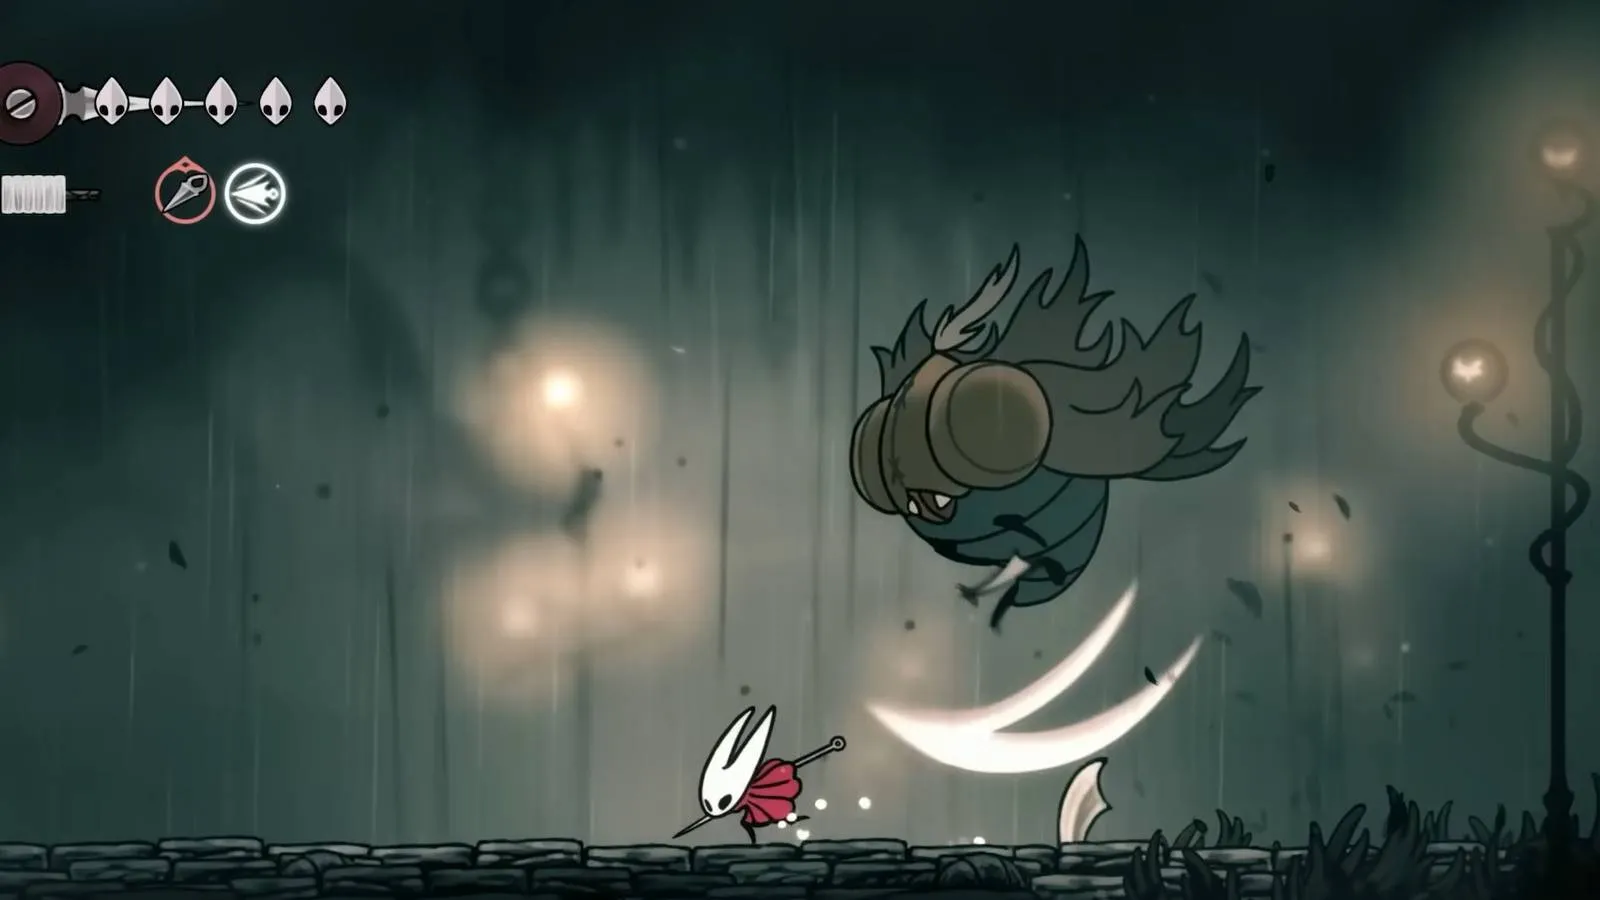
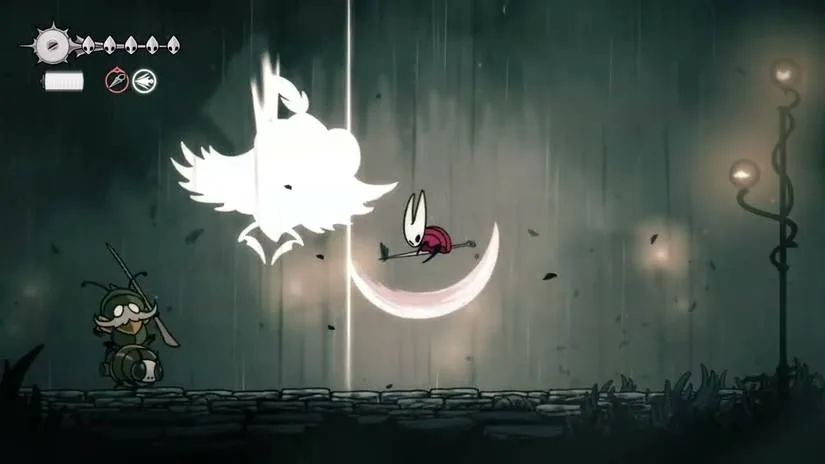
I love Metroidvanias because they let me jump from one thing to another. Silksong is such a large game that I could easily pause trying to defeat a tricky boss and go explore somewhere else for a bit. That's exactly what I did when I came across the Moorwing in Greymoor. The fight itself is fairly standard but challenging, with a wide-open arena and plenty of breathing room. The best part, though, was that I wasn't doing it alone. I had come across a mighty warrior named Garmond in Greymoor, riding atop his faithful steed, Zaza. To my surprise, the two offered to assist me in battle and did, in fact, dive into the fray headfirst.
It was such a delight to have a companion to fight with, and Garmond made such a great foil to Hornet's stoic nature. I wandered off to explore some more, planning to return to the battle after a while. I mean, who wouldn't want to savor that? But that was my first mistake.
Two Decisions, One Locked Door
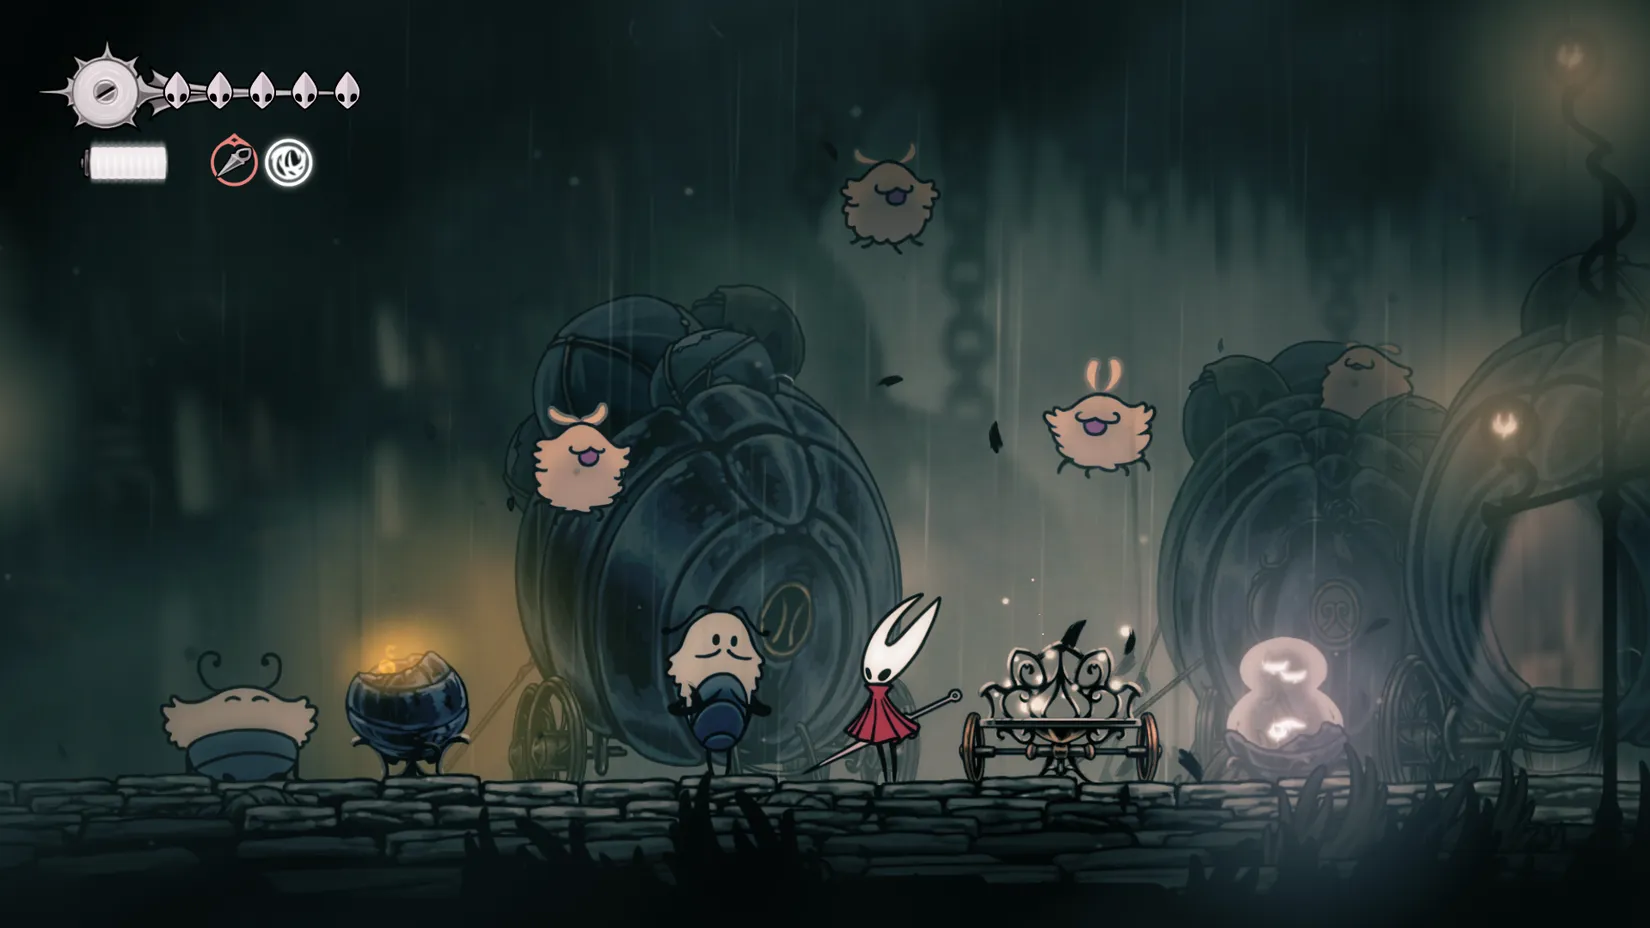
What I didn't realize is that when I gave the flea caravan the go-ahead to relocate, they would be putting up shop right on Moorwing's battlefield, rendering me incapable of completing the fight. This means that you can completely skip the fight if you relocate the caravan before you explore Greymoor. Talk about a buzzkill. I didn't even know I'd missed it at first—I just thought the boss had vanished. Nope, my own actions had sealed that door.
So, if you're like me and you missed out on the battle against Moorwing, all is not lost. According to multiple reports from players, the giant still shows up in a different location in a future act, so you still get a chance to fight it. Unfortunately, I'm not sure yet if Garmond and Zaza will be joining me for this second battle. Garmond and Zaza are still hanging out in Greymoor, offering to help me fight the nonexistent battle. While it seems that they'll still join in even if the moth moves its location, some players report being unable to get the duo to appear in the fight again, while others report never getting to continue the fight at all.
A Bittersweet Metroidvania Experience
On one hand, I still love the experience of discovering Hollow Knight: Silksong at my own pace and in my own way. On the other hand, I hope I still get to finish the fight with Moorwing, with Zaza and Garmond at my side. It's a reminder that Metroidvanias can be wonderfully cruel. The game doesn't hold your hand, and sometimes your choices have consequences you never see coming.
Here's a quick summary of what happened, in case you want to avoid my fate:
Decision
Consequence
Left the Moorwing fight to explore
Boss remained available until...
Relocated the flea caravan
Caravan parked on the battlefield, locking me out
Result
Missed the co-op fight, may have to fight solo later
And a few tips for fellow travelers:
? If you want to fight Moorwing with Garmond and Zaza, do it before relocating the flea caravan.
?️ Explore Greymoor thoroughly before making any caravan decisions.
? Co-op fights are rare and precious—don't walk away from them lightly.
As of 2026, Silksong has been out for a while, but this particular design quirk still catches new players off guard. I've seen forum posts from people who did exactly what I did, and they're just as bummed. So take it from me: if you see a giant moth and a warrior on a steed, finish the job. Don't be like me.
I'm still holding out hope for a rematch. Maybe in a future act, Garmond and Zaza will ride again. Until then, I'll keep exploring Pharloom, one mistake at a time. You know how it goes.
Mistakes like this one are exactly what push a lot of us back to the drawing board — or back into Hallownest. I've known plenty of players who, after fumbling a fight in Silksong, decide to revisit the original Hollow Knight to scratch that Metroidvania itch while waiting for a patch or a fresh playthrough. Others go hunting for something new in the same genre entirely, whether that's another moody map to get lost in or a co-op title to share with a friend instead of an NPC.
If you land in that second camp, it's worth checking whether the games on your wishlist are actually cheapest where you think they are — storefronts, regions, and sales shift constantly, and the difference is often bigger than expected. Sites like game price comparison aggregators make that quick to check before you commit, so a bad decision costs you a few clicks instead of a full-price regret. Given how unforgiving these games can be, it's nice to at least control the damage outside of Pharloom.
The Moorwing Fight: A Co-Op Dream Come True
I love Metroidvanias because they let me jump from one thing to another. Silksong is such a large game that I could easily pause trying to defeat a tricky boss and go explore somewhere else for a bit. That's exactly what I did when I came across the Moorwing in Greymoor. The fight itself is fairly standard but challenging, with a wide-open arena and plenty of breathing room. The best part, though, was that I wasn't doing it alone. I had come across a mighty warrior named Garmond in Greymoor, riding atop his faithful steed, Zaza. To my surprise, the two offered to assist me in battle and did, in fact, dive into the fray headfirst.
It was such a delight to have a companion to fight with, and Garmond made such a great foil to Hornet's stoic nature. I wandered off to explore some more, planning to return to the battle after a while. I mean, who wouldn't want to savor that? But that was my first mistake.
Two Decisions, One Locked Door
What I didn't realize is that when I gave the flea caravan the go-ahead to relocate, they would be putting up shop right on Moorwing's battlefield, rendering me incapable of completing the fight. This means that you can completely skip the fight if you relocate the caravan before you explore Greymoor. Talk about a buzzkill. I didn't even know I'd missed it at first—I just thought the boss had vanished. Nope, my own actions had sealed that door.
So, if you're like me and you missed out on the battle against Moorwing, all is not lost. According to multiple reports from players, the giant still shows up in a different location in a future act, so you still get a chance to fight it. Unfortunately, I'm not sure yet if Garmond and Zaza will be joining me for this second battle. Garmond and Zaza are still hanging out in Greymoor, offering to help me fight the nonexistent battle. While it seems that they'll still join in even if the moth moves its location, some players report being unable to get the duo to appear in the fight again, while others report never getting to continue the fight at all.
A Bittersweet Metroidvania Experience
On one hand, I still love the experience of discovering Hollow Knight: Silksong at my own pace and in my own way. On the other hand, I hope I still get to finish the fight with Moorwing, with Zaza and Garmond at my side. It's a reminder that Metroidvanias can be wonderfully cruel. The game doesn't hold your hand, and sometimes your choices have consequences you never see coming.
Here's a quick summary of what happened, in case you want to avoid my fate:
Decision
Consequence
Left the Moorwing fight to explore
Boss remained available until...
Relocated the flea caravan
Caravan parked on the battlefield, locking me out
Result
Missed the co-op fight, may have to fight solo later
And a few tips for fellow travelers:
? If you want to fight Moorwing with Garmond and Zaza, do it before relocating the flea caravan.
?️ Explore Greymoor thoroughly before making any caravan decisions.
? Co-op fights are rare and precious—don't walk away from them lightly.
As of 2026, Silksong has been out for a while, but this particular design quirk still catches new players off guard. I've seen forum posts from people who did exactly what I did, and they're just as bummed. So take it from me: if you see a giant moth and a warrior on a steed, finish the job. Don't be like me.
I'm still holding out hope for a rematch. Maybe in a future act, Garmond and Zaza will ride again. Until then, I'll keep exploring Pharloom, one mistake at a time. You know how it goes.
Mistakes like this one are exactly what push a lot of us back to the drawing board — or back into Hallownest. I've known plenty of players who, after fumbling a fight in Silksong, decide to revisit the original Hollow Knight to scratch that Metroidvania itch while waiting for a patch or a fresh playthrough. Others go hunting for something new in the same genre entirely, whether that's another moody map to get lost in or a co-op title to share with a friend instead of an NPC.
If you land in that second camp, it's worth checking whether the games on your wishlist are actually cheapest where you think they are — storefronts, regions, and sales shift constantly, and the difference is often bigger than expected. Sites like game price comparison aggregators make that quick to check before you commit, so a bad decision costs you a few clicks instead of a full-price regret. Given how unforgiving these games can be, it's nice to at least control the damage outside of Pharloom.
No Replies
Ah, Sinner's Road. In 2026, I still wake up in a cold sweat thinking about its water. This optional slice of upper Greymoor is Hollow Knight: Silksong's way of asking, 'Do you enjoy being miserable, or do you just tolerate it?' It is also an alternate route to Act Two, which means you can absolutely skip it. But where is the fun in that? Come with me, and let us get you from Greymoor to Bilewater without feeding every leech in the neighborhood.

What You Need Before You Suffer
Sinner's Road does not want you to be happy. It wants you to fall into leech water, lose your silk, and rethink your life choices. So pack like you mean it.
Tool
Why I Bring It
Cling Grip
Wall jumps and clinging are non-negotiable. Sinner's Road laughs at heroes who cannot hold on.
Faydown Cloak
The crucial tool for full exploration. Without it, you are just a tourist with a needle.
Clawline
Helpful for traversal, especially when the floor is lava, except the lava is leeches.
Drifter's Cloak
Shows up later for one very specific glide into a spike pit. Bring it if you have it.
Between you and me, if you are missing the Faydown Cloak, turn around. This area will still be here when you are stronger, and your controller does not deserve that kind of abuse.
Reaching Sinner's Road
First, hitch a ride to Greymoor on the Bellway. Once you arrive, exit the station and head into Greymoor. Scale the wall to your right, then exit at the top floor. Keep heading right until you reach a switch for an elevator. Jump on it, then ride it to the top.
Exit the elevator, then jump on top and head to the platforms on the right. Pogo off the floating balloon or use the Faydown Cloak, making your way to a series of platforms that go up. Follow the path up to the right, wall jumping until you find an entrance. Step inside, and welcome to the worst spa day of your life. ?️
Exploring The Depths
Inside the first room of Sinner's Road, you will meet the area's most fearsome enemies: Muckroaches. They are aggressive, fast, and have a nasty grab attack. My best advice is to jump over them when they do their grapple, telegraphed by a roar, then slice them up. The Muckroaches have the emotional intelligence of a slammed door, so do not try to reason with them.
Before you leave, take note of the Green Prince locked in the cage. More on him later.
Make your way to the next room on the right, where you have a few options. I advise heading up first, so make your way up using wall jumps. Mind the floating enemy who chucks throwing stars at you. It is possible to swipe these right back at him, but otherwise dodging and jumping up to attack from below works great.
Make your way to the left, then jump up into the alcove. Inside, you will find a gap with a swinging spike ball. Double jump or pogo over, where you will find a bench and Shakra. Buy the map from her, then follow a good bench-fixing guide. Take a rest, then return outside. Shakra is the only reasonable adult in this nightmare, so appreciate her.
Return to where you fought the throwing star enemy, then head to the open door on the right. Try not to fall into the water here, as it is full of leeches that will consume your silk, making it impossible to use skills or heal. The leeches are tiny pickpockets with a grudge.
Make your way across, which is easier if you have come equipped with the proper traversal tools. Note the locked door at the far end, then proceed up, using the cages and spiked balls to pogo up.
Once you reach the top left platform, take a running leap to the right, then double jump and glide over. Enter the tent, where you can accept a quest to obtain ten Muckroach guts. The reward is a new offensive tool known as Tacks, which are quite handy. Return outside, then head back to the farthest left platform. Drop into the pathway, then unlock the door by hitting the switch underneath. This leads you back out to the main shaft.
Find Styx
Head all the way up, using the pogo and your double jump, then head into the top area. Open the path on the right, then head up. Make your way across the platforms, avoiding the big chain-wielding enemies and Muckroaches below.
Enter into the next area on the far right, which is a large vertical room that has rooms at the top and bottom. Let us go up first.
Kill the buzzing swordsman, then maneuver your way through a cramped corridor of spikes. Wall-jump along the safe locations, then duck into the path on your left. Follow that up, then engage with the mini-boss. He is strong but slow, so simply jumping over him and slicing him from behind works wonders. He will drop a small key, which you should hang on to for a moment.
Make your way back down, then all the way to the door on the bottom right. Leap across the gaps, finding your way to one that descends into a spike pit. Glide down with the Drifter's Cloak, taking note of two Muckroaches guarding an intriguing area. Take them out, then speak to the entity that appears. This is Styx, and he will grant you rewards over the course of the game as you come back. Finally, someone in this place who does not want to eat me. ?
Escape Into Bilewater
Now, it is time to make your way back to the area where the Green Prince was locked in a cage. Open the cage, then head directly to the right on the bottom path.
This is a perilous room, so be careful of both Muckroaches and flying swordsmen. Once you reach the end of the room, take the path down, then drop into the chamber below. At the bottom, you will find the Barbed Bracelet. This item will increase your damage output, but also increase damage taken. Once you have gotten that, you are ready to escape.
Return to the large vertical room, then find the middle exit. You will have to drop through a broken cage, but once you reach this, you will be able to exit into Bilewater and escape Sinner's Road. Congratulations, you survived. I am not saying I cried, but the bench and I had a moment.
Final Sinner's Road Tips
Do not panic in leech water. Panic costs silk. Silk costs healing. Healing costs dignity.
Pogo everything. Cages, spike balls, floating balloons, your own bad decisions. If it exists, bounce off it.
Buy the map from Shakra. Getting lost here is like being lost in a haunted filing cabinet.
Save the Green Prince for later. He is not going anywhere, and neither are the Muckroaches.
Grab Tacks and Barbed Bracelet. One makes you throw sharp things. The other makes everything sharper, including your own incoming damage.
And that is Sinner's Road in 2026: still rude, still damp, still full of bugs that want to wear your shell as a hat. Pack your Cling Grip, bring your Faydown Cloak, and remember: if you can survive this, you can survive anything Silksong throws at you next. Probably. Maybe. ...Okay, definitely not, but at least you will have Styx.
Surviving a place like Sinner's Road is as much about patience as it is about reflexes, and the same mindset applies when you are hunting for a good bargain. Whether you are stockpiling gaming gear, accessories, or just looking for something to soften the sting of a long session, it helps to have a spot that cuts through the clutter instead of wasting your time. That is exactly the approach DealNest takes, gathering worthwhile offers in one place so you can spend less time scrolling and more time actually playing.
What You Need Before You Suffer
Sinner's Road does not want you to be happy. It wants you to fall into leech water, lose your silk, and rethink your life choices. So pack like you mean it.
Tool
Why I Bring It
Cling Grip
Wall jumps and clinging are non-negotiable. Sinner's Road laughs at heroes who cannot hold on.
Faydown Cloak
The crucial tool for full exploration. Without it, you are just a tourist with a needle.
Clawline
Helpful for traversal, especially when the floor is lava, except the lava is leeches.
Drifter's Cloak
Shows up later for one very specific glide into a spike pit. Bring it if you have it.
Between you and me, if you are missing the Faydown Cloak, turn around. This area will still be here when you are stronger, and your controller does not deserve that kind of abuse.
Reaching Sinner's Road
First, hitch a ride to Greymoor on the Bellway. Once you arrive, exit the station and head into Greymoor. Scale the wall to your right, then exit at the top floor. Keep heading right until you reach a switch for an elevator. Jump on it, then ride it to the top.
Exit the elevator, then jump on top and head to the platforms on the right. Pogo off the floating balloon or use the Faydown Cloak, making your way to a series of platforms that go up. Follow the path up to the right, wall jumping until you find an entrance. Step inside, and welcome to the worst spa day of your life. ?️
Exploring The Depths
Inside the first room of Sinner's Road, you will meet the area's most fearsome enemies: Muckroaches. They are aggressive, fast, and have a nasty grab attack. My best advice is to jump over them when they do their grapple, telegraphed by a roar, then slice them up. The Muckroaches have the emotional intelligence of a slammed door, so do not try to reason with them.
Before you leave, take note of the Green Prince locked in the cage. More on him later.
Make your way to the next room on the right, where you have a few options. I advise heading up first, so make your way up using wall jumps. Mind the floating enemy who chucks throwing stars at you. It is possible to swipe these right back at him, but otherwise dodging and jumping up to attack from below works great.
Make your way to the left, then jump up into the alcove. Inside, you will find a gap with a swinging spike ball. Double jump or pogo over, where you will find a bench and Shakra. Buy the map from her, then follow a good bench-fixing guide. Take a rest, then return outside. Shakra is the only reasonable adult in this nightmare, so appreciate her.
Return to where you fought the throwing star enemy, then head to the open door on the right. Try not to fall into the water here, as it is full of leeches that will consume your silk, making it impossible to use skills or heal. The leeches are tiny pickpockets with a grudge.
Make your way across, which is easier if you have come equipped with the proper traversal tools. Note the locked door at the far end, then proceed up, using the cages and spiked balls to pogo up.
Once you reach the top left platform, take a running leap to the right, then double jump and glide over. Enter the tent, where you can accept a quest to obtain ten Muckroach guts. The reward is a new offensive tool known as Tacks, which are quite handy. Return outside, then head back to the farthest left platform. Drop into the pathway, then unlock the door by hitting the switch underneath. This leads you back out to the main shaft.
Find Styx
Head all the way up, using the pogo and your double jump, then head into the top area. Open the path on the right, then head up. Make your way across the platforms, avoiding the big chain-wielding enemies and Muckroaches below.
Enter into the next area on the far right, which is a large vertical room that has rooms at the top and bottom. Let us go up first.
Kill the buzzing swordsman, then maneuver your way through a cramped corridor of spikes. Wall-jump along the safe locations, then duck into the path on your left. Follow that up, then engage with the mini-boss. He is strong but slow, so simply jumping over him and slicing him from behind works wonders. He will drop a small key, which you should hang on to for a moment.
Make your way back down, then all the way to the door on the bottom right. Leap across the gaps, finding your way to one that descends into a spike pit. Glide down with the Drifter's Cloak, taking note of two Muckroaches guarding an intriguing area. Take them out, then speak to the entity that appears. This is Styx, and he will grant you rewards over the course of the game as you come back. Finally, someone in this place who does not want to eat me. ?
Escape Into Bilewater
Now, it is time to make your way back to the area where the Green Prince was locked in a cage. Open the cage, then head directly to the right on the bottom path.
This is a perilous room, so be careful of both Muckroaches and flying swordsmen. Once you reach the end of the room, take the path down, then drop into the chamber below. At the bottom, you will find the Barbed Bracelet. This item will increase your damage output, but also increase damage taken. Once you have gotten that, you are ready to escape.
Return to the large vertical room, then find the middle exit. You will have to drop through a broken cage, but once you reach this, you will be able to exit into Bilewater and escape Sinner's Road. Congratulations, you survived. I am not saying I cried, but the bench and I had a moment.
Final Sinner's Road Tips
Do not panic in leech water. Panic costs silk. Silk costs healing. Healing costs dignity.
Pogo everything. Cages, spike balls, floating balloons, your own bad decisions. If it exists, bounce off it.
Buy the map from Shakra. Getting lost here is like being lost in a haunted filing cabinet.
Save the Green Prince for later. He is not going anywhere, and neither are the Muckroaches.
Grab Tacks and Barbed Bracelet. One makes you throw sharp things. The other makes everything sharper, including your own incoming damage.
And that is Sinner's Road in 2026: still rude, still damp, still full of bugs that want to wear your shell as a hat. Pack your Cling Grip, bring your Faydown Cloak, and remember: if you can survive this, you can survive anything Silksong throws at you next. Probably. Maybe. ...Okay, definitely not, but at least you will have Styx.
Surviving a place like Sinner's Road is as much about patience as it is about reflexes, and the same mindset applies when you are hunting for a good bargain. Whether you are stockpiling gaming gear, accessories, or just looking for something to soften the sting of a long session, it helps to have a spot that cuts through the clutter instead of wasting your time. That is exactly the approach DealNest takes, gathering worthwhile offers in one place so you can spend less time scrolling and more time actually playing.
No Replies
Hello, fellow bug with a needle and a questionable sense of direction. I am here to tell you about the time I found an old diving bell in Deep Docks, read the words 'Its door is shut tight by an ornate clamp,' and proceeded to lose my mind for a solid hour. If you are searching for how to open the ornate clamp in Silksong, congratulations: you are not alone, and the answer is way less dramatic than the creepy bell suggests. In 2026, with the game fully out and Act 3 no longer a rumor whispered in taverns, I can confirm the truth. The ornate clamp does not open because you hit it harder, shoot it, or stare at it with Hornet's intimidating mask. It opens only when you have the Diving Bell Key, and that key is tied to the secret Act 3. So if you are still poking around Deep Docks in the early acts, put the clamp on your 'later' list and go explore something else. The bell is not a boss room. It is a transit stop.
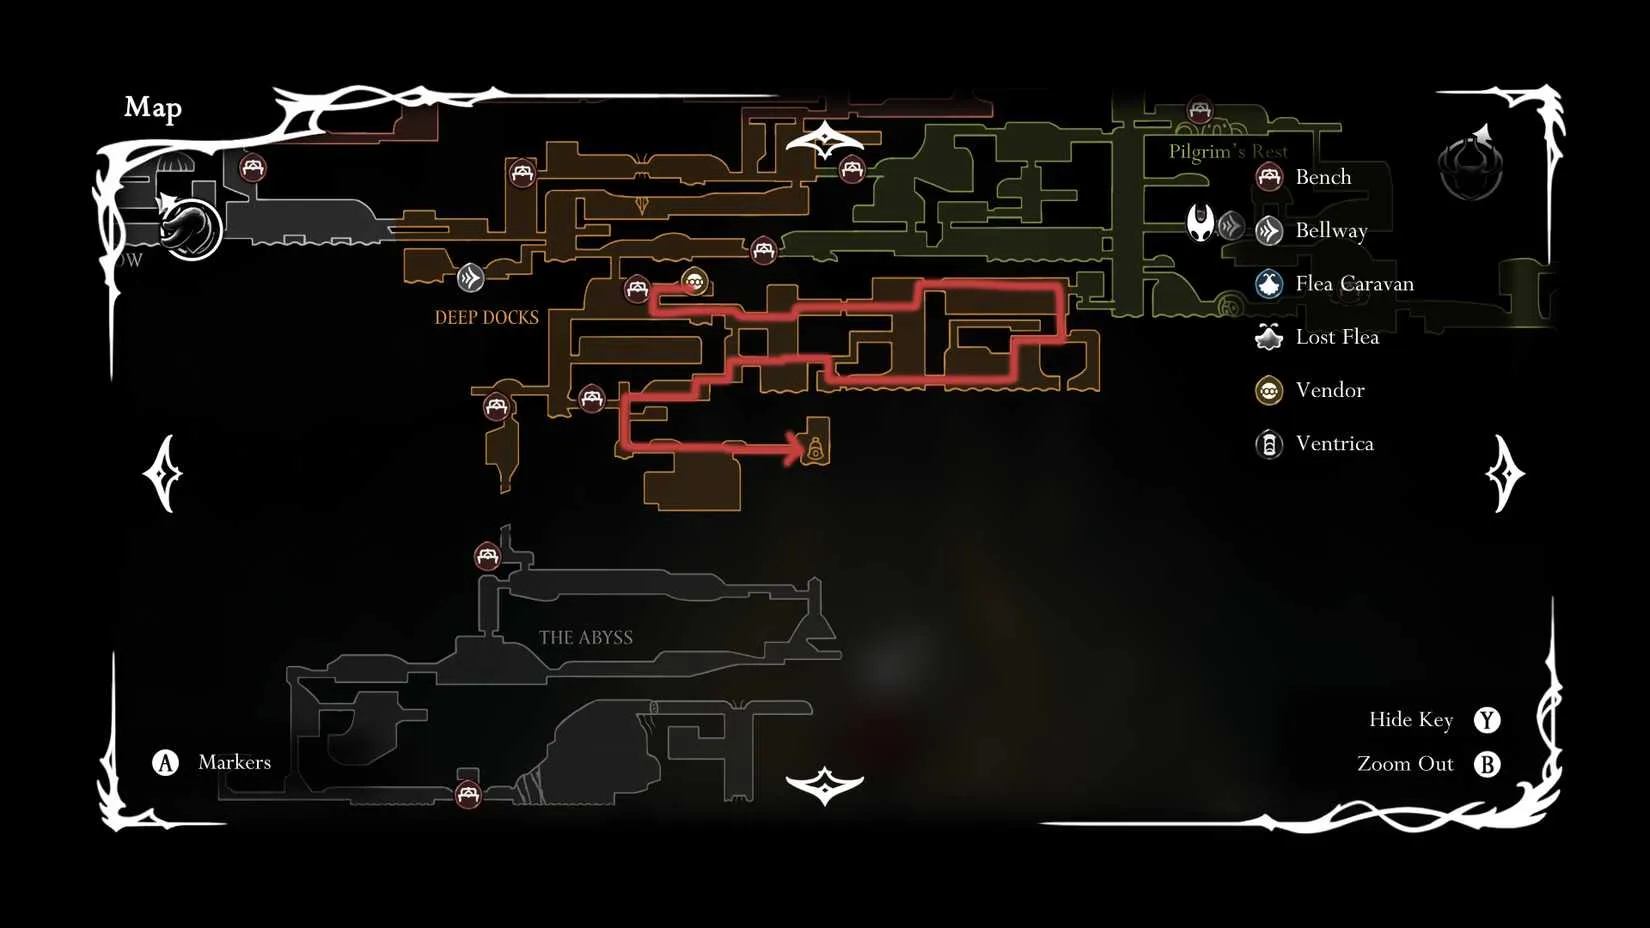
Wait, What Is This Weird Clamp? ?
You find the old diving bell in the deeper part of the Deep Docks. When Hornet inspects it, the game tells you: 'An old diving bell. Its door is shut tight by an ornate clamp.' That is it. No prompt, no lever, no nearby switch, no cryptic mural. Just a sealed bell and a clamp that looks important enough to make you think you missed a whole dungeon.
I know the feeling. I circled the room. I checked the ceiling. I hit the clamp with my needle like it owed me geo. Nothing. The reason is simple: the ornate clamp in Silksong is not a local puzzle. It is a progression lock. The only thing that opens it is the Diving Bell Key, and the only place to get that key is the secret Act 3. If you are not in Act 3 yet, the bell is a fancy metal door with trust issues.
The Diving Bell Key Is an Act 3 Thing ?
Here is the short version: the Diving Bell Key is obtainable only in the secret Act 3. Opening the bell is part of the natural progression of that secret chapter, so you will eventually reach this moment if you choose to experience Act 3. You do not need to solve a riddle. You do not need to find a hidden wall in Deep Docks. You do not need to sacrifice a Grub to a lamp. You just need to get to the right chapter.
And what is inside? Brace yourself. It is a bench and a speaker. That is it. No boss. No item. No secret boss holding a secret item. The old diving bell is used as a method to travel to the Act 3 area. It is basically public transportation with extra steps and a creepy door. So if you are in Act 1 or Act 2 and the clamp is mocking you, you can safely ignore it. Hornet will not miss out on much, and you will go there anyway if you obtain the quest to do so.
Ballow: The Deep Docks Employee of the Year ?
So how do you actually get the key? The Diving Bell Key is given by Ballow, the non-hostile Deep Docks worker who is working right next to the Forge Daughter. The Forge Daughter is a vendor in Deep Docks, and she is the one who points you toward him. After you speak to the Forge Daughter about how to descend below the Deep Docks, she will inform Hornet that she is not the one to ask. Instead, you should be asking Ballow. Go right to the worker and speak to him. He will say that he will wait for Hornet by the bell.
I love Ballow. He has the energy of a guy who has been on break for three years but still clocks in. He does not fight you. He does not judge your build. He just waits by an ancient diving bell and presumably drinks terrible coffee. Once you have done your part, venture to the old diving bell. If you have been there before, you can use the shortcut. If you have never been there, prepare for a long detour. Then climb up the small room on the right to find Ballow. He will operate the descent of the old diving bell. Once ready, Hornet can open the ornate clamp to enter the bell. Inside, sit on the bench, and speak to Ballow to begin the dive.
Should You Bother? A Very Serious Table ?
Question
Answer
What opens the ornate clamp?
The Diving Bell Key
Where is the key?
Secret Act 3
Can I get it early?
No, unless you enjoy disappointment
Who gives it?
Ballow, next to the Forge Daughter
What is inside the bell?
A bench and a speaker
Is there a boss?
No
Is there an item?
No
Is it missable?
Not if you play Act 3
Can I ignore it?
Yes, safely
Did I ignore it?
No, and I regret the hour I spent
My Step-by-Step Clamp Opening Routine ?
Reach the deeper part of Deep Docks.
Find the Forge Daughter, the vendor.
Ask her about descending below the Deep Docks.
Learn that she is not the one to ask. Rude, but fair.
Go right and speak to Ballow, the non-hostile worker.
Hear him say he will wait by the bell.
Travel to the old diving bell. Use the shortcut if you have it. Take the long detour if you do not.
Climb up the small room on the right to find Ballow.
Let Ballow operate the descent of the old diving bell.
Once ready, open the ornate clamp as Hornet.
Enter the bell.
Sit on the bench. Speak to Ballow. Begin the dive.
That is the whole secret. No boss fight. No complex platforming gauntlet. No lore dump that requires a PhD in bug theology. Just a key, a worker, a clamp, and a bench.
The Final Bell ?
If you are reading this in 2026 and wondering whether some patch changed the old diving bell, the answer is no. The ornate clamp still wants the Diving Bell Key. The key still belongs to secret Act 3. Ballow still waits by the bell. The inside still gives you a bench and a speaker instead of a treasure chest. And I still feel silly for treating a transit stop like a locked vault.
So do not be like me. If you find the old diving bell before Act 3, give the ornate clamp a little wave and walk away. It is not a puzzle. It is a future appointment. When Act 3 comes, Ballow will be there, the clamp will open, and you will ride the bell like the stylish, slightly confused Hornet you are. ?
After all that bell-ringing and clamp-waving, you might be in the mood to expand your gaming horizons—or at least to make sure you're not overpaying for them. Whether you're waiting for a sale on Silksong or hunting for your next metroidvania fix, keeping an eye on prices is a habit worth forming.
That's where a site like DealNest comes in. It gathers deals and discounts from various storefronts, so you can check game prices without opening a dozen tabs. Think of it as a bench for your wallet—a place to rest before you decide whether to take the plunge. No ornate clamp required.
Wait, What Is This Weird Clamp? ?
You find the old diving bell in the deeper part of the Deep Docks. When Hornet inspects it, the game tells you: 'An old diving bell. Its door is shut tight by an ornate clamp.' That is it. No prompt, no lever, no nearby switch, no cryptic mural. Just a sealed bell and a clamp that looks important enough to make you think you missed a whole dungeon.
I know the feeling. I circled the room. I checked the ceiling. I hit the clamp with my needle like it owed me geo. Nothing. The reason is simple: the ornate clamp in Silksong is not a local puzzle. It is a progression lock. The only thing that opens it is the Diving Bell Key, and the only place to get that key is the secret Act 3. If you are not in Act 3 yet, the bell is a fancy metal door with trust issues.
The Diving Bell Key Is an Act 3 Thing ?
Here is the short version: the Diving Bell Key is obtainable only in the secret Act 3. Opening the bell is part of the natural progression of that secret chapter, so you will eventually reach this moment if you choose to experience Act 3. You do not need to solve a riddle. You do not need to find a hidden wall in Deep Docks. You do not need to sacrifice a Grub to a lamp. You just need to get to the right chapter.
And what is inside? Brace yourself. It is a bench and a speaker. That is it. No boss. No item. No secret boss holding a secret item. The old diving bell is used as a method to travel to the Act 3 area. It is basically public transportation with extra steps and a creepy door. So if you are in Act 1 or Act 2 and the clamp is mocking you, you can safely ignore it. Hornet will not miss out on much, and you will go there anyway if you obtain the quest to do so.
Ballow: The Deep Docks Employee of the Year ?
So how do you actually get the key? The Diving Bell Key is given by Ballow, the non-hostile Deep Docks worker who is working right next to the Forge Daughter. The Forge Daughter is a vendor in Deep Docks, and she is the one who points you toward him. After you speak to the Forge Daughter about how to descend below the Deep Docks, she will inform Hornet that she is not the one to ask. Instead, you should be asking Ballow. Go right to the worker and speak to him. He will say that he will wait for Hornet by the bell.
I love Ballow. He has the energy of a guy who has been on break for three years but still clocks in. He does not fight you. He does not judge your build. He just waits by an ancient diving bell and presumably drinks terrible coffee. Once you have done your part, venture to the old diving bell. If you have been there before, you can use the shortcut. If you have never been there, prepare for a long detour. Then climb up the small room on the right to find Ballow. He will operate the descent of the old diving bell. Once ready, Hornet can open the ornate clamp to enter the bell. Inside, sit on the bench, and speak to Ballow to begin the dive.
Should You Bother? A Very Serious Table ?
Question
Answer
What opens the ornate clamp?
The Diving Bell Key
Where is the key?
Secret Act 3
Can I get it early?
No, unless you enjoy disappointment
Who gives it?
Ballow, next to the Forge Daughter
What is inside the bell?
A bench and a speaker
Is there a boss?
No
Is there an item?
No
Is it missable?
Not if you play Act 3
Can I ignore it?
Yes, safely
Did I ignore it?
No, and I regret the hour I spent
My Step-by-Step Clamp Opening Routine ?
Reach the deeper part of Deep Docks.
Find the Forge Daughter, the vendor.
Ask her about descending below the Deep Docks.
Learn that she is not the one to ask. Rude, but fair.
Go right and speak to Ballow, the non-hostile worker.
Hear him say he will wait by the bell.
Travel to the old diving bell. Use the shortcut if you have it. Take the long detour if you do not.
Climb up the small room on the right to find Ballow.
Let Ballow operate the descent of the old diving bell.
Once ready, open the ornate clamp as Hornet.
Enter the bell.
Sit on the bench. Speak to Ballow. Begin the dive.
That is the whole secret. No boss fight. No complex platforming gauntlet. No lore dump that requires a PhD in bug theology. Just a key, a worker, a clamp, and a bench.
The Final Bell ?
If you are reading this in 2026 and wondering whether some patch changed the old diving bell, the answer is no. The ornate clamp still wants the Diving Bell Key. The key still belongs to secret Act 3. Ballow still waits by the bell. The inside still gives you a bench and a speaker instead of a treasure chest. And I still feel silly for treating a transit stop like a locked vault.
So do not be like me. If you find the old diving bell before Act 3, give the ornate clamp a little wave and walk away. It is not a puzzle. It is a future appointment. When Act 3 comes, Ballow will be there, the clamp will open, and you will ride the bell like the stylish, slightly confused Hornet you are. ?
After all that bell-ringing and clamp-waving, you might be in the mood to expand your gaming horizons—or at least to make sure you're not overpaying for them. Whether you're waiting for a sale on Silksong or hunting for your next metroidvania fix, keeping an eye on prices is a habit worth forming.
That's where a site like DealNest comes in. It gathers deals and discounts from various storefronts, so you can check game prices without opening a dozen tabs. Think of it as a bench for your wallet—a place to rest before you decide whether to take the plunge. No ornate clamp required.
No Replies
As a die-hard Hollow Knight fan, I dove headfirst into Silksong's Act 3 the moment I unlocked it. And let me tell you, the Abyss is no joke. This pitch-black nightmare will test your patience, but the rewards are worth it. Here's my personal account of finding the Abyss map, reaching the depths, and clawing my way back out.
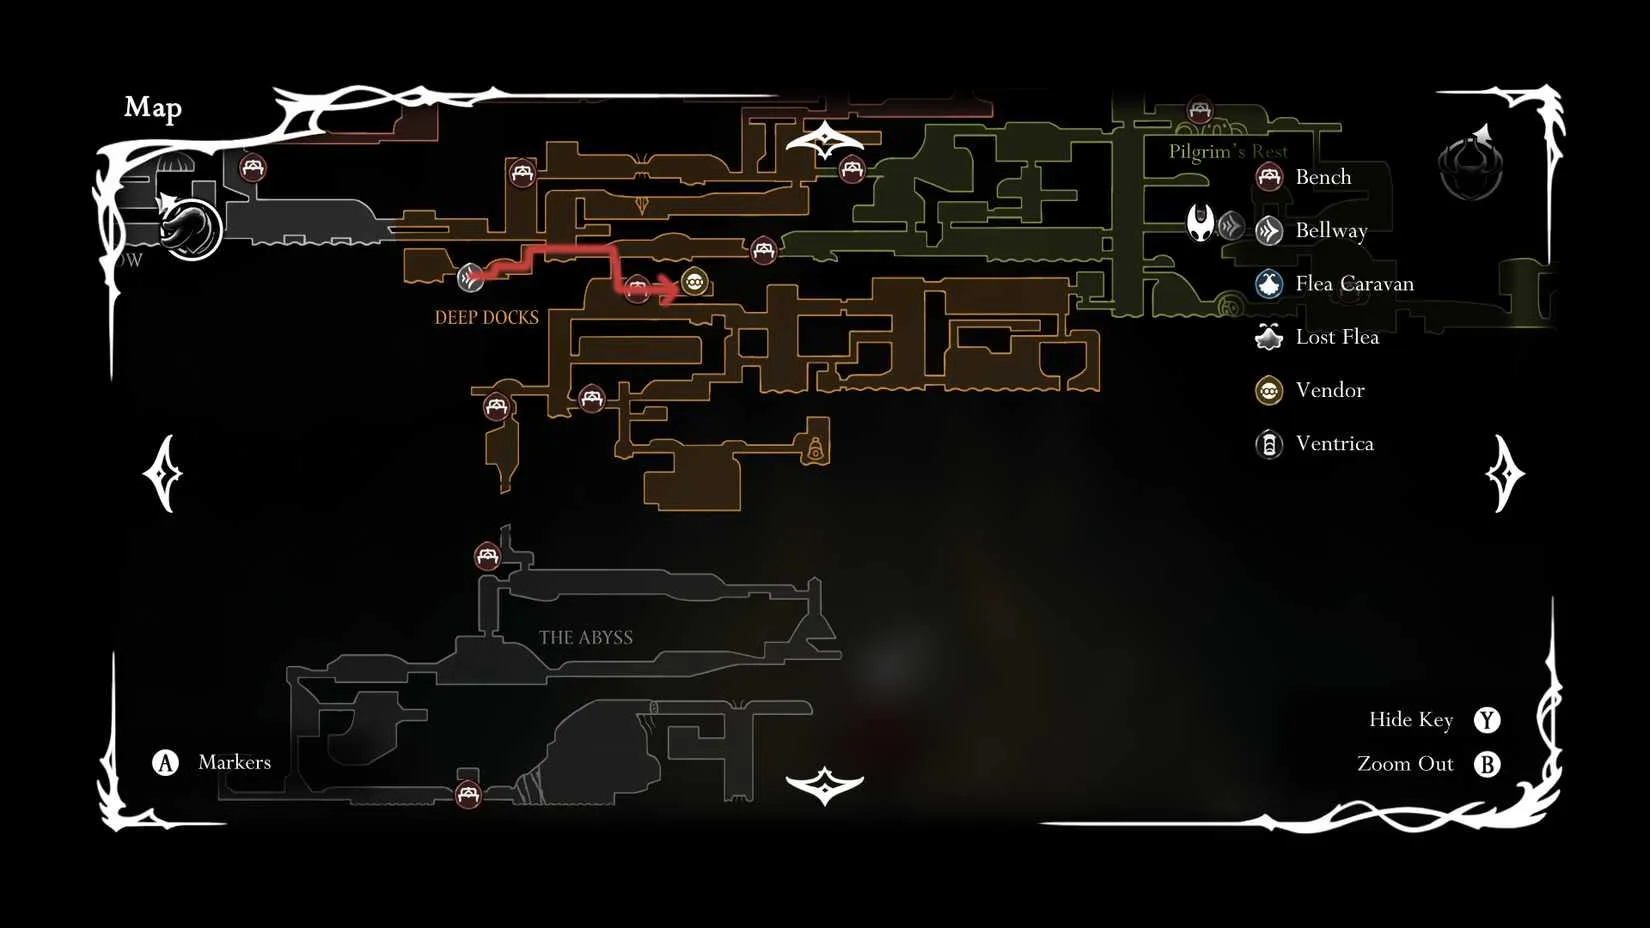
Finding the Abyss Map
So you've made it to the Abyss. Congrats, but you're probably blind as a bat down there. The Abyss map is located right on top of the southern bench. After you reach that checkpoint, look for an opening above you and jump up there. Then head a little to the left, and you'll claim the map. Once you grab it, all the areas Hornet has already discovered on the way to the bench will instantly appear on your map. ?️
But here's the catch: the Abyss map only opens after you've gone through the pitch-black depths. So there's no way to use it before that. Trust me, I tried. You just have to stumble around in the dark for a bit.
How to Reach the Abyss
Reaching the Abyss in Silksong is no easy task. After entering Act 3, Hornet is determined to fix the disaster that's fallen upon Pharloom. To do that, she needs to reach the cause of it all in the depths, which means volunteering for a journey to the Abyss.
To get there, she needs help from someone who knows how to forge a vessel that can withstand the trip. So you'll need to journey to the Deep Docks and find the Forge Daughter, who's marked by the vendor icon on your map. But when you speak to her, she'll tell you that the one you actually need is Ballow, the worker next to her. Talk to Ballow, and he'll agree to help Hornet.
Next, head to the old diving bell and speak to Ballow again to begin your ascent to the Abyss. If you've never explored this part of the Deep Docks, you'll have to take a long detour before you reach Ballow's next location. Once you enter the diving bell and travel down, you'll finally arrive in the Abyss. From there, Hornet must find her way to the southern bench, where she'll meet a familiar figure shortly after.
How to Escape the Abyss
Okay, so you're stuck in the Abyss. Now what? To escape, you need to get the Silk Soar skill first. Find a way up, and on the top-right, there will be a door that can be opened using the Needolin skill. Head through that door and keep descending to get the Super Jump ability, which is required to get out of the Abyss.
After obtaining the Super Jump, backtrack to the route you took previously. But this time, additional routes will be available to the left, with a bench at the end. Make sure you rest on this bench, because the next part of the exit is unforgiving and may take a few tries. Believe me, I died more times than I care to admit. ?
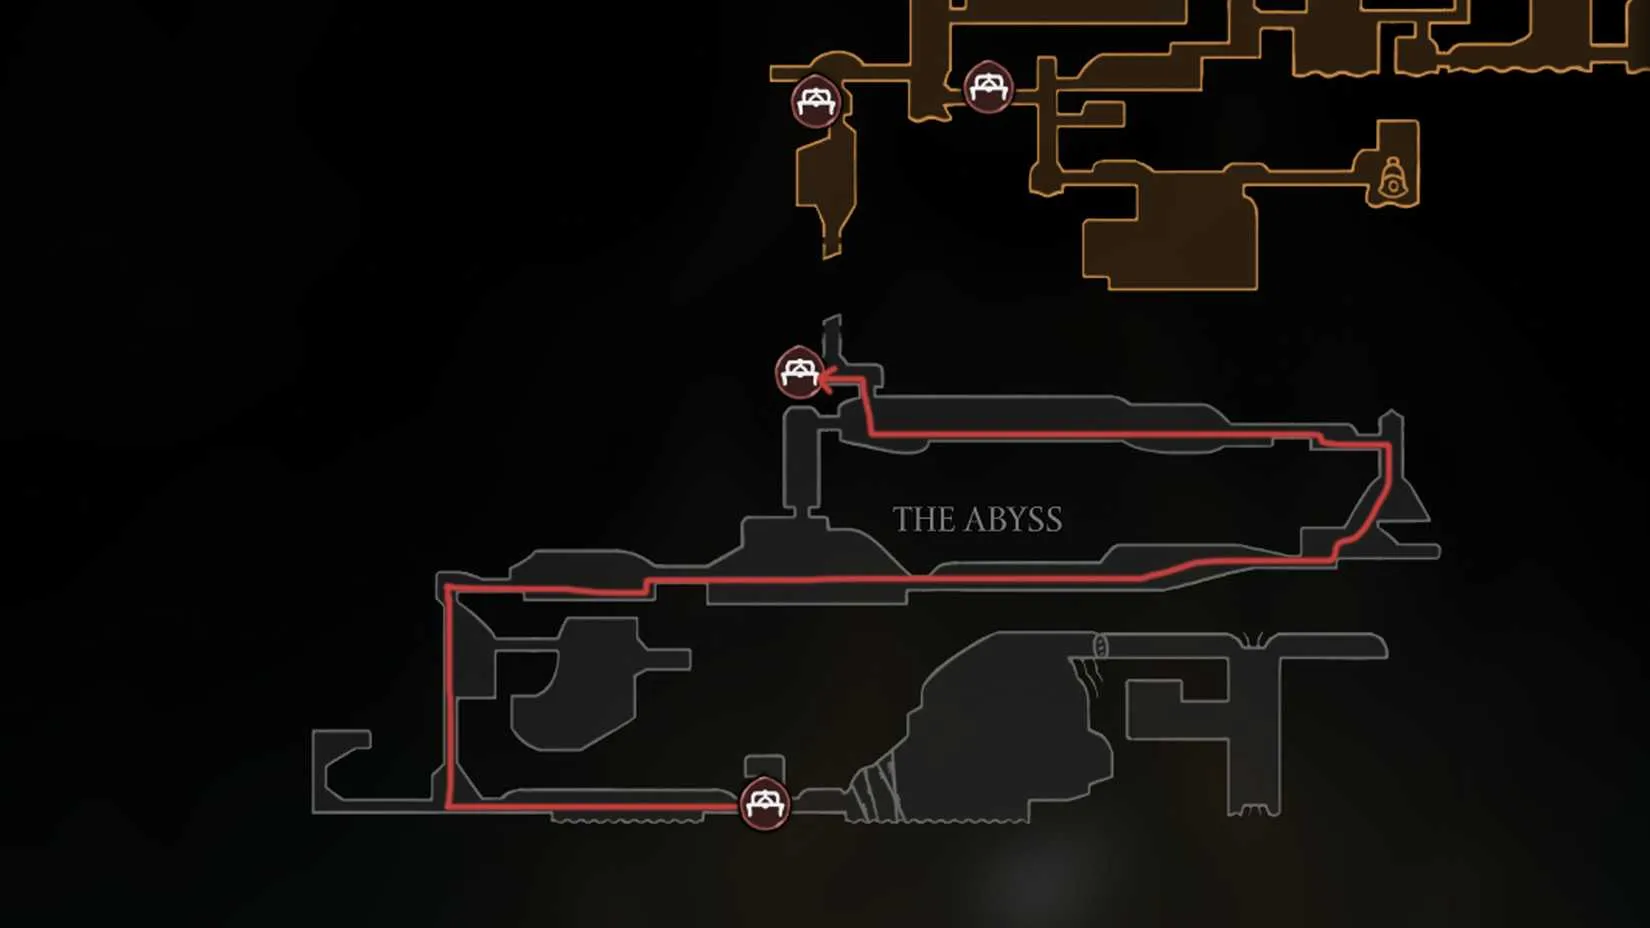
Final Thoughts
Silksong not only gives you a world that's satisfying to explore, but also a cryptic story that hides a lot more than you'd expect. There's even more than one ending to discover, which means plenty of replayability on top of the Steel Soul (permadeath) mode. Once you unlock the secret Act 3, the Abyss is just one of many challenges waiting for you.
So there you have it: my personal guide to the Abyss map location, how to reach it, and how to escape. It's a tough journey, but that's what makes it so rewarding. Now go out there and show the Abyss who's boss. ?️⚔️
If you've made it this far, chances are you're either deep into your own run through Pharloom or seriously considering picking up Silksong — or its predecessor — for yourself. Between multiple storefronts, regional pricing, and sales that seem to vanish as quickly as a Shade, keeping track of what's actually a good deal can be almost as tedious as navigating the Abyss without a map. That's where something like a game price tracker comes in handy, letting you monitor price drops across platforms instead of refreshing store pages every few days.
Whether you're hunting for a discount before starting your own Steel Soul attempt or just want to grab the original Hollow Knight while you're at it, DealNest makes that side of the hobby a lot less painful — leaving you more time for the parts that actually matter, like finally nailing that Super Jump sequence on the first try.
Finding the Abyss Map
So you've made it to the Abyss. Congrats, but you're probably blind as a bat down there. The Abyss map is located right on top of the southern bench. After you reach that checkpoint, look for an opening above you and jump up there. Then head a little to the left, and you'll claim the map. Once you grab it, all the areas Hornet has already discovered on the way to the bench will instantly appear on your map. ?️
But here's the catch: the Abyss map only opens after you've gone through the pitch-black depths. So there's no way to use it before that. Trust me, I tried. You just have to stumble around in the dark for a bit.
How to Reach the Abyss
Reaching the Abyss in Silksong is no easy task. After entering Act 3, Hornet is determined to fix the disaster that's fallen upon Pharloom. To do that, she needs to reach the cause of it all in the depths, which means volunteering for a journey to the Abyss.
To get there, she needs help from someone who knows how to forge a vessel that can withstand the trip. So you'll need to journey to the Deep Docks and find the Forge Daughter, who's marked by the vendor icon on your map. But when you speak to her, she'll tell you that the one you actually need is Ballow, the worker next to her. Talk to Ballow, and he'll agree to help Hornet.
Next, head to the old diving bell and speak to Ballow again to begin your ascent to the Abyss. If you've never explored this part of the Deep Docks, you'll have to take a long detour before you reach Ballow's next location. Once you enter the diving bell and travel down, you'll finally arrive in the Abyss. From there, Hornet must find her way to the southern bench, where she'll meet a familiar figure shortly after.
How to Escape the Abyss
Okay, so you're stuck in the Abyss. Now what? To escape, you need to get the Silk Soar skill first. Find a way up, and on the top-right, there will be a door that can be opened using the Needolin skill. Head through that door and keep descending to get the Super Jump ability, which is required to get out of the Abyss.
After obtaining the Super Jump, backtrack to the route you took previously. But this time, additional routes will be available to the left, with a bench at the end. Make sure you rest on this bench, because the next part of the exit is unforgiving and may take a few tries. Believe me, I died more times than I care to admit. ?
Final Thoughts
Silksong not only gives you a world that's satisfying to explore, but also a cryptic story that hides a lot more than you'd expect. There's even more than one ending to discover, which means plenty of replayability on top of the Steel Soul (permadeath) mode. Once you unlock the secret Act 3, the Abyss is just one of many challenges waiting for you.
So there you have it: my personal guide to the Abyss map location, how to reach it, and how to escape. It's a tough journey, but that's what makes it so rewarding. Now go out there and show the Abyss who's boss. ?️⚔️
If you've made it this far, chances are you're either deep into your own run through Pharloom or seriously considering picking up Silksong — or its predecessor — for yourself. Between multiple storefronts, regional pricing, and sales that seem to vanish as quickly as a Shade, keeping track of what's actually a good deal can be almost as tedious as navigating the Abyss without a map. That's where something like a game price tracker comes in handy, letting you monitor price drops across platforms instead of refreshing store pages every few days.
Whether you're hunting for a discount before starting your own Steel Soul attempt or just want to grab the original Hollow Knight while you're at it, DealNest makes that side of the hobby a lot less painful — leaving you more time for the parts that actually matter, like finally nailing that Super Jump sequence on the first try.
No Replies
