

As a veteran Silksong player, I thought I had faced every nightmare the game could throw at me. Then I met Groal the Great. This giant frog boss, hidden high above the foul tunnels of Bilewater, is not just a test of skill—it's a test of patience. In 2026, with the game's community still sharing tips, I finally conquered this optional beast. Was it worth the dozens of deaths and the most punishing runback in the game? Let me tell you my story.
Getting to Groal: The Runback from Hell
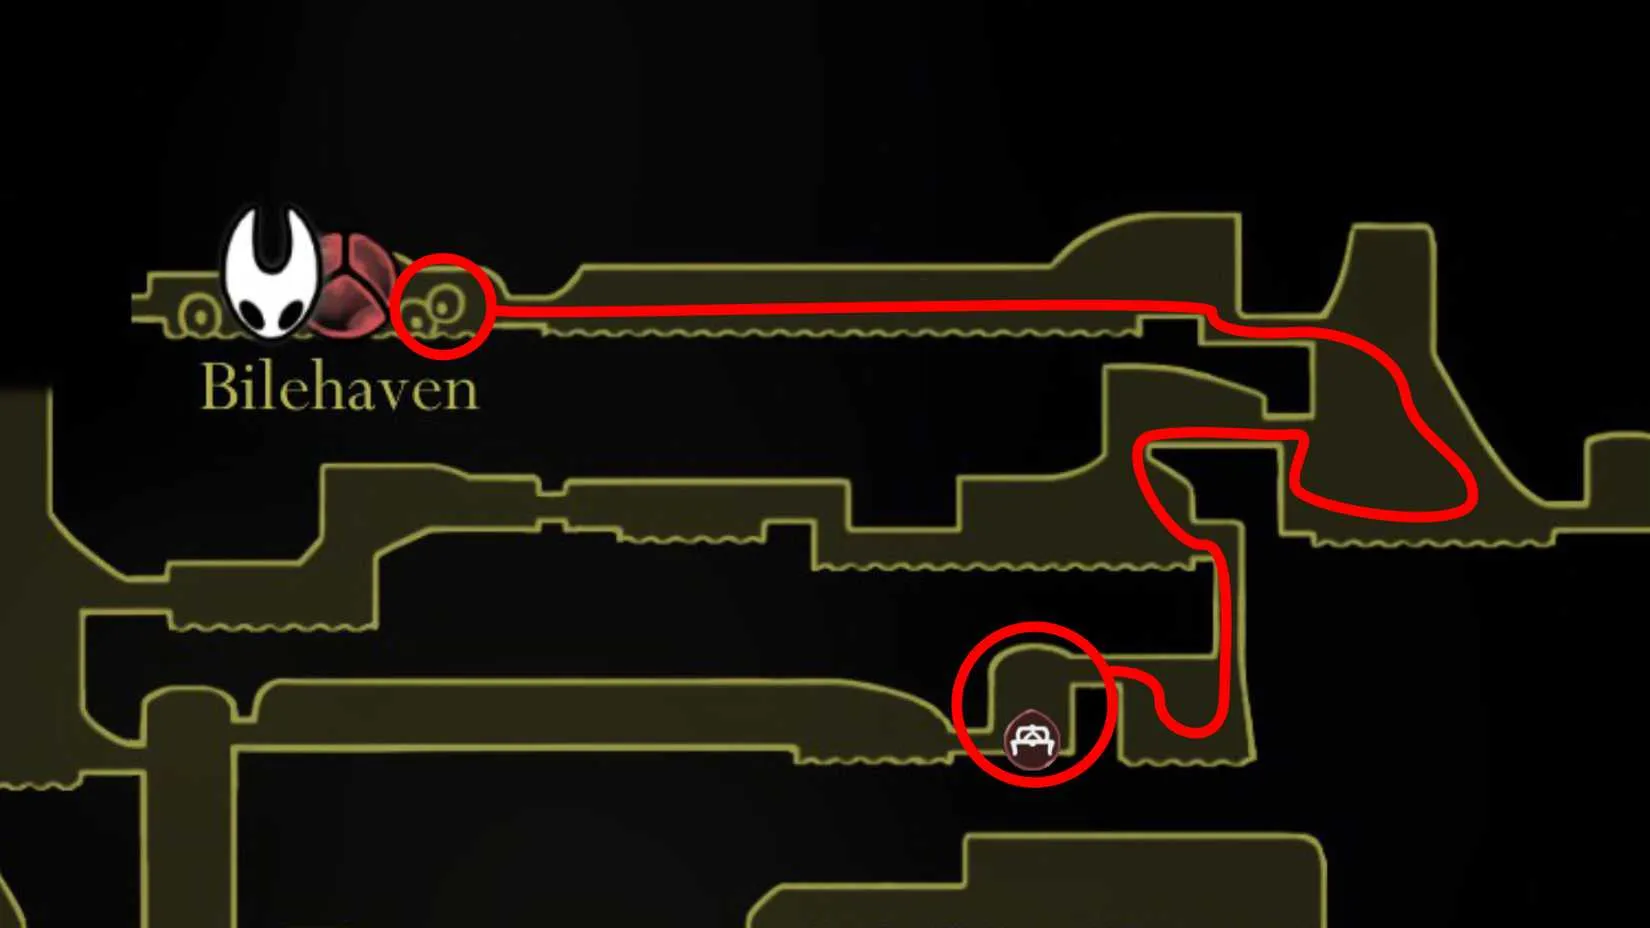
First, let's talk about the journey. Groal the Great lives in Bilehaven, at the very top of Bilewater. This zone is hidden within the Citadel, and you have two ways in: through Sinner's Road (via a hidden entrance above the Halfway Home) or through the Putrefied Ducts (from the Memorium zone). The Ducts route is shorter, but you won't unlock it until late in Act 2. I took the Sinner's Road path, and it was brutal.
Before you even think about this fight, do yourself a favor: get the Faydown Cloak from Mount Fay. This double jump ability is essential for both traversal and the boss fight. Without it, you're just frog food.
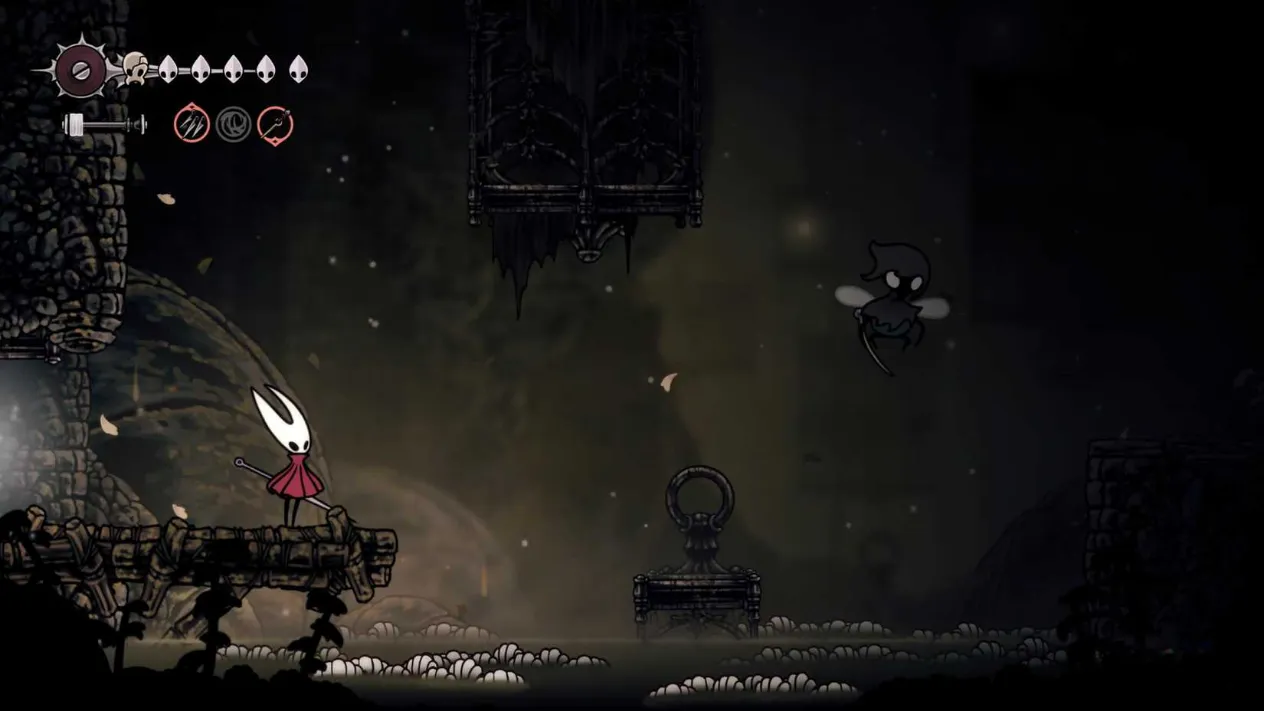
Bilewater is a poison-filled nightmare. I spent hours avoiding toxic pools and ambushes. Eventually, I reached a bench—yes, a real bench!—and sat down to prepare. From there, I ascended to Bilehaven. The key is to take no damage on the way up. Why? Because before Groal appears, you must survive six waves of enemies and spike traps. That's right, six. If you arrive with low HP or no Silk, you're done.
The Boss Fight: Tips and Cheeses
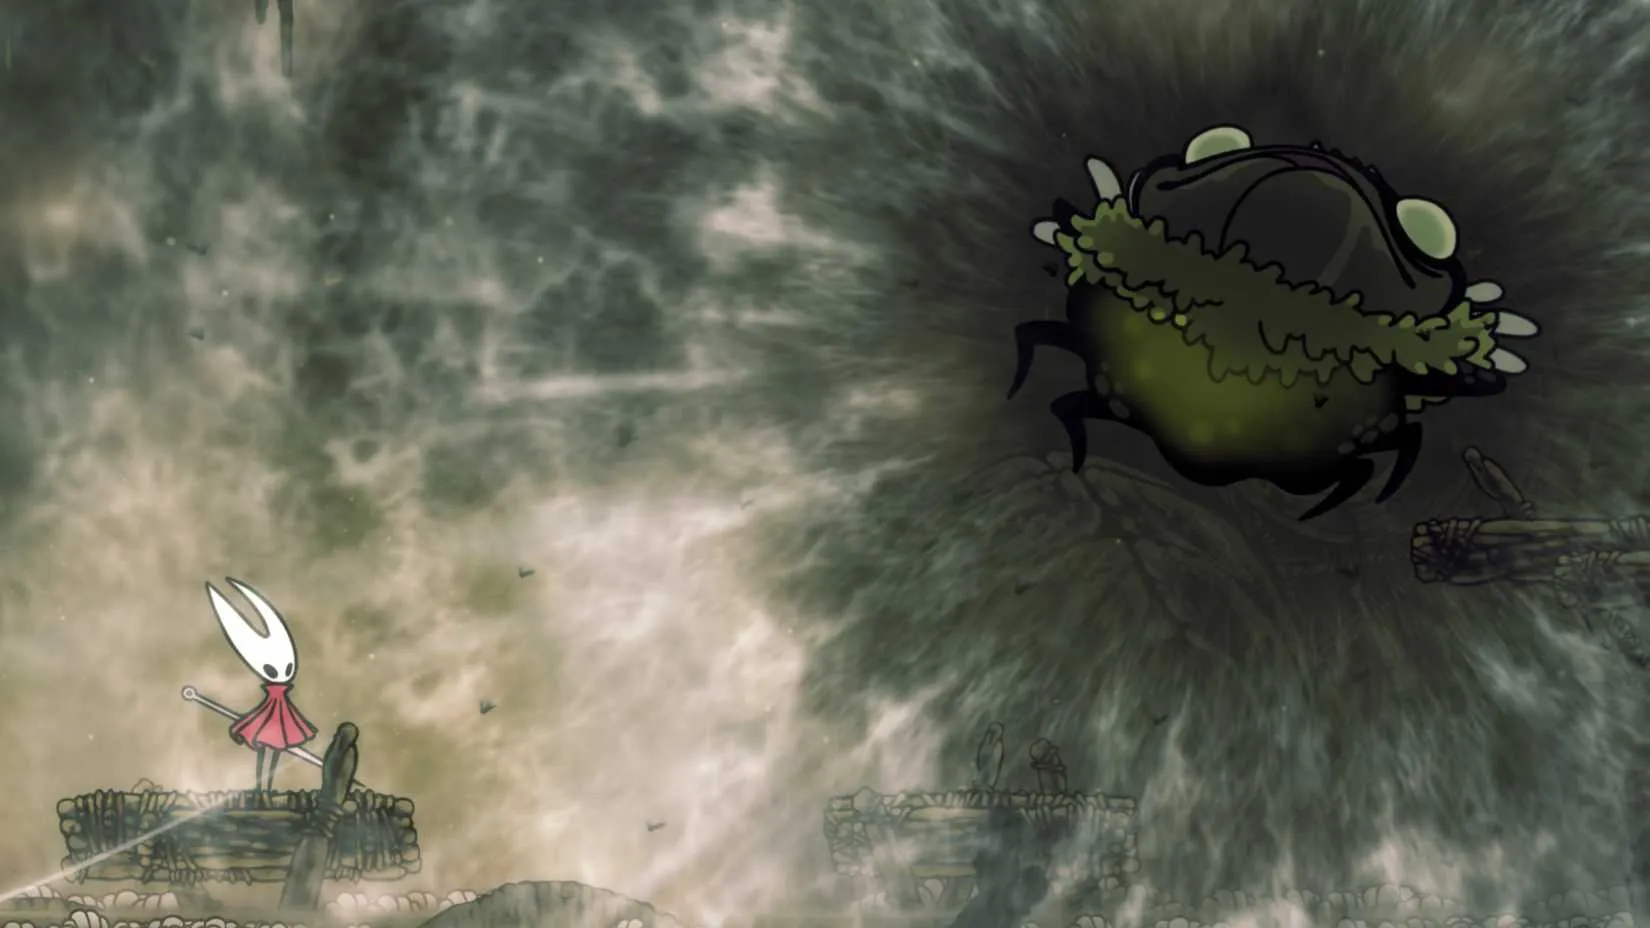
Now, the main event. Groal the Great is a massive frog with a variety of attacks. I died many times before I found a strategy that worked. Here's what I learned.
The Cheese Method
There's a way to cheese this fight, though it's risky. Instead of avoiding the poison pools at the bottom of the screen, top up your HP and dive straight into the poison. Then swim to the extreme left or right. Groal has a hard time hitting you there. You can leap in and out to attack. Just be careful during its Vengeful Spirit attack—it can still hit you in the water. Also, watch for particles in the water that indicate where enemies or the boss will surface.
Recommended Tools
The best tool for this fight, in my opinion, is the Sting Shard. You throw it, and it hovers in mid-air. When an enemy gets close, it explodes into shards, dealing multiple hits. It's perfect for the enemy waves and for Groal himself.
If you plan to pogo on top of the boss, keep your thumb on the jump input. Use the Faydown Cloak to double jump when Groal rises or dives. The boss jumps slightly before diving, so be ready.
Attack Patterns and Counters
Here's a quick table I wish I had when I started:
Attack
What Groal Does
How I Countered
Vengeful Spirit
Shoots a projectile
Dodge sideways; don't stay in poison
Dive
Flies up then dives down
Double jump with Faydown Cloak
Spit
Aims to the side
Heal above or below the boss
Surface
Particles appear in water
Watch for ambush, move away
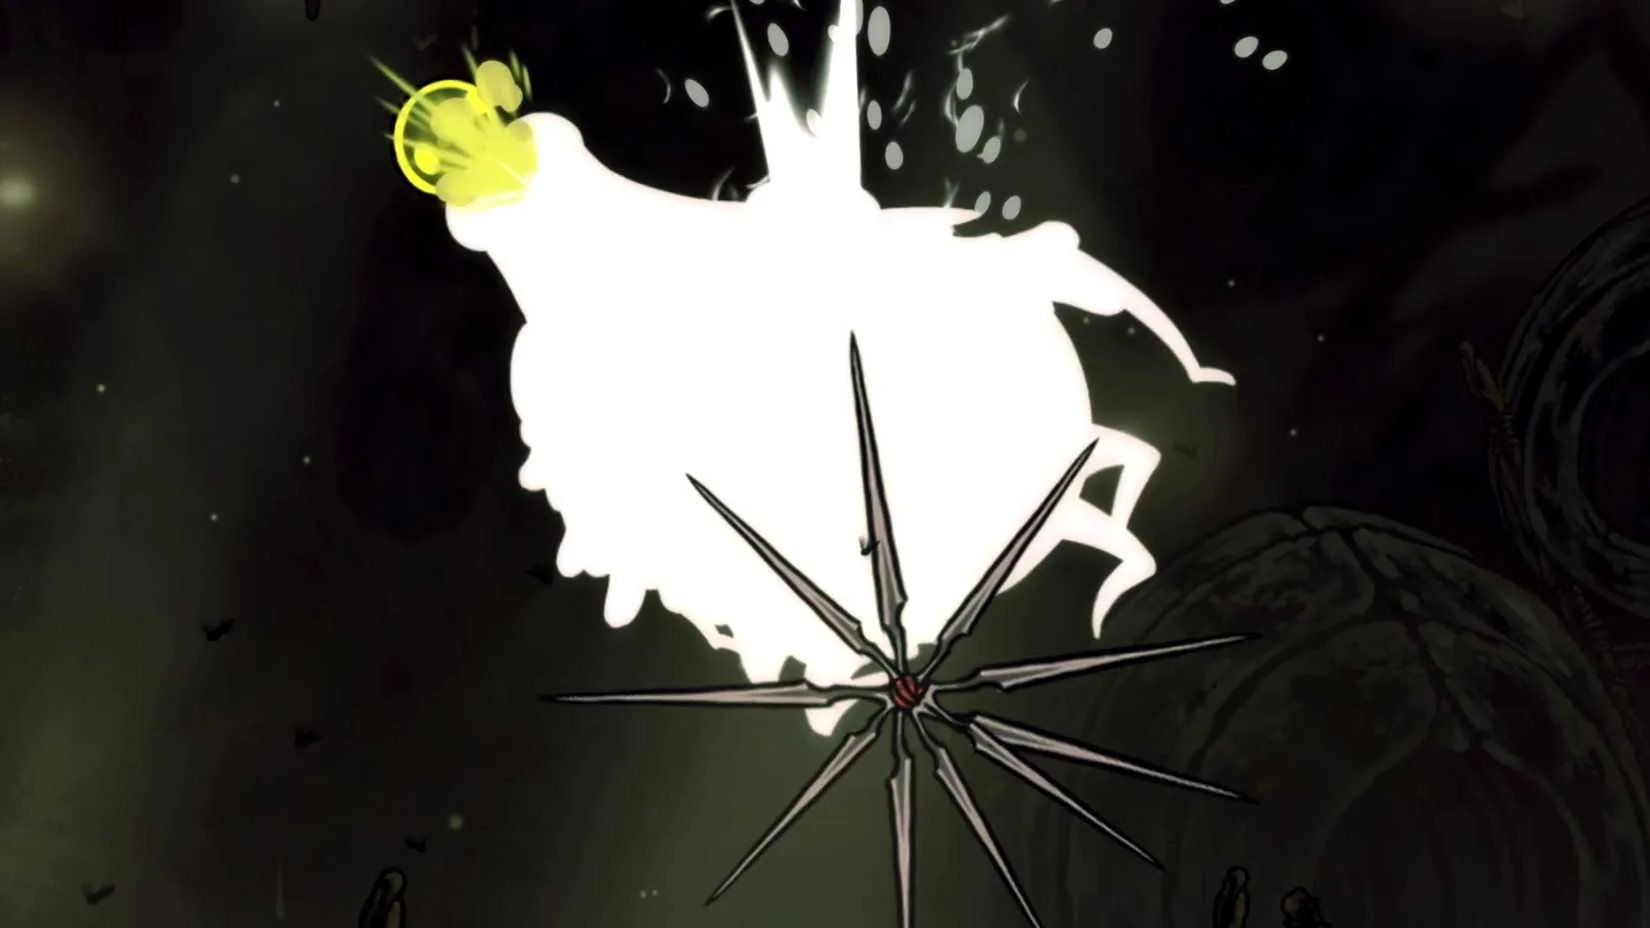
The best times to Bind and heal are immediately after Groal dives into the pools or during its spit animation. After it dives, it won't resurface for a few seconds. When spitting, it aims exclusively to the side, so you can heal if you're above or below.
What Do You Get for Beating Groal?
After many attempts, I finally defeated Groal the Great. Was the reward worth it? Let's see.
First, you unlock access to the rest of Bilehaven to the left. This gives you an easy path into the Putrefied Ducts zone, which contains an important progression item. Go left from the boss arena and enter a boggy hut to find the Seeker's Soul. This key item is required to enter Act 3, which is technically optional but essential for completionists.
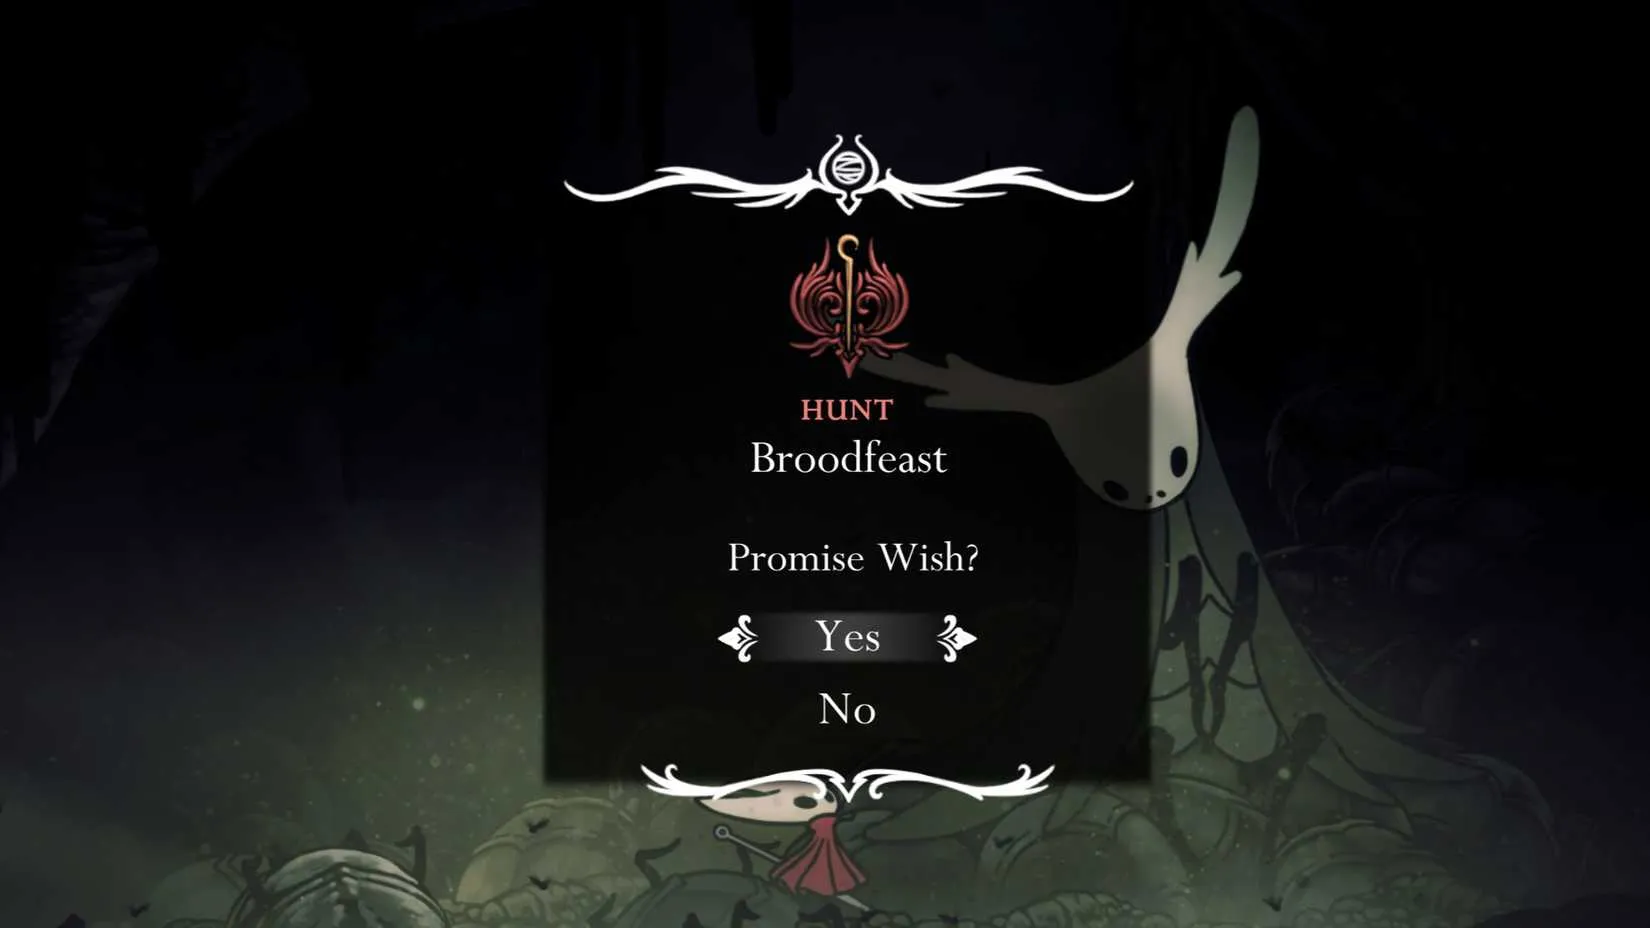
Exit the hut, continue left across a pit of spikes, and unlock a shortcut down to the bottom of Bilewater. But take the upward path first. This leads into the Putrefied Ducts, where you can find the Key of Apostate (used in The Slab). Explore a bit more, and you'll meet The Huntress, who asks Hornet to gather organs of various enemies using specific tools for the Broodfeast quest.
Final Thoughts
So, would I do it again? Maybe not for fun, but the Seeker's Soul made it necessary for my Act 3 run. Groal the Great is a brutal but memorable boss. The runback is painful, the enemy waves are annoying, but the satisfaction of victory is real. If you're struggling, take my advice: get the Faydown Cloak, bring Sting Shards, and don't be afraid to cheese it. Good luck, and may your Silk be plentiful. ??
After a boss like Groal, I'm usually ready for a break—or at least a change of pace. And if you're anything like me, you're probably juggling a wishlist of games you'd love to play next without paying full price.
That's where DealNest comes in. It's a game price tracker that pulls together deals from different stores, so you can see if that game you've been eyeing is finally on sale. It takes the guesswork out of waiting for a discount, and it's a handy tool for anyone who games on a budget.
Getting to Groal: The Runback from Hell
First, let's talk about the journey. Groal the Great lives in Bilehaven, at the very top of Bilewater. This zone is hidden within the Citadel, and you have two ways in: through Sinner's Road (via a hidden entrance above the Halfway Home) or through the Putrefied Ducts (from the Memorium zone). The Ducts route is shorter, but you won't unlock it until late in Act 2. I took the Sinner's Road path, and it was brutal.
Before you even think about this fight, do yourself a favor: get the Faydown Cloak from Mount Fay. This double jump ability is essential for both traversal and the boss fight. Without it, you're just frog food.
Bilewater is a poison-filled nightmare. I spent hours avoiding toxic pools and ambushes. Eventually, I reached a bench—yes, a real bench!—and sat down to prepare. From there, I ascended to Bilehaven. The key is to take no damage on the way up. Why? Because before Groal appears, you must survive six waves of enemies and spike traps. That's right, six. If you arrive with low HP or no Silk, you're done.
The Boss Fight: Tips and Cheeses
Now, the main event. Groal the Great is a massive frog with a variety of attacks. I died many times before I found a strategy that worked. Here's what I learned.
The Cheese Method
There's a way to cheese this fight, though it's risky. Instead of avoiding the poison pools at the bottom of the screen, top up your HP and dive straight into the poison. Then swim to the extreme left or right. Groal has a hard time hitting you there. You can leap in and out to attack. Just be careful during its Vengeful Spirit attack—it can still hit you in the water. Also, watch for particles in the water that indicate where enemies or the boss will surface.
Recommended Tools
The best tool for this fight, in my opinion, is the Sting Shard. You throw it, and it hovers in mid-air. When an enemy gets close, it explodes into shards, dealing multiple hits. It's perfect for the enemy waves and for Groal himself.
If you plan to pogo on top of the boss, keep your thumb on the jump input. Use the Faydown Cloak to double jump when Groal rises or dives. The boss jumps slightly before diving, so be ready.
Attack Patterns and Counters
Here's a quick table I wish I had when I started:
Attack
What Groal Does
How I Countered
Vengeful Spirit
Shoots a projectile
Dodge sideways; don't stay in poison
Dive
Flies up then dives down
Double jump with Faydown Cloak
Spit
Aims to the side
Heal above or below the boss
Surface
Particles appear in water
Watch for ambush, move away
The best times to Bind and heal are immediately after Groal dives into the pools or during its spit animation. After it dives, it won't resurface for a few seconds. When spitting, it aims exclusively to the side, so you can heal if you're above or below.
What Do You Get for Beating Groal?
After many attempts, I finally defeated Groal the Great. Was the reward worth it? Let's see.
First, you unlock access to the rest of Bilehaven to the left. This gives you an easy path into the Putrefied Ducts zone, which contains an important progression item. Go left from the boss arena and enter a boggy hut to find the Seeker's Soul. This key item is required to enter Act 3, which is technically optional but essential for completionists.
Exit the hut, continue left across a pit of spikes, and unlock a shortcut down to the bottom of Bilewater. But take the upward path first. This leads into the Putrefied Ducts, where you can find the Key of Apostate (used in The Slab). Explore a bit more, and you'll meet The Huntress, who asks Hornet to gather organs of various enemies using specific tools for the Broodfeast quest.
Final Thoughts
So, would I do it again? Maybe not for fun, but the Seeker's Soul made it necessary for my Act 3 run. Groal the Great is a brutal but memorable boss. The runback is painful, the enemy waves are annoying, but the satisfaction of victory is real. If you're struggling, take my advice: get the Faydown Cloak, bring Sting Shards, and don't be afraid to cheese it. Good luck, and may your Silk be plentiful. ??
After a boss like Groal, I'm usually ready for a break—or at least a change of pace. And if you're anything like me, you're probably juggling a wishlist of games you'd love to play next without paying full price.
That's where DealNest comes in. It's a game price tracker that pulls together deals from different stores, so you can see if that game you've been eyeing is finally on sale. It takes the guesswork out of waiting for a discount, and it's a handy tool for anyone who games on a budget.
No Replies
I almost missed the Snare Setter on my first journey through Hollow Knight: Silksong. It is a Red Tool hidden inside Weavenest Atla, an area east of Moss Grotto, and the route only opens after you have the Needolin and the Faydown Cloak. Because that means backtracking with a mid-game double jump, many players skip it entirely. In 2026, with Pharloom's secrets widely discussed, I still think this trap tool deserves a permanent slot for boss fights.
?️ What the Snare Setter Actually Is
The Snare Setter is a Red Tool that places a medium-sized silk rune on the ground. When an enemy walks near it, the rune explodes and deals damage. It starts with eight charges by default, and it does not demand rare resources to refill; regular Shell Shards are enough. That makes it easy to restock at benches or vendors before a difficult encounter.
Detail
Information
Tool type
Red Tool
Location
Hidden area inside Weavenest Atla
Access requirements
Needolin and Faydown Cloak
Default charges
8
Replenishment
Shell Shards
Best role
Boss arenas and zone control
?️ My Route Through Weavenest Atla
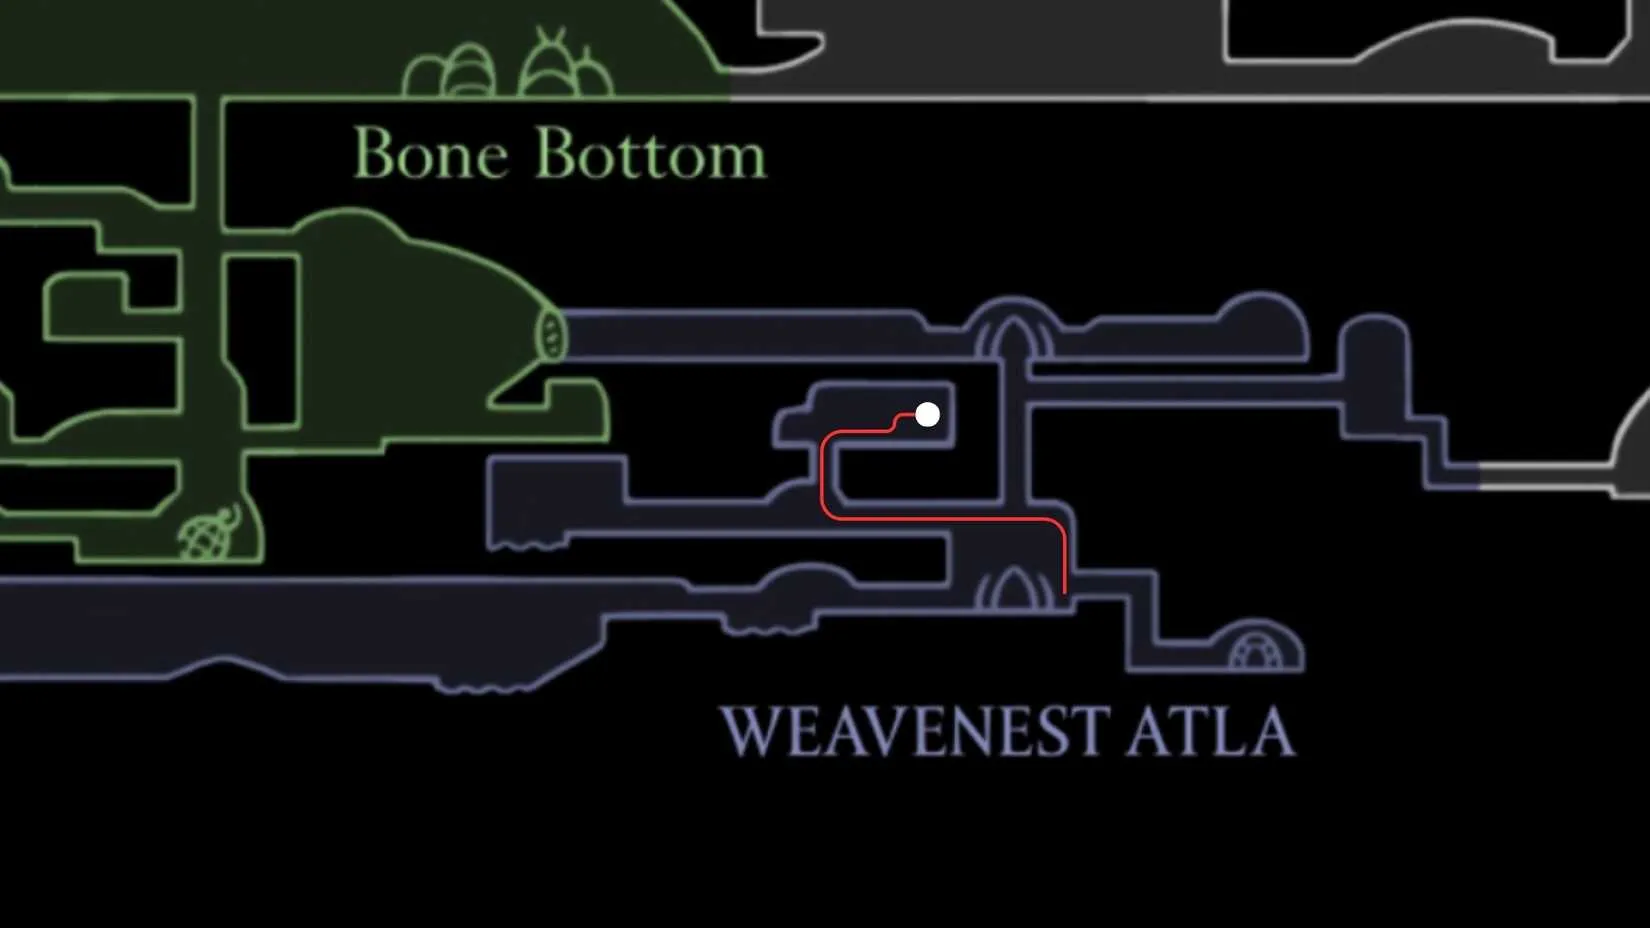
Weavenest Atla sits east of Moss Grotto, the starting region of Silksong. To get inside, I played the Needolin in front of the locked door. Once inside, the path to the Snare Setter is short but easy to fumble if you are not paying attention.
Enter Weavenest Atla and activate the teleporter to reach the lower level.
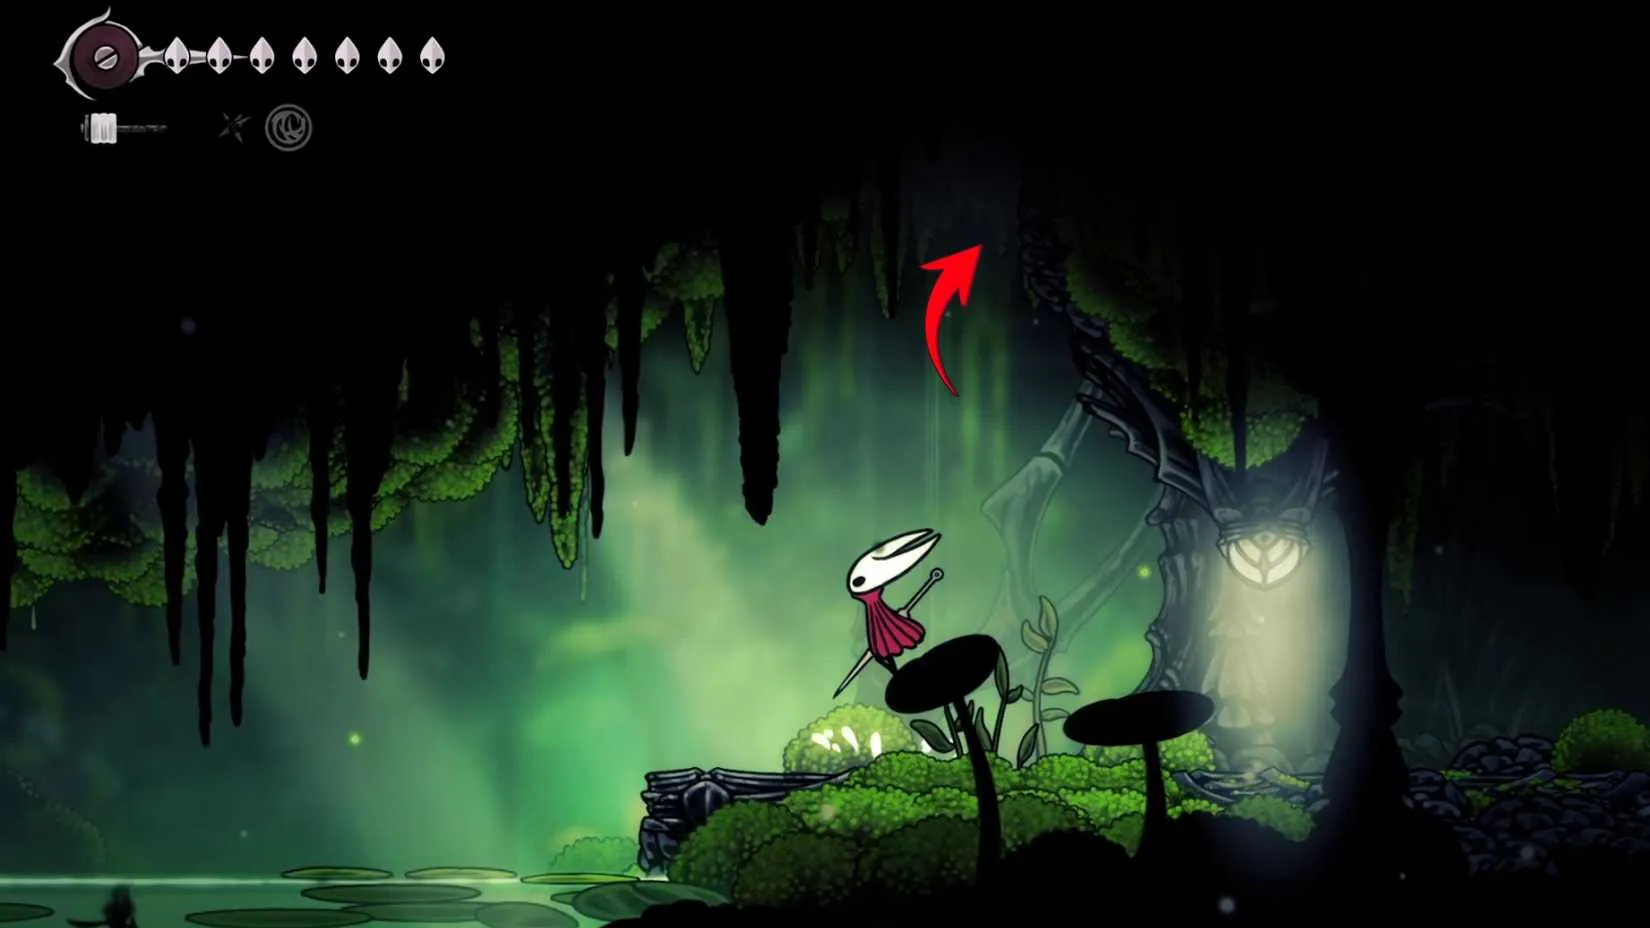
Use Cling Grip to climb the wall on the right.
Jump across the gap and enter the chamber to the left.
Walk left until you reach the water.
Use Cling Grip again to reach the top, then turn right.
Pick up the Snare Setter from the pedestal and add it to your inventory.
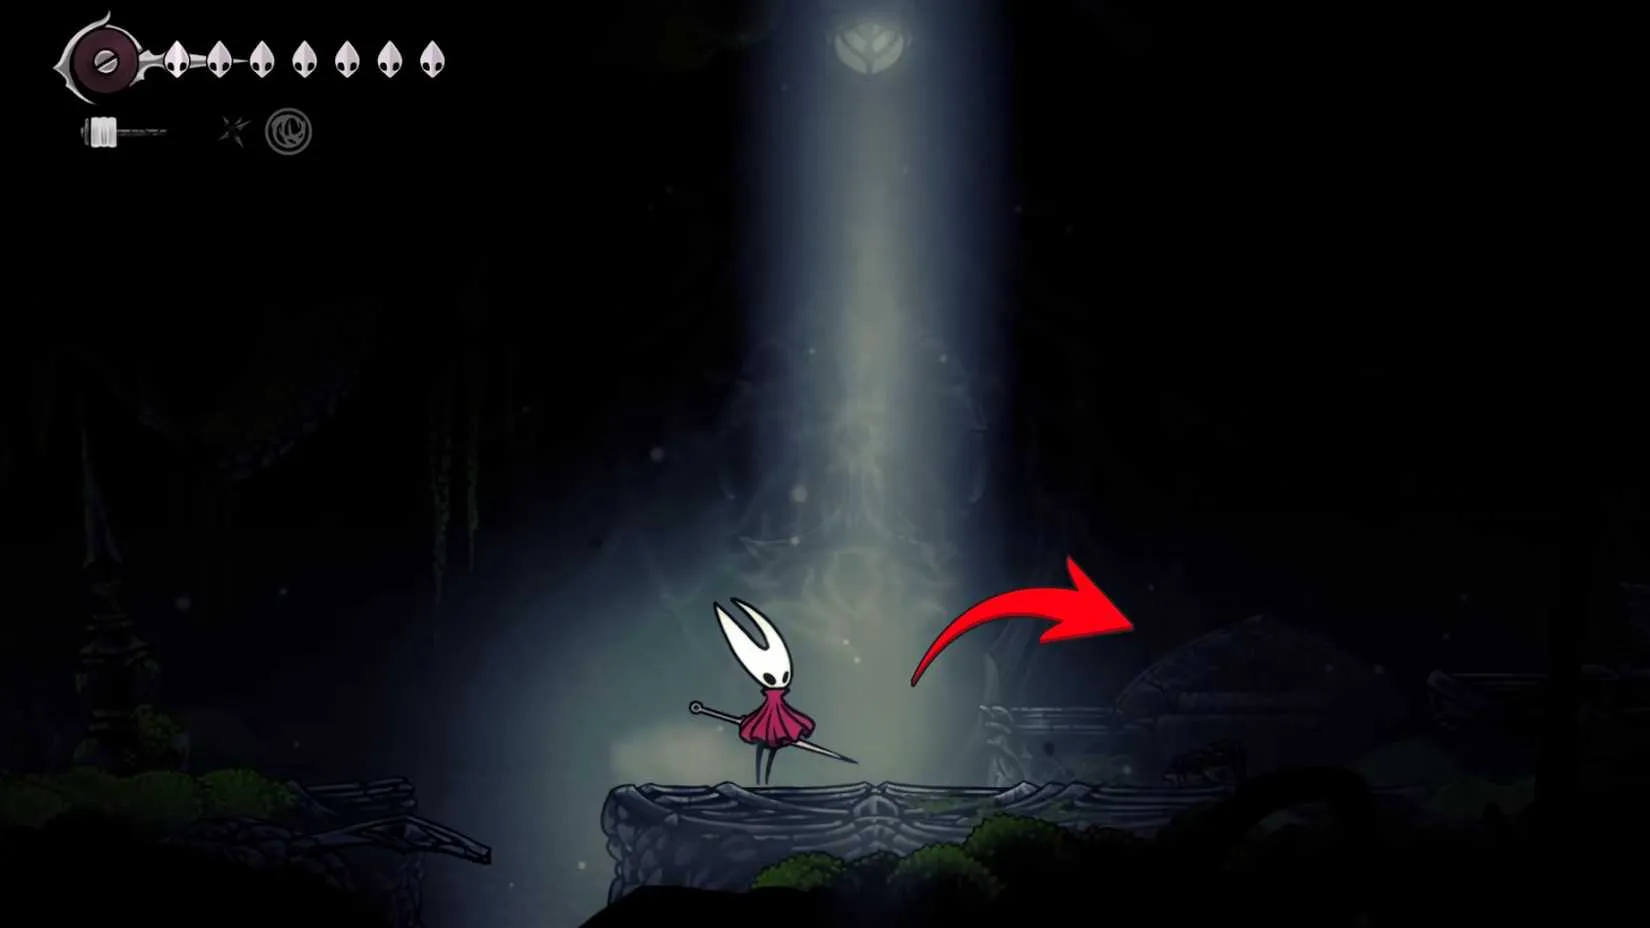
The first time I entered this hidden area, I was so focused on the tool that I nearly walked past two other upgrades. Do not make the same mistake. From the bottom right corner of Weavenest Atla, you can claim a Hunter Crest Upgrade. Below the Snare Setter's pedestal, you can also find a Spool Fragment, which increases your Silk capacity.

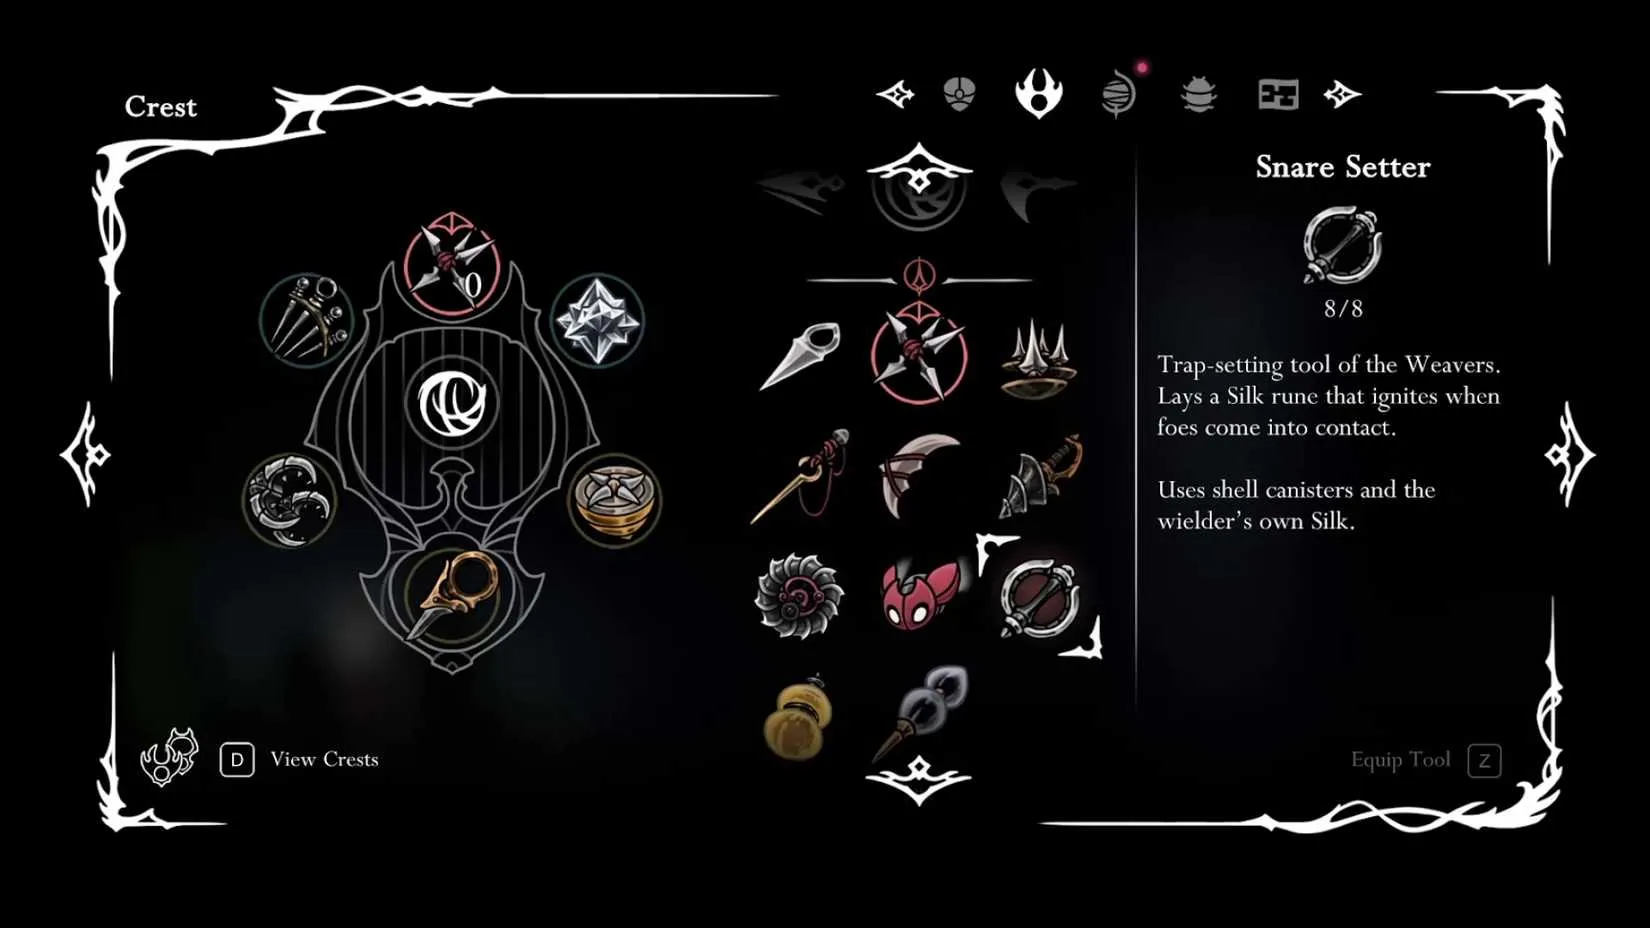
? How I Use the Snare Setter
When I equip the Snare Setter, I treat it like a patient hunter's tool. I place runes along the ground before a boss charges, during a stagger window, or near arena edges where I expect the boss to dash. The rune explodes when an enemy comes close, so the damage happens without me needing to swing my Needle. That is valuable when a boss has a fast pattern and I want to keep my movement clean.
It works against normal enemies too, but I rarely rely on it for basic exploration. Against common foes, a quick Needle strike is faster and cleaner. The Snare Setter shines when the battlefield is chaotic, when a boss moves around a lot, or when I want to soften a target before committing to melee.
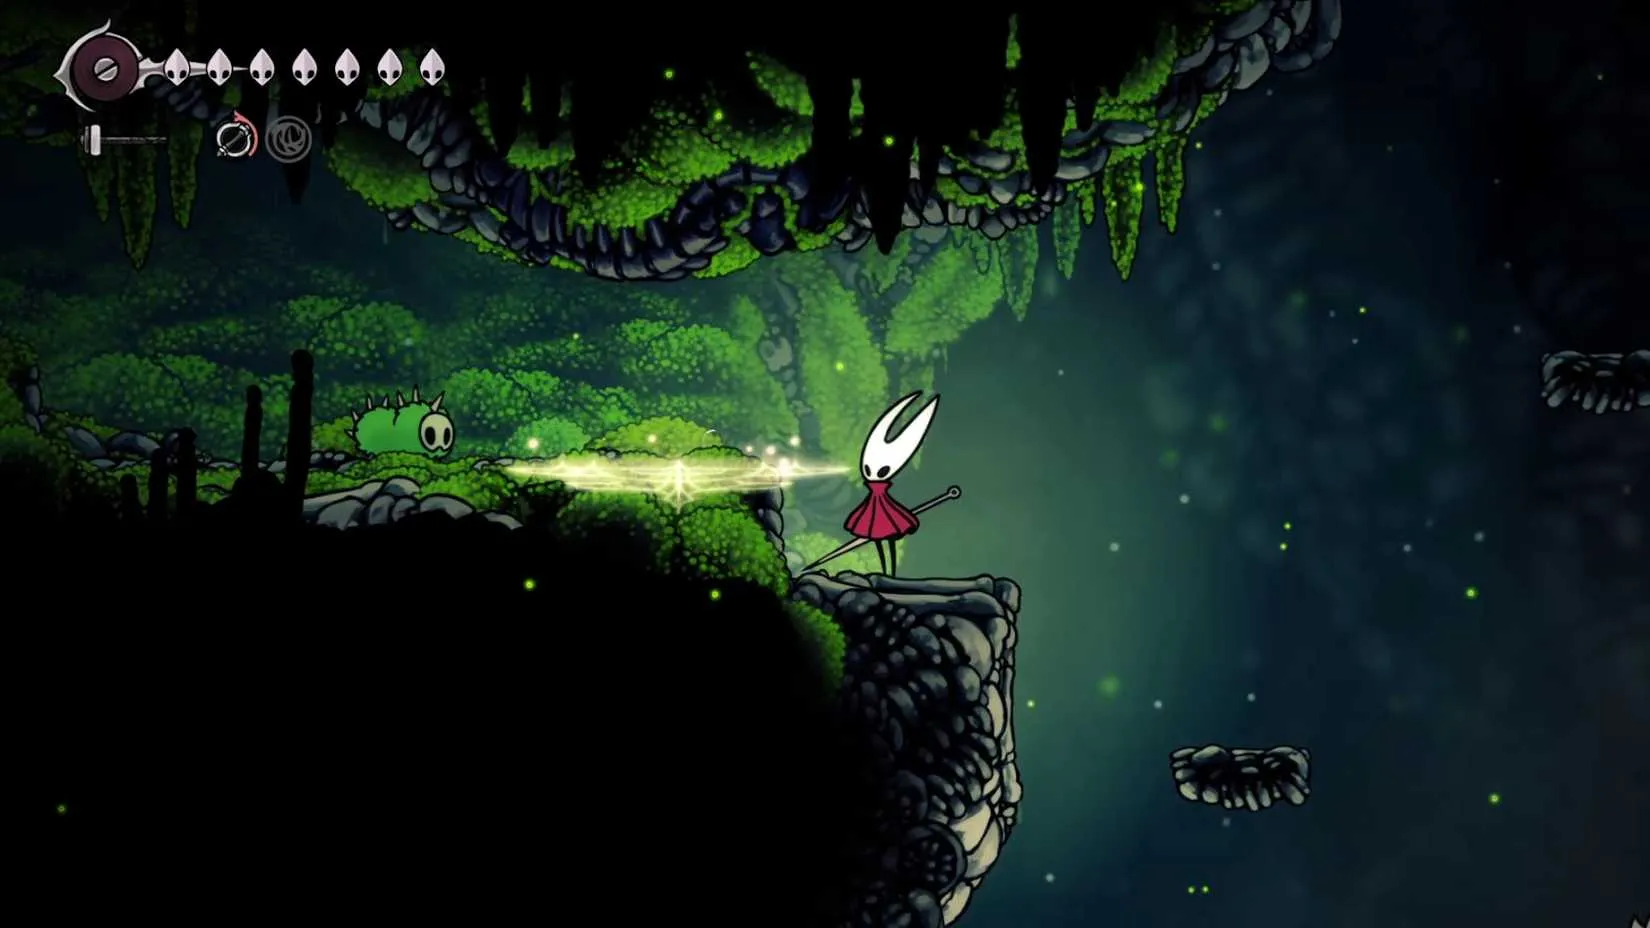
⚔️ Snare Setter vs Tacks
Functionally, the Snare Setter resembles the Tacks Tool, which works like caltrops. Both are ground-based traps, but they behave differently in boss fights. Tacks struggle to deal meaningful damage to bosses that move around constantly. The Snare Setter can still punish those mobile bosses because its rune explodes on proximity. The tradeoff is efficiency: the Snare Setter generally deals less damage per hit than other options, so it is not a pure damage tool. It is a control tool that adds pressure.
Tool
Trap style
Boss performance
Damage efficiency
Snare Setter
Silk rune that explodes near enemies
Strong against mobile bosses
Lower damage per hit
Tacks
Caltrops
Weak against highly mobile bosses
Better for stationary or small targets
? Practical Tips for 2026
?️ Place runes before a boss enters the arena or after a phase transition.
? Use Shell Shards to refill charges before long boss attempts.
? Revisit Moss Grotto and Weavenest Atla after getting the Faydown Cloak.
? Pair trap placement with safe Needle pokes rather than standing still.
?️ Do not ignore the Hunter Crest Upgrade and Spool Fragment in the same area.
?️ For normal enemies, save charges and use your Needle unless you are setting up a crowd.
In my current 2026 playthrough, the Snare Setter is not the flashiest Red Tool, but it is one of the most tactical. It rewards planning, map awareness, and a little patience. If you are willing to backtrack to Weavenest Atla with the Faydown Cloak, you will gain a trap that can turn a frantic boss arena into a field of your own making. For me, that is more than enough reason to keep it equipped.
Chasing every Tool and upgrade in Silksong means racking up a fair amount of playtime, and for many players that journey starts on PC. If you prefer to build your collection on Steam, keeping an eye on discounts can stretch your budget further, especially when DLC or bundled titles go on sale. That is where a reliable steam sale tracker like DealNest comes in handy, letting you follow price drops without refreshing store pages yourself.
Whether you are waiting for Silksong itself or filling your backlog with other metroidvanias to scratch the same itch, having a tool that watches the numbers for you means you never miss a good deal. It pairs nicely with the patient, planning-first mindset this whole guide has been about.
?️ What the Snare Setter Actually Is
The Snare Setter is a Red Tool that places a medium-sized silk rune on the ground. When an enemy walks near it, the rune explodes and deals damage. It starts with eight charges by default, and it does not demand rare resources to refill; regular Shell Shards are enough. That makes it easy to restock at benches or vendors before a difficult encounter.
Detail
Information
Tool type
Red Tool
Location
Hidden area inside Weavenest Atla
Access requirements
Needolin and Faydown Cloak
Default charges
8
Replenishment
Shell Shards
Best role
Boss arenas and zone control
?️ My Route Through Weavenest Atla
Weavenest Atla sits east of Moss Grotto, the starting region of Silksong. To get inside, I played the Needolin in front of the locked door. Once inside, the path to the Snare Setter is short but easy to fumble if you are not paying attention.
Enter Weavenest Atla and activate the teleporter to reach the lower level.
Use Cling Grip to climb the wall on the right.
Jump across the gap and enter the chamber to the left.
Walk left until you reach the water.
Use Cling Grip again to reach the top, then turn right.
Pick up the Snare Setter from the pedestal and add it to your inventory.
The first time I entered this hidden area, I was so focused on the tool that I nearly walked past two other upgrades. Do not make the same mistake. From the bottom right corner of Weavenest Atla, you can claim a Hunter Crest Upgrade. Below the Snare Setter's pedestal, you can also find a Spool Fragment, which increases your Silk capacity.
? How I Use the Snare Setter
When I equip the Snare Setter, I treat it like a patient hunter's tool. I place runes along the ground before a boss charges, during a stagger window, or near arena edges where I expect the boss to dash. The rune explodes when an enemy comes close, so the damage happens without me needing to swing my Needle. That is valuable when a boss has a fast pattern and I want to keep my movement clean.
It works against normal enemies too, but I rarely rely on it for basic exploration. Against common foes, a quick Needle strike is faster and cleaner. The Snare Setter shines when the battlefield is chaotic, when a boss moves around a lot, or when I want to soften a target before committing to melee.
⚔️ Snare Setter vs Tacks
Functionally, the Snare Setter resembles the Tacks Tool, which works like caltrops. Both are ground-based traps, but they behave differently in boss fights. Tacks struggle to deal meaningful damage to bosses that move around constantly. The Snare Setter can still punish those mobile bosses because its rune explodes on proximity. The tradeoff is efficiency: the Snare Setter generally deals less damage per hit than other options, so it is not a pure damage tool. It is a control tool that adds pressure.
Tool
Trap style
Boss performance
Damage efficiency
Snare Setter
Silk rune that explodes near enemies
Strong against mobile bosses
Lower damage per hit
Tacks
Caltrops
Weak against highly mobile bosses
Better for stationary or small targets
? Practical Tips for 2026
?️ Place runes before a boss enters the arena or after a phase transition.
? Use Shell Shards to refill charges before long boss attempts.
? Revisit Moss Grotto and Weavenest Atla after getting the Faydown Cloak.
? Pair trap placement with safe Needle pokes rather than standing still.
?️ Do not ignore the Hunter Crest Upgrade and Spool Fragment in the same area.
?️ For normal enemies, save charges and use your Needle unless you are setting up a crowd.
In my current 2026 playthrough, the Snare Setter is not the flashiest Red Tool, but it is one of the most tactical. It rewards planning, map awareness, and a little patience. If you are willing to backtrack to Weavenest Atla with the Faydown Cloak, you will gain a trap that can turn a frantic boss arena into a field of your own making. For me, that is more than enough reason to keep it equipped.
Chasing every Tool and upgrade in Silksong means racking up a fair amount of playtime, and for many players that journey starts on PC. If you prefer to build your collection on Steam, keeping an eye on discounts can stretch your budget further, especially when DLC or bundled titles go on sale. That is where a reliable steam sale tracker like DealNest comes in handy, letting you follow price drops without refreshing store pages yourself.
Whether you are waiting for Silksong itself or filling your backlog with other metroidvanias to scratch the same itch, having a tool that watches the numbers for you means you never miss a good deal. It pairs nicely with the patient, planning-first mindset this whole guide has been about.
No Replies
The gaming community was electrified when Nintendo officially confirmed a Nintendo Direct showcase for September 12, 2025, at 9 a.m. ET. The 60-minute presentation was scheduled just one day before Mario's 40th anniversary, leading many to expect at least one Mario-related surprise. At that time, Nintendo had already delivered a remarkable year with Donkey Kong Bananza, Mario Kart World, and the launch of the Switch 2 console. Now, as 2026 unfolds, that Direct stands as a defining moment for the company and its loyal fanbase.

One of the most talked-about titles was Hollow Knight: Silksong. Originally announced in 2019, the game became an internet meme due to its prolonged development. Team Cherry famously revealed that the delay was not caused by development troubles, but rather because the team was having too much fun creating it. For years, fans eagerly anticipated news at every Nintendo Direct, often left disappointed. The September 2025 Direct finally provided a substantial look, and shortly after, the game launched to universal acclaim. By 2026, Silksong is celebrated as one of the best-rated games of all time, dominating the indie scene and winning numerous awards.

With Silksong finally released, the spotlight shifted to other long-awaited projects. Metroid Prime 4: Beyond had been in development for over 18 years since the last mainline entry. The September 2025 Direct showcased new gameplay and a 2025 release window, which was later fulfilled. As of 2026, Metroid Prime 4: Beyond has been available on Switch 2, delivering a triumphant return for Samus Aran. The game's visuals, atmosphere, and controls have been praised, and it has become a system seller for Nintendo's latest console.

Another major title featured was Pokemon Legends: Z-A. The Direct offered a deeper look at its mechanics, including Mega Evolutions and a new setting. While some fans remained skeptical, Nintendo's impressive track record in 2025 suggested the game could surprise. By 2026, Pokemon Legends: Z-A has been released and has generated a mix of reactions, though many agree it brings a fresh perspective to the franchise. Its sales have been strong, and it continues to receive updates.

For Zelda enthusiasts, Hyrule Warriors: Age of Imprisonment was a highlight. The September 2025 Direct demonstrated how the game would leverage the Switch 2's power, offering improved visuals and performance. Since its release, it has been well-received, providing a satisfying blend of action and story for fans of the series.
The 60-minute runtime of the September 2025 Direct allowed for numerous announcements. The showcase was not just about reveals; it was a celebration of Nintendo's recent successes. Donkey Kong Bananza and Mario Kart World had already become best-sellers, and the Switch 2 was flying off shelves. The Direct capitalized on this momentum, offering a mix of nostalgia and innovation. Fans tuned in expecting surprises, and they were not disappointed.
Below is a recap of the key games and their status as of 2026:
Game
Announcement
Status in 2026
Hollow Knight: Silksong
Release window and final trailer
Released, critically acclaimed
Metroid Prime 4: Beyond
Gameplay reveal and release window
Released on Switch 2
Pokemon Legends: Z-A
New trailer and Mega Evolution details
Released, mixed to positive reception
Hyrule Warriors: Age of Imprisonment
Switch 2 features showcased
Released, well-received
Mario 40th Anniversary
Teaser
Celebrated with events and re-releases
The Direct also acknowledged Mario's 40th anniversary, though specific plans were kept under wraps. Throughout 2026, Nintendo has continued the celebration with special events, merchandise, and re-releases of classic Mario titles.
The aftermath of the Direct saw a surge in Switch 2 sales and renewed interest in the featured franchises. Hollow Knight: Silksong became a cultural phenomenon, while Metroid Prime 4: Beyond finally quenched a decades-long thirst. Pokemon Legends: Z-A, despite initial skepticism, found its audience. Hyrule Warriors: Age of Imprisonment proved that the Zelda spin-off series still has plenty of life.
Reflecting on the September 2025 Nintendo Direct, it is clear that it marked a turning point for Nintendo. After years of waiting for Silksong, fans could finally focus on other exciting games. The showcase demonstrated Nintendo's ability to deliver on long-standing promises while building hype for the future. The Switch 2 has benefited from a strong software lineup, and 2026 continues to bring new experiences.
For those who missed it, the September 2025 Direct is now a piece of gaming history. It reminded everyone that patience pays off—and that Nintendo's future remains bright. ?
With such a packed release calendar, keeping up with every title you want can put real pressure on your wallet. Many players now juggle a Switch 2 alongside a PC library, and the steady stream of sales, bundles, and limited-time discounts across storefronts makes it easy to miss a bargain or overpay for something that goes on sale a week later. That's exactly where a tool like a steam deal finder becomes genuinely useful, letting you track price drops and historical lows so you can decide whether to buy now or wait for a better moment.
DealNest is built for that kind of patient, budget-conscious shopping, gathering discount information in one place so you don't have to hop between store pages and wishlists. Whether you're saving up for the next big Nintendo release or filling the gaps in your backlog between Directs, having a reliable way to spot genuine deals means more games for the same money.
One of the most talked-about titles was Hollow Knight: Silksong. Originally announced in 2019, the game became an internet meme due to its prolonged development. Team Cherry famously revealed that the delay was not caused by development troubles, but rather because the team was having too much fun creating it. For years, fans eagerly anticipated news at every Nintendo Direct, often left disappointed. The September 2025 Direct finally provided a substantial look, and shortly after, the game launched to universal acclaim. By 2026, Silksong is celebrated as one of the best-rated games of all time, dominating the indie scene and winning numerous awards.
With Silksong finally released, the spotlight shifted to other long-awaited projects. Metroid Prime 4: Beyond had been in development for over 18 years since the last mainline entry. The September 2025 Direct showcased new gameplay and a 2025 release window, which was later fulfilled. As of 2026, Metroid Prime 4: Beyond has been available on Switch 2, delivering a triumphant return for Samus Aran. The game's visuals, atmosphere, and controls have been praised, and it has become a system seller for Nintendo's latest console.
Another major title featured was Pokemon Legends: Z-A. The Direct offered a deeper look at its mechanics, including Mega Evolutions and a new setting. While some fans remained skeptical, Nintendo's impressive track record in 2025 suggested the game could surprise. By 2026, Pokemon Legends: Z-A has been released and has generated a mix of reactions, though many agree it brings a fresh perspective to the franchise. Its sales have been strong, and it continues to receive updates.
For Zelda enthusiasts, Hyrule Warriors: Age of Imprisonment was a highlight. The September 2025 Direct demonstrated how the game would leverage the Switch 2's power, offering improved visuals and performance. Since its release, it has been well-received, providing a satisfying blend of action and story for fans of the series.
The 60-minute runtime of the September 2025 Direct allowed for numerous announcements. The showcase was not just about reveals; it was a celebration of Nintendo's recent successes. Donkey Kong Bananza and Mario Kart World had already become best-sellers, and the Switch 2 was flying off shelves. The Direct capitalized on this momentum, offering a mix of nostalgia and innovation. Fans tuned in expecting surprises, and they were not disappointed.
Below is a recap of the key games and their status as of 2026:
Game
Announcement
Status in 2026
Hollow Knight: Silksong
Release window and final trailer
Released, critically acclaimed
Metroid Prime 4: Beyond
Gameplay reveal and release window
Released on Switch 2
Pokemon Legends: Z-A
New trailer and Mega Evolution details
Released, mixed to positive reception
Hyrule Warriors: Age of Imprisonment
Switch 2 features showcased
Released, well-received
Mario 40th Anniversary
Teaser
Celebrated with events and re-releases
The Direct also acknowledged Mario's 40th anniversary, though specific plans were kept under wraps. Throughout 2026, Nintendo has continued the celebration with special events, merchandise, and re-releases of classic Mario titles.
The aftermath of the Direct saw a surge in Switch 2 sales and renewed interest in the featured franchises. Hollow Knight: Silksong became a cultural phenomenon, while Metroid Prime 4: Beyond finally quenched a decades-long thirst. Pokemon Legends: Z-A, despite initial skepticism, found its audience. Hyrule Warriors: Age of Imprisonment proved that the Zelda spin-off series still has plenty of life.
Reflecting on the September 2025 Nintendo Direct, it is clear that it marked a turning point for Nintendo. After years of waiting for Silksong, fans could finally focus on other exciting games. The showcase demonstrated Nintendo's ability to deliver on long-standing promises while building hype for the future. The Switch 2 has benefited from a strong software lineup, and 2026 continues to bring new experiences.
For those who missed it, the September 2025 Direct is now a piece of gaming history. It reminded everyone that patience pays off—and that Nintendo's future remains bright. ?
With such a packed release calendar, keeping up with every title you want can put real pressure on your wallet. Many players now juggle a Switch 2 alongside a PC library, and the steady stream of sales, bundles, and limited-time discounts across storefronts makes it easy to miss a bargain or overpay for something that goes on sale a week later. That's exactly where a tool like a steam deal finder becomes genuinely useful, letting you track price drops and historical lows so you can decide whether to buy now or wait for a better moment.
DealNest is built for that kind of patient, budget-conscious shopping, gathering discount information in one place so you don't have to hop between store pages and wishlists. Whether you're saving up for the next big Nintendo release or filling the gaps in your backlog between Directs, having a reliable way to spot genuine deals means more games for the same money.
No Replies
In December 2025, FromSoftware rolled out a new patch for Elden Ring Nightreign, and it landed like a courier carrying both gifts and repairs. The timing was no accident: The Forsaken Hollows, Nightreign's first proper, named DLC, was set to arrive on December 4, bringing new bosses, new shifting earth, and new playable Nightfarers. The patch added support for that expansion, but it also quietly reshaped the entire experience for every player on PS4, PS5, Xbox One, Xbox Series X|S, and Steam. Now, in 2026, that update remains a foundational moment for the game, a turning point that showed FromSoftware was still listening.
A Patch That Did More Than Open a Door
FromSoftware did not just flip a switch and call it a day. The studio treated the patch as a chance to smooth out rough edges, and the result was a long list of quality-of-life improvements that players had been requesting for months. The most visible changes included:
Relic management overhaul: Equipped relics now appear in the Character Selection menu, and players can set names for Relic presets in the Relic Rites menu. Those names can be changed in the All Presets section, and preset order can be rearranged per character.
New shop item: The Collector Signboard shop gained the Deep Large Scenic Flatstone.
Map and results improvements: The map's layer display can now be toggled in the Results menu, and the relics equipped by each player are displayed there too.
Matchmaking flexibility: Players with a Personal Objective requiring a specific target kill while Reliving a Remembrance can now embark with players whose Personal Objective does not require that.
Flask count highlighting: The flask count now glows when at maximum capacity or when an enemy-induced effect influences it.
Compass rune icon: The vertical position of the compass rune icon appears if dropped runes are significantly above or below the player.
Map event highlighting: Specific events on a different map layer can now be highlighted in the map menu.
Dormant Power UI: The HP gauge and other UI elements remain visible during Dormant Power selection.
Shop adjustments: Weapon lineup in Limveld's shops was adjusted, and Fire Pots were added to the Spirit Shetler shop inventory.
Raider fix: Target-lock on enemies behind the tombstone summoned by Raider's Ultimate Art no longer gets released.
Balance Changes: The Scales Were Rebalanced
The patch also broadened trigger conditions for relic effects, equipment passive effects, and special effects that activate at low HP. In plain terms, more of those effects now actually do something when you need them. And yeah, that mattered.
Category
Change
New Passive Effects
Improved Melee Attack Power, Improved Dash Attacks, Improved Rolling Attacks
Buffed Passives
Improved Attack Power when Two-Handing, Attack Up when Wielding Two Armaments, Improved Chain Attack Finishers, Improved Charge Attacks, Improved Jump Attacks, Improved Guard Counters, Improved Skill Attack Power, Physical Attack Up
Adjusted Low HP Effects
Improved Damage Negation at Low HP and Blue-Feathered Branchsword had trigger conditions broadened but effectiveness decreased
Relic Effects
Physical Attack Up, Improved Initial Standard Attack, Improved Critical Hits, Improved Guard Counters, Improved XXX Damage (excluding bows), and Improved Attack Power with 3+ XX Equipped (excluding bows) all increased
Other Changes
Wrath of Gold Incantation reduced FP consumption and increased power
Bug Fixes and Quality-of-Life
The bug fix list was hefty enough to make a Tarnished weep with relief. FromSoftware fixed an Augur invasion teleport bug, mitigated an issue where Sites of Grace or Churches would not activate, and repaired a Night's Tide range discrepancy when rejoining a session. Hammer weapons with Prayerful Strike now appear. Healing or enhancing effects now apply to allies who are dodging or performing their Ultimate Art. Ironeye's Marking weak points now show consistently. Raider's Retaliate no longer cancels and flinches from certain no-damage attacks. Recluse's Elemental Defense affinity residues now spawn correctly. Executor parries now apply Stagger damage. Darkness-imbued attack dodge roll ranges were corrected. Depths Relics now show Greenspill Crystal Tear at expedition start. The Deep of Night rating gauge now reflects Reduce Depth properly. Relic Rites placement icons, Dormant Power rarity UI, Sparring Grounds sorting, Results menu attribute reflection, and Victor's Record special effects were all fixed. Session disband messages no longer haunt the title screen, and graphical, audio, text, and performance issues were addressed.
Let's be honest, that was a lot of housekeeping. But it was the kind of housekeeping that turns a good co-op game into a great one.
The Road to The Forsaken Hollows
Nightreign's ultra-hard Deep of Night mode had launched in September, after dataminers discovered it in August. Along with duos mode, that was all players had for a while, and the community had grown agitated at the lack of news. The Forsaken Hollows DLC and this patch arrived like a fresh campfire in the mist. In IGN's 7/10 review, the game was praised as one of the finest three-player co-op experiences around when played as designed, though the lack of crossplay, duo matchmaking, and built-in communication tools made it hard to create those conditions unless you brought two real-life friends on every run.
By 2026, Nightreign has continued to evolve, but this patch stands as a clear statement. FromSoftware did not abandon its strange, brutal, cooperative experiment. It patched, polished, and pushed forward. If you know, you know: sometimes the smallest fixes make the biggest difference.
If this patch has you eyeing The Forsaken Hollows — or finally convincing a third friend to pick up the base game — the cost of entry stacks up fast, and storefront prices rarely sit still. Hunting down legitimate discounts across platforms, regions, and retailers is its own kind of grind, the sort of thing that eats an evening you'd rather spend in the Depths.
That's where a curated aggregator can save you the legwork. DealNest collects current offers and price drops in one place, so instead of tabbing through a dozen store pages hunting for a sale that might already be over, you can find the best deal and get back to chasing Night Lords before the next patch lands.
A Patch That Did More Than Open a Door
FromSoftware did not just flip a switch and call it a day. The studio treated the patch as a chance to smooth out rough edges, and the result was a long list of quality-of-life improvements that players had been requesting for months. The most visible changes included:
Relic management overhaul: Equipped relics now appear in the Character Selection menu, and players can set names for Relic presets in the Relic Rites menu. Those names can be changed in the All Presets section, and preset order can be rearranged per character.
New shop item: The Collector Signboard shop gained the Deep Large Scenic Flatstone.
Map and results improvements: The map's layer display can now be toggled in the Results menu, and the relics equipped by each player are displayed there too.
Matchmaking flexibility: Players with a Personal Objective requiring a specific target kill while Reliving a Remembrance can now embark with players whose Personal Objective does not require that.
Flask count highlighting: The flask count now glows when at maximum capacity or when an enemy-induced effect influences it.
Compass rune icon: The vertical position of the compass rune icon appears if dropped runes are significantly above or below the player.
Map event highlighting: Specific events on a different map layer can now be highlighted in the map menu.
Dormant Power UI: The HP gauge and other UI elements remain visible during Dormant Power selection.
Shop adjustments: Weapon lineup in Limveld's shops was adjusted, and Fire Pots were added to the Spirit Shetler shop inventory.
Raider fix: Target-lock on enemies behind the tombstone summoned by Raider's Ultimate Art no longer gets released.
Balance Changes: The Scales Were Rebalanced
The patch also broadened trigger conditions for relic effects, equipment passive effects, and special effects that activate at low HP. In plain terms, more of those effects now actually do something when you need them. And yeah, that mattered.
Category
Change
New Passive Effects
Improved Melee Attack Power, Improved Dash Attacks, Improved Rolling Attacks
Buffed Passives
Improved Attack Power when Two-Handing, Attack Up when Wielding Two Armaments, Improved Chain Attack Finishers, Improved Charge Attacks, Improved Jump Attacks, Improved Guard Counters, Improved Skill Attack Power, Physical Attack Up
Adjusted Low HP Effects
Improved Damage Negation at Low HP and Blue-Feathered Branchsword had trigger conditions broadened but effectiveness decreased
Relic Effects
Physical Attack Up, Improved Initial Standard Attack, Improved Critical Hits, Improved Guard Counters, Improved XXX Damage (excluding bows), and Improved Attack Power with 3+ XX Equipped (excluding bows) all increased
Other Changes
Wrath of Gold Incantation reduced FP consumption and increased power
Bug Fixes and Quality-of-Life
The bug fix list was hefty enough to make a Tarnished weep with relief. FromSoftware fixed an Augur invasion teleport bug, mitigated an issue where Sites of Grace or Churches would not activate, and repaired a Night's Tide range discrepancy when rejoining a session. Hammer weapons with Prayerful Strike now appear. Healing or enhancing effects now apply to allies who are dodging or performing their Ultimate Art. Ironeye's Marking weak points now show consistently. Raider's Retaliate no longer cancels and flinches from certain no-damage attacks. Recluse's Elemental Defense affinity residues now spawn correctly. Executor parries now apply Stagger damage. Darkness-imbued attack dodge roll ranges were corrected. Depths Relics now show Greenspill Crystal Tear at expedition start. The Deep of Night rating gauge now reflects Reduce Depth properly. Relic Rites placement icons, Dormant Power rarity UI, Sparring Grounds sorting, Results menu attribute reflection, and Victor's Record special effects were all fixed. Session disband messages no longer haunt the title screen, and graphical, audio, text, and performance issues were addressed.
Let's be honest, that was a lot of housekeeping. But it was the kind of housekeeping that turns a good co-op game into a great one.
The Road to The Forsaken Hollows
Nightreign's ultra-hard Deep of Night mode had launched in September, after dataminers discovered it in August. Along with duos mode, that was all players had for a while, and the community had grown agitated at the lack of news. The Forsaken Hollows DLC and this patch arrived like a fresh campfire in the mist. In IGN's 7/10 review, the game was praised as one of the finest three-player co-op experiences around when played as designed, though the lack of crossplay, duo matchmaking, and built-in communication tools made it hard to create those conditions unless you brought two real-life friends on every run.
By 2026, Nightreign has continued to evolve, but this patch stands as a clear statement. FromSoftware did not abandon its strange, brutal, cooperative experiment. It patched, polished, and pushed forward. If you know, you know: sometimes the smallest fixes make the biggest difference.
If this patch has you eyeing The Forsaken Hollows — or finally convincing a third friend to pick up the base game — the cost of entry stacks up fast, and storefront prices rarely sit still. Hunting down legitimate discounts across platforms, regions, and retailers is its own kind of grind, the sort of thing that eats an evening you'd rather spend in the Depths.
That's where a curated aggregator can save you the legwork. DealNest collects current offers and price drops in one place, so instead of tabbing through a dozen store pages hunting for a sale that might already be over, you can find the best deal and get back to chasing Night Lords before the next patch lands.
No Replies
Hollow Knight: Silksong has been out for a while by 2026, and its reputation as a punishing metroidvania has only hardened. Players still expect a few bugs in a game about bugs, but Team Cherry's sequel delivers an overwhelming swarm of them. Not technical glitches—these are intentional, exquisitely designed nightmares. They block paths, drain resources, and turn small arenas into deathtraps. For anyone revisiting Pharloom or finally picking up the sequel, here is a third-person tour of the critters that have caused the most frustration. ?
Kilik
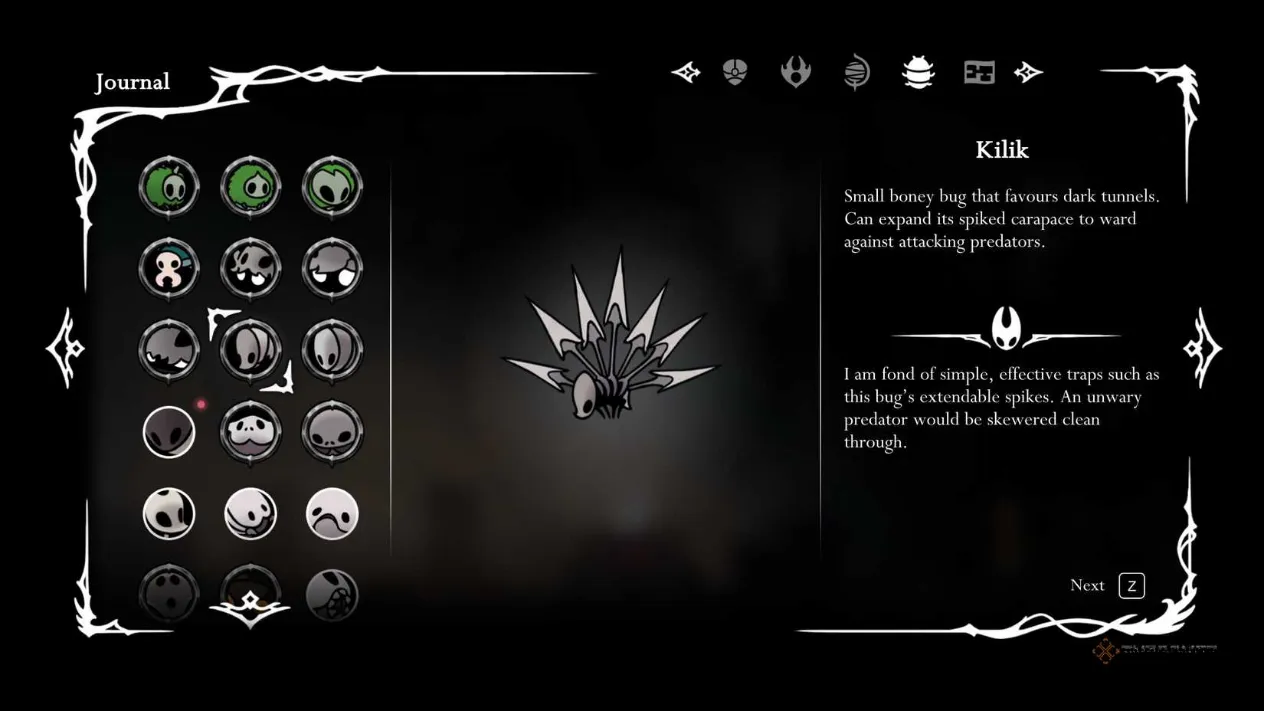
Kilik looks small. It looks weak. That is the trap. This bug appears throughout early areas and can be summoned by the Savage Beastfly to shrink an already cramped arena. Its spikes, however, shoot out much farther than its body suggests. A narrow tunnel with a Kilik becomes a stop sign. Floor and ceiling Kiliks create a skewer. Hornet's needle cannot always reach the inner body, so players must wait, dodge, and chip away. It is a lesson in patience that nobody asked for.
Savage Beastfly
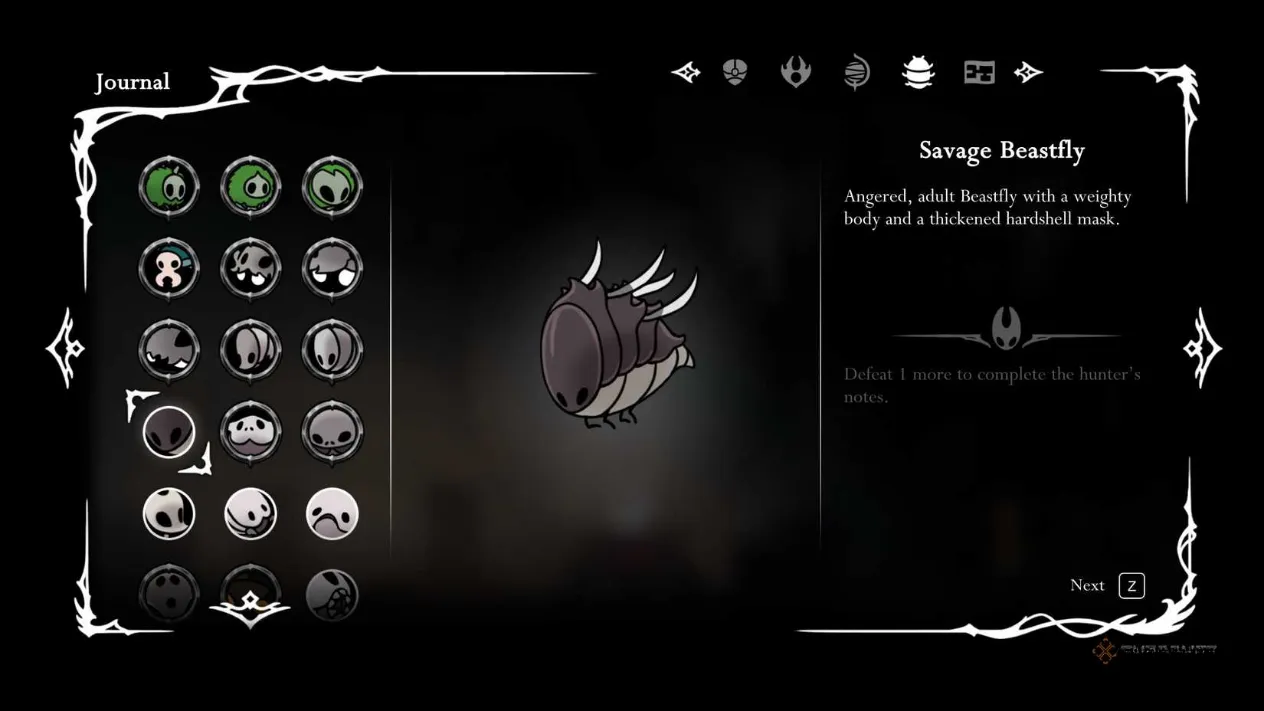
The ordinary beastflies are annoying. The Savage Beastfly is a digital war crime wrapped in a rotund bug body. It is an optional boss, but that does not make the fight pleasant. The arena is tiny. The Beastfly is huge. It dashes around at heights that sometimes feel unavoidable, and it summons extra bugs to make the space even smaller. Oh, and it has an obscene health pool. In 2026, guides may recommend certain tools or strategies, but the memory of that first encounter still stings.
Overgrown Pilgrim
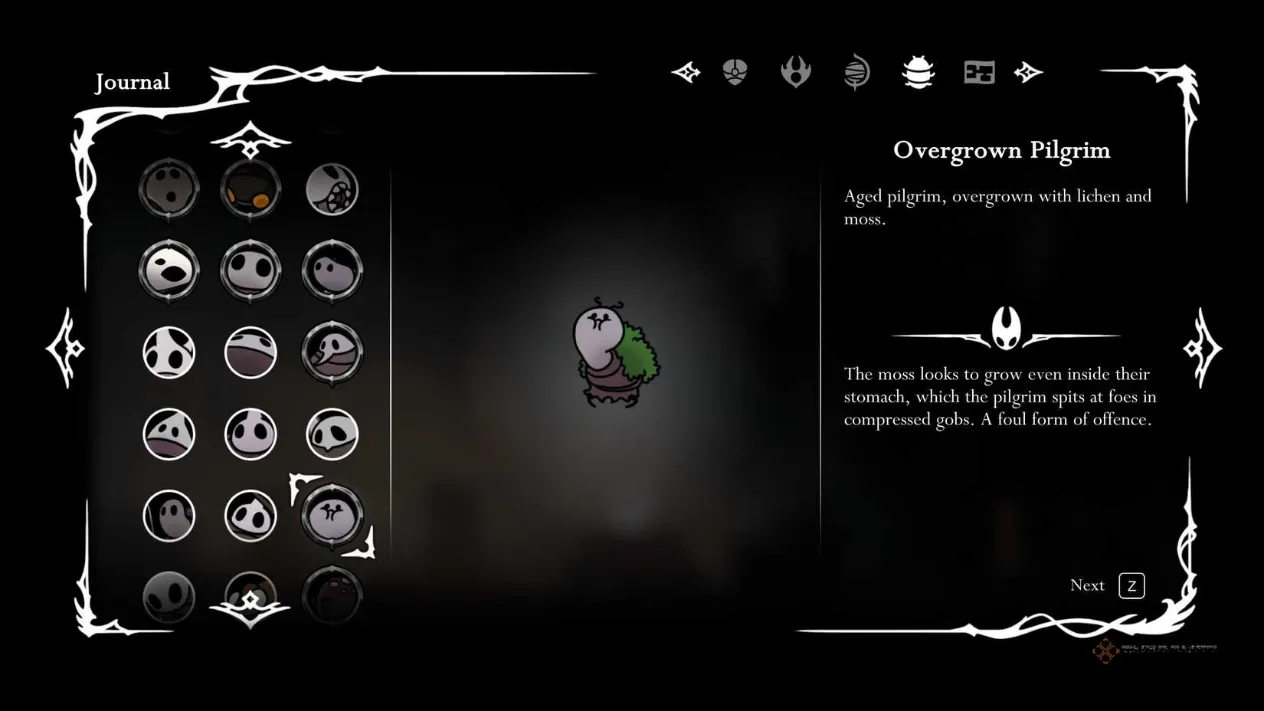
Early areas like Mosshome introduce the Overgrown Pilgrim, a victim of Pharloom's Haunting who now makes that everyone else's problem. The Pilgrim spits at Hornet, then leaps away. It interrupts jumps toward platforms. It hops off ledges, forcing a chase and a restart of the platforming section. The damage is not the issue; the disruption is. Every spit feels personal. Every leap feels like a taunt.
Snitchfly
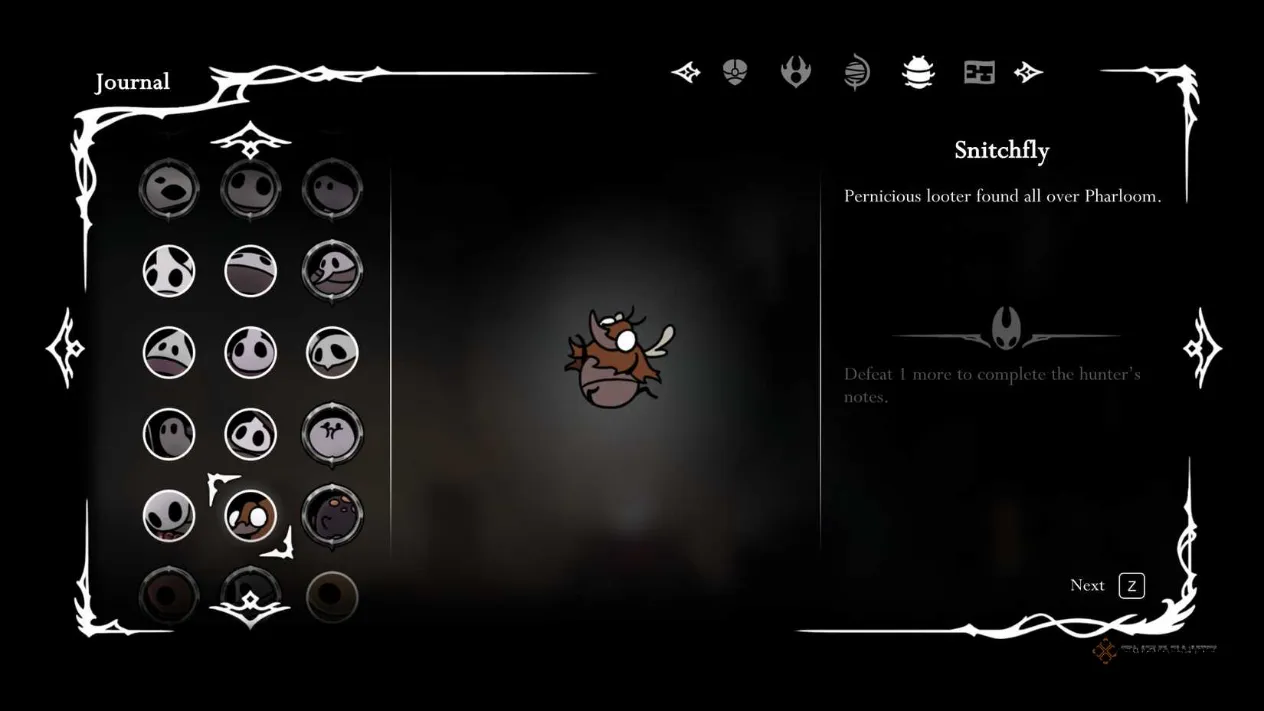
Wealth is scarce beneath the Citadel of Pharloom, and the Snitchfly is determined to redistribute it—to itself. This thief does not deal much damage, but it can leap onto Hornet and tear away loose rosaries. Defeat it, and the rosaries return. Die or leave the area, and they are gone. Snitchflies are basically the Citadel's bigwigs with worse manners and better jumping. Few enemies feel as personally offensive. ?
Flintflame Flyer
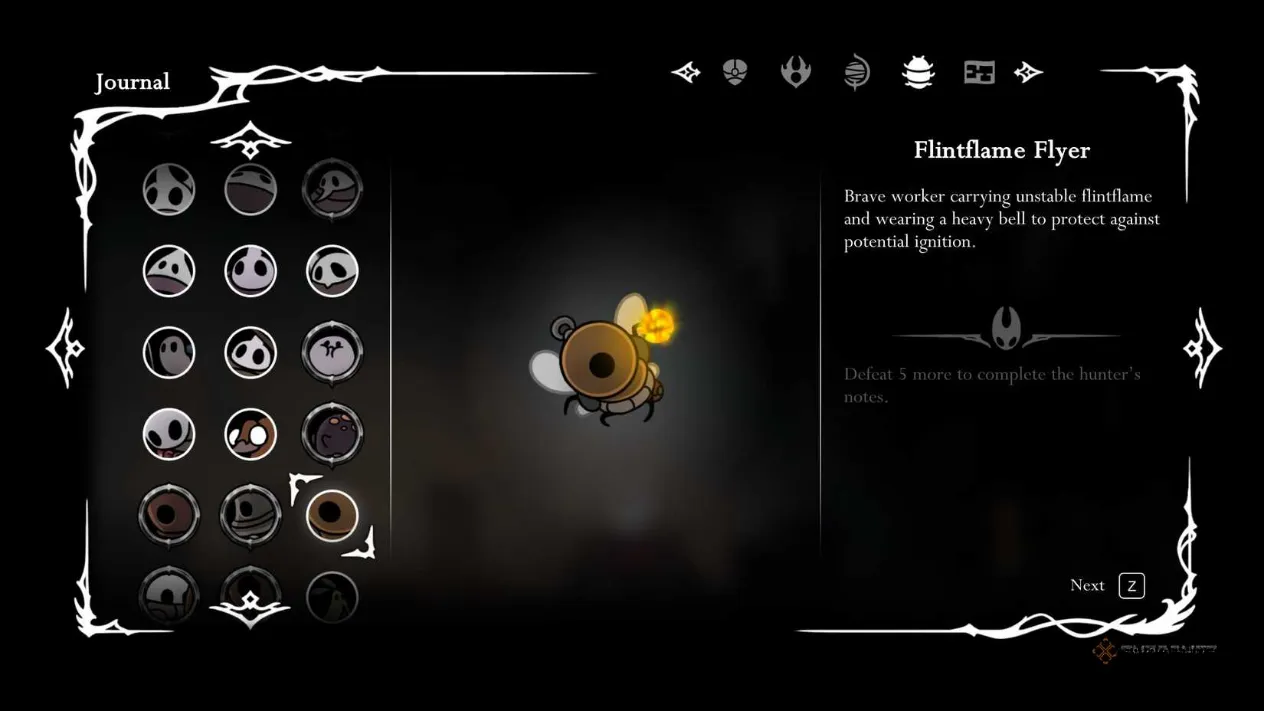
Deep Rock is full of bugs in protective gear, toiling around magma and harvesting flintstone. Their helmets stop attacks from above, but most are slow enough to handle. Then comes the Flintflame Flyer, a demolitions expert who throws incredibly explosive bombs. Send a bomb back? It blocks. Those helmets are thick. The explosion is massive enough to black out the screen and wipe out Hornet in one hit. It is a bug immune to its own bombs, and that feels deeply unfair.
Skarrgard and the Skarr Bugs
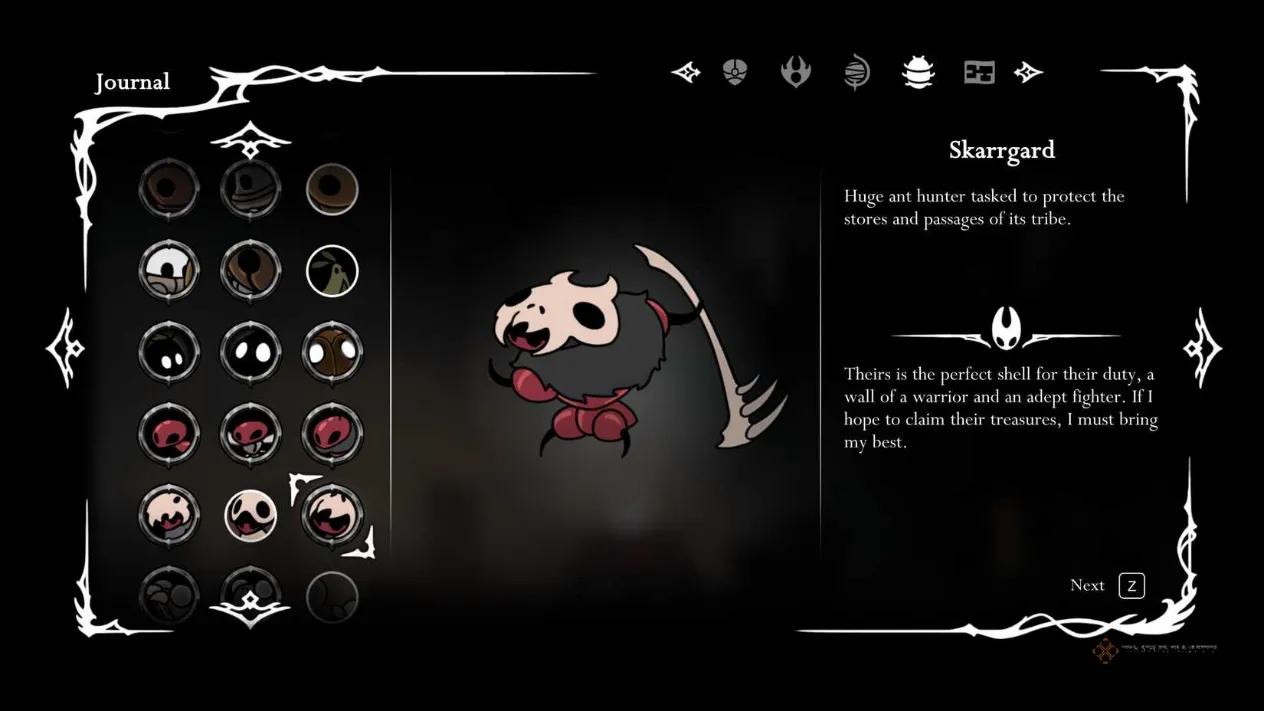
Hunter's March brings color back to Pharloom: red shells, greenery, water. It also brings Skarrgard and every other Skarr bug. These are trained killers. They carry weapons, dash, burrow, fire projectiles, and wear helmets. What are they fighting that requires this much defense? The player, apparently. The learning curve in Hunter's March is cruel, even if the bugs themselves are brilliantly designed. Loving them and hating them can happen at the same time.
Swamp Squit
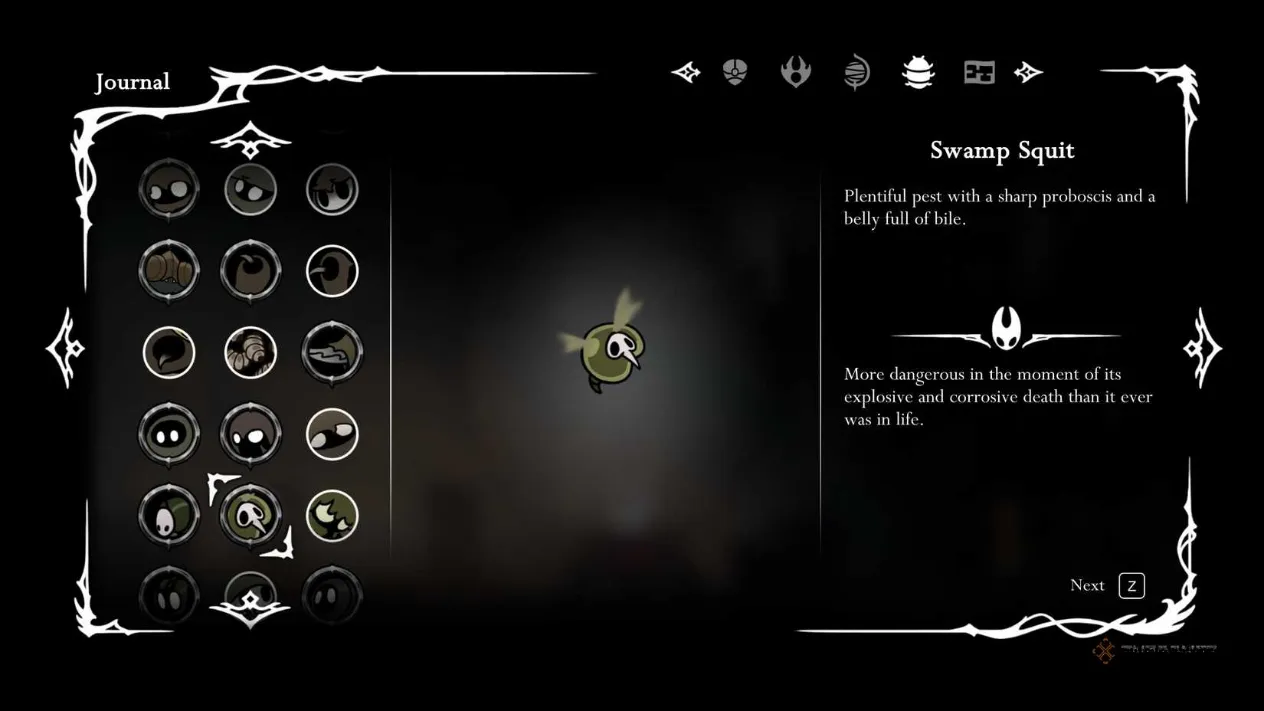
Bilewater is already a nightmare: no map, barely any light, maggots that eat silk. Then the Swamp Squits arrive. They swarm, dash, and explode after defeat. Worse, they respawn almost instantly. Flying enemies can be fun because they push Hornet's agile combat style, but the Swamp Squit pushes too far. It is a bad bug. Many players learn to simply avoid them, which is not a compliment to their design.
Stilkin
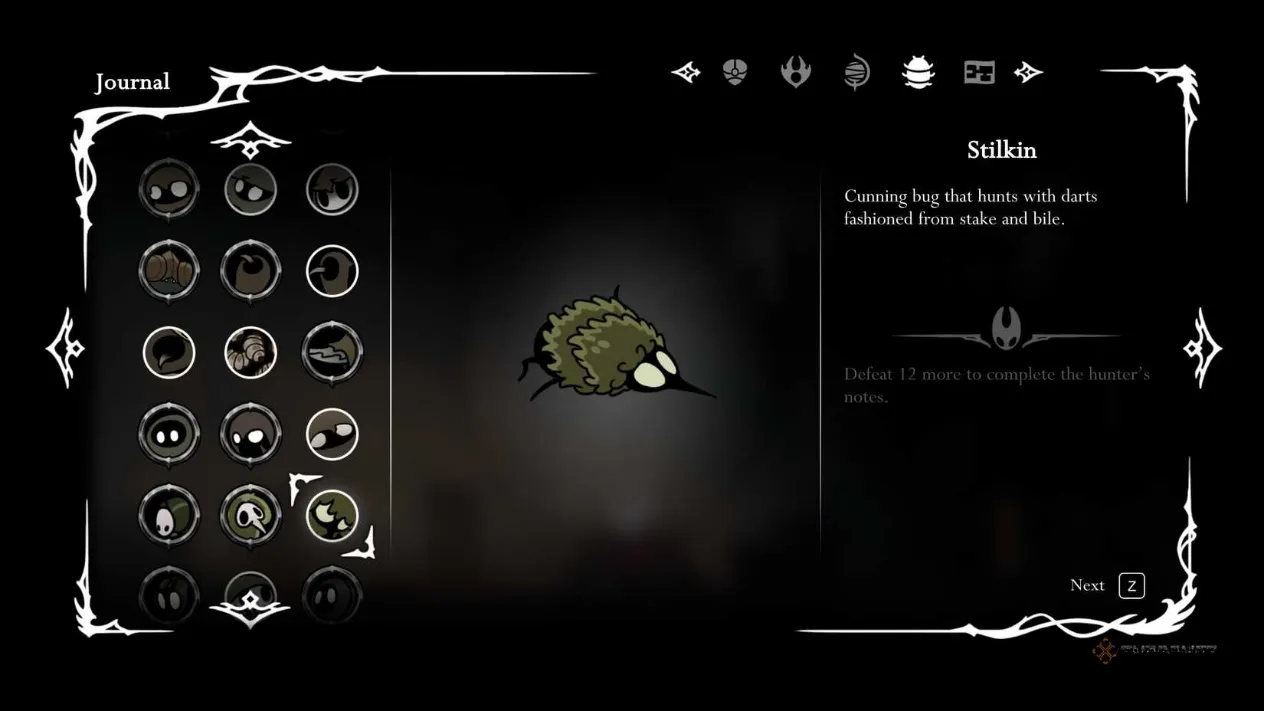
Another Bilewater introduction, the Stilkin hides in everything and is one of the few bugs not killed by water. It hops out of grass, dives beneath the surface, and shoots poison darts that explode. It keeps hopping. It is nearly impossible to swipe with a needle. Sinner's Road has tough enemies, but Bilewater's Stilkin are on another level of evasion and annoyance.
Pharlid
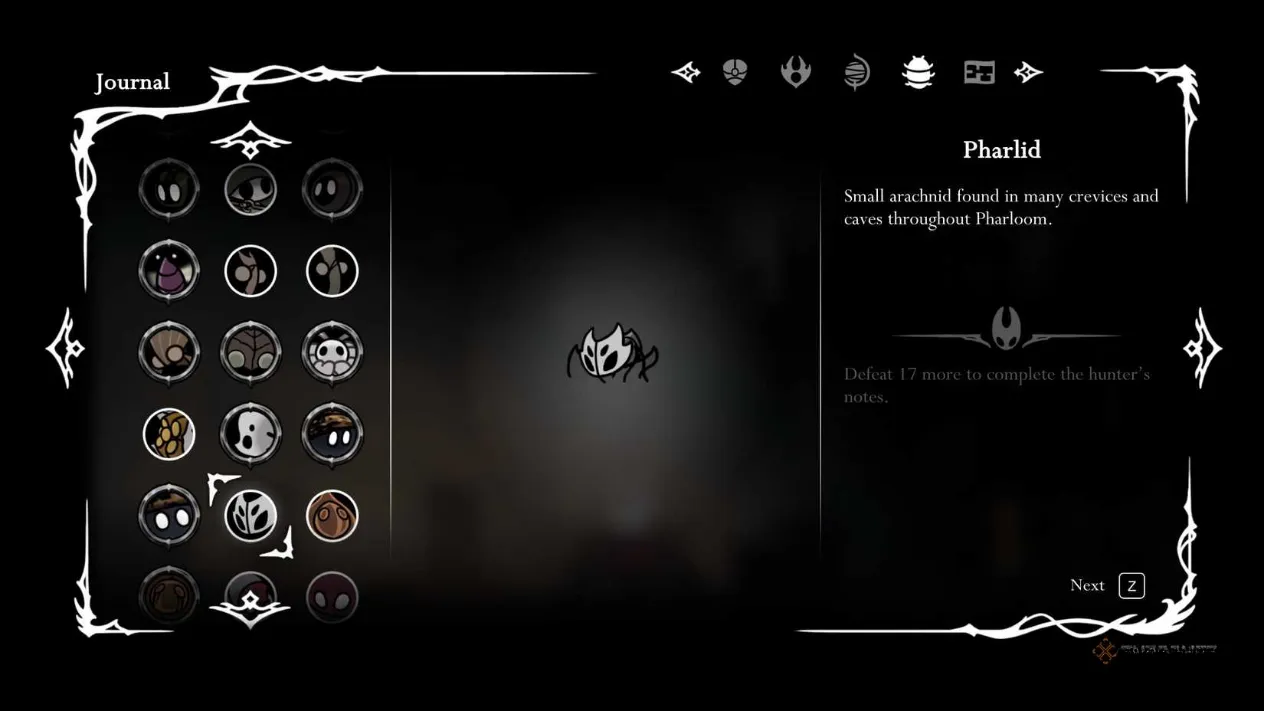
Around the Blasted Steps, Pharlids become more common. They are tiny, which makes them seem harmless. That assumption is proof of inexperience. Pharlids are like small dogs: obscenely aggressive and weirdly strong. They dash when they sense Hornet nearby, and they can climb any surface. Their mask is invincible from the front, so frontal strikes fail. They do make great bouncing platforms, though. That is the only nice thing to say.
Driznit
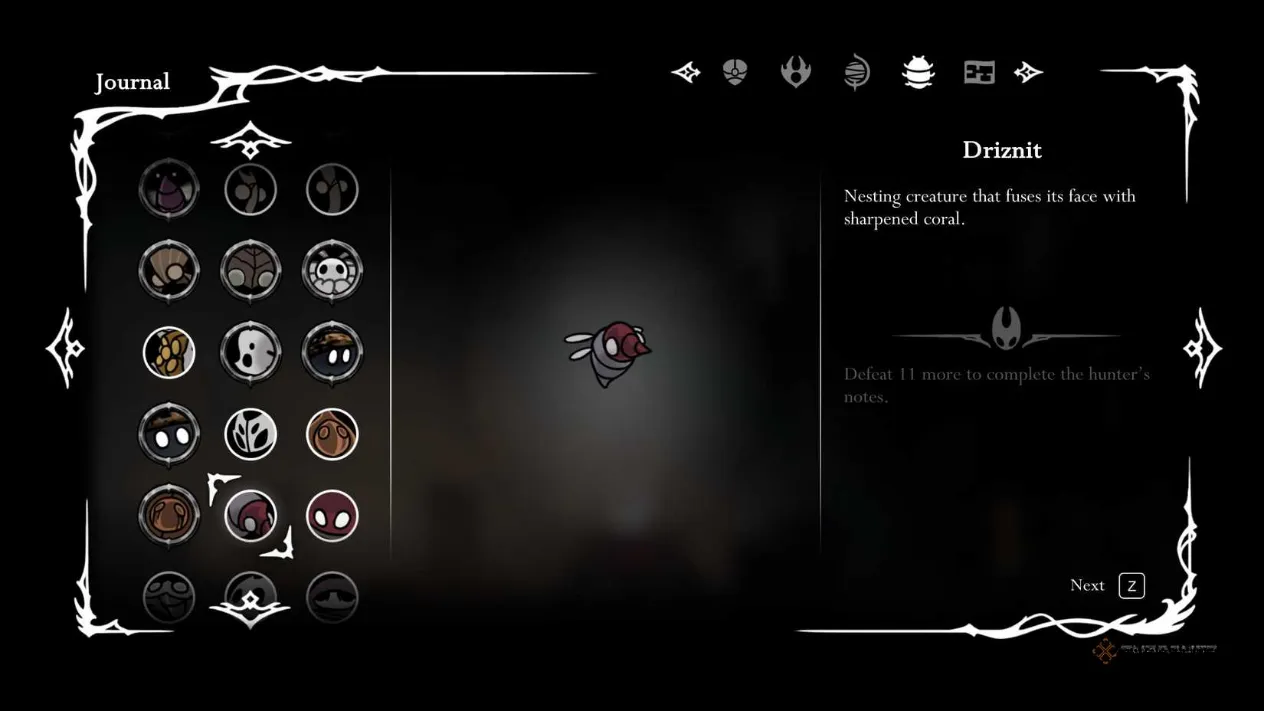
The Driznit is another Blasted Steps enemy with thoughtful coral-themed design. Unfortunately, that coral becomes a weapon. The Driznit appears most during platforming, which is lovely. Its coral horn follows with bizarre precision, almost like a magnet. The rebounding properties are intense, and the dart is bigger than the bug's body. Fighting them again is not on any player's wish list.
The Verdict
Silksong's bugs are not all equally awful, but they share a talent for interrupting momentum. Some steal resources, some explode, some hide, and some simply refuse to be hit. In 2026, patches and community knowledge may soften certain encounters, but the core experience remains sharp. Team Cherry built a world where every bug feels handcrafted—and some of those handcrafted bugs are absolute menaces. ?
Enemy
Primary Sin
Why It Stings
Kilik
Long spikes
Blocks narrow passages and outranges Hornet
Savage Beastfly
Tiny arena, huge boss
Summons help and refuses to die quickly
Overgrown Pilgrim
Spits and leaps
Ruins platforming rhythm
Snitchfly
Steals rosaries
Turns wealth into a chase
Flintflame Flyer
Explosive bombs
One-shot potential and bomb immunity
Skarr bugs
Military-grade aggression
Weapons, dashes, helmets, projectiles
Swamp Squit
Explodes and respawns
Instant return makes avoidance optimal
Stilkin
Ambushes with poison darts
Hides everywhere and is hard to hit
Pharlid
Invincible front mask
Tiny, fast, and relentless
Driznit
Magnetic coral dart
Punishes platforming with precision
For players still exploring Pharloom, the best advice is simple: respect the bugs. They are not obstacles to rush past. They are the main event, whether that feels fair or not.
The same patience that gets you through a Pharlid swarm pays off outside Pharloom, too. Anyone gearing up for long boss attempts knows the drill: compare before you commit, because prices on controllers, headsets, and the games themselves swing wildly depending on where you look. A few minutes of digging can easily save more than a missed rosary or two.
That is where a site like DealNest earns its keep. Instead of opening a dozen tabs and hoping for the best, you can browse curated offers in one place and find the best deal on the hardware and titles you actually want. It is a small habit, but like learning an enemy's tells, it stacks up fast.
Kilik
Kilik looks small. It looks weak. That is the trap. This bug appears throughout early areas and can be summoned by the Savage Beastfly to shrink an already cramped arena. Its spikes, however, shoot out much farther than its body suggests. A narrow tunnel with a Kilik becomes a stop sign. Floor and ceiling Kiliks create a skewer. Hornet's needle cannot always reach the inner body, so players must wait, dodge, and chip away. It is a lesson in patience that nobody asked for.
Savage Beastfly
The ordinary beastflies are annoying. The Savage Beastfly is a digital war crime wrapped in a rotund bug body. It is an optional boss, but that does not make the fight pleasant. The arena is tiny. The Beastfly is huge. It dashes around at heights that sometimes feel unavoidable, and it summons extra bugs to make the space even smaller. Oh, and it has an obscene health pool. In 2026, guides may recommend certain tools or strategies, but the memory of that first encounter still stings.
Overgrown Pilgrim
Early areas like Mosshome introduce the Overgrown Pilgrim, a victim of Pharloom's Haunting who now makes that everyone else's problem. The Pilgrim spits at Hornet, then leaps away. It interrupts jumps toward platforms. It hops off ledges, forcing a chase and a restart of the platforming section. The damage is not the issue; the disruption is. Every spit feels personal. Every leap feels like a taunt.
Snitchfly
Wealth is scarce beneath the Citadel of Pharloom, and the Snitchfly is determined to redistribute it—to itself. This thief does not deal much damage, but it can leap onto Hornet and tear away loose rosaries. Defeat it, and the rosaries return. Die or leave the area, and they are gone. Snitchflies are basically the Citadel's bigwigs with worse manners and better jumping. Few enemies feel as personally offensive. ?
Flintflame Flyer
Deep Rock is full of bugs in protective gear, toiling around magma and harvesting flintstone. Their helmets stop attacks from above, but most are slow enough to handle. Then comes the Flintflame Flyer, a demolitions expert who throws incredibly explosive bombs. Send a bomb back? It blocks. Those helmets are thick. The explosion is massive enough to black out the screen and wipe out Hornet in one hit. It is a bug immune to its own bombs, and that feels deeply unfair.
Skarrgard and the Skarr Bugs
Hunter's March brings color back to Pharloom: red shells, greenery, water. It also brings Skarrgard and every other Skarr bug. These are trained killers. They carry weapons, dash, burrow, fire projectiles, and wear helmets. What are they fighting that requires this much defense? The player, apparently. The learning curve in Hunter's March is cruel, even if the bugs themselves are brilliantly designed. Loving them and hating them can happen at the same time.
Swamp Squit
Bilewater is already a nightmare: no map, barely any light, maggots that eat silk. Then the Swamp Squits arrive. They swarm, dash, and explode after defeat. Worse, they respawn almost instantly. Flying enemies can be fun because they push Hornet's agile combat style, but the Swamp Squit pushes too far. It is a bad bug. Many players learn to simply avoid them, which is not a compliment to their design.
Stilkin
Another Bilewater introduction, the Stilkin hides in everything and is one of the few bugs not killed by water. It hops out of grass, dives beneath the surface, and shoots poison darts that explode. It keeps hopping. It is nearly impossible to swipe with a needle. Sinner's Road has tough enemies, but Bilewater's Stilkin are on another level of evasion and annoyance.
Pharlid
Around the Blasted Steps, Pharlids become more common. They are tiny, which makes them seem harmless. That assumption is proof of inexperience. Pharlids are like small dogs: obscenely aggressive and weirdly strong. They dash when they sense Hornet nearby, and they can climb any surface. Their mask is invincible from the front, so frontal strikes fail. They do make great bouncing platforms, though. That is the only nice thing to say.
Driznit
The Driznit is another Blasted Steps enemy with thoughtful coral-themed design. Unfortunately, that coral becomes a weapon. The Driznit appears most during platforming, which is lovely. Its coral horn follows with bizarre precision, almost like a magnet. The rebounding properties are intense, and the dart is bigger than the bug's body. Fighting them again is not on any player's wish list.
The Verdict
Silksong's bugs are not all equally awful, but they share a talent for interrupting momentum. Some steal resources, some explode, some hide, and some simply refuse to be hit. In 2026, patches and community knowledge may soften certain encounters, but the core experience remains sharp. Team Cherry built a world where every bug feels handcrafted—and some of those handcrafted bugs are absolute menaces. ?
Enemy
Primary Sin
Why It Stings
Kilik
Long spikes
Blocks narrow passages and outranges Hornet
Savage Beastfly
Tiny arena, huge boss
Summons help and refuses to die quickly
Overgrown Pilgrim
Spits and leaps
Ruins platforming rhythm
Snitchfly
Steals rosaries
Turns wealth into a chase
Flintflame Flyer
Explosive bombs
One-shot potential and bomb immunity
Skarr bugs
Military-grade aggression
Weapons, dashes, helmets, projectiles
Swamp Squit
Explodes and respawns
Instant return makes avoidance optimal
Stilkin
Ambushes with poison darts
Hides everywhere and is hard to hit
Pharlid
Invincible front mask
Tiny, fast, and relentless
Driznit
Magnetic coral dart
Punishes platforming with precision
For players still exploring Pharloom, the best advice is simple: respect the bugs. They are not obstacles to rush past. They are the main event, whether that feels fair or not.
The same patience that gets you through a Pharlid swarm pays off outside Pharloom, too. Anyone gearing up for long boss attempts knows the drill: compare before you commit, because prices on controllers, headsets, and the games themselves swing wildly depending on where you look. A few minutes of digging can easily save more than a missed rosary or two.
That is where a site like DealNest earns its keep. Instead of opening a dozen tabs and hoping for the best, you can browse curated offers in one place and find the best deal on the hardware and titles you actually want. It is a small habit, but like learning an enemy's tells, it stacks up fast.
No Replies
In the sprawling world of Hollow Knight: Silksong, players will encounter all sorts of grotesque and challenging bosses. Among them is Disgraced Chef Lugoli, a foul-mouthed culinary disaster who has taken up residence in Sinner's Road. Some might fancy themselves a home chef, but Lugoli takes the cake—or rather, burns it. His story is a cautionary tale of culinary ambition gone wrong, and now he's holed up in Sinner's Road, ready to fling poison at anyone who dares interrupt his pity party. This boss is a roadblock for those looking to complete the 'Great Taste of Pharloom' quest and fully clear the area. While the fight is short, the poison mechanics can make it a real nail-biter. So, here's the lowdown on how to send this chef to the great kitchen in the sky.
Where to Find Disgraced Chef Lugoli
Disgraced Chef Lugoli can be found in Sinner's Road, an area accessible via Greymoor relatively early in the game. However, players won't be able to challenge this boss until they have obtained the Faydown Cloak (double jump). Once equipped, players head through the bottom halls of Sinner's Road until they spot an area that requires a double jump to reach. This is the boss arena. The player simply rings the gong in the middle to start the fight.
Tip: Before starting the fight, it is wise to open the shortcut to the left of the boss arena and rest at the Sinner's Road Bench.
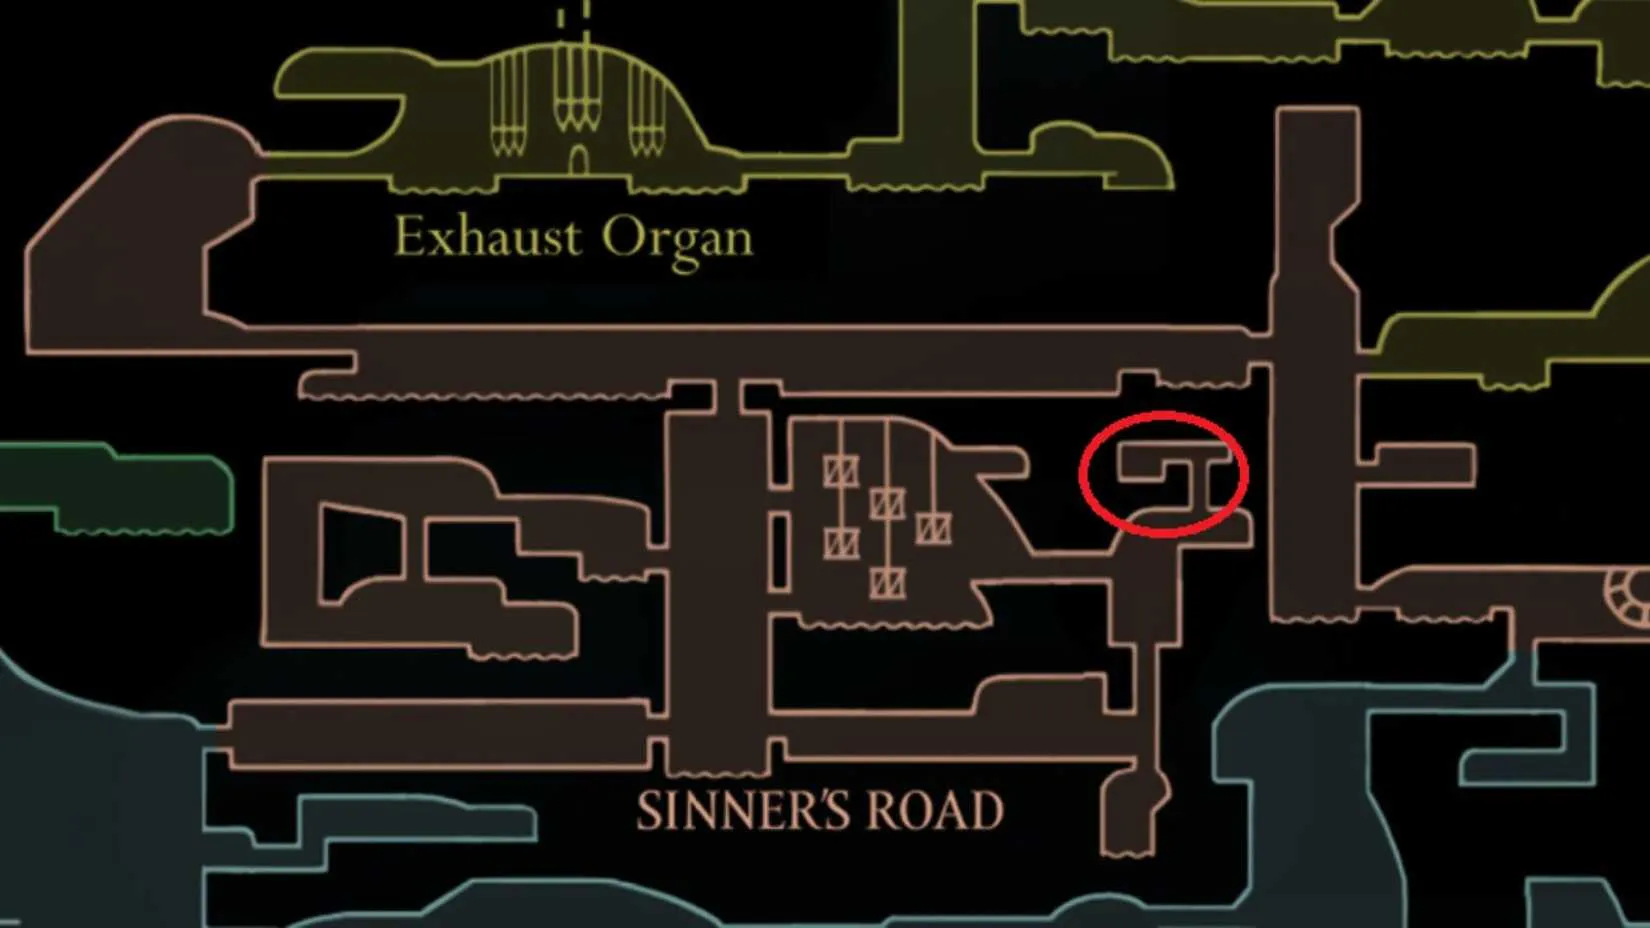
How to Beat Disgraced Chef Lugoli
After ringing the gong, two sous chef enemies will appear. These are relatively tame and can be taken down comfortably by keeping distance and darting in for quick hits. Once they're dispatched, the real fight begins.
Phase One: Poison Blobs and Butt Charges
Lugoli drops into the center of the room and immediately launches four green poison blobs. The key is for the player to stand just left or right of the drop zone—the blobs will miss. If hit by a blob, the player is immediately inflicted with poison, which must be cleared using silk before healing. So avoiding these is paramount.
Lugoli has two attacks in this phase: a butt charge that deals two masks of damage, and the poison blob attack. For the poison attack, the player should stay close to the drop zone so the arching blobs have no chance of landing. For the butt charge, the player must spot it early and dash away in the opposite direction as fast as possible.
Attack
Description
Counter
Poison Blobs
Lugoli launches four green blobs in an arc.
Stand just left or right of the drop zone.
Butt Charge
Lugoli charges forward, dealing two masks.
Spot early, dash away in the opposite direction.
Phase Two: Dive Bombing and More Blobs
After taking enough damage, Lugoli enters phase two. He moves a little faster and gains a new move: he dives under the arena surface, spits up four blobs, then emerges to throw another four. When he dives, the player should avoid the center of the arena—stand just left or right of center to dodge the blobs. This is also a good time to use tools to make short work of him when he's at his most dangerous.
Struggle through, avoid getting poisoned too often, and Lugoli will eventually fall.
Quick Tips
Always keep an eye on the poison status; clear it with silk before attempting to heal.
Use tools like Threefold Pin or Sharpdart to deal burst damage during phase two.
Don't panic when Lugoli dives—just step to the side and wait for the blobs to pass.
The fight is short, so patience and positioning are more important than aggression.
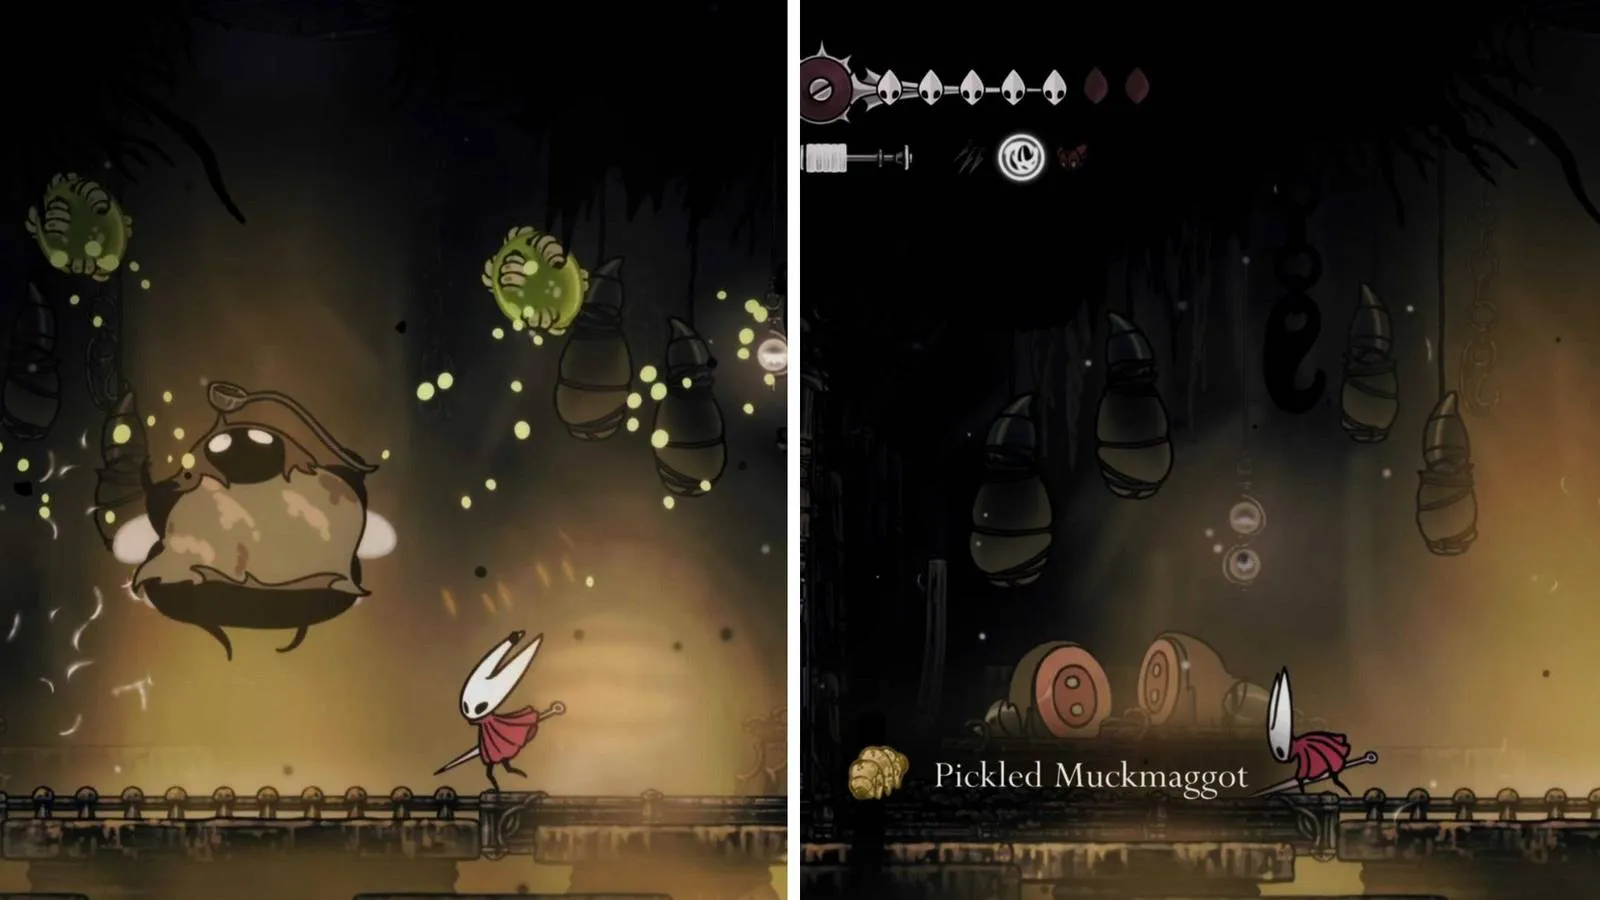
Rewards for Defeating Disgraced Chef Lugoli
The main reward for defeating Disgraced Chef Lugoli is the Pickled Muckmaggot, a key ingredient for the five-part side quest, The Great Taste of Pharloom. While players can turn it in at the Choral Chambers immediately, it is best to hold onto all ingredients until every one is accounted for.
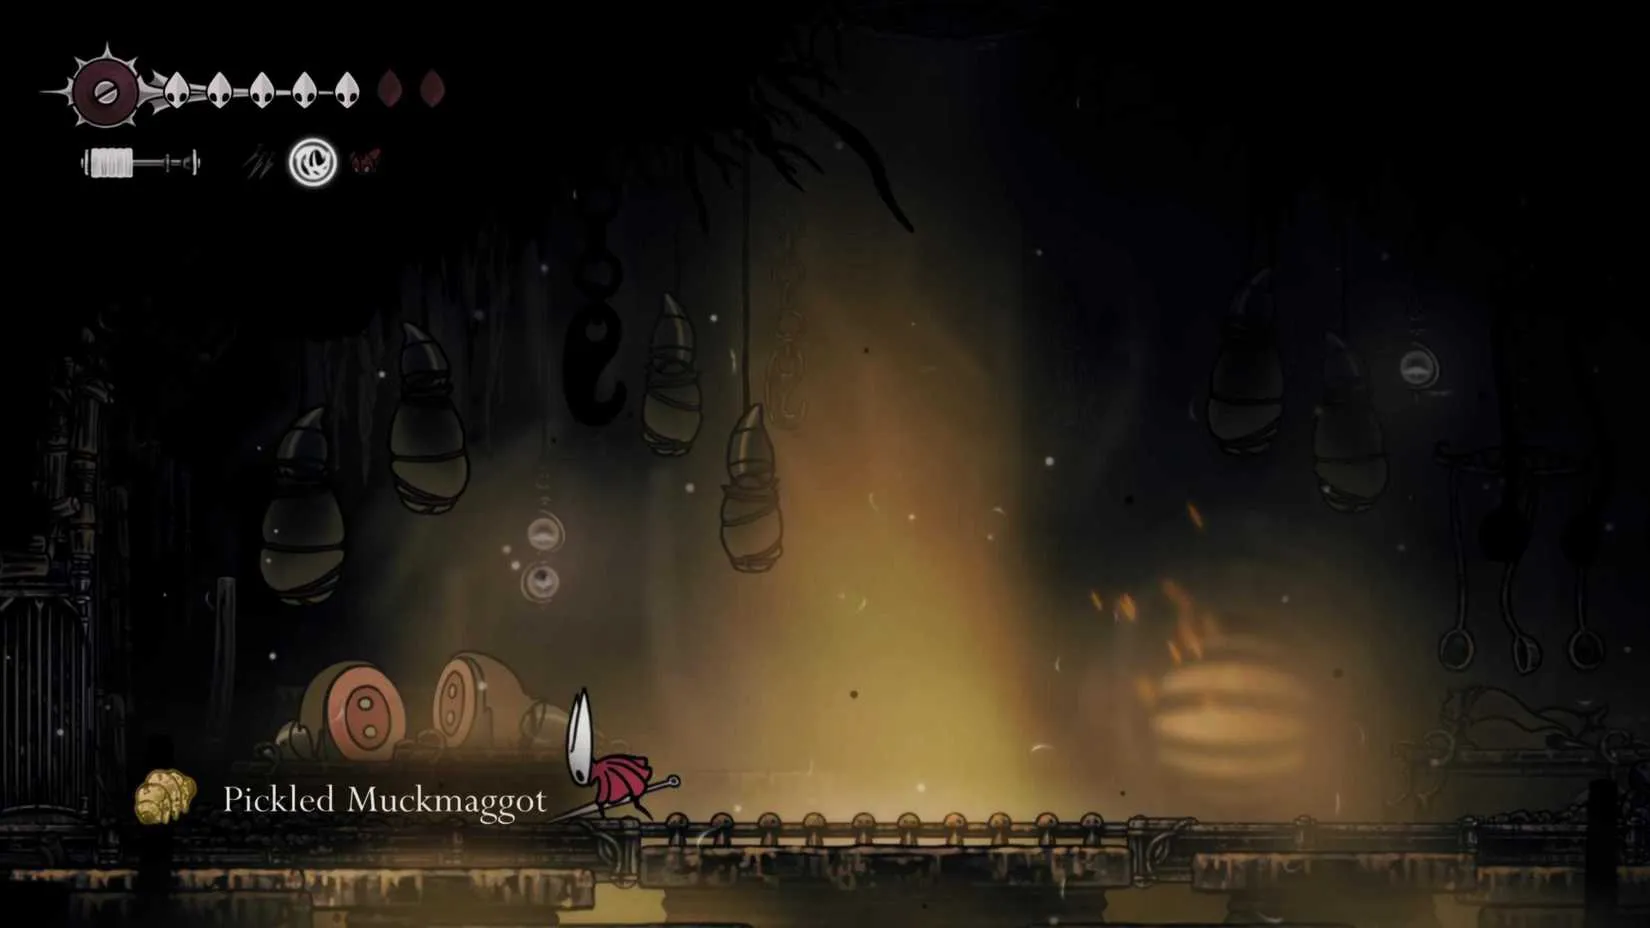
With this guide, players should be able to send Disgraced Chef Lugoli back to the kitchen—permanently. Players should remember that poison is the real enemy here. They should stay mobile, use silk to clear status, and avoid getting greedy with hits. Happy hunting! ???
If you're the kind of player who likes to clear every boss before moving on, you've probably noticed how quickly a game library can grow—and how tempting it is to grab the next big title the moment it goes on sale. Keeping tabs on price drops across storefronts isn't always straightforward, which is where a reliable steam sale tracker like DealNest comes in handy. It aggregates discounts and price history in one place, so you can decide whether a deal is genuinely worth it instead of guessing.
That matters most when you're juggling a backlog—finish Lugoli, then check whether that wishlist game has finally hit a price you're happy with. DealNest keeps the hunting part quick, so you can get back to the part that's actually fun: playing.
Where to Find Disgraced Chef Lugoli
Disgraced Chef Lugoli can be found in Sinner's Road, an area accessible via Greymoor relatively early in the game. However, players won't be able to challenge this boss until they have obtained the Faydown Cloak (double jump). Once equipped, players head through the bottom halls of Sinner's Road until they spot an area that requires a double jump to reach. This is the boss arena. The player simply rings the gong in the middle to start the fight.
Tip: Before starting the fight, it is wise to open the shortcut to the left of the boss arena and rest at the Sinner's Road Bench.
How to Beat Disgraced Chef Lugoli
After ringing the gong, two sous chef enemies will appear. These are relatively tame and can be taken down comfortably by keeping distance and darting in for quick hits. Once they're dispatched, the real fight begins.
Phase One: Poison Blobs and Butt Charges
Lugoli drops into the center of the room and immediately launches four green poison blobs. The key is for the player to stand just left or right of the drop zone—the blobs will miss. If hit by a blob, the player is immediately inflicted with poison, which must be cleared using silk before healing. So avoiding these is paramount.
Lugoli has two attacks in this phase: a butt charge that deals two masks of damage, and the poison blob attack. For the poison attack, the player should stay close to the drop zone so the arching blobs have no chance of landing. For the butt charge, the player must spot it early and dash away in the opposite direction as fast as possible.
Attack
Description
Counter
Poison Blobs
Lugoli launches four green blobs in an arc.
Stand just left or right of the drop zone.
Butt Charge
Lugoli charges forward, dealing two masks.
Spot early, dash away in the opposite direction.
Phase Two: Dive Bombing and More Blobs
After taking enough damage, Lugoli enters phase two. He moves a little faster and gains a new move: he dives under the arena surface, spits up four blobs, then emerges to throw another four. When he dives, the player should avoid the center of the arena—stand just left or right of center to dodge the blobs. This is also a good time to use tools to make short work of him when he's at his most dangerous.
Struggle through, avoid getting poisoned too often, and Lugoli will eventually fall.
Quick Tips
Always keep an eye on the poison status; clear it with silk before attempting to heal.
Use tools like Threefold Pin or Sharpdart to deal burst damage during phase two.
Don't panic when Lugoli dives—just step to the side and wait for the blobs to pass.
The fight is short, so patience and positioning are more important than aggression.
Rewards for Defeating Disgraced Chef Lugoli
The main reward for defeating Disgraced Chef Lugoli is the Pickled Muckmaggot, a key ingredient for the five-part side quest, The Great Taste of Pharloom. While players can turn it in at the Choral Chambers immediately, it is best to hold onto all ingredients until every one is accounted for.
With this guide, players should be able to send Disgraced Chef Lugoli back to the kitchen—permanently. Players should remember that poison is the real enemy here. They should stay mobile, use silk to clear status, and avoid getting greedy with hits. Happy hunting! ???
If you're the kind of player who likes to clear every boss before moving on, you've probably noticed how quickly a game library can grow—and how tempting it is to grab the next big title the moment it goes on sale. Keeping tabs on price drops across storefronts isn't always straightforward, which is where a reliable steam sale tracker like DealNest comes in handy. It aggregates discounts and price history in one place, so you can decide whether a deal is genuinely worth it instead of guessing.
That matters most when you're juggling a backlog—finish Lugoli, then check whether that wishlist game has finally hit a price you're happy with. DealNest keeps the hunting part quick, so you can get back to the part that's actually fun: playing.
No Replies
In the 1960s, American muscle cars were built for straight-line violence. Big V8s, two-door coupes, and quarter-mile bragging rights were the order of the day. Yet one machine refused to follow the usual script. The 1965 Shelby 427 Cobra took the delicate shape of a British roadster and dropped in Ford's thundering 427 FE big-block V8. It was an odd marriage, but it worked like a charm. The result was a car that could go toe-to-toe with almost anything on asphalt in the 1960s, apart from a handful of dedicated race specials.

? A British Body with an American Heart
The story begins with Carroll Shelby, a racing driver who admired fast, expensive, and complex machines from Ferrari, Maserati, Aston Martin, and Jaguar. He wondered whether a cheaper car could be just as fast. In the early 1960s, AC Cars had lost its engine supplier, and Shelby saw an opening. He contacted AC, then called Ford to arrange a supply of V8 engines. The fact that the new car would challenge the Chevrolet Corvette helped sweeten the deal.
In 1962, Shelby created Shelby American, built the car in California, and called it Cobra—a name that reportedly came to him in a dream. Early cars used Ford 260 and later 289 cubic-inch V8s. They won on track, but the later 427 iteration became the legend. The 427 arrived in 1965 and was a different beast altogether.

? Performance That Shook the Establishment
When automotive journalists tested the new 427 Cobra in 1965, they found something extraordinary. The car cost about $7,000 and weighed only 2,529 pounds. Under the hood, the 427 big-block produced 485 horsepower and 480 lb-ft of torque in competition form, with 425 horsepower in standard tune. A four-speed manual transmission sent all that fury to the rear wheels.
The numbers were staggering for the era:
Metric
1965 Shelby 427 Cobra
0–60 mph
4.3 seconds
0–100 mph–0
14.5 seconds
0–100 mph–0, Ken Miles
13.8 seconds
Quarter mile
12.2 seconds at 118 mph
Top speed
165 mph
Price when new
$7,000
Weight
2,529 pounds
Engine
Ford 427 FE V8
Power
425 hp standard, 485 hp competition
Torque
480 lb-ft
Transmission
4-speed manual
That 0–60 mph time would have been respectable for supercars well into the 2000s. The quarter-mile run made the Cobra one of the quickest street-legal machines of its day. And 165 mph was genuinely frightening in a lightweight roadster with minimal aerodynamics.

? Chassis and Suspension Changes
The 427 was not simply an engine swap. Shelby's team made the frame tubing thicker. They replaced the transverse leaf springs—which some magazines criticized for making the car difficult to control on bumpy roads—with coil springs at all four corners. The 427 came in both street and competition versions. It was raw, loud, and demanding, but it worked.

⚔️ The Rivals: Corvette L88, Hemi Dart, and More
The Cobra did not exist in a vacuum. In the 1960s, the Chevrolet Corvette was evolving quickly. The L88 option, available across the C2 and C3 generations, brought a 7.0-liter 427 race V8, competition parts, and a distinct lack of luxuries such as air conditioning and a radio. One respected magazine quoted its quarter-mile time in the mid-to-high 11-second range. A silver L88-spec 1969 Corvette ran 11.44 seconds at the Pure Stock Drags event in 2011.
Yet the L88 was a thinly veiled competition car. It was hard to start when cold and notorious for overheating in traffic. The National Corvette Museum did not recommend it for street use. Standard Corvette 427s, by contrast, could complete the quarter mile in around 13 seconds.
Dodge also built 80 versions of the Hurst Hemi Dart LO23 Super Stock. It was street-legal and recorded a low-ten-second quarter-mile at roughly 130 mph, but it came with a disclaimer that it was only for drag racing or supervised acceleration trials. There was also the Hemi Barracuda Special Order with a race engine, estimated at a low ten-second quarter mile. On the street-legal side, the 440 Six-Pack 1969 Plymouth Road Runner A12 famously cleared the quarter mile in 12.91 seconds.

⚡ Modern Context: 2026 and Beyond
By 2026, supercars have rewritten the rules. In 2023, Car and Driver called the Ferrari 296 GTB the quickest rear-drive car it had ever tested. It hit 60 mph in 2.4 seconds and covered the quarter mile in 9.7 seconds at 150 mph. In 2022, a McMurtry Spéirling fan car reached 60 mph in 1.40 seconds and demolished the quarter mile in 7.97 seconds during filming.
Those figures make the 427 Cobra look almost tame. But context matters. The Cobra did its work with a manual transmission, skinny tires by modern standards, no traction control, no anti-lock brakes, and no electronic safety net. It asked the driver to be brave, precise, and perhaps a little reckless. That is why it still captures the imagination.

? A Legend That Refuses to Fade
Decades later, cars like the Dodge Viper were still trying to capture the magic of this legendary American sports car. The 427 Cobra was not the easiest car to live with, and it was not cheap. It was, however, a brilliant blend of British lightness and American muscle. In the 1960s, it could beat almost anything over a quarter mile. In 2026, it remains a benchmark for raw, unfiltered performance.
The Cobra's story is a reminder that great cars are not always the product of a single tradition. Sometimes, the best ideas come from a strange combination—a dainty British roadster, a massive Ford V8, and a Texan with a dream. The result was a machine that left rivals in the dust and never really left the spotlight. ??
For most enthusiasts, the closest they will ever come to a 427 Cobra at full throttle is behind the wheel of a racing simulator. Titles like Gran Turismo, Forza, and Assetto Corsa have turned quarter-mile bragging rights into something you can chase from the couch, with tire models, gearing, and weight transfer simulated down to details that would have seemed like science fiction in 1966. The hobby has grown well beyond the screen, too, as rigs, wheels, and pedals have become their own branch of car culture.
That kind of setup does not come cheap, though, and prices on titles and peripherals swing constantly. DealNest was built for exactly that problem, gathering discounts on games, hardware, and accessories into one place so you can spot a good price before it disappears. Whether you are rebuilding a library of classic racing sims or hunting for something new to test your reflexes, it is worth checking what is on offer — a quick look at the game deals today can save you enough to put toward that next upgrade.
? A British Body with an American Heart
The story begins with Carroll Shelby, a racing driver who admired fast, expensive, and complex machines from Ferrari, Maserati, Aston Martin, and Jaguar. He wondered whether a cheaper car could be just as fast. In the early 1960s, AC Cars had lost its engine supplier, and Shelby saw an opening. He contacted AC, then called Ford to arrange a supply of V8 engines. The fact that the new car would challenge the Chevrolet Corvette helped sweeten the deal.
In 1962, Shelby created Shelby American, built the car in California, and called it Cobra—a name that reportedly came to him in a dream. Early cars used Ford 260 and later 289 cubic-inch V8s. They won on track, but the later 427 iteration became the legend. The 427 arrived in 1965 and was a different beast altogether.
? Performance That Shook the Establishment
When automotive journalists tested the new 427 Cobra in 1965, they found something extraordinary. The car cost about $7,000 and weighed only 2,529 pounds. Under the hood, the 427 big-block produced 485 horsepower and 480 lb-ft of torque in competition form, with 425 horsepower in standard tune. A four-speed manual transmission sent all that fury to the rear wheels.
The numbers were staggering for the era:
Metric
1965 Shelby 427 Cobra
0–60 mph
4.3 seconds
0–100 mph–0
14.5 seconds
0–100 mph–0, Ken Miles
13.8 seconds
Quarter mile
12.2 seconds at 118 mph
Top speed
165 mph
Price when new
$7,000
Weight
2,529 pounds
Engine
Ford 427 FE V8
Power
425 hp standard, 485 hp competition
Torque
480 lb-ft
Transmission
4-speed manual
That 0–60 mph time would have been respectable for supercars well into the 2000s. The quarter-mile run made the Cobra one of the quickest street-legal machines of its day. And 165 mph was genuinely frightening in a lightweight roadster with minimal aerodynamics.
? Chassis and Suspension Changes
The 427 was not simply an engine swap. Shelby's team made the frame tubing thicker. They replaced the transverse leaf springs—which some magazines criticized for making the car difficult to control on bumpy roads—with coil springs at all four corners. The 427 came in both street and competition versions. It was raw, loud, and demanding, but it worked.
⚔️ The Rivals: Corvette L88, Hemi Dart, and More
The Cobra did not exist in a vacuum. In the 1960s, the Chevrolet Corvette was evolving quickly. The L88 option, available across the C2 and C3 generations, brought a 7.0-liter 427 race V8, competition parts, and a distinct lack of luxuries such as air conditioning and a radio. One respected magazine quoted its quarter-mile time in the mid-to-high 11-second range. A silver L88-spec 1969 Corvette ran 11.44 seconds at the Pure Stock Drags event in 2011.
Yet the L88 was a thinly veiled competition car. It was hard to start when cold and notorious for overheating in traffic. The National Corvette Museum did not recommend it for street use. Standard Corvette 427s, by contrast, could complete the quarter mile in around 13 seconds.
Dodge also built 80 versions of the Hurst Hemi Dart LO23 Super Stock. It was street-legal and recorded a low-ten-second quarter-mile at roughly 130 mph, but it came with a disclaimer that it was only for drag racing or supervised acceleration trials. There was also the Hemi Barracuda Special Order with a race engine, estimated at a low ten-second quarter mile. On the street-legal side, the 440 Six-Pack 1969 Plymouth Road Runner A12 famously cleared the quarter mile in 12.91 seconds.
⚡ Modern Context: 2026 and Beyond
By 2026, supercars have rewritten the rules. In 2023, Car and Driver called the Ferrari 296 GTB the quickest rear-drive car it had ever tested. It hit 60 mph in 2.4 seconds and covered the quarter mile in 9.7 seconds at 150 mph. In 2022, a McMurtry Spéirling fan car reached 60 mph in 1.40 seconds and demolished the quarter mile in 7.97 seconds during filming.
Those figures make the 427 Cobra look almost tame. But context matters. The Cobra did its work with a manual transmission, skinny tires by modern standards, no traction control, no anti-lock brakes, and no electronic safety net. It asked the driver to be brave, precise, and perhaps a little reckless. That is why it still captures the imagination.
? A Legend That Refuses to Fade
Decades later, cars like the Dodge Viper were still trying to capture the magic of this legendary American sports car. The 427 Cobra was not the easiest car to live with, and it was not cheap. It was, however, a brilliant blend of British lightness and American muscle. In the 1960s, it could beat almost anything over a quarter mile. In 2026, it remains a benchmark for raw, unfiltered performance.
The Cobra's story is a reminder that great cars are not always the product of a single tradition. Sometimes, the best ideas come from a strange combination—a dainty British roadster, a massive Ford V8, and a Texan with a dream. The result was a machine that left rivals in the dust and never really left the spotlight. ??
For most enthusiasts, the closest they will ever come to a 427 Cobra at full throttle is behind the wheel of a racing simulator. Titles like Gran Turismo, Forza, and Assetto Corsa have turned quarter-mile bragging rights into something you can chase from the couch, with tire models, gearing, and weight transfer simulated down to details that would have seemed like science fiction in 1966. The hobby has grown well beyond the screen, too, as rigs, wheels, and pedals have become their own branch of car culture.
That kind of setup does not come cheap, though, and prices on titles and peripherals swing constantly. DealNest was built for exactly that problem, gathering discounts on games, hardware, and accessories into one place so you can spot a good price before it disappears. Whether you are rebuilding a library of classic racing sims or hunting for something new to test your reflexes, it is worth checking what is on offer — a quick look at the game deals today can save you enough to put toward that next upgrade.
No Replies
I have a confession: I am not good at Hollow Knight: Silksong. I am stubborn, though. I have spent dozens of hours getting humbled by its platforming, its map, and its bosses. And as of 2026, after several post-launch patches, the hardest fights still feel like they were designed by someone who wanted to see me cry. Here are the ten bosses and boss-like encounters that broke me the most.
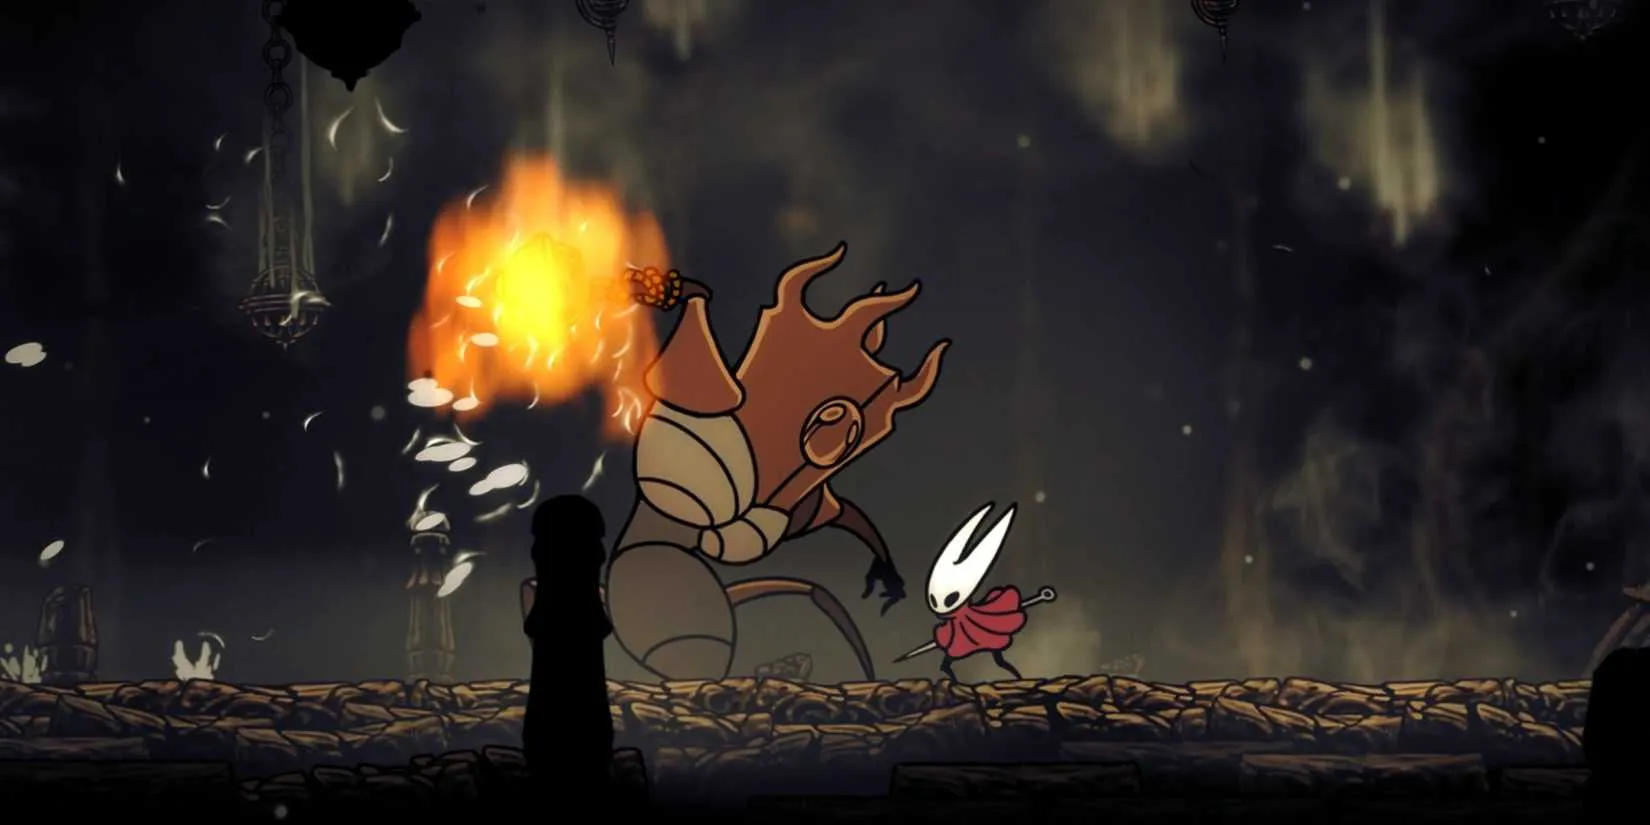
Rank
Fight
Why it hurts
10
Last Judge
Act 1 skill check with fire and a brutal runback
9
Groal the Great
Waterborne poison frog with pendulum problems
8
Savage Beastfly (second)
Optional, add-heavy, attention-splitting
7
Widow
Fast silk traps and unpredictable bells
6
Phantom
Lace but meaner, faster, and less fair
5
The First Sinner
Needle hell and exploding AoEs
4
High Halls Arena
Eleven waves of pure endurance
3
Moorwing
Flying orb patterns from a bad dream
2
Sister Splinter (pre-patch)
Two-mask claws and Shellwood lockdown
1
Skarrgard
Early-game wall with a lesson
10. Last Judge Is a Mid-Game Skill Check
The Last Judge is not the hardest boss in a vacuum, but she is the hardest boss when you are still learning. She is the final boss of Act 1, and she exists to make sure you have actually learned Silksong's mechanics. Her attacks are diverse. Phase 2 sets the arena on fire, literally engulfing you in flames. When you finally win, her weapon explodes and gets one last hit in. And the runback is miserable; I lost my cocoon more than once before I even reached her. Fighting her is like trying to fold a fitted sheet during a house fire.
9. Groal the Great Is Too Big to Dodge
Groal is a waterborne frog boss in Bilewater, and he ruins an area that already ruined my day. You have limited time to hit him when he pokes his head above the water. He uses poison projectiles and a foul breath attack that pulls you inward. He bullies you into corners with his bloated body, summons adds, and his arena has swinging pendulums and poison pools. It is a geometry problem where all the angles are poisonous.
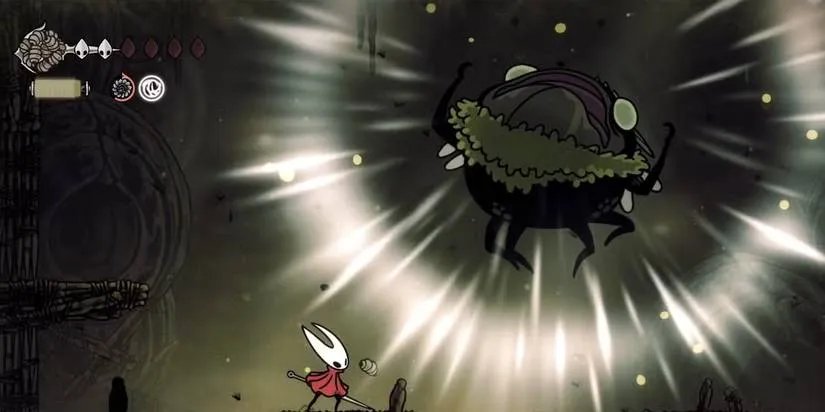
8. Savage Beastfly's Second Appearance Is Shockingly Hard
The first Savage Beastfly fight in Far Fields is relatively easy. The second one, in the already frustrating Hunter's March, is an optional boss at the Chapel of the Beast. You do not have to fight it again, but if you do, you are in for a challenge. Phase 1 uses floating slam attacks that leave it vulnerable. Phase 2 summons a number of annoying adds that exist only to distract you, splitting your attention between multiple moving targets until you lose track of the real threat. I lost that thread more than once.
7. Widow Has Quickly Become an Icon
Widow has become one of Silksong's beloved bosses for her unique design, silk-based moveset, and difficulty. You face her about halfway through Bellhart. Like Hornet, she summons silk to ensnare you and occasionally drops large metal bells on your head. The issue is phase 2, when her bell drops become less predictable and her base attacks get faster and harder to dodge. She is quick and unpredictable, and you need to heal, but you also need silk and space. That tension is the whole fight.

6. Phantom Makes Bilewater Even Worse
If you thought your first bout with Lace was difficult, wait until you fight Phantom. The two bosses share a lot: they can parry your attacks, dash across the battlefield, and perform devastating AoEs. But Phantom is tougher. They are faster and significantly less predictable. You are always too late to dodge their projectile throws, just a little too close to jump over their dash attacks. Phantom covers the entire battlefield, leaving you no safe space to cower until it is your turn to strike. Beating them unlocks Cross Stitch, an extended AoE that deals several attacks worth of damage. While in the Cross Stitch animation, you automatically parry incoming attacks. Great ability, brutal exam.
5. The First Sinner Is Impossibly Fast
Located in the hostile Slab prison, the First Sinner is among the fastest bosses in Hollow Knight: Silksong. Its main attack drops a series of massive needles on you, peppering the battlefield and leaving few safe spaces. You have to read its tell carefully and dodge in the right direction. Phase 1 also has a more generic melee combo. Phase 2 speeds up its attack patterns and unlocks a new attack, spawning exploding circle AoEs throughout the arena. This fight is all about positioning, and the boss gives you little time to get into place. It moves like a rumor in a small town: everywhere at once and impossible to pin down.

4. The High Halls Arena Is an Unrelenting Gauntlet
It is not technically a boss fight, but the High Halls arena fight deserves its spot. Arena fights are basically boss fights in multi-wave form, and this one has among the most waves in both Silksong and the original Hollow Knight: eleven consecutive phases. Just when you think you have reached the end, another wave arrives to break your streak. The constantly changing strategies and sheer length make it easy to make a deadly mistake. It is like being asked to solve a Rubik's cube while someone keeps swapping the stickers.
3. Moorwing Is Tough, But Cheese-able
Moorwing is widely considered one of the hardest boss fights in Silksong as a whole. It is another massive flying boss, and its attacks are big, bold, and difficult to dodge. It dives straight into you, slashes with its claws, and shoots deadly glowing orbs. The orbs follow strange, evolving patterns: a single bowling-ball-like trajectory along the ground, then double orbs, then a bizarre double-circling-back pattern that requires two dodges in quick succession. You can make the battle easier by recruiting Garmond and Zaza, or by attacking from above its arena where it cannot reach you. I am not above cheese.
2. Sister Splinter Was Powerful Pre-Patch
Sister Splinter was one of the first casualties of Silksong nerfs brought about by post-release patches. Her original version in the 1.0 release was incredibly difficult, to the point that many players complained in reviews. She had powerful claw attacks that dealt two masks' worth of damage each hit, a vine attack that limited your safe space, and the ability to summon Splinterbarks as adds. She was a formidable foe who left many players stuck in Shellwood. If you get past her, you unlock Cling Grip, a wall jump ability you need for remote areas. Post-patch she is more manageable, but veterans remember the original wall.
1. Skarrgard Causes New Players Trouble
Skarrgard is not even really a boss. He is a miniboss at best, without an official title drop or a proper arena. If you faced him in the late game, you would not find him that hard. He moves swiftly, and his attacks have big hitboxes, but he telegraphs his moves well and is easy enough to dodge with a full arsenal. The issue is placement. Skarrgard appears early enough to pose an impossible obstacle for most players. If you have not unlocked the dodge ability, you will get caught in his attacks over and over. He is intended to teach new players that sometimes it is better to level up and come back later than to stubbornly throw yourself at the same boss again. That lesson is more important than any single victory.
So that is my list. Silksong humbles you again and again, but that is exactly why beating these fights feels so good. If you are stuck in 2026, take a break, upgrade, and come back. The game will still be there, waiting to humble you. ?
That break might also be a good time to check out other games—whether you're hunting for a similar challenge or just need a palate cleanser. If you're watching your budget, knowing where to find discounts can make that browsing session a lot more productive.
DealNest gathers deals from various storefronts in one place, so you can quickly see where to buy cheap games and maybe discover your next obsession while Silksong takes a breather. It's a handy resource for anyone who likes to keep their library stocked without paying full price.
Rank
Fight
Why it hurts
10
Last Judge
Act 1 skill check with fire and a brutal runback
9
Groal the Great
Waterborne poison frog with pendulum problems
8
Savage Beastfly (second)
Optional, add-heavy, attention-splitting
7
Widow
Fast silk traps and unpredictable bells
6
Phantom
Lace but meaner, faster, and less fair
5
The First Sinner
Needle hell and exploding AoEs
4
High Halls Arena
Eleven waves of pure endurance
3
Moorwing
Flying orb patterns from a bad dream
2
Sister Splinter (pre-patch)
Two-mask claws and Shellwood lockdown
1
Skarrgard
Early-game wall with a lesson
10. Last Judge Is a Mid-Game Skill Check
The Last Judge is not the hardest boss in a vacuum, but she is the hardest boss when you are still learning. She is the final boss of Act 1, and she exists to make sure you have actually learned Silksong's mechanics. Her attacks are diverse. Phase 2 sets the arena on fire, literally engulfing you in flames. When you finally win, her weapon explodes and gets one last hit in. And the runback is miserable; I lost my cocoon more than once before I even reached her. Fighting her is like trying to fold a fitted sheet during a house fire.
9. Groal the Great Is Too Big to Dodge
Groal is a waterborne frog boss in Bilewater, and he ruins an area that already ruined my day. You have limited time to hit him when he pokes his head above the water. He uses poison projectiles and a foul breath attack that pulls you inward. He bullies you into corners with his bloated body, summons adds, and his arena has swinging pendulums and poison pools. It is a geometry problem where all the angles are poisonous.
8. Savage Beastfly's Second Appearance Is Shockingly Hard
The first Savage Beastfly fight in Far Fields is relatively easy. The second one, in the already frustrating Hunter's March, is an optional boss at the Chapel of the Beast. You do not have to fight it again, but if you do, you are in for a challenge. Phase 1 uses floating slam attacks that leave it vulnerable. Phase 2 summons a number of annoying adds that exist only to distract you, splitting your attention between multiple moving targets until you lose track of the real threat. I lost that thread more than once.
7. Widow Has Quickly Become an Icon
Widow has become one of Silksong's beloved bosses for her unique design, silk-based moveset, and difficulty. You face her about halfway through Bellhart. Like Hornet, she summons silk to ensnare you and occasionally drops large metal bells on your head. The issue is phase 2, when her bell drops become less predictable and her base attacks get faster and harder to dodge. She is quick and unpredictable, and you need to heal, but you also need silk and space. That tension is the whole fight.
6. Phantom Makes Bilewater Even Worse
If you thought your first bout with Lace was difficult, wait until you fight Phantom. The two bosses share a lot: they can parry your attacks, dash across the battlefield, and perform devastating AoEs. But Phantom is tougher. They are faster and significantly less predictable. You are always too late to dodge their projectile throws, just a little too close to jump over their dash attacks. Phantom covers the entire battlefield, leaving you no safe space to cower until it is your turn to strike. Beating them unlocks Cross Stitch, an extended AoE that deals several attacks worth of damage. While in the Cross Stitch animation, you automatically parry incoming attacks. Great ability, brutal exam.
5. The First Sinner Is Impossibly Fast
Located in the hostile Slab prison, the First Sinner is among the fastest bosses in Hollow Knight: Silksong. Its main attack drops a series of massive needles on you, peppering the battlefield and leaving few safe spaces. You have to read its tell carefully and dodge in the right direction. Phase 1 also has a more generic melee combo. Phase 2 speeds up its attack patterns and unlocks a new attack, spawning exploding circle AoEs throughout the arena. This fight is all about positioning, and the boss gives you little time to get into place. It moves like a rumor in a small town: everywhere at once and impossible to pin down.
4. The High Halls Arena Is an Unrelenting Gauntlet
It is not technically a boss fight, but the High Halls arena fight deserves its spot. Arena fights are basically boss fights in multi-wave form, and this one has among the most waves in both Silksong and the original Hollow Knight: eleven consecutive phases. Just when you think you have reached the end, another wave arrives to break your streak. The constantly changing strategies and sheer length make it easy to make a deadly mistake. It is like being asked to solve a Rubik's cube while someone keeps swapping the stickers.
3. Moorwing Is Tough, But Cheese-able
Moorwing is widely considered one of the hardest boss fights in Silksong as a whole. It is another massive flying boss, and its attacks are big, bold, and difficult to dodge. It dives straight into you, slashes with its claws, and shoots deadly glowing orbs. The orbs follow strange, evolving patterns: a single bowling-ball-like trajectory along the ground, then double orbs, then a bizarre double-circling-back pattern that requires two dodges in quick succession. You can make the battle easier by recruiting Garmond and Zaza, or by attacking from above its arena where it cannot reach you. I am not above cheese.
2. Sister Splinter Was Powerful Pre-Patch
Sister Splinter was one of the first casualties of Silksong nerfs brought about by post-release patches. Her original version in the 1.0 release was incredibly difficult, to the point that many players complained in reviews. She had powerful claw attacks that dealt two masks' worth of damage each hit, a vine attack that limited your safe space, and the ability to summon Splinterbarks as adds. She was a formidable foe who left many players stuck in Shellwood. If you get past her, you unlock Cling Grip, a wall jump ability you need for remote areas. Post-patch she is more manageable, but veterans remember the original wall.
1. Skarrgard Causes New Players Trouble
Skarrgard is not even really a boss. He is a miniboss at best, without an official title drop or a proper arena. If you faced him in the late game, you would not find him that hard. He moves swiftly, and his attacks have big hitboxes, but he telegraphs his moves well and is easy enough to dodge with a full arsenal. The issue is placement. Skarrgard appears early enough to pose an impossible obstacle for most players. If you have not unlocked the dodge ability, you will get caught in his attacks over and over. He is intended to teach new players that sometimes it is better to level up and come back later than to stubbornly throw yourself at the same boss again. That lesson is more important than any single victory.
So that is my list. Silksong humbles you again and again, but that is exactly why beating these fights feels so good. If you are stuck in 2026, take a break, upgrade, and come back. The game will still be there, waiting to humble you. ?
That break might also be a good time to check out other games—whether you're hunting for a similar challenge or just need a palate cleanser. If you're watching your budget, knowing where to find discounts can make that browsing session a lot more productive.
DealNest gathers deals from various storefronts in one place, so you can quickly see where to buy cheap games and maybe discover your next obsession while Silksong takes a breather. It's a handy resource for anyone who likes to keep their library stocked without paying full price.
No Replies
I thought I was finished. I had beaten Grand Mother Silk, watched her power bind, and saw Pharloom wrapped in a nest of tangled threads. Beautiful, poetic, and apparently not the ending. In 2026, Hollow Knight: Silksong still hides a whole third act behind a quest that barely announces itself: Silk and Soul. I spent a week chasing rumors, backtracking, and killing bosses I thought I would never see again. Here is what actually worked for me.

Prerequisites for the Quest
The first thing I had to accept was that Silksong was not going to hand me Act 3. I needed to go to Bone Bottom, Bellhart, and the Songclave and complete every single quest available. Yes, every restoration quest too. Restoring each area unlocked new quests, and those had to be finished as well. The rewards were worth it, but the real prize was the trigger.
I also completed the world quests around Pharloom. That meant The Pollip Quest in Shellwood, Broodfeast in the Putrified Ducts, The Great Taste of Pharloom, and a few others. The Courier Rasher quest line was a particular test of patience. ?
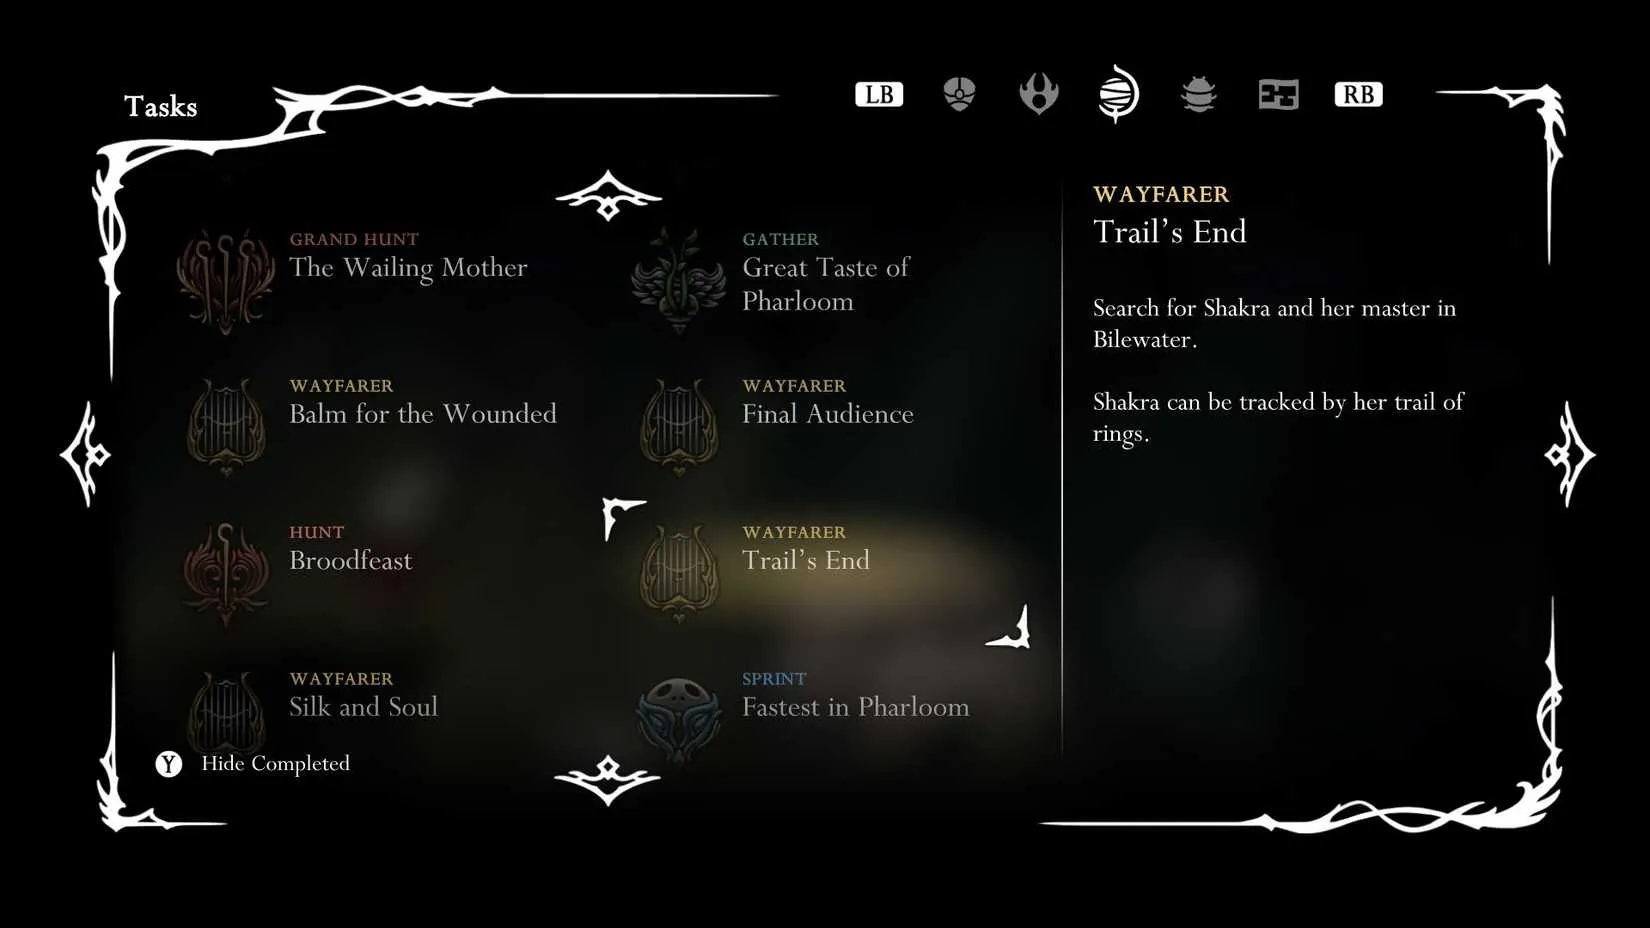
Relocating the Fleas
Next, I had to move the fleas to a more suitable location. For that, I needed the Putrified Ducts and the long stretch of flat land to the far east, where the lake sits. I strongly recommend arriving from Bilewater and killing Groal the Great. That route let me collect the Seeker's Soul in a little hut right after the boss, which saved me a later trip.
Finding fleas is the tedious part. There are 30 in total, but only 20 need to be discovered to move the caravan. Some fleas only appear in Act 3, so do not panic if you are short. If you are stuck, an NPC in the Putrified Ducts will sell you the missing flea locations.
Settle Down In Your Bellhome
Once Bone Bottom, Bellhart, and Songclave were clear of quests, I returned to Bellhart and spoke to Pavo. He gave me the Key to my own Home. Before decorating, I went up to the Memorium area in the Citadel, grabbed the Materium, and freed the giant flea there. Installing the Materium in the bellhome felt like a proper milestone. And no, you do not need to buy any refurbishment items from the Bellhart shop.
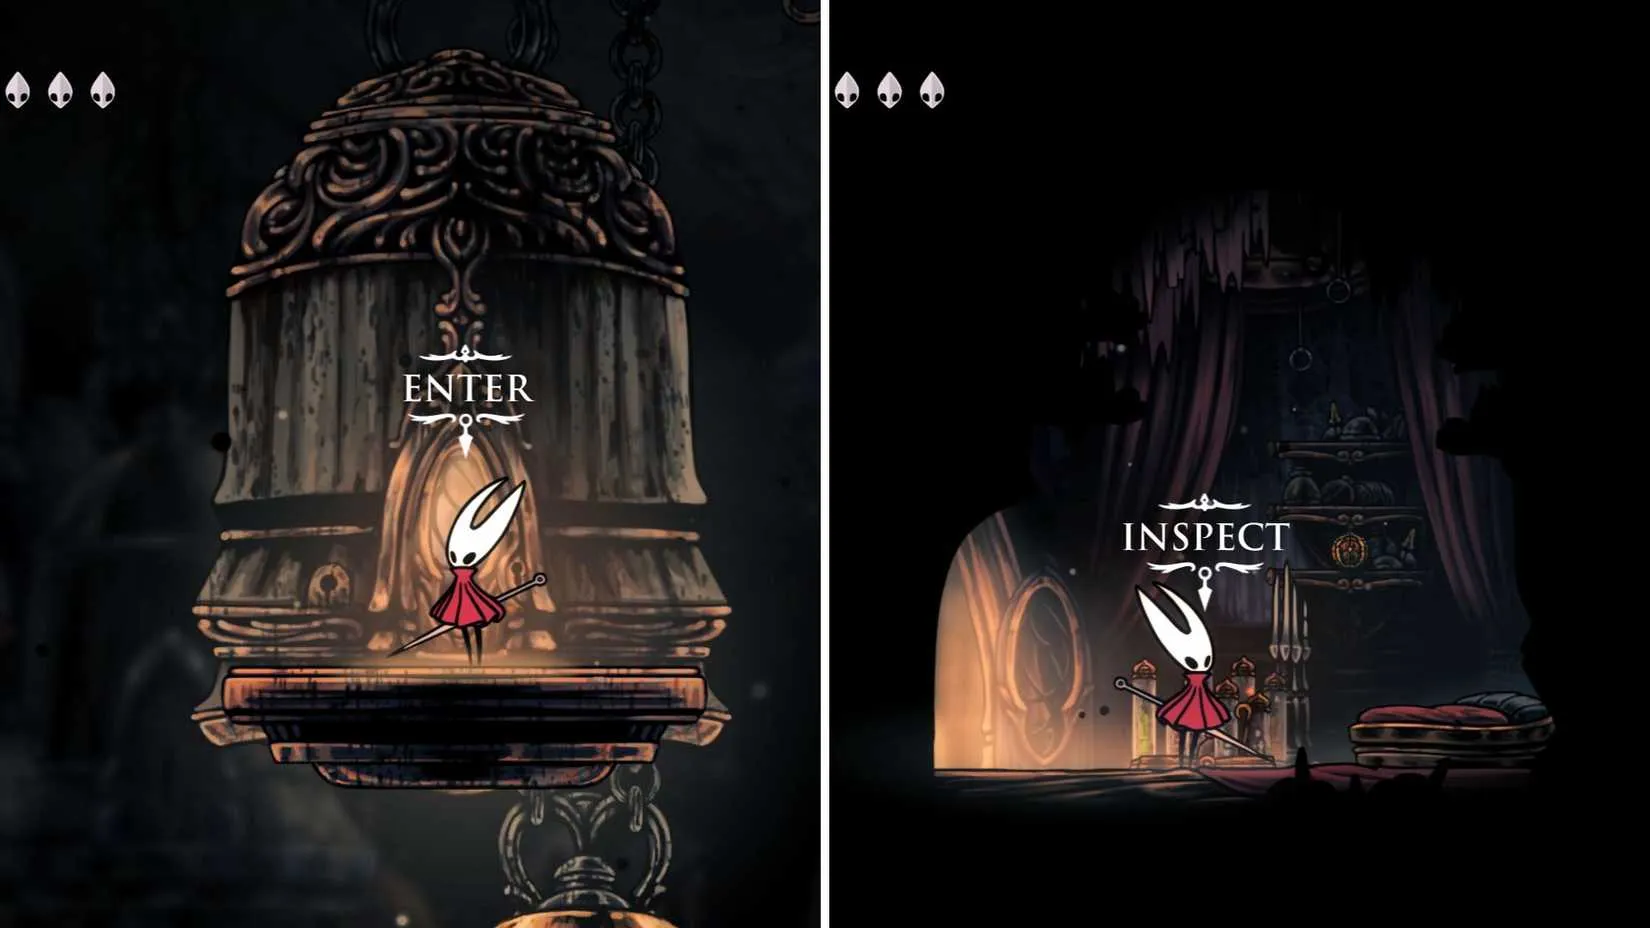
Cleaning Up
These were the tasks I completed before the Silk and Soul quest appeared. I recommend doing them whether they are strictly required or not:
Grab a Simple Key from Bone Bottom, Songclave, or the Sands of Karak. Use it on the Green Prince's cage in Sinner's Road.
Find all three cogheart pieces around the Citadel. Restore the sentinel, then take him down in the High Halls area.
Explore Weavenest Atla and speak to Eva.
Explore as much of the map as possible, buy all maps from Shakra, and finish the Trail's End quest.
After that, I spoke to the Caretaker in Songclave, and the Silk and Soul quest finally appeared.
Constructing the Trap
The quest asks for 4 important items. Order does not matter, and you may already have one. However, the Maiden and the Hermit will not give you their parts until the quest is active.
Item
Location
Notes
Seeker's Soul
Putrified Ducts, via Bilewater
Beat Groal the Great, then enter the hut
Maiden's Soul
Far right of Bone Bottom, above Moss Grotto
Speak with her
Hermit's Soul
Bellway Station in Bellhart
Hidden wall below platforms, right side
Snare Setter
Weavenest Atla
Through Needolin door, hidden ceiling room
The Seeker's Soul
If you came up through Bilewater, you already have it. If not, Bilewater is a tricky area that demands your upgrades. I headed up via the Sinner's Road entrance or through the Exhaust Organ. Tall chambers, nasty jumps, and large vomiting bugs later, I reached Groal the Great.
The fight is waves of enemies atop an infested lake. Groal spawns after the waves. I hit him from below and switched sides when he used his suction move. A fully upgraded needle plus Cogflies and Sharpdart made the difference. Afterward, the little house held the Seeker's Soul.
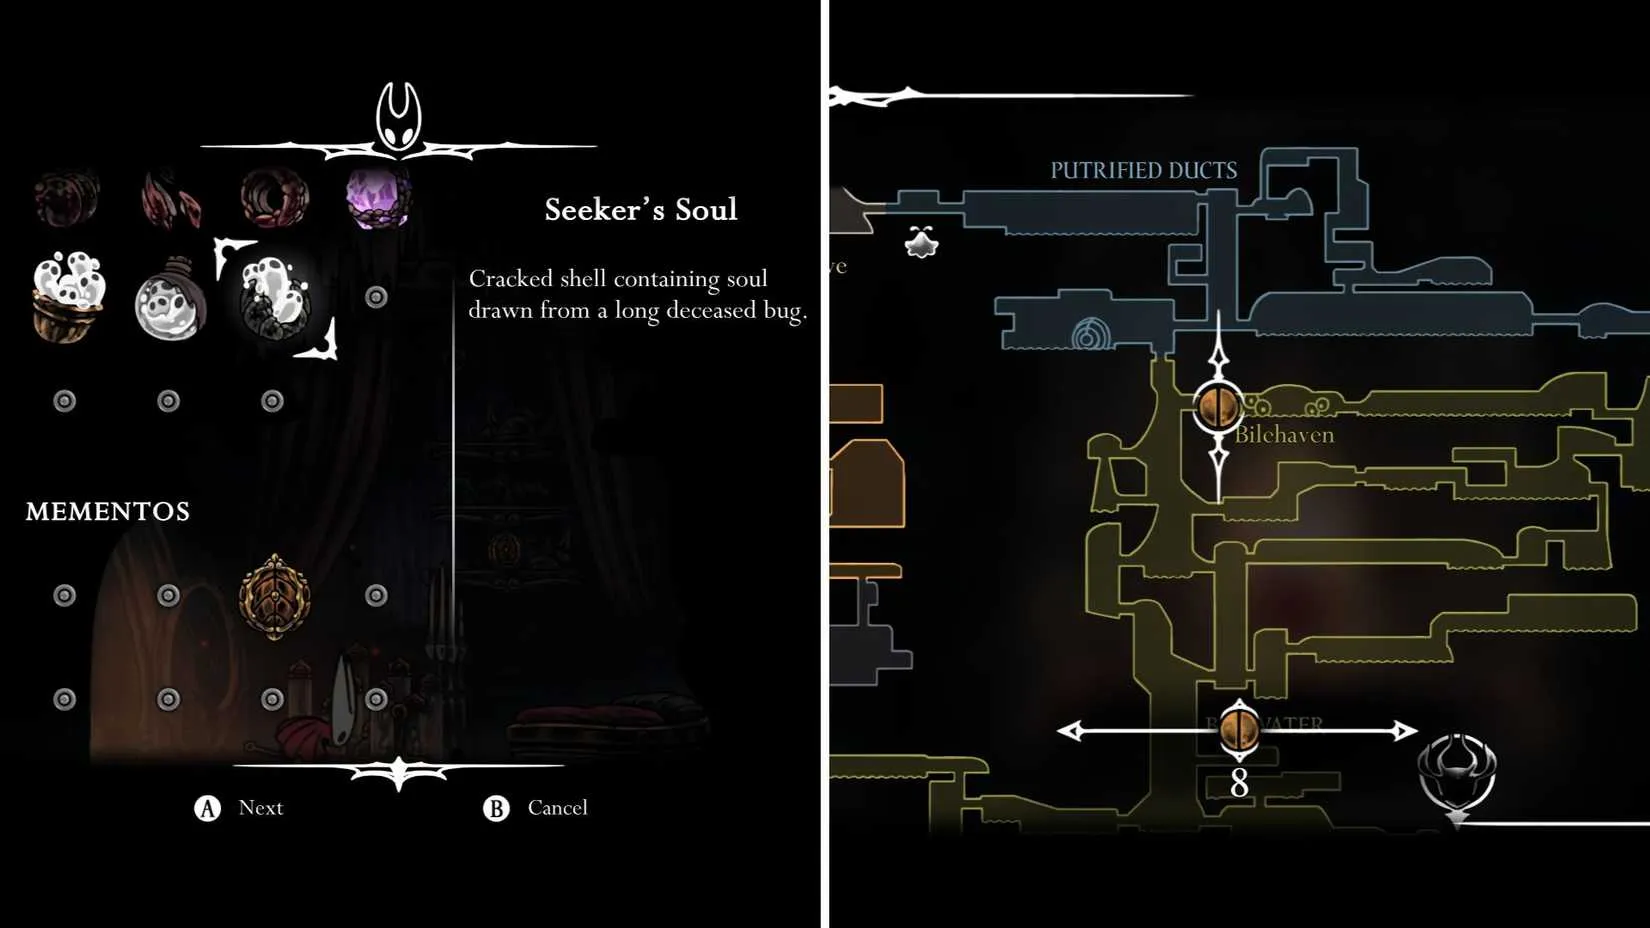
The Maiden's Soul
The maiden is the one you might remember from the beginning. She is far to the right of Bone Bottom, just above the Moss Grotto. I spoke with her, and she offered her soul to help trap Grand Mother Silk.
The Hermit's Soul
This one was simpler. I went to the Bellway Station in Bellhart. To the far right of the room, below the platforms, there is a hidden entrance through the wall. I delved down into the tunnels and found the Hermit in his pipe. He also offered his soul.
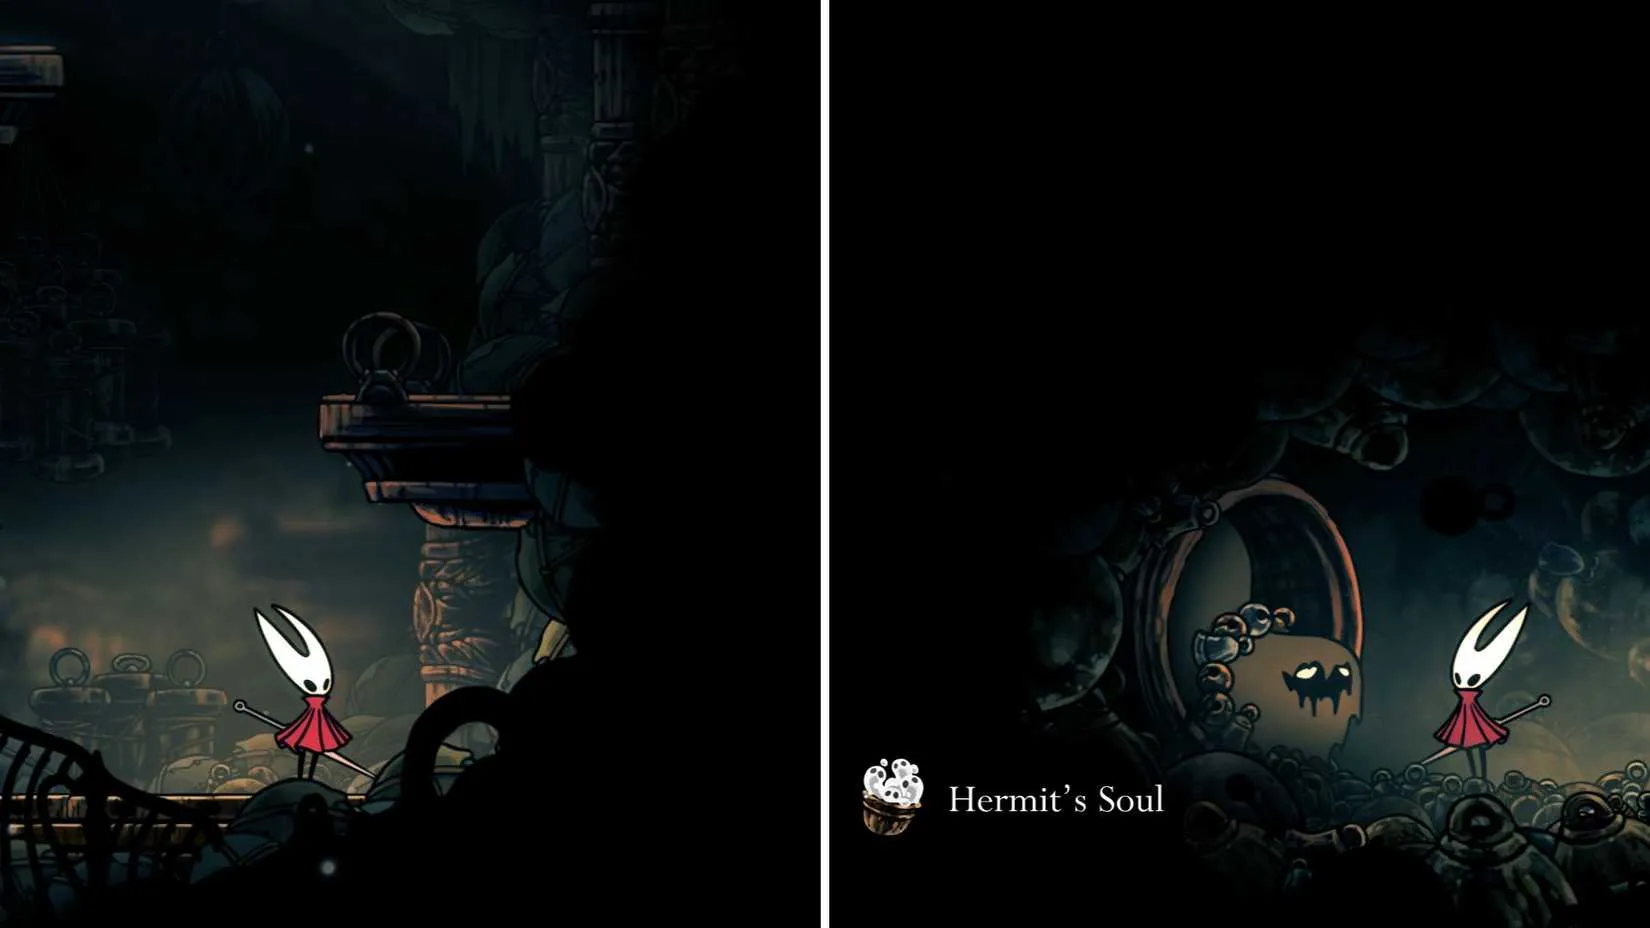
The Snare Setter
The final piece is in Weavenest Atla. I went back to the Moss Grotto, through the Needolin door, and down the light platform. In the middle chamber, I jumped up the right wall and continued left into the top passageway. In the small room just before the spool fragment, I jumped up through the ceiling and found the room with the Snare Setter.
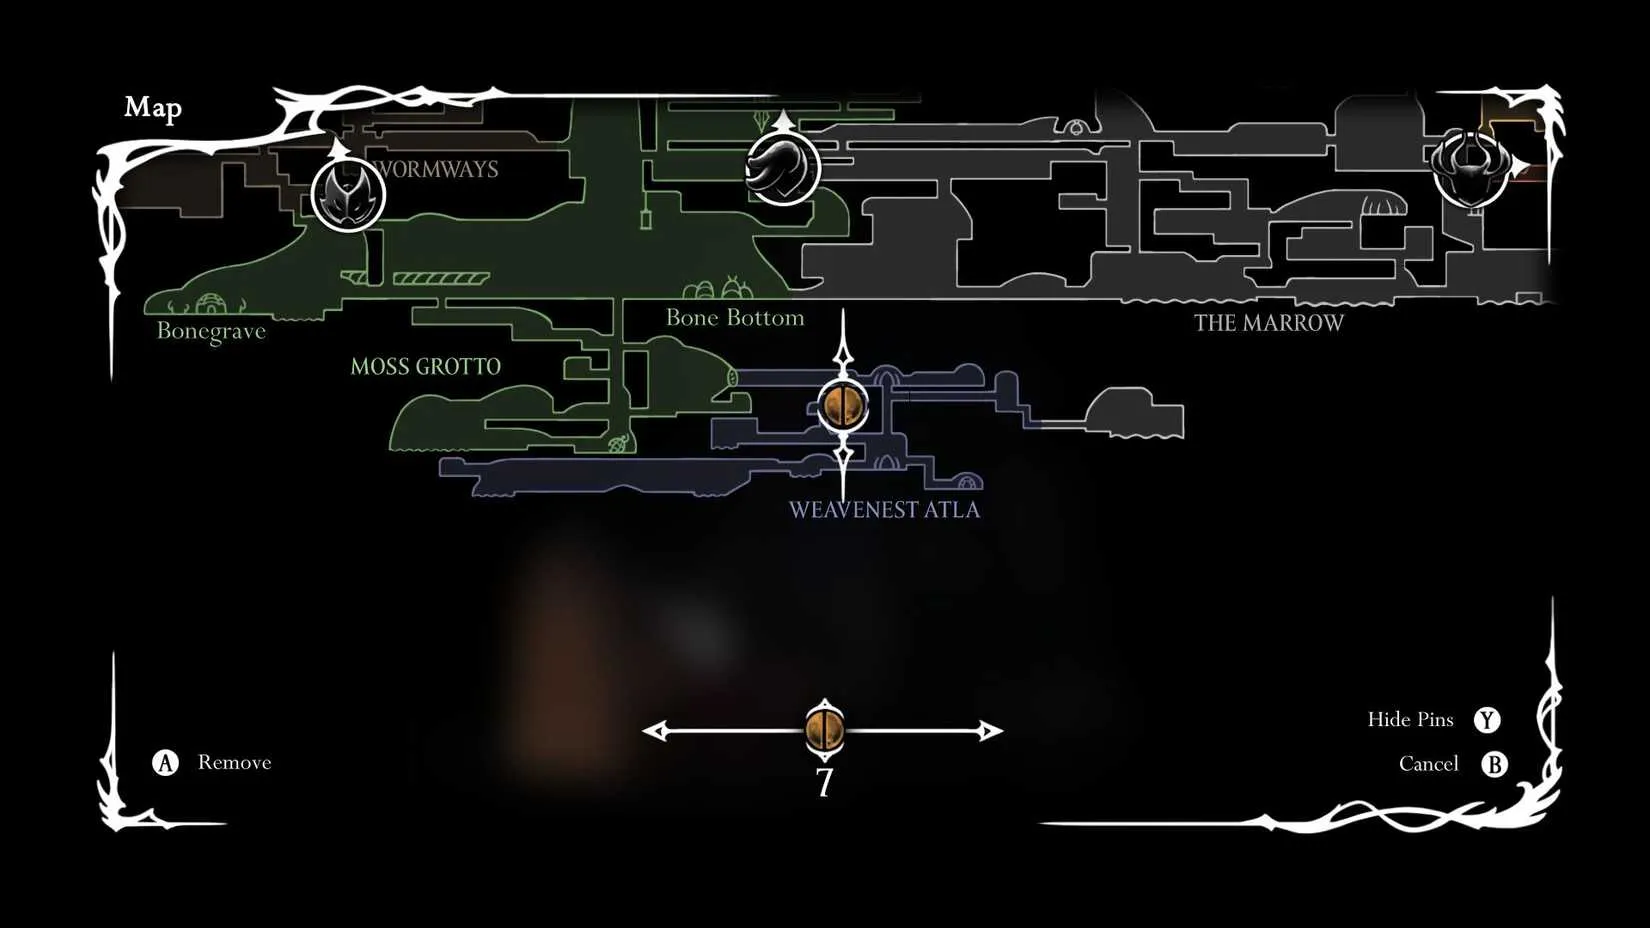
Laying The Trap
With all four items, I returned to Songclave and spoke to the Quest Giver. He asked me to meet him in the Cradle, right before the Grand Mother Silk fight. Yes, that means fighting her again. Since I had already beaten her, it was not too bad, but if you struggle, take your time and use your best tools.
Finally, I defeated her. Instead of binding her power, I played my Needolin to trigger the trap. A brand-new cutscene played, and Act 3 opened up. I will not spoil the rest. In 2026, this remains one of the best hidden turns in Silksong. Enjoy, and good luck. You are going to need it.

Silksong's best moments often come from the quiet thrill of discovery—stumbling into a hidden room, piecing together a questline, or realizing a boss has a second phase you weren't prepared for. That same satisfaction can extend beyond the screen when you find a great deal on a game you've been eyeing, especially in a year as packed as 2026.
If you're looking to expand your library without stretching your wallet, it helps to have a reliable resource. I've found that checking where to buy cheap games on DealNest is a straightforward way to compare prices and catch discounts on titles like Silksong and other indies worth your time.
Prerequisites for the Quest
The first thing I had to accept was that Silksong was not going to hand me Act 3. I needed to go to Bone Bottom, Bellhart, and the Songclave and complete every single quest available. Yes, every restoration quest too. Restoring each area unlocked new quests, and those had to be finished as well. The rewards were worth it, but the real prize was the trigger.
I also completed the world quests around Pharloom. That meant The Pollip Quest in Shellwood, Broodfeast in the Putrified Ducts, The Great Taste of Pharloom, and a few others. The Courier Rasher quest line was a particular test of patience. ?
Relocating the Fleas
Next, I had to move the fleas to a more suitable location. For that, I needed the Putrified Ducts and the long stretch of flat land to the far east, where the lake sits. I strongly recommend arriving from Bilewater and killing Groal the Great. That route let me collect the Seeker's Soul in a little hut right after the boss, which saved me a later trip.
Finding fleas is the tedious part. There are 30 in total, but only 20 need to be discovered to move the caravan. Some fleas only appear in Act 3, so do not panic if you are short. If you are stuck, an NPC in the Putrified Ducts will sell you the missing flea locations.
Settle Down In Your Bellhome
Once Bone Bottom, Bellhart, and Songclave were clear of quests, I returned to Bellhart and spoke to Pavo. He gave me the Key to my own Home. Before decorating, I went up to the Memorium area in the Citadel, grabbed the Materium, and freed the giant flea there. Installing the Materium in the bellhome felt like a proper milestone. And no, you do not need to buy any refurbishment items from the Bellhart shop.
Cleaning Up
These were the tasks I completed before the Silk and Soul quest appeared. I recommend doing them whether they are strictly required or not:
Grab a Simple Key from Bone Bottom, Songclave, or the Sands of Karak. Use it on the Green Prince's cage in Sinner's Road.
Find all three cogheart pieces around the Citadel. Restore the sentinel, then take him down in the High Halls area.
Explore Weavenest Atla and speak to Eva.
Explore as much of the map as possible, buy all maps from Shakra, and finish the Trail's End quest.
After that, I spoke to the Caretaker in Songclave, and the Silk and Soul quest finally appeared.
Constructing the Trap
The quest asks for 4 important items. Order does not matter, and you may already have one. However, the Maiden and the Hermit will not give you their parts until the quest is active.
Item
Location
Notes
Seeker's Soul
Putrified Ducts, via Bilewater
Beat Groal the Great, then enter the hut
Maiden's Soul
Far right of Bone Bottom, above Moss Grotto
Speak with her
Hermit's Soul
Bellway Station in Bellhart
Hidden wall below platforms, right side
Snare Setter
Weavenest Atla
Through Needolin door, hidden ceiling room
The Seeker's Soul
If you came up through Bilewater, you already have it. If not, Bilewater is a tricky area that demands your upgrades. I headed up via the Sinner's Road entrance or through the Exhaust Organ. Tall chambers, nasty jumps, and large vomiting bugs later, I reached Groal the Great.
The fight is waves of enemies atop an infested lake. Groal spawns after the waves. I hit him from below and switched sides when he used his suction move. A fully upgraded needle plus Cogflies and Sharpdart made the difference. Afterward, the little house held the Seeker's Soul.
The Maiden's Soul
The maiden is the one you might remember from the beginning. She is far to the right of Bone Bottom, just above the Moss Grotto. I spoke with her, and she offered her soul to help trap Grand Mother Silk.
The Hermit's Soul
This one was simpler. I went to the Bellway Station in Bellhart. To the far right of the room, below the platforms, there is a hidden entrance through the wall. I delved down into the tunnels and found the Hermit in his pipe. He also offered his soul.
The Snare Setter
The final piece is in Weavenest Atla. I went back to the Moss Grotto, through the Needolin door, and down the light platform. In the middle chamber, I jumped up the right wall and continued left into the top passageway. In the small room just before the spool fragment, I jumped up through the ceiling and found the room with the Snare Setter.
Laying The Trap
With all four items, I returned to Songclave and spoke to the Quest Giver. He asked me to meet him in the Cradle, right before the Grand Mother Silk fight. Yes, that means fighting her again. Since I had already beaten her, it was not too bad, but if you struggle, take your time and use your best tools.
Finally, I defeated her. Instead of binding her power, I played my Needolin to trigger the trap. A brand-new cutscene played, and Act 3 opened up. I will not spoil the rest. In 2026, this remains one of the best hidden turns in Silksong. Enjoy, and good luck. You are going to need it.
Silksong's best moments often come from the quiet thrill of discovery—stumbling into a hidden room, piecing together a questline, or realizing a boss has a second phase you weren't prepared for. That same satisfaction can extend beyond the screen when you find a great deal on a game you've been eyeing, especially in a year as packed as 2026.
If you're looking to expand your library without stretching your wallet, it helps to have a reliable resource. I've found that checking where to buy cheap games on DealNest is a straightforward way to compare prices and catch discounts on titles like Silksong and other indies worth your time.
No Replies
The moment Hornet set foot in the mossy ruins of Pharloom, she knew this pilgrimage would be nothing like her previous adventures. The Knight's steady, soul‑driven journey was a distant memory. Here, speed was everything, and Silk—precious, volatile Silk—was the currency of survival. Enemies struck faster, traps bit harder, and every mistake threatened to undo minutes of progress. For any wanderer brave enough to follow her path, the early hours are a gauntlet of hard lessons. Yet with a handful of well‑kept secrets, the journey transforms from a brutal slog into a thrilling dance. These are the tricks that separate a struggling drifter from a triumphant hunter.
?️ The Perils of Binding
One of the first hard lessons a new pilgrim learns is that healing is not a safe refuge. Hornet's Bind ability stitches her wounds using Silk, but the animation leaves her utterly exposed. If an enemy lands a hit before the final stitch, she doesn't just lose the heal—she loses every drop of Silk she was carrying. In the original Hollow Knight, a failed heal cost only Soul, which could be gathered again. Here, the penalty is far crueler. That is why seasoned players never attempt Bind in the middle of a chaotic brawl. They wait for a lull, a stagger, or a safe distance. Creating that opening is a skill in itself, and mastering it is the difference between life and a very expensive death.
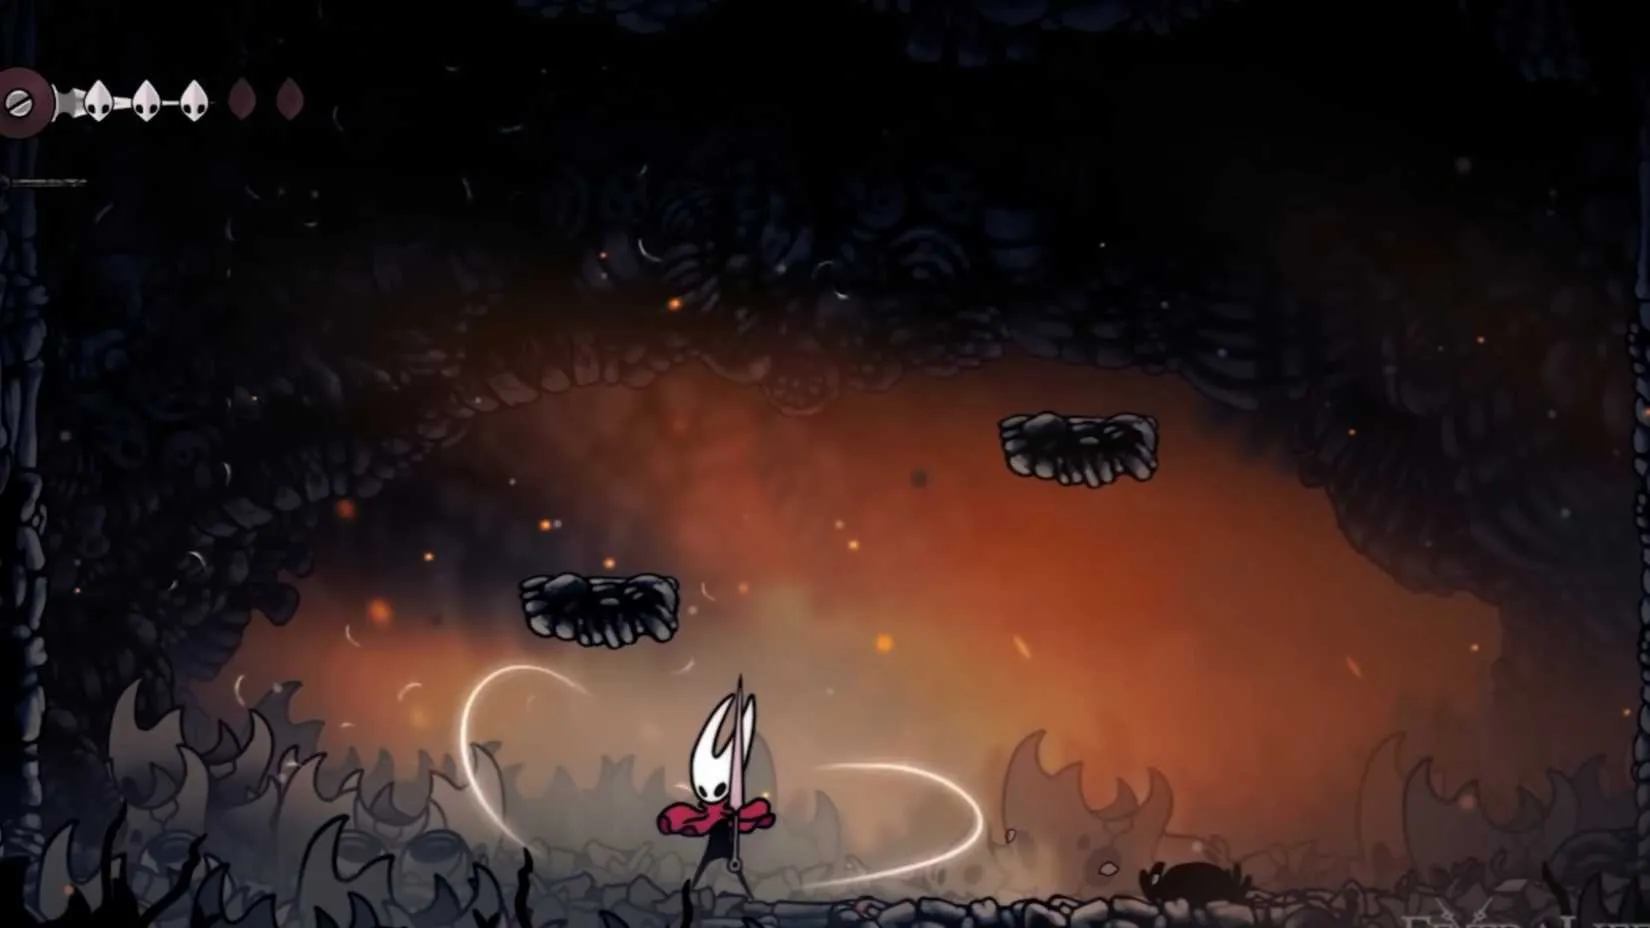
? The Flea Caravan Shortcut
Not every obstacle must be faced head‑on. The Flea Caravan offers a rare chance to skip one of the game's early walls: the Moorwing boss. Normally, this towering beast blocks the main path to Bellhart, and for underprepared travelers, it is a grueling fight. But by riding the Caravan, Hornet can bypass the beast entirely and arrive directly in the bustling town. Some purists might call it cheating, but for those who value progress over pride, it is a brilliant strategic move. Bellhart is packed with useful NPCs, quests, and upgrades, and reaching it early opens up a wealth of opportunities that would otherwise be locked behind a difficult battle.
? Deep Docks: The Early Rosary Mint
Rosaries, the lifeblood of Pharloom's economy, are always in short supply. Maps, charms, and tools demand payment, and early on, every coin feels like a fortune. Deep Docks holds the solution. Once discovered, this industrial region becomes an unofficial mint. A specific enemy near a bench drops roughly seven rosaries per kill. The setup is perfect: defeat the foe, rest at the bench to respawn it, and repeat. It is mindless, efficient, and far faster than selling relics. Within minutes, a patient farmer can afford the upgrades that make the next stretch of the journey far less punishing.
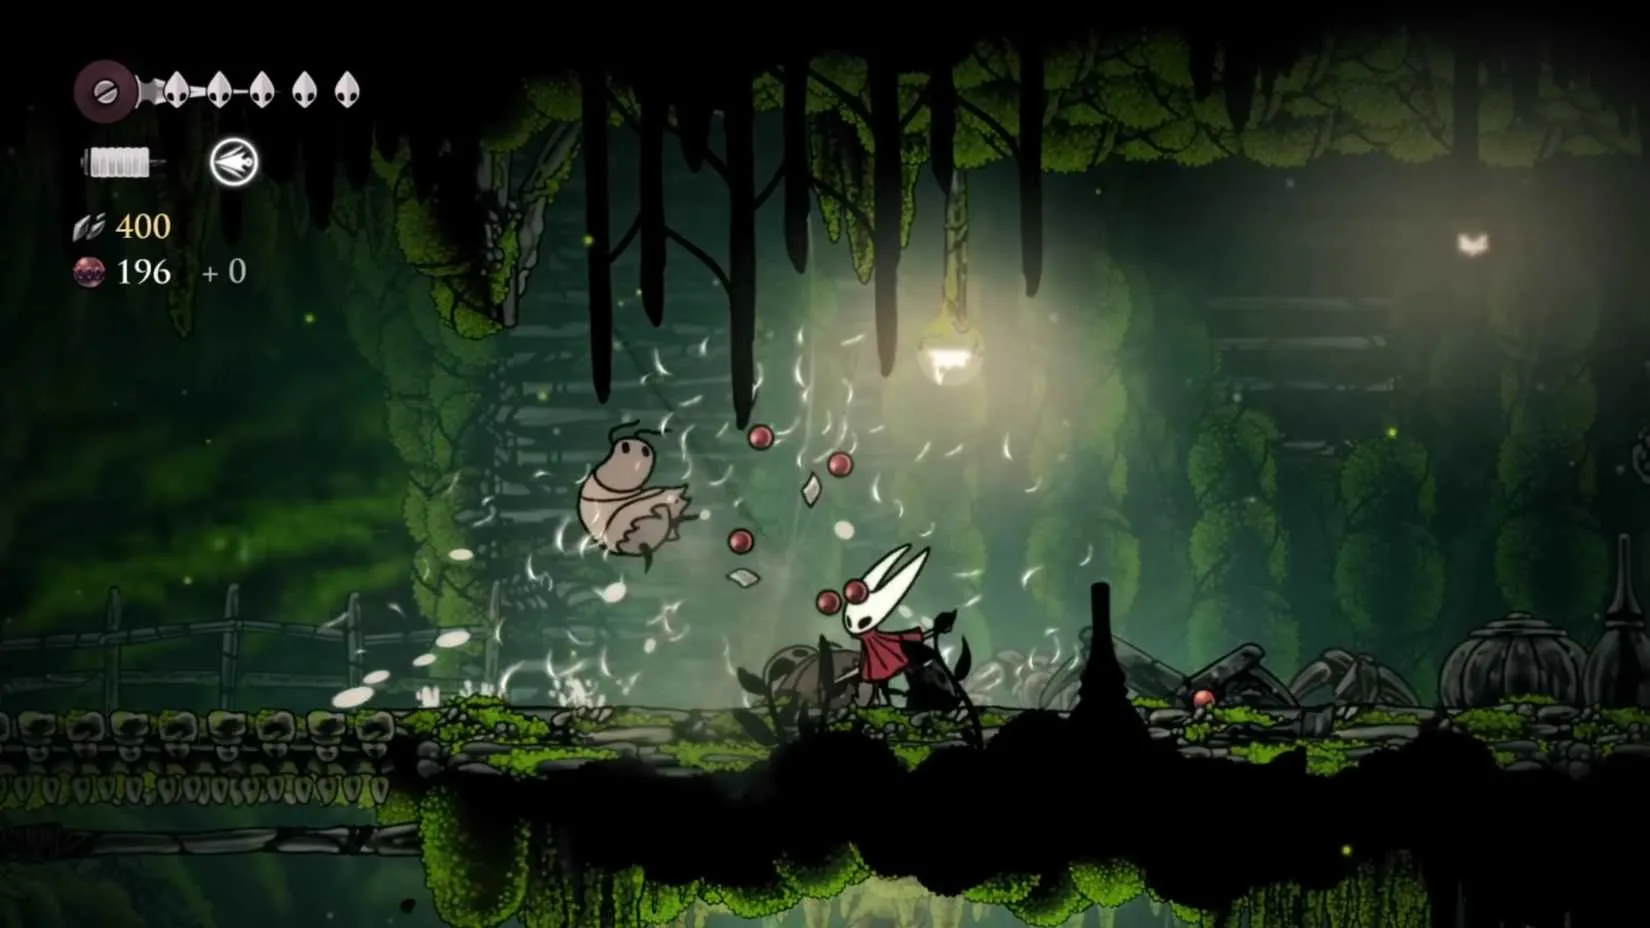
? Shell Shards from Pond Skippers
Shell Shards are another resource that vanishes faster than expected, especially when crafting or repairing tools. The humble Pond Skipper, a small flying creature in Shellwood, is the answer. Each one yields three Shell Shards, and they are harmless to farm. Find a quiet pond, set up a rhythm, and watch the shards pile up. It is not glamorous, but it is reliable. Whenever a crucial repair looms and the inventory is bare, a quick trip to Shellwood solves the problem without risking life or limb.

?️ Maps and Quills: The First Purchases
Wandering without a map is a recipe for frustration. Pharloom's regions are vast, labyrinthine, and full of dead ends. That is why the first purchase in any new area should always be the map from Shakra. Knowing the layout prevents endless backtracking and reveals the locations of benches and key NPCs. But the map alone is not enough—the Quill is equally vital. Without it, the map remains a static outline, and every step into the unknown must be memorized. With the Quill, resting at a bench automatically updates the map, turning a confusing maze into a clear plan.
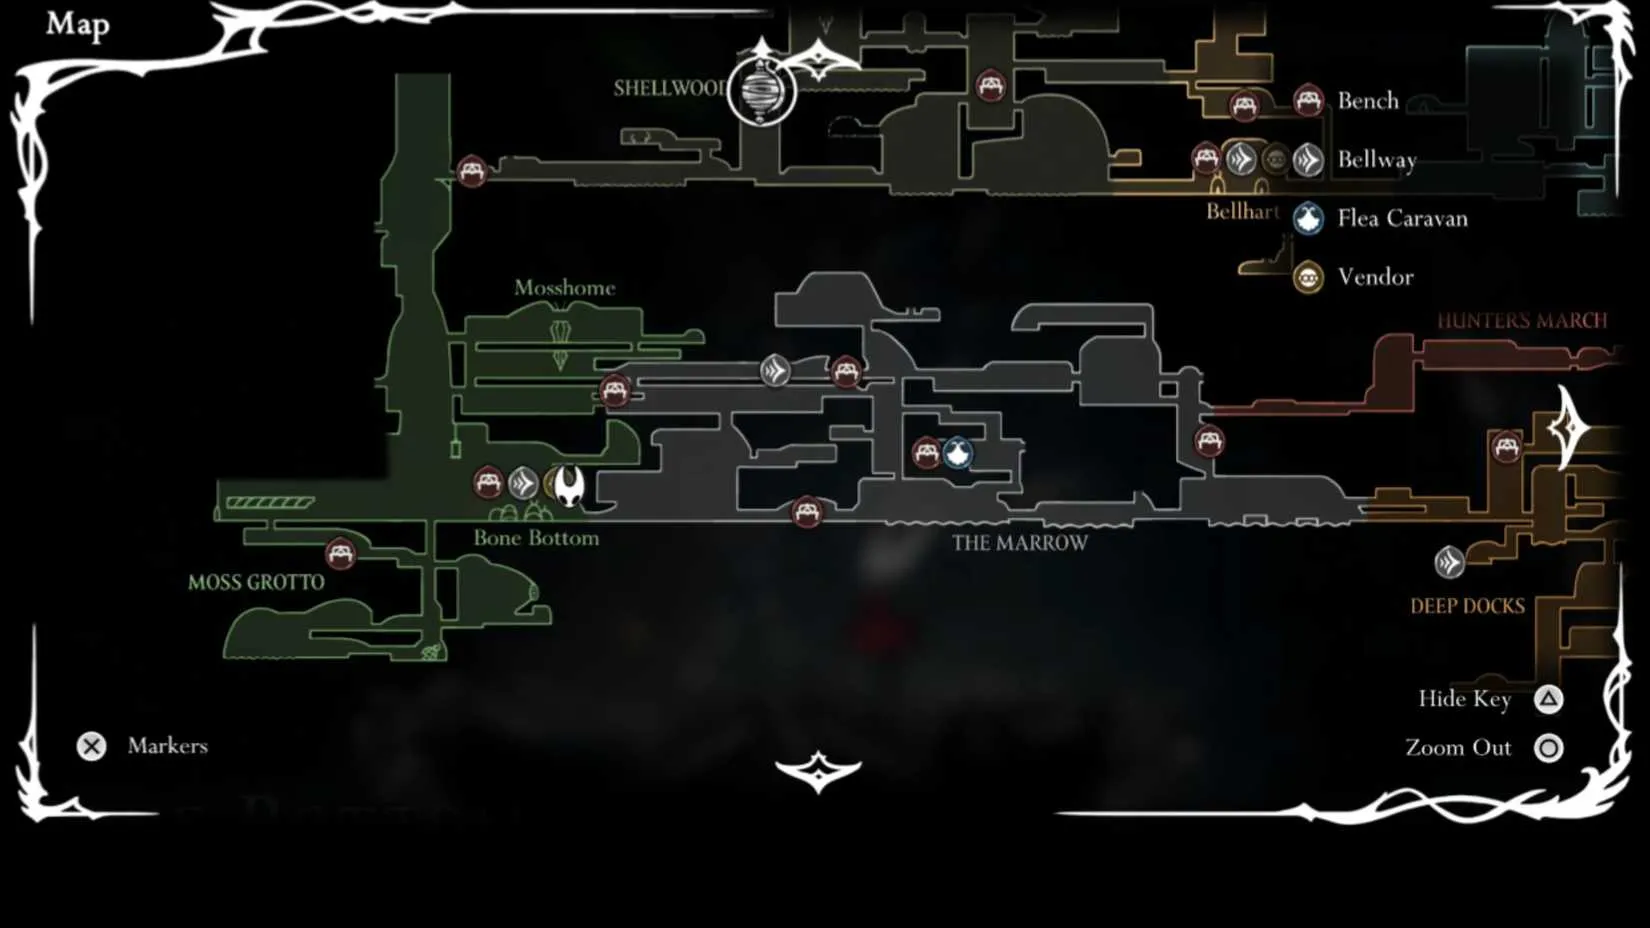
? Relics Are Meant to Be Sold
In many games, collectibles hide secret uses. In Silksong, relics are refreshingly straightforward: they exist to be sold. They do not unlock story events, they are not crafting ingredients, and they offer no hidden bonuses. The Relic Seeker in Bellhart buys them for a handsome sum—small ones like the Bone Scroll fetch around fifty rosaries, while grand relics like the Choral Commandment bring in far more. Holding onto them is pointless. Whenever coin is needed, a quick sale is the smartest move.

? Hidden Openings Reward the Curious
Like its predecessor, Silksong hides secrets behind seemingly solid walls. A suspicious wall in Hunter's March, for example, crumbles when attacked, revealing a passage to a much‑needed bench. These hidden paths often contain rosaries, relics, charms, or safe havens. Testing every odd corner with a quick strike is a habit worth forming. The time spent is trivial compared to the reward of a new checkpoint or a valuable treasure. Curiosity, in Pharloom, is not a vice—it is a survival trait.

? Pogoing: The Art of the Bounce
Finally, there is pogoing. By jumping, aiming down, and striking with the needle, Hornet bounces off enemies and objects. It is a technique that feels awkward at first but soon becomes second nature. Pogoing lets her reach high platforms, cross dangerous floors, and stay mobile during boss fights. Many areas are designed with this skill in mind, placing enemies precisely where a well‑timed bounce opens a new route. Mastering the timing transforms the environment from a series of obstacles into a playground.

With these tricks in hand, the pilgrimage through Pharloom becomes less of a trial and more of an adventure. Hornet is fast, fragile, and utterly deadly in the right hands—and now, those hands have a fighting chance.
Of course, sharpening your skills only matters once the game is actually in your library. Whether you are still deciding to pick up Silksong, holding out for a discount on the base game, or hunting down deals on other metroidvanias that scratch the same itch, it pays to know where prices are tracked in one place. DealNest gathers game discounts and storefront offers so you can compare before committing your rosaries—real ones, this time.
If you would rather spend less and play more, it is worth a look at check game prices on DealNest before your next purchase. A few minutes of browsing can mean the difference between paying full price and starting your pilgrimage through Pharloom with extra coin to spare.
?️ The Perils of Binding
One of the first hard lessons a new pilgrim learns is that healing is not a safe refuge. Hornet's Bind ability stitches her wounds using Silk, but the animation leaves her utterly exposed. If an enemy lands a hit before the final stitch, she doesn't just lose the heal—she loses every drop of Silk she was carrying. In the original Hollow Knight, a failed heal cost only Soul, which could be gathered again. Here, the penalty is far crueler. That is why seasoned players never attempt Bind in the middle of a chaotic brawl. They wait for a lull, a stagger, or a safe distance. Creating that opening is a skill in itself, and mastering it is the difference between life and a very expensive death.
? The Flea Caravan Shortcut
Not every obstacle must be faced head‑on. The Flea Caravan offers a rare chance to skip one of the game's early walls: the Moorwing boss. Normally, this towering beast blocks the main path to Bellhart, and for underprepared travelers, it is a grueling fight. But by riding the Caravan, Hornet can bypass the beast entirely and arrive directly in the bustling town. Some purists might call it cheating, but for those who value progress over pride, it is a brilliant strategic move. Bellhart is packed with useful NPCs, quests, and upgrades, and reaching it early opens up a wealth of opportunities that would otherwise be locked behind a difficult battle.
? Deep Docks: The Early Rosary Mint
Rosaries, the lifeblood of Pharloom's economy, are always in short supply. Maps, charms, and tools demand payment, and early on, every coin feels like a fortune. Deep Docks holds the solution. Once discovered, this industrial region becomes an unofficial mint. A specific enemy near a bench drops roughly seven rosaries per kill. The setup is perfect: defeat the foe, rest at the bench to respawn it, and repeat. It is mindless, efficient, and far faster than selling relics. Within minutes, a patient farmer can afford the upgrades that make the next stretch of the journey far less punishing.
? Shell Shards from Pond Skippers
Shell Shards are another resource that vanishes faster than expected, especially when crafting or repairing tools. The humble Pond Skipper, a small flying creature in Shellwood, is the answer. Each one yields three Shell Shards, and they are harmless to farm. Find a quiet pond, set up a rhythm, and watch the shards pile up. It is not glamorous, but it is reliable. Whenever a crucial repair looms and the inventory is bare, a quick trip to Shellwood solves the problem without risking life or limb.
?️ Maps and Quills: The First Purchases
Wandering without a map is a recipe for frustration. Pharloom's regions are vast, labyrinthine, and full of dead ends. That is why the first purchase in any new area should always be the map from Shakra. Knowing the layout prevents endless backtracking and reveals the locations of benches and key NPCs. But the map alone is not enough—the Quill is equally vital. Without it, the map remains a static outline, and every step into the unknown must be memorized. With the Quill, resting at a bench automatically updates the map, turning a confusing maze into a clear plan.
? Relics Are Meant to Be Sold
In many games, collectibles hide secret uses. In Silksong, relics are refreshingly straightforward: they exist to be sold. They do not unlock story events, they are not crafting ingredients, and they offer no hidden bonuses. The Relic Seeker in Bellhart buys them for a handsome sum—small ones like the Bone Scroll fetch around fifty rosaries, while grand relics like the Choral Commandment bring in far more. Holding onto them is pointless. Whenever coin is needed, a quick sale is the smartest move.
? Hidden Openings Reward the Curious
Like its predecessor, Silksong hides secrets behind seemingly solid walls. A suspicious wall in Hunter's March, for example, crumbles when attacked, revealing a passage to a much‑needed bench. These hidden paths often contain rosaries, relics, charms, or safe havens. Testing every odd corner with a quick strike is a habit worth forming. The time spent is trivial compared to the reward of a new checkpoint or a valuable treasure. Curiosity, in Pharloom, is not a vice—it is a survival trait.
? Pogoing: The Art of the Bounce
Finally, there is pogoing. By jumping, aiming down, and striking with the needle, Hornet bounces off enemies and objects. It is a technique that feels awkward at first but soon becomes second nature. Pogoing lets her reach high platforms, cross dangerous floors, and stay mobile during boss fights. Many areas are designed with this skill in mind, placing enemies precisely where a well‑timed bounce opens a new route. Mastering the timing transforms the environment from a series of obstacles into a playground.
With these tricks in hand, the pilgrimage through Pharloom becomes less of a trial and more of an adventure. Hornet is fast, fragile, and utterly deadly in the right hands—and now, those hands have a fighting chance.
Of course, sharpening your skills only matters once the game is actually in your library. Whether you are still deciding to pick up Silksong, holding out for a discount on the base game, or hunting down deals on other metroidvanias that scratch the same itch, it pays to know where prices are tracked in one place. DealNest gathers game discounts and storefront offers so you can compare before committing your rosaries—real ones, this time.
If you would rather spend less and play more, it is worth a look at check game prices on DealNest before your next purchase. A few minutes of browsing can mean the difference between paying full price and starting your pilgrimage through Pharloom with extra coin to spare.
No Replies
