

The canopy of Shellwood had finally gone quiet. Hornet stood among the hanging vines with a new trick woven into her limbs — the Cling Grip, the wall-clinging skill that every traveler in Pharloom eventually needs and that no one can afford to skip. Shellwood is not an optional detour; it is a gate, and the gate has just swung open. So the question that follows is a natural one, the same question that has sent thousands of players scrolling through forums in 2026: what now? Where does the pilgrimage go once the trees stop talking?
The answer is not east, and it is not deeper into the woods. It is back toward the people Hornet left behind — specifically, toward the haunted settlement of Bellhart.
First, Break the Curse in Bellhart ?️
Before any gate in the Citadel will acknowledge her, Hornet needs a voice that can answer the Citadel's own music. That voice comes from the Needolin, and the Needolin can only be earned by lifting the curse that has settled over Bellhart. Until that curse breaks, the road ahead is simply a wall with scenery painted on it. This is why the sequence matters so much: Cling Grip opens Shellwood, and Bellhart opens everything after it.
Once the Needolin hums in her grasp, the map changes shape. Songs become doors. Ledges become invitations.
The Shortcut Out of Shellwood ?
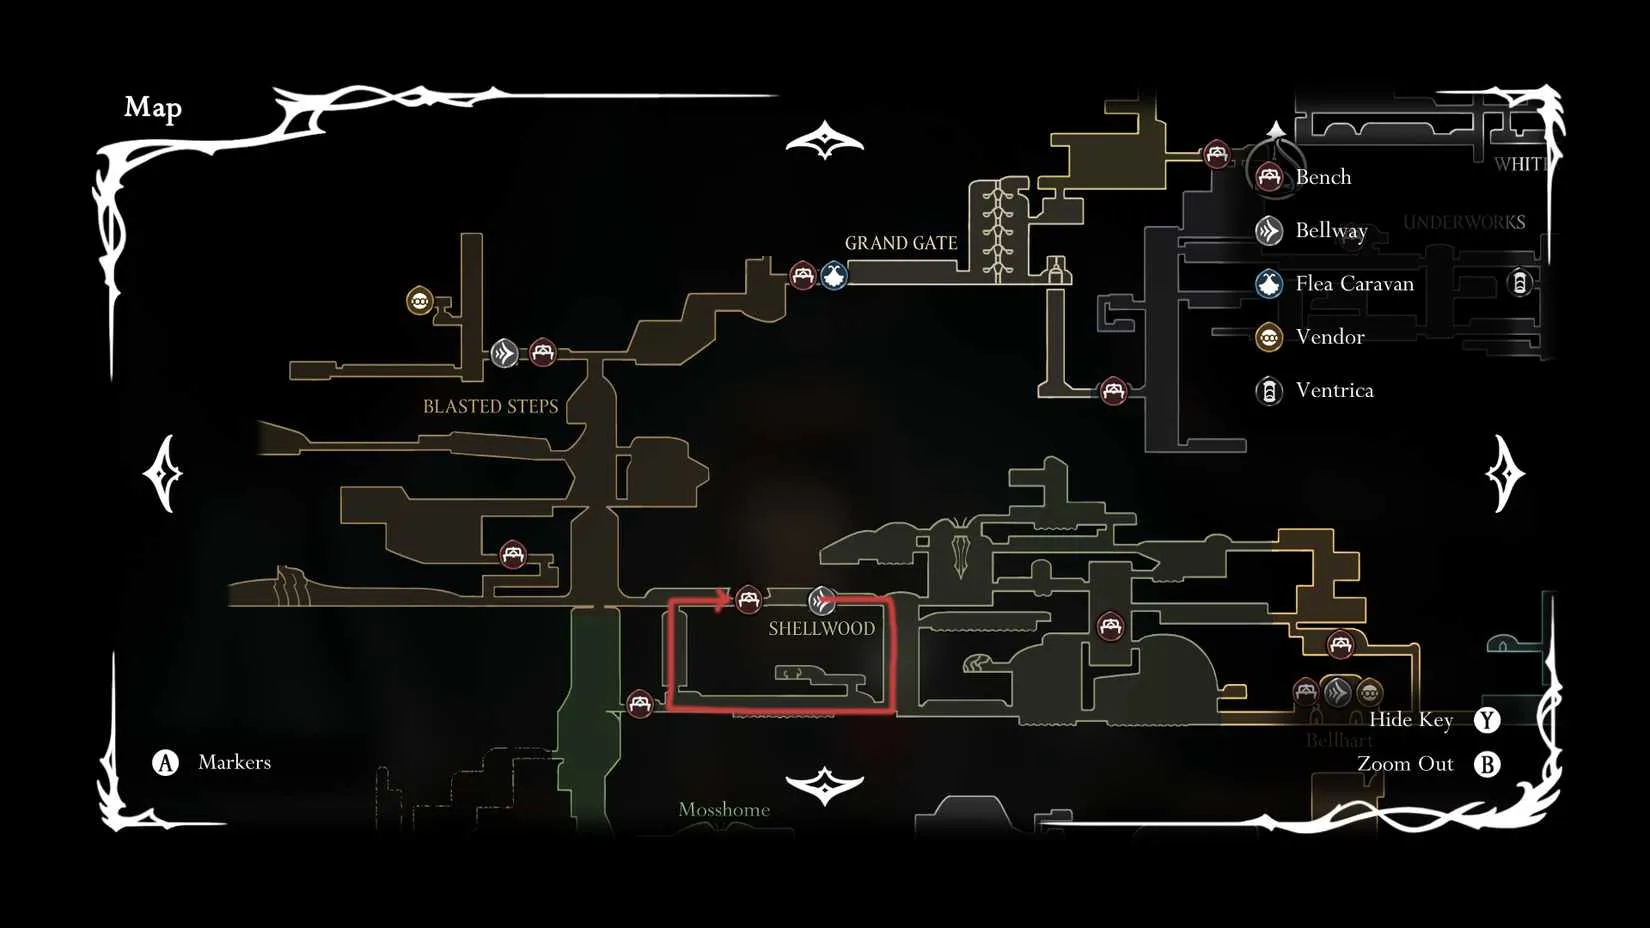
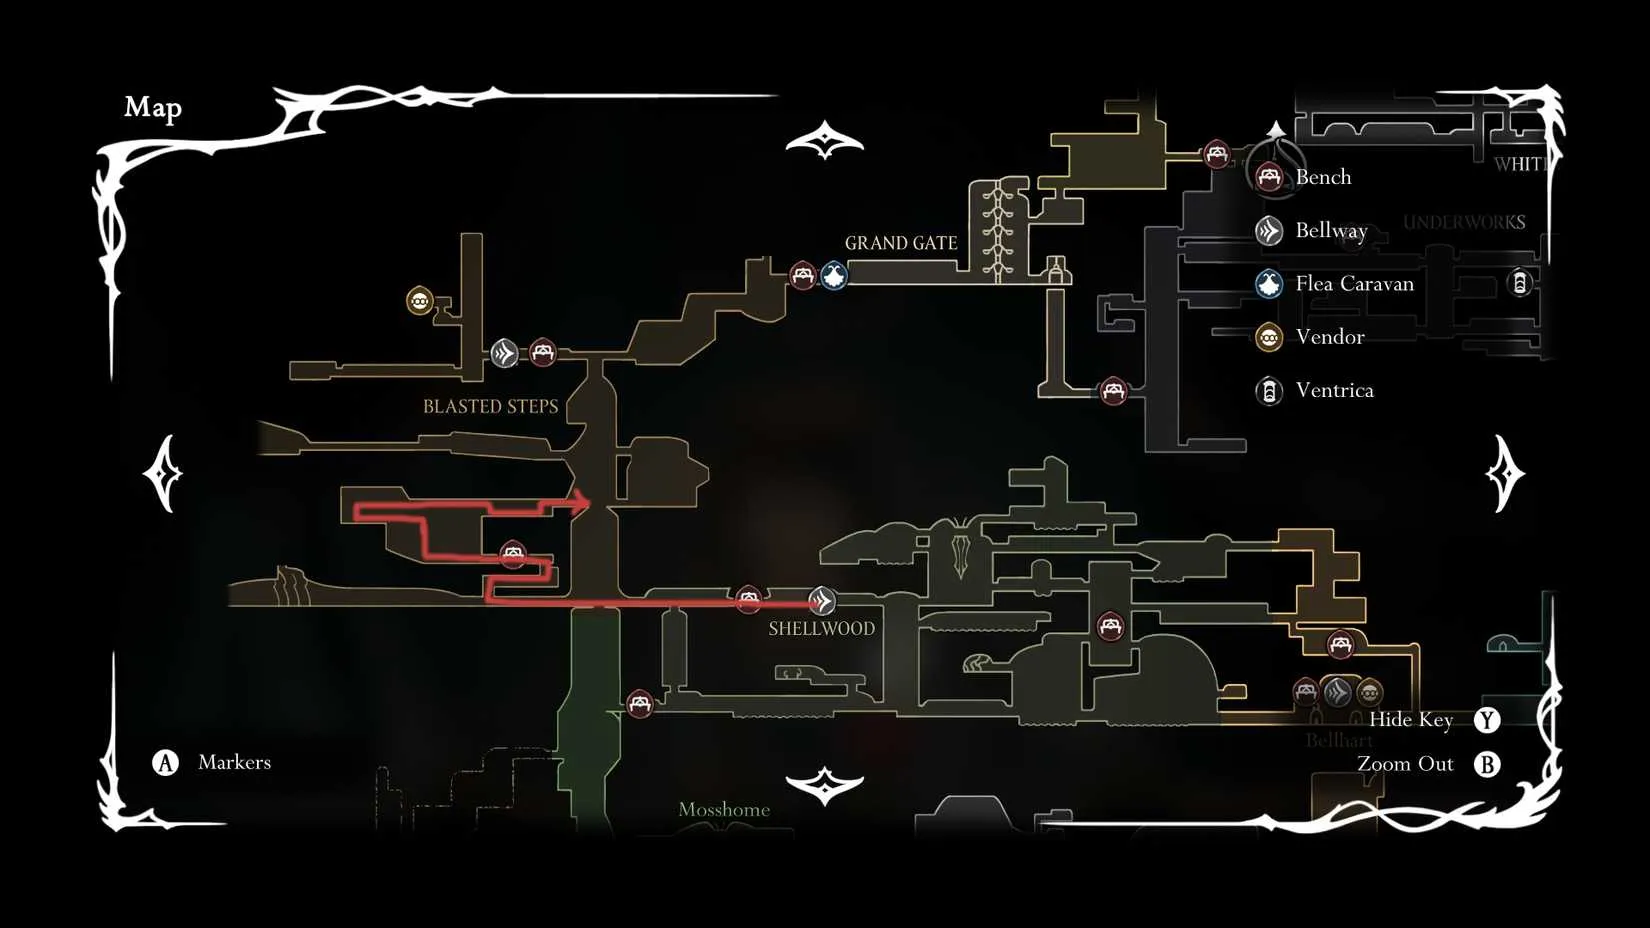
Most travelers assume they must crawl all the way back through Bone Bottom and start the western trek from scratch. There is a better way, and it hides in plain sight. Hornet should move toward the bench that links Shellwood to Bone Bottom — but she should not drop down to it. Just before reaching that bench, she needs to look up. A passage hangs overhead, and the freshly acquired wall jump is the key to it. Climbing that shaft unlocks a bench sitting directly beside the Shellwood Bellway, which turns a long walk into a short hop.
From that bench, the route unfolds like this:
Step
Action
Reward
1
Run left through the large open room until an upward path appears
Progress toward the Steps
2
Climb and locate the bench
A safe place to rest and save
3
Head left, then up, into the tall vertical chamber
Access to the eastern rooms
4
Enter the right-hand room from the vertical area
Shakra's location
Finding Shakra and the Blasted Steps Map ?️
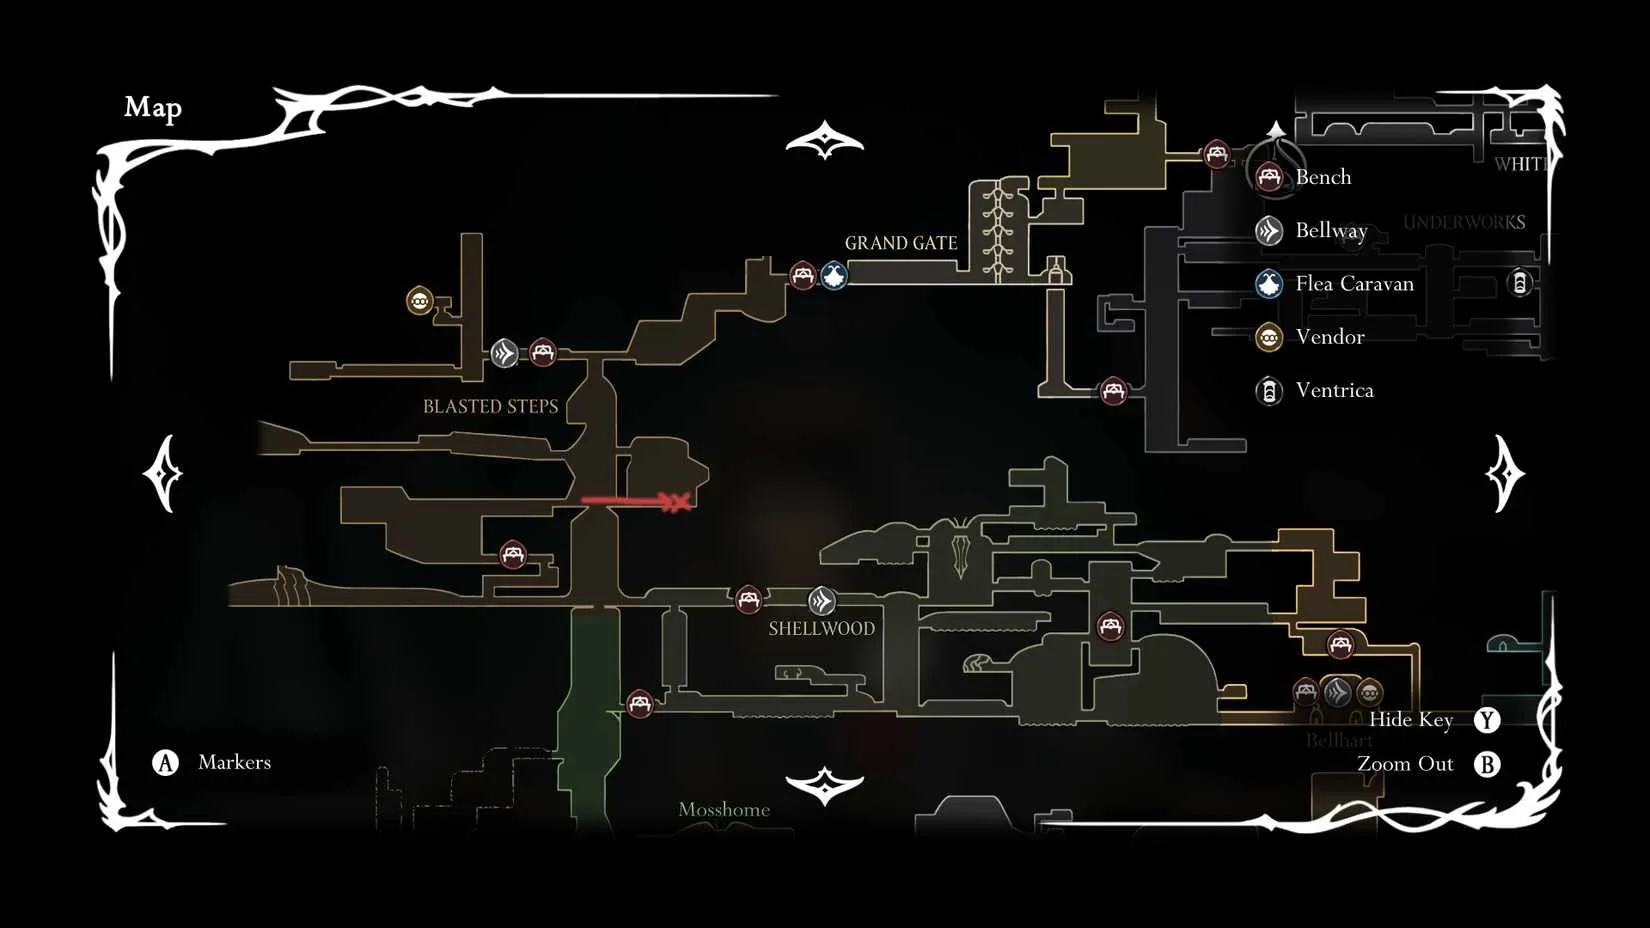
The vertical chamber is the landmark to watch for. Once Hornet reaches it, she should slip into the room on the right, where the wandering merchant Shakra waits. Shakra sells the Blasted Steps map, and buying it is not a luxury — the region is a maze of wind, sand, and crumbling stone, and going in blind is how runs end. There is a simple tell for whether the right room has been found: Shakra's signature rings begin appearing on the ground, scattered like coins from a pocket.
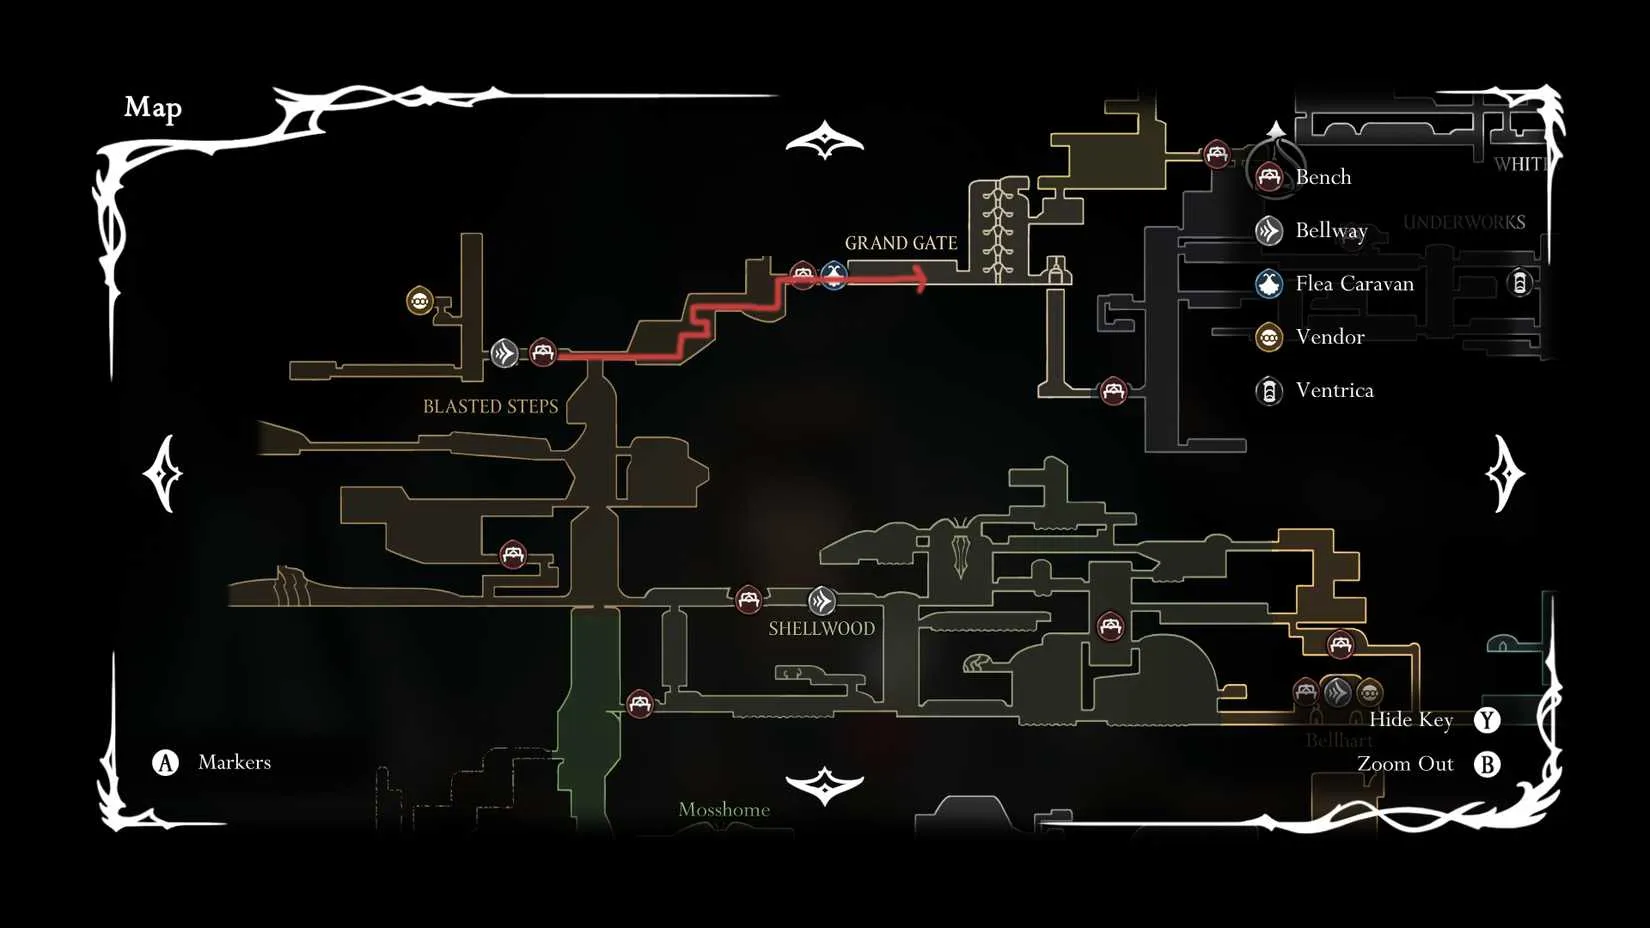
With the map in hand, the next objective is vertical. Hornet must climb the tall chamber until she finds the Bellway station of the Blasted Steps. There are two ways up — straight from Shakra's room, or out the door and up from the corridor beyond — and both funnel to the same platform. It is worth resting at the bench, unlocking the fast-travel point, and only then pressing east.
The Grand Gate and the Last Judge ⚖️
East of the Bellway, the path narrows and the wind sharpens until Hornet arrives at the Grand Gate itself. Here the Needolin proves its worth: the gate does not open to strength or speed, only to song. This is precisely why the Bellhart curse could never be postponed.
And then the gate delivers its price. A boss encounter with the Last Judge begins, a fight that punishes anyone who wandered in without a nearby respawn point. That is the quiet reason the bench by the Grand Gate matters so much — losing the duel and waking up half a region away is a far crueler punishment than the fight itself.
A Quick Checklist Before the Gate ✅
Break the Bellhart curse and claim the Needolin
Use the hidden upward passage near the Bone Bottom bench for a shortcut
Buy the Blasted Steps map from Shakra
Unlock the Blasted Steps Bellway and rest at the bench
Approach the Grand Gate, play the Needolin, and brace for the Last Judge
Shellwood taught Hornet how to hold on. Bellhart taught her how to speak. The Grand Gate is where those two lessons finally meet — and where the Citadel begins to listen.
Runs through the Blasted Steps tend to teach the same lesson in different ways: preparation is what separates a clean ascent from a loop of painful resets. That mindset is worth carrying over before you even press start — entering the Citadel with your tools upgraded, your map collection complete, and your patience intact turns a punishing climb into something closer to a dance. Plenty of players only discover how much they enjoy this style of exploration after they've already committed to a full playthrough, which makes getting the base game at a fair price the first real decision of the journey.
If you're still weighing whether to take that first step, browsing a site like cheapest steam keys from DealNest is a practical way to compare prices before committing, so the only thing left to worry about is the Last Judge's timing. Once the download is done, the checklist above is waiting — and the Grand Gate won't open itself.
The answer is not east, and it is not deeper into the woods. It is back toward the people Hornet left behind — specifically, toward the haunted settlement of Bellhart.
First, Break the Curse in Bellhart ?️
Before any gate in the Citadel will acknowledge her, Hornet needs a voice that can answer the Citadel's own music. That voice comes from the Needolin, and the Needolin can only be earned by lifting the curse that has settled over Bellhart. Until that curse breaks, the road ahead is simply a wall with scenery painted on it. This is why the sequence matters so much: Cling Grip opens Shellwood, and Bellhart opens everything after it.
Once the Needolin hums in her grasp, the map changes shape. Songs become doors. Ledges become invitations.
The Shortcut Out of Shellwood ?
Most travelers assume they must crawl all the way back through Bone Bottom and start the western trek from scratch. There is a better way, and it hides in plain sight. Hornet should move toward the bench that links Shellwood to Bone Bottom — but she should not drop down to it. Just before reaching that bench, she needs to look up. A passage hangs overhead, and the freshly acquired wall jump is the key to it. Climbing that shaft unlocks a bench sitting directly beside the Shellwood Bellway, which turns a long walk into a short hop.
From that bench, the route unfolds like this:
Step
Action
Reward
1
Run left through the large open room until an upward path appears
Progress toward the Steps
2
Climb and locate the bench
A safe place to rest and save
3
Head left, then up, into the tall vertical chamber
Access to the eastern rooms
4
Enter the right-hand room from the vertical area
Shakra's location
Finding Shakra and the Blasted Steps Map ?️
The vertical chamber is the landmark to watch for. Once Hornet reaches it, she should slip into the room on the right, where the wandering merchant Shakra waits. Shakra sells the Blasted Steps map, and buying it is not a luxury — the region is a maze of wind, sand, and crumbling stone, and going in blind is how runs end. There is a simple tell for whether the right room has been found: Shakra's signature rings begin appearing on the ground, scattered like coins from a pocket.
With the map in hand, the next objective is vertical. Hornet must climb the tall chamber until she finds the Bellway station of the Blasted Steps. There are two ways up — straight from Shakra's room, or out the door and up from the corridor beyond — and both funnel to the same platform. It is worth resting at the bench, unlocking the fast-travel point, and only then pressing east.
The Grand Gate and the Last Judge ⚖️
East of the Bellway, the path narrows and the wind sharpens until Hornet arrives at the Grand Gate itself. Here the Needolin proves its worth: the gate does not open to strength or speed, only to song. This is precisely why the Bellhart curse could never be postponed.
And then the gate delivers its price. A boss encounter with the Last Judge begins, a fight that punishes anyone who wandered in without a nearby respawn point. That is the quiet reason the bench by the Grand Gate matters so much — losing the duel and waking up half a region away is a far crueler punishment than the fight itself.
A Quick Checklist Before the Gate ✅
Break the Bellhart curse and claim the Needolin
Use the hidden upward passage near the Bone Bottom bench for a shortcut
Buy the Blasted Steps map from Shakra
Unlock the Blasted Steps Bellway and rest at the bench
Approach the Grand Gate, play the Needolin, and brace for the Last Judge
Shellwood taught Hornet how to hold on. Bellhart taught her how to speak. The Grand Gate is where those two lessons finally meet — and where the Citadel begins to listen.
Runs through the Blasted Steps tend to teach the same lesson in different ways: preparation is what separates a clean ascent from a loop of painful resets. That mindset is worth carrying over before you even press start — entering the Citadel with your tools upgraded, your map collection complete, and your patience intact turns a punishing climb into something closer to a dance. Plenty of players only discover how much they enjoy this style of exploration after they've already committed to a full playthrough, which makes getting the base game at a fair price the first real decision of the journey.
If you're still weighing whether to take that first step, browsing a site like cheapest steam keys from DealNest is a practical way to compare prices before committing, so the only thing left to worry about is the Last Judge's timing. Once the download is done, the checklist above is waiting — and the Grand Gate won't open itself.
No Replies
Every so often a boss fight stops feeling like a wall and starts feeling like a conversation. In Hollow Knight: Silksong, that conversation happens high inside the Exhaust Organ, where an old master of the needle waits in silence for a challenger worth their time. Phantom is optional — a detour on the long road toward the Citadel — yet the duel they offer has become one of the most beloved encounters in all of Pharloom, a fast and elegant dance that recalls Grimm and the Mantis Lords far more than the grinding brutality of the Last Judge. Beat them, and the reward is not merely a second route forward, but one of the strongest silk arts the game has to offer.
?️ Where the Old Master Waits
Phantom lives at the very top of the Exhaust Organ, a region tucked inside Bilewater. It can be reached first through Sinner's Road, and later through the Putrefied Docks and the Whispering Vaults, acting as a bridge between Lower Pharloom and the Citadel. Before any of that, though, a traveler must first survive the Mist.
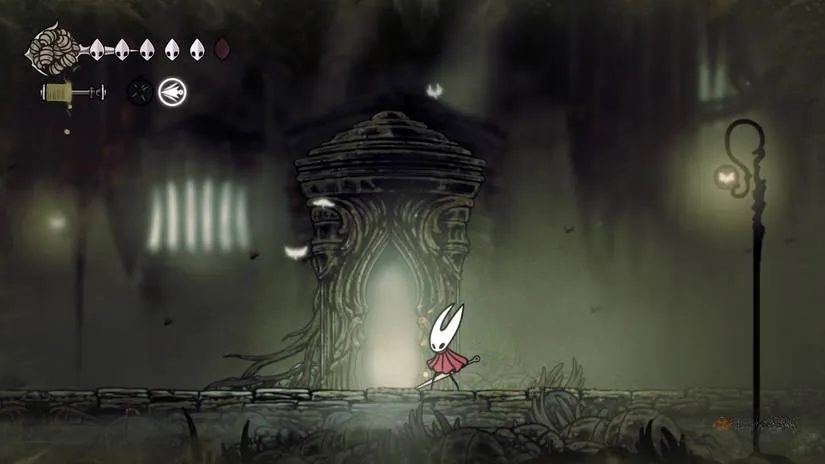
The Mist is a dense, disorienting puzzle, and brute force will not solve it. The rules are simple once understood:
Play your Needolin near spirit moths and follow the path they reveal.
Only take exits that the spirit moths themselves indicate.
Defeat wraiths the moment they appear — never let them accumulate.
Carry a dependable trap that is both aerial and ranged, so wraiths in tight corners can be cleared safely.
Once inside the Organ proper, the climb continues. Steam exhaust vents punish careless movement, and the way up is a vertical gauntlet of paths and platforms. Two habits make the ascent bearable: strike every stray spool you pass to refill silk for the fight ahead, and sit on the bench up and to the left of the central chamber module before committing.
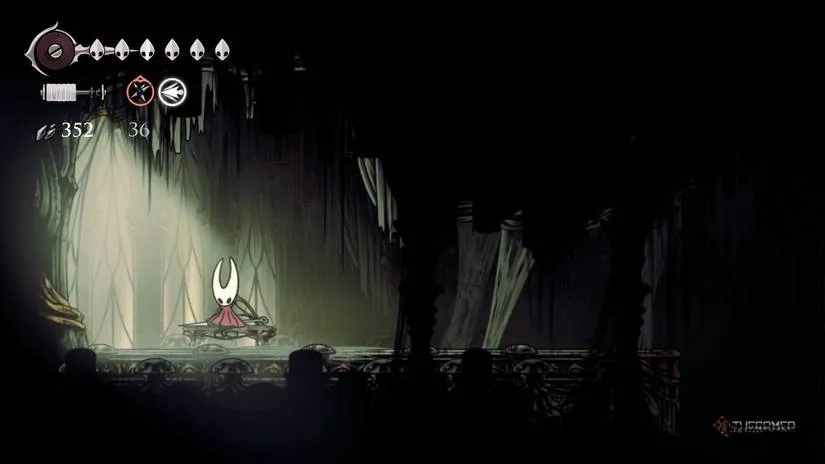
⚔️ Reading the Blade
Phantom is a medium-difficulty boss with a move list only slightly longer than what the early game has trained a player to expect — appropriate for an encounter that serves as the midgame handoff. They carry four moves in the first phase, and the second phase adds exactly one more with no other significant changes. The real challenge is a health pool that sits right alongside the Last Judge's for sheer bulk.
Knowing when to heal matters more than knowing when to strike.
Window
What to do
Just after dodging an Aerial Pin Pull
Heal slightly off the ground, in the farthest corner
Immediately after escaping a Music of the Light
Heal, or lay a trap
During staggers
Free healing and free damage
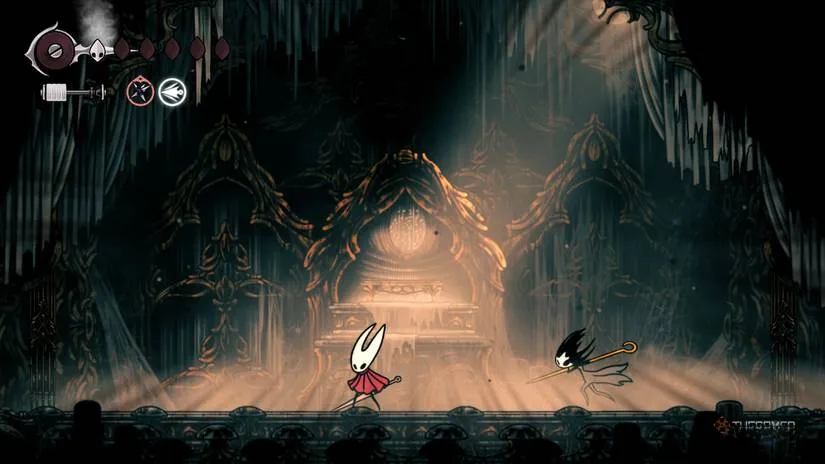
Trap placement works beautifully in the same windows. Tacks, Silkshot, and Sting Shard all perform wonders against Phantom, and every one of them hits harder with the Pollip Heart tool equipped.
? Silk Arts and Sharp Answers
Silk Storm earns its place here for bonus damage whenever spare silk allows, while Silkspear remains useful but less impressive, thanks to how many of Phantom's attacks sweep quickly and horizontally.
Silk Storm: best used while jumping over Phantom during their Triple Stab or Pin Pull.
Silkspear: best used after a Music of the Light, or after dodging an Aerial Pin Pull.
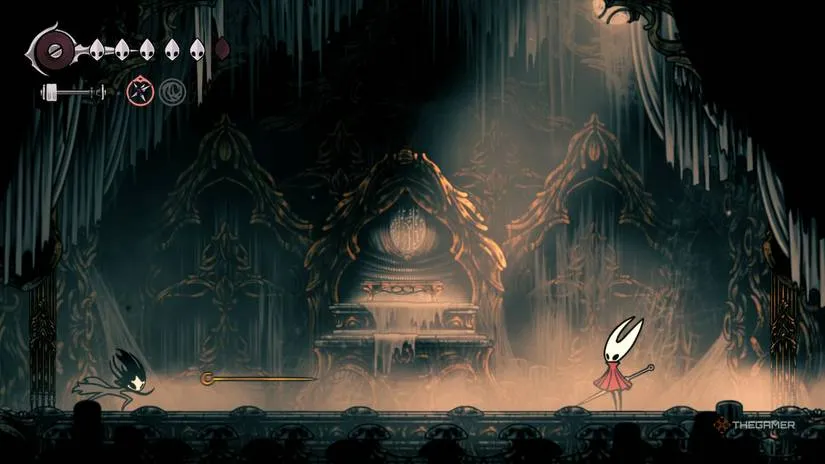
Phantom's attacks are strikingly close to Hornet's old repertoire. Their movement is nimble and graceful, matching Hornet's own running speed, which means standing still is a death sentence. Most of their attacks demand a dash to avoid, and accurate pogo strikes are the key to keeping the fight from dragging.
? The Final Roar
Near the end, Phantom roars and vanishes, launching a five-hit series of downward slams that land one right after another. Swerve between each impact. Do not attempt to heal or set traps until the fifth and final strike has landed and Phantom has come to rest. This is not a true phase transition so much as a last-ditch effort to prove superiority — and it is where careless challengers die.
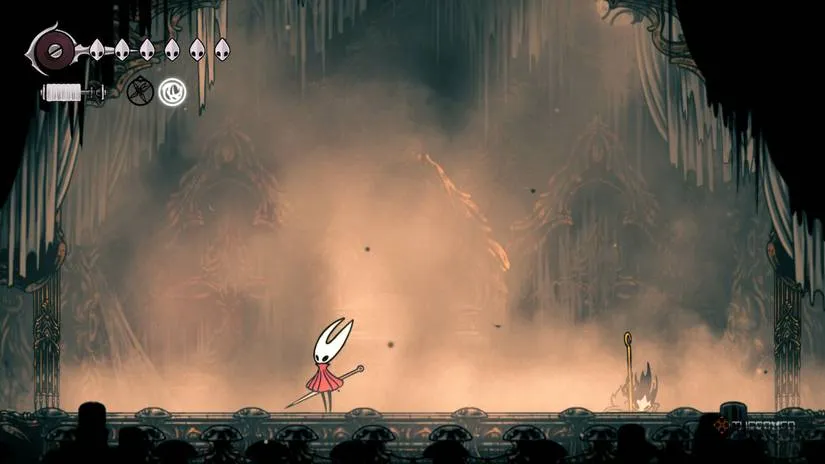
? The Prize: Cross Stitch
Phantom is entirely about precision and reaction — fitting, given what they leave behind. As a reward for honorably ending their vigil, the victor receives the very parry ability Phantom used against them: Cross Stitch.
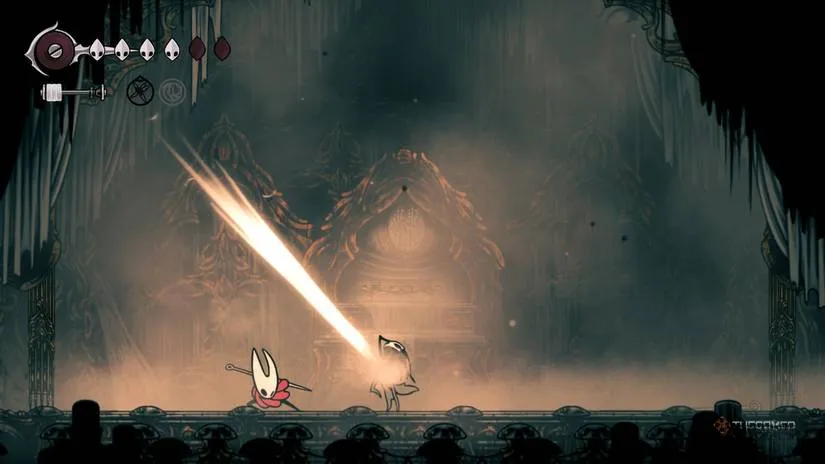
Cross Stitch parries all enemies and counters most attack types, and it remains one of the most satisfying silk powers well into the late game. Even players who have already reached the Citadel are strongly encouraged to turn back, climb the Exhaust Organ one more time, and claim it. Some fights are worth the walk back. This one is worth the whole journey.
For anyone still waiting on the sidelines, the barrier to entry is smaller than it looks — Silksong regularly dips below its sticker price if you know where to shop, and the savings are worth pocketing before you commit to the climb through the Exhaust Organ. Sites like DealNest aggregate discounted offers across storefronts, so a quick check there can turn a full-price purchase into a bargain. If you've been holding off on joining Hornet's journey until the price felt right, browsing the cheapest steam keys available is a sensible first step.
It's a small detour, but one that mirrors the game's own philosophy: patience and preparation pay off. Scout the deal, secure the copy, and then get back to the part that actually matters — learning Phantom's rhythm until that five-slam finale stops being terrifying and starts being routine.
?️ Where the Old Master Waits
Phantom lives at the very top of the Exhaust Organ, a region tucked inside Bilewater. It can be reached first through Sinner's Road, and later through the Putrefied Docks and the Whispering Vaults, acting as a bridge between Lower Pharloom and the Citadel. Before any of that, though, a traveler must first survive the Mist.
The Mist is a dense, disorienting puzzle, and brute force will not solve it. The rules are simple once understood:
Play your Needolin near spirit moths and follow the path they reveal.
Only take exits that the spirit moths themselves indicate.
Defeat wraiths the moment they appear — never let them accumulate.
Carry a dependable trap that is both aerial and ranged, so wraiths in tight corners can be cleared safely.
Once inside the Organ proper, the climb continues. Steam exhaust vents punish careless movement, and the way up is a vertical gauntlet of paths and platforms. Two habits make the ascent bearable: strike every stray spool you pass to refill silk for the fight ahead, and sit on the bench up and to the left of the central chamber module before committing.
⚔️ Reading the Blade
Phantom is a medium-difficulty boss with a move list only slightly longer than what the early game has trained a player to expect — appropriate for an encounter that serves as the midgame handoff. They carry four moves in the first phase, and the second phase adds exactly one more with no other significant changes. The real challenge is a health pool that sits right alongside the Last Judge's for sheer bulk.
Knowing when to heal matters more than knowing when to strike.
Window
What to do
Just after dodging an Aerial Pin Pull
Heal slightly off the ground, in the farthest corner
Immediately after escaping a Music of the Light
Heal, or lay a trap
During staggers
Free healing and free damage
Trap placement works beautifully in the same windows. Tacks, Silkshot, and Sting Shard all perform wonders against Phantom, and every one of them hits harder with the Pollip Heart tool equipped.
? Silk Arts and Sharp Answers
Silk Storm earns its place here for bonus damage whenever spare silk allows, while Silkspear remains useful but less impressive, thanks to how many of Phantom's attacks sweep quickly and horizontally.
Silk Storm: best used while jumping over Phantom during their Triple Stab or Pin Pull.
Silkspear: best used after a Music of the Light, or after dodging an Aerial Pin Pull.
Phantom's attacks are strikingly close to Hornet's old repertoire. Their movement is nimble and graceful, matching Hornet's own running speed, which means standing still is a death sentence. Most of their attacks demand a dash to avoid, and accurate pogo strikes are the key to keeping the fight from dragging.
? The Final Roar
Near the end, Phantom roars and vanishes, launching a five-hit series of downward slams that land one right after another. Swerve between each impact. Do not attempt to heal or set traps until the fifth and final strike has landed and Phantom has come to rest. This is not a true phase transition so much as a last-ditch effort to prove superiority — and it is where careless challengers die.
? The Prize: Cross Stitch
Phantom is entirely about precision and reaction — fitting, given what they leave behind. As a reward for honorably ending their vigil, the victor receives the very parry ability Phantom used against them: Cross Stitch.
Cross Stitch parries all enemies and counters most attack types, and it remains one of the most satisfying silk powers well into the late game. Even players who have already reached the Citadel are strongly encouraged to turn back, climb the Exhaust Organ one more time, and claim it. Some fights are worth the walk back. This one is worth the whole journey.
For anyone still waiting on the sidelines, the barrier to entry is smaller than it looks — Silksong regularly dips below its sticker price if you know where to shop, and the savings are worth pocketing before you commit to the climb through the Exhaust Organ. Sites like DealNest aggregate discounted offers across storefronts, so a quick check there can turn a full-price purchase into a bargain. If you've been holding off on joining Hornet's journey until the price felt right, browsing the cheapest steam keys available is a sensible first step.
It's a small detour, but one that mirrors the game's own philosophy: patience and preparation pay off. Scout the deal, secure the copy, and then get back to the part that actually matters — learning Phantom's rhythm until that five-slam finale stops being terrifying and starts being routine.
No Replies
I’ll be straight with you: Bilewater is a nasty piece of work. I’d heard whispers about the Seeker’s Soul in Hollow Knight: Silksong, but I didn’t realize it would send me through one of the game’s most miserable optional areas. Still, as of 2026, if you’re chasing the secret Act 3, you need this creepy little item. So here’s how I got it, how I used it, and what I wish I’d known before I took the plunge.
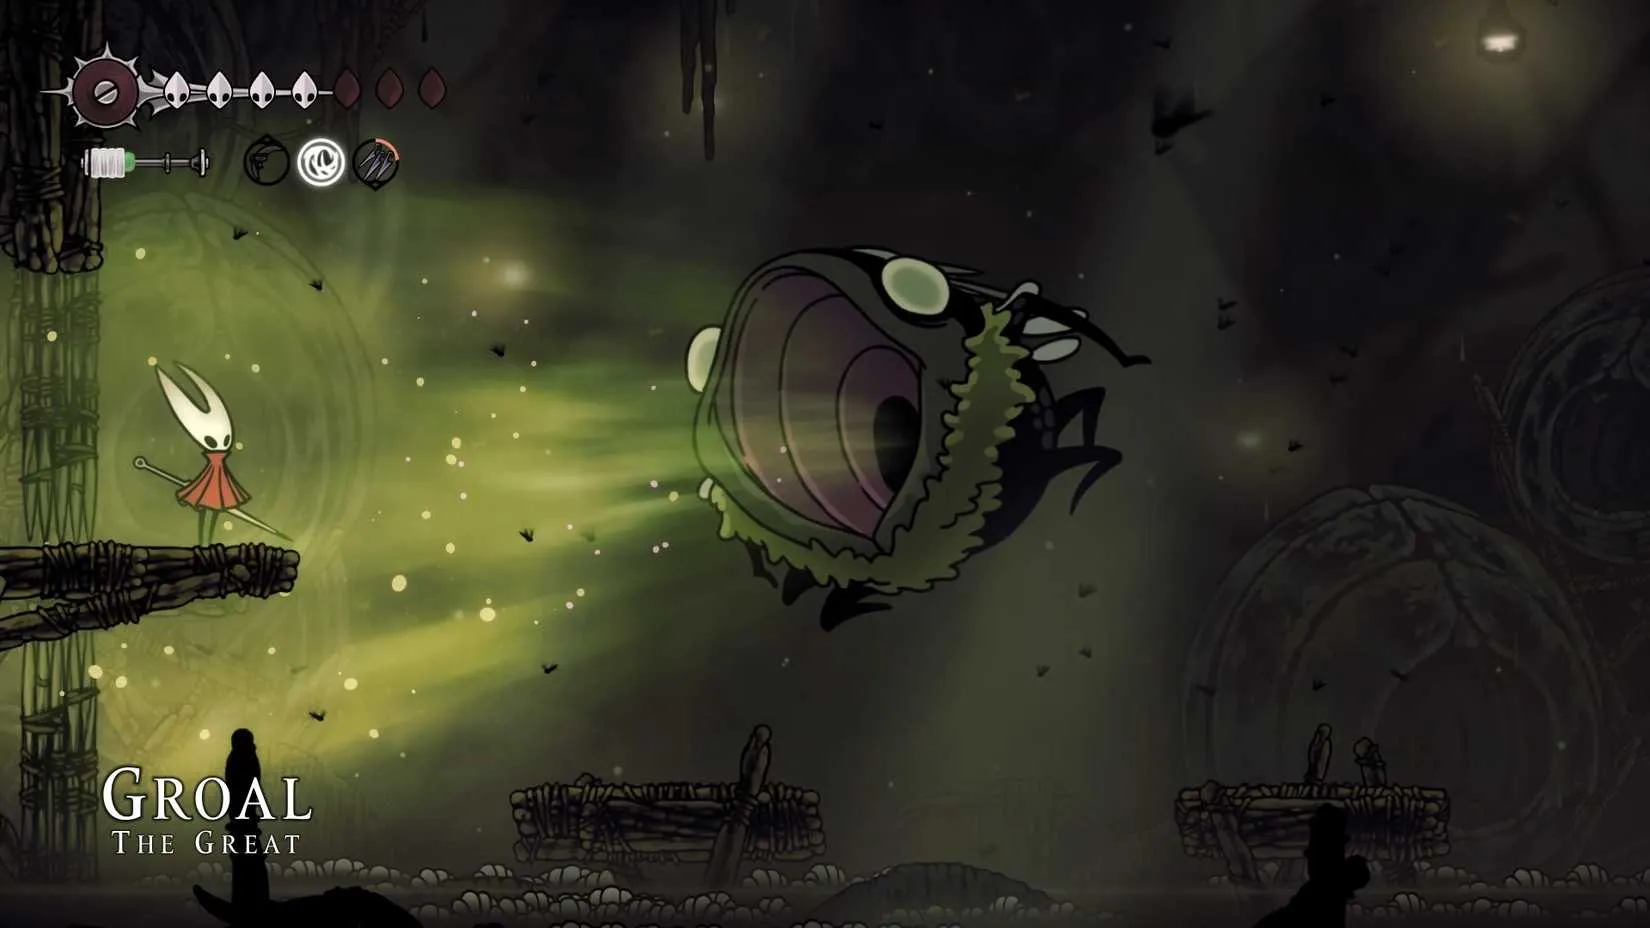
Long story short, Seeker’s Soul is tucked inside a shell home in Bilewater. It’s close to the Key of Apostate spot, so if you’re already hunting that key, you can kill two birds with one stone. I did exactly that, and it felt like a small mercy in an otherwise brutal zone.
There are two ways to reach it. I tried both because I’m a glutton for punishment.
Route 1: The Southern Slog
Start in Bilewater’s southern edge.
Pass through Sinner’s Road.
Push north until you hit the top section of Bilewater.
This route is the “classic” way, and by classic I mean it can kick your teeth in. You’ll face several waves of enemies, and then you’ll run into Groal, a boss who doesn’t believe in warm-ups. The worst part? There’s no nearby bench. If you fall in combat, you’re sent back to the last bench you visited. I learned that the hard way, and let me tell you, walking back felt like Groundhog Day.
Route 2: The Putrified Ducts Shortcut
Enter Bilewater from the northern side.
Use the Putrified Ducts route.
Drop into the top section and grab the Seeker’s Soul.
This is the route I recommend. It’s safer, faster, and it skips Groal entirely. The catch? You need the Double Jump skill, which means you can’t pull this off early. It’s a midgame route, plain and simple. If you have Double Jump, take it. If you don’t, maybe go do something else first, because the southern route is a real gauntlet.
Route
Entry Point
Boss?
Requirement
Verdict
Southern
Sinner’s Road
Groal
None, but high risk
? Only if you hate yourself
Northern
Putrified Ducts
None
Double Jump
✅ Best route
Once I grabbed Seeker’s Soul, I stared at my inventory like, “Okay, what now?” The answer is: not much, at least at first. Seeker’s Soul is required to unlock the secret Act 3 in Silksong. But it’s not a solo act. You need three other souls, and two of them only become obtainable after you promise the Silk and Soul Wish. So until you trigger the Silk and Soul quest—and that takes a fair bit of prerequisite work—Seeker’s Soul just sits in Hornet’s inventory like a weird paperweight.
That’s the thing that tripped me up. I thought I’d missed a prompt or a hidden door. Nope. The game just wants you to hold onto it. So if you’re in the same boat, don’t panic. It’s not bugged; it’s just waiting for the rest of the quest chain to catch up.
While you’re collecting pre-quest items, there’s another one worth grabbing: the Snare Setter. I picked it up from Weavenest Atla, and it’s a handy tool to have in your pocket. Here’s how I did it.

First, go to Bone Bottom and find the door that requires the Needolin song. Play the song, and you’ll be transported down into Weavenest Atla. Once you’re down there, look for a wall you can climb. Climb up until you spot a route at mid-height on the left side. Slip into that hidden route, then find another way up. Keep heading up, and you’ll eventually spot the Snare Setter sitting on top of a desk. Grab it, and you’re golden.
I’ll admit, I walked past that hidden route twice before I saw it. The game doesn’t exactly roll out a red carpet. But once you know where to look, it’s not too bad. Just keep an eye out for climbable walls and side paths.
So, what’s the bottom line? If you’re aiming for the secret Act 3 in 2026, you need Seeker’s Soul. Take the Putrified Ducts route if you have Double Jump. If you don’t, prepare for a rough ride through Sinner’s Road and Groal. And remember: Seeker’s Soul is only one piece of the puzzle. The Silk and Soul Wish quest has to be active before the other souls even show up. Until then, let it sit in your inventory and gather dust.
Would I do it again? Maybe. Bilewater still gives me the heebie-jeebies, but the payoff is worth it. If you’re going for 100% or just want to see what Act 3 has in store, don’t skip this one. Just bring patience, a fully upgraded Hornet, and maybe a snack. You’re going to need it.
All this waiting around for quest chains to unlock is a good reminder that gaming often involves a lot of patience — and sometimes a lot of money, too. Whether you're stocking up on metroidvanias to fill the gap between Silksong sessions or hunting for your next obsession, a steam deal finder like DealNest makes it easy to track price drops across your wishlist without lifting a finger. It won't help you beat Groal, but it might save you enough to afford a few extra snacks.
Long story short, Seeker’s Soul is tucked inside a shell home in Bilewater. It’s close to the Key of Apostate spot, so if you’re already hunting that key, you can kill two birds with one stone. I did exactly that, and it felt like a small mercy in an otherwise brutal zone.
There are two ways to reach it. I tried both because I’m a glutton for punishment.
Route 1: The Southern Slog
Start in Bilewater’s southern edge.
Pass through Sinner’s Road.
Push north until you hit the top section of Bilewater.
This route is the “classic” way, and by classic I mean it can kick your teeth in. You’ll face several waves of enemies, and then you’ll run into Groal, a boss who doesn’t believe in warm-ups. The worst part? There’s no nearby bench. If you fall in combat, you’re sent back to the last bench you visited. I learned that the hard way, and let me tell you, walking back felt like Groundhog Day.
Route 2: The Putrified Ducts Shortcut
Enter Bilewater from the northern side.
Use the Putrified Ducts route.
Drop into the top section and grab the Seeker’s Soul.
This is the route I recommend. It’s safer, faster, and it skips Groal entirely. The catch? You need the Double Jump skill, which means you can’t pull this off early. It’s a midgame route, plain and simple. If you have Double Jump, take it. If you don’t, maybe go do something else first, because the southern route is a real gauntlet.
Route
Entry Point
Boss?
Requirement
Verdict
Southern
Sinner’s Road
Groal
None, but high risk
? Only if you hate yourself
Northern
Putrified Ducts
None
Double Jump
✅ Best route
Once I grabbed Seeker’s Soul, I stared at my inventory like, “Okay, what now?” The answer is: not much, at least at first. Seeker’s Soul is required to unlock the secret Act 3 in Silksong. But it’s not a solo act. You need three other souls, and two of them only become obtainable after you promise the Silk and Soul Wish. So until you trigger the Silk and Soul quest—and that takes a fair bit of prerequisite work—Seeker’s Soul just sits in Hornet’s inventory like a weird paperweight.
That’s the thing that tripped me up. I thought I’d missed a prompt or a hidden door. Nope. The game just wants you to hold onto it. So if you’re in the same boat, don’t panic. It’s not bugged; it’s just waiting for the rest of the quest chain to catch up.
While you’re collecting pre-quest items, there’s another one worth grabbing: the Snare Setter. I picked it up from Weavenest Atla, and it’s a handy tool to have in your pocket. Here’s how I did it.
First, go to Bone Bottom and find the door that requires the Needolin song. Play the song, and you’ll be transported down into Weavenest Atla. Once you’re down there, look for a wall you can climb. Climb up until you spot a route at mid-height on the left side. Slip into that hidden route, then find another way up. Keep heading up, and you’ll eventually spot the Snare Setter sitting on top of a desk. Grab it, and you’re golden.
I’ll admit, I walked past that hidden route twice before I saw it. The game doesn’t exactly roll out a red carpet. But once you know where to look, it’s not too bad. Just keep an eye out for climbable walls and side paths.
So, what’s the bottom line? If you’re aiming for the secret Act 3 in 2026, you need Seeker’s Soul. Take the Putrified Ducts route if you have Double Jump. If you don’t, prepare for a rough ride through Sinner’s Road and Groal. And remember: Seeker’s Soul is only one piece of the puzzle. The Silk and Soul Wish quest has to be active before the other souls even show up. Until then, let it sit in your inventory and gather dust.
Would I do it again? Maybe. Bilewater still gives me the heebie-jeebies, but the payoff is worth it. If you’re going for 100% or just want to see what Act 3 has in store, don’t skip this one. Just bring patience, a fully upgraded Hornet, and maybe a snack. You’re going to need it.
All this waiting around for quest chains to unlock is a good reminder that gaming often involves a lot of patience — and sometimes a lot of money, too. Whether you're stocking up on metroidvanias to fill the gap between Silksong sessions or hunting for your next obsession, a steam deal finder like DealNest makes it easy to track price drops across your wishlist without lifting a finger. It won't help you beat Groal, but it might save you enough to afford a few extra snacks.
No Replies
Among the seven crests in Hollow Knight: Silksong, six can be acquired during the first two acts. The seventh—the Shaman Crest—is a late-game treasure that only appears in Act 3, and only after players have obtained the Silk Soar ability from the depths of The Abyss. This crest is widely regarded as the most powerful of the bunch, and for good reason: it allows Hornet to equip three different Silk Skills simultaneously, turning her into a veritable tornado of steel and silk. To put it in perspective, it's like giving a concert pianist three extra hands, each playing a different melody that somehow harmonizes into pure devastation. Or, if one prefers, imagine a chess grandmaster who can make three moves at once—bosses never stand a chance. When paired with blue tools like the  Volt Filament, the Shaman Crest becomes even more deadly, as the added electric damage synergizes beautifully with rapid-fire Silk Skills.

Before players can claim the Shaman Crest, they must have unlocked Hornet's Silk Soar ability. Assuming that prerequisite is met, the journey begins at the Bone Bottom Bellway. From there, players should head left until they come to a hole with a ray of light shining down on it. Once there, they can drop down and head inside the doorway to the Ruined Chapel on their left.
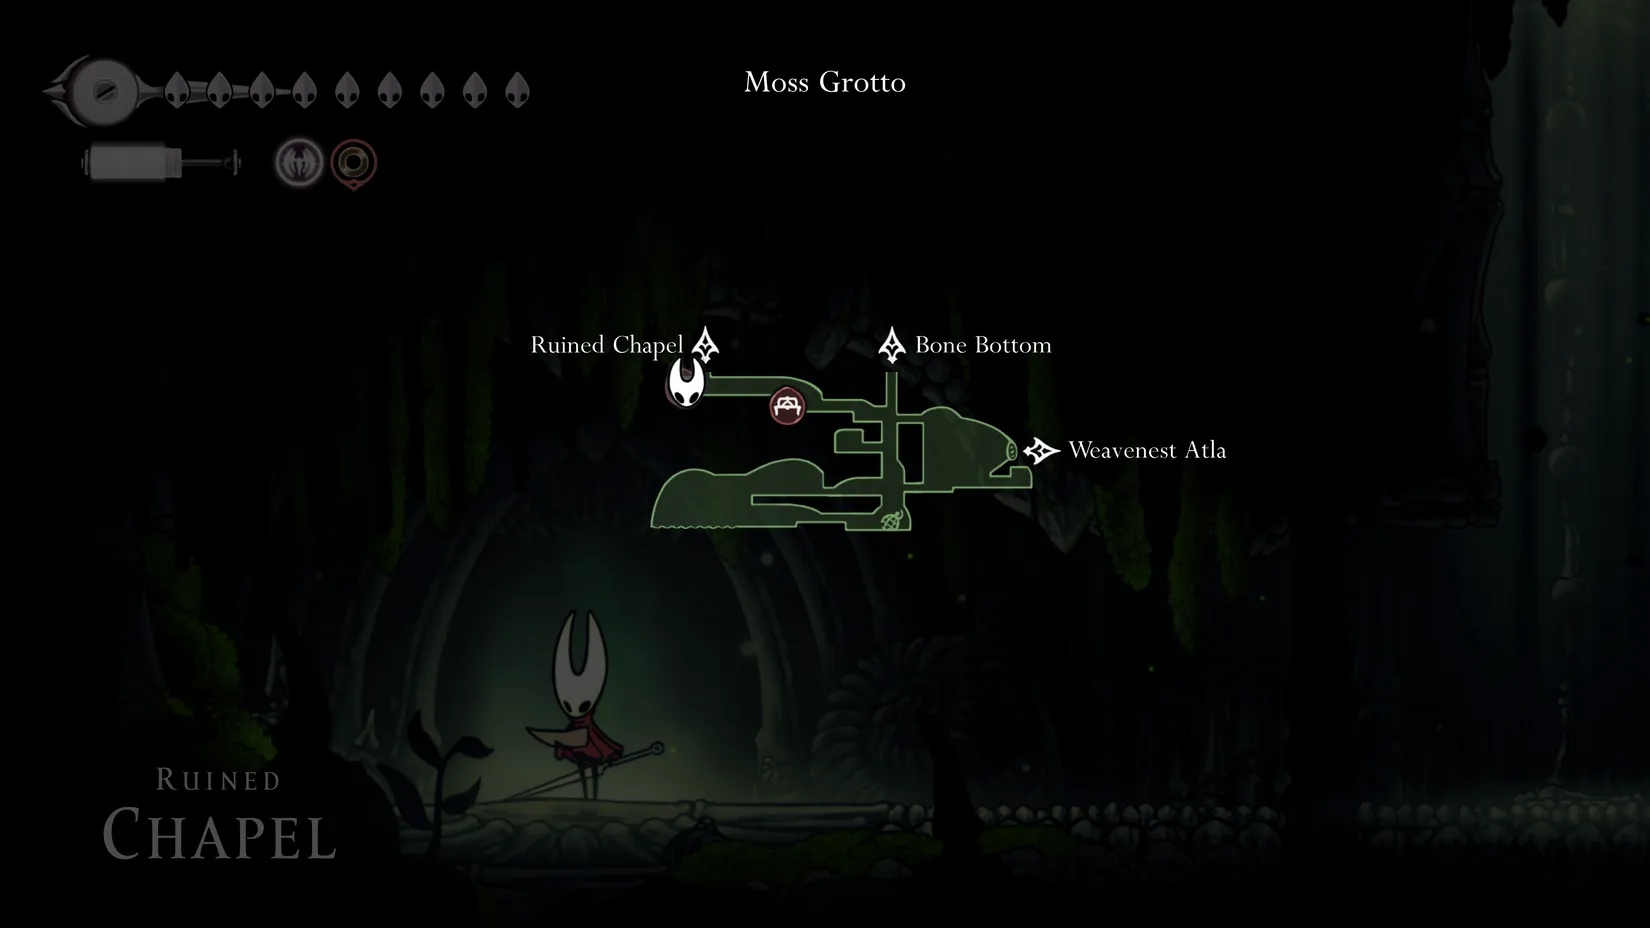
Inside the Ruined Chapel, players should head to the far right and stand in front of the lore marker. Then, they need to use Silk Soar by holding down together with the harpoon button (S on PC, L2 on PlayStation, LT on Xbox, or L on Switch). This action propels Hornet through the ceiling above her, allowing her to carry on to the right. From here, it's a simple case of following the path, while being sure to destroy the three breakable walls using slash attacks along the way.
Eventually, players will drop down into an area with a destroyed statue. Standing in front of this will allow them to hold down to claim, after which they'll just need to tap the Bind button a few times to unlock the Shaman Crest. The moment of acquisition is shown below.
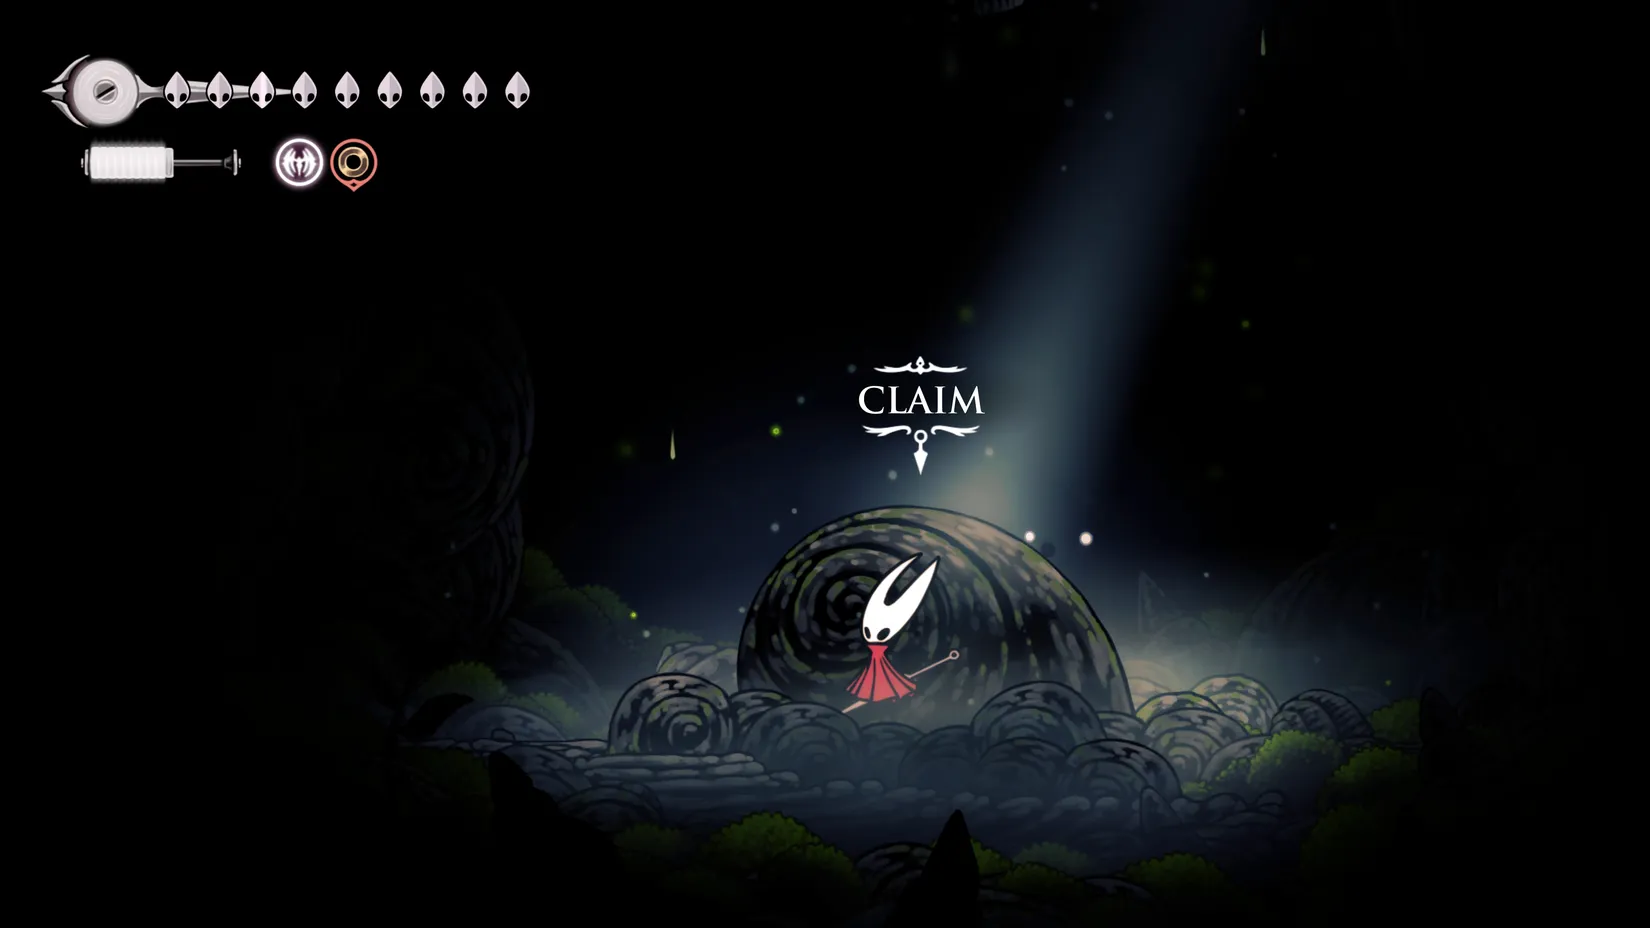
To begin with, the Shaman Crest only has three white slots unlocked. However, by using a couple of Memory Lockets, players can unlock two blue slots. If they haven't already done so, they can add a yellow slot and one additional blue slot by getting the two Vesticrests from Eva in Weavenest Atla. Here's a quick breakdown of the slot progression:
Slot Type
Initial
After Memory Lockets
After Vesticrests
⚪ White
3
3
3
? Blue
0
2
3
? Yellow
0
0
1
With the full array of slots unlocked, the Shaman Crest transforms Hornet into a one-woman army. The ability to wield three Silk Skills at once means players can chain devastating attacks, control crowds, and melt boss health bars. It's the difference between bringing a spoon to a sword fight and bringing a Swiss Army knife that also happens to be a flamethrower—except even that analogy undersells it. Think of the Shaman Crest as a skeleton key that unlocks a door behind which sits a personal battalion of silk-wielding warriors, all answering to Hornet's command.
In 2026, the Shaman Crest remains a game-changer for Silksong enthusiasts. Whether players are veterans of the first game or newcomers to the sequel, mastering this crest is essential for tackling the toughest challenges that Act 3 and beyond have to offer. So go forth, claim that crest, and watch as Hornet becomes an unstoppable force of nature. ?⚔️✨
Maxing out the Shaman Crest means farming Memory Lockets and tracking down the Vesticrests from Eva, and that kind of prep work often pushes players to look for ways to stretch their gaming budget a little further. If you're planning to pick up Hollow Knight: Silksong on another platform, grab the original game for a fresh playthrough, or stock up on similar Metroidvania titles to fill the wait between Acts, it's worth keeping an eye on where prices drop before committing. Comparing storefronts and watching for limited-time discounts can save you enough to justify that extra DLC or soundtracks you've been eyeing.
That's where a deal-tracking site like DealNest comes in handy, rounding up the best game deals across platforms so you don't have to refresh a dozen store pages yourself. Whether you're chasing a discount on the game itself or hunting for the next great adventure to sink dozens of hours into, having a curated list of current offers makes the search far less tedious—and leaves more time for perfecting your Hornet combos.
Before players can claim the Shaman Crest, they must have unlocked Hornet's Silk Soar ability. Assuming that prerequisite is met, the journey begins at the Bone Bottom Bellway. From there, players should head left until they come to a hole with a ray of light shining down on it. Once there, they can drop down and head inside the doorway to the Ruined Chapel on their left.
Inside the Ruined Chapel, players should head to the far right and stand in front of the lore marker. Then, they need to use Silk Soar by holding down together with the harpoon button (S on PC, L2 on PlayStation, LT on Xbox, or L on Switch). This action propels Hornet through the ceiling above her, allowing her to carry on to the right. From here, it's a simple case of following the path, while being sure to destroy the three breakable walls using slash attacks along the way.
Eventually, players will drop down into an area with a destroyed statue. Standing in front of this will allow them to hold down to claim, after which they'll just need to tap the Bind button a few times to unlock the Shaman Crest. The moment of acquisition is shown below.
To begin with, the Shaman Crest only has three white slots unlocked. However, by using a couple of Memory Lockets, players can unlock two blue slots. If they haven't already done so, they can add a yellow slot and one additional blue slot by getting the two Vesticrests from Eva in Weavenest Atla. Here's a quick breakdown of the slot progression:
Slot Type
Initial
After Memory Lockets
After Vesticrests
⚪ White
3
3
3
? Blue
0
2
3
? Yellow
0
0
1
With the full array of slots unlocked, the Shaman Crest transforms Hornet into a one-woman army. The ability to wield three Silk Skills at once means players can chain devastating attacks, control crowds, and melt boss health bars. It's the difference between bringing a spoon to a sword fight and bringing a Swiss Army knife that also happens to be a flamethrower—except even that analogy undersells it. Think of the Shaman Crest as a skeleton key that unlocks a door behind which sits a personal battalion of silk-wielding warriors, all answering to Hornet's command.
In 2026, the Shaman Crest remains a game-changer for Silksong enthusiasts. Whether players are veterans of the first game or newcomers to the sequel, mastering this crest is essential for tackling the toughest challenges that Act 3 and beyond have to offer. So go forth, claim that crest, and watch as Hornet becomes an unstoppable force of nature. ?⚔️✨
Maxing out the Shaman Crest means farming Memory Lockets and tracking down the Vesticrests from Eva, and that kind of prep work often pushes players to look for ways to stretch their gaming budget a little further. If you're planning to pick up Hollow Knight: Silksong on another platform, grab the original game for a fresh playthrough, or stock up on similar Metroidvania titles to fill the wait between Acts, it's worth keeping an eye on where prices drop before committing. Comparing storefronts and watching for limited-time discounts can save you enough to justify that extra DLC or soundtracks you've been eyeing.
That's where a deal-tracking site like DealNest comes in handy, rounding up the best game deals across platforms so you don't have to refresh a dozen store pages yourself. Whether you're chasing a discount on the game itself or hunting for the next great adventure to sink dozens of hours into, having a curated list of current offers makes the search far less tedious—and leaves more time for perfecting your Hornet combos.
No Replies
So you've clawed your way into the Citadel in Hollow Knight: Silksong, and now you're staring up at High Halls like it's the world's most hostile apartment building. Well, it is. The Citadel is packed with platforming sections that will punish you for missing a single jump, and enemies that chase you like you owe them money. High Halls, accessible soon after leaving the Underworks, is no exception. But don't worry—this guide will walk you through the route, the tricks, and the map location. And yes, there will be spikes. So many spikes.
First, a quick reality check: you need the Clawline ability. Without it, you're just a bug with a needle and a bad attitude. Once you have Clawline, your first task is to find and defeat the Cogwork Dancers boss. Yes, those mechanical ballet nightmares. After they're scrap metal, head down and left to reach the top left section of the Coral Chambers. There, you'll spot a Bench directly below a few grapple points. Sit on it. Seriously, sit on it. You'll thank yourself later.
From the Bench, start making your way up using Clawline. The first section is relatively simple—just go right and ignore the enemies. Why fight when you can run? Use your dash to zip past them if you're feeling fancy. When you reach the grapple wheel, harpoon onto a hook and wait for it to rotate upward. Then use your abilities to slip through the top right passage. More enemies? Ignore them again. Dash over their heads like the graceful spider you are.
Now the real fun begins. You'll enter a room with spikes on the bottom and another grapple wheel. This time, ignore the wheel. Instead, float downwards, carefully avoiding the spikes. You'll see a grapple on your right—Clawline to it immediately, or you'll become a Hornet kebab. Once you're holding on, wait a few seconds. The spikes below you will retract. Then float down. You'll have to do this little dance again. After that, you'll spot an enemy. Avoid it by going further down. Easy, right?
Be careful in the next section. You have to move Hornet while floating to avoid spikes, and then harpoon one last time. This is where many players rage-quit. But you're better than that, aren't you? After the final harpoon, go further down. When you see the sign of a Ventrica Station on your right, head through the passage. You'll come across a Bench. Interact with the Station if you have Rosaries—but make sure you have 70 remaining, because there's a machine on the right that sells the map for High Halls. Yes, you have to pay for the privilege of knowing where you are. Capitalism at its finest.
Here's a quick summary table for the visual learners:
Step
Action
Tip
1
Get Clawline, defeat Cogwork Dancers
Don't skip the Bench
2
Go up from Coral Chambers Bench
Ignore enemies, dash past
3
First grapple wheel
Wait for rotation, go top right
4
Second room with spikes
Ignore wheel, float down, Clawline right
5
Wait on grapple
Spikes retract, then float down
6
Repeat, avoid enemy
Go further down
7
Final floating section
Move Hornet mid-air, harpoon
8
Reach Ventrica Station
Need 70 Rosaries for map
Why bother with High Halls at all? Because it's there. Also, it's packed with lore, secrets, and a few shiny things that completionists crave. In 2026, players are still debating whether High Halls is harder than the rest of the Citadel. (Spoiler: it is.) But the view from the top? Worth every spike.
The enemies in the Citadel are relentless. They'll chase you across rooms, through tunnels, and into your dreams. But here's a secret: most of them are slow enough to outrun. Use your dash, use your Clawline, and never look back. If you do get hit, don't panic. Hornet can take a few hits. Just don't fall on spikes. Spikes don't care about your feelings.
Rosaries are the currency of Pharloom. If you're broke, you might need to farm some before attempting this route. Or just sell your soul. Your choice. But remember: 70 Rosaries for the map is a bargain compared to wandering around blindly for hours. Trust me, you don't want to be that bug.
So, are you ready to conquer the Citadel's highest halls? Or will you let a few spikes break your spirit? Grab your Clawline and get climbing. The map won't buy itself.
If your controller's analog stick has started drifting after one too many failed harpoons, or you're hunting for a cheaper copy of the game to hand off to a friend, it pays to know where the actual discounts are. Rather than tab-hopping between storefronts and hoping a sale pops up, you can compare prices here and let DealNest do the scouting — useful whether you're after peripherals sturdy enough to survive a boss fight or just a good deal on the next title in your backlog.
DealNest gathers listings in one place, so you spend less time grinding through pages and more time actually playing. No spikes, no rage-quits, just a quick look before you commit.
First, a quick reality check: you need the Clawline ability. Without it, you're just a bug with a needle and a bad attitude. Once you have Clawline, your first task is to find and defeat the Cogwork Dancers boss. Yes, those mechanical ballet nightmares. After they're scrap metal, head down and left to reach the top left section of the Coral Chambers. There, you'll spot a Bench directly below a few grapple points. Sit on it. Seriously, sit on it. You'll thank yourself later.
From the Bench, start making your way up using Clawline. The first section is relatively simple—just go right and ignore the enemies. Why fight when you can run? Use your dash to zip past them if you're feeling fancy. When you reach the grapple wheel, harpoon onto a hook and wait for it to rotate upward. Then use your abilities to slip through the top right passage. More enemies? Ignore them again. Dash over their heads like the graceful spider you are.
Now the real fun begins. You'll enter a room with spikes on the bottom and another grapple wheel. This time, ignore the wheel. Instead, float downwards, carefully avoiding the spikes. You'll see a grapple on your right—Clawline to it immediately, or you'll become a Hornet kebab. Once you're holding on, wait a few seconds. The spikes below you will retract. Then float down. You'll have to do this little dance again. After that, you'll spot an enemy. Avoid it by going further down. Easy, right?
Be careful in the next section. You have to move Hornet while floating to avoid spikes, and then harpoon one last time. This is where many players rage-quit. But you're better than that, aren't you? After the final harpoon, go further down. When you see the sign of a Ventrica Station on your right, head through the passage. You'll come across a Bench. Interact with the Station if you have Rosaries—but make sure you have 70 remaining, because there's a machine on the right that sells the map for High Halls. Yes, you have to pay for the privilege of knowing where you are. Capitalism at its finest.
Here's a quick summary table for the visual learners:
Step
Action
Tip
1
Get Clawline, defeat Cogwork Dancers
Don't skip the Bench
2
Go up from Coral Chambers Bench
Ignore enemies, dash past
3
First grapple wheel
Wait for rotation, go top right
4
Second room with spikes
Ignore wheel, float down, Clawline right
5
Wait on grapple
Spikes retract, then float down
6
Repeat, avoid enemy
Go further down
7
Final floating section
Move Hornet mid-air, harpoon
8
Reach Ventrica Station
Need 70 Rosaries for map
Why bother with High Halls at all? Because it's there. Also, it's packed with lore, secrets, and a few shiny things that completionists crave. In 2026, players are still debating whether High Halls is harder than the rest of the Citadel. (Spoiler: it is.) But the view from the top? Worth every spike.
The enemies in the Citadel are relentless. They'll chase you across rooms, through tunnels, and into your dreams. But here's a secret: most of them are slow enough to outrun. Use your dash, use your Clawline, and never look back. If you do get hit, don't panic. Hornet can take a few hits. Just don't fall on spikes. Spikes don't care about your feelings.
Rosaries are the currency of Pharloom. If you're broke, you might need to farm some before attempting this route. Or just sell your soul. Your choice. But remember: 70 Rosaries for the map is a bargain compared to wandering around blindly for hours. Trust me, you don't want to be that bug.
So, are you ready to conquer the Citadel's highest halls? Or will you let a few spikes break your spirit? Grab your Clawline and get climbing. The map won't buy itself.
If your controller's analog stick has started drifting after one too many failed harpoons, or you're hunting for a cheaper copy of the game to hand off to a friend, it pays to know where the actual discounts are. Rather than tab-hopping between storefronts and hoping a sale pops up, you can compare prices here and let DealNest do the scouting — useful whether you're after peripherals sturdy enough to survive a boss fight or just a good deal on the next title in your backlog.
DealNest gathers listings in one place, so you spend less time grinding through pages and more time actually playing. No spikes, no rage-quits, just a quick look before you commit.
No Replies
I still remember my first Steel Soul Mode run in Hollow Knight: Silksong. It was early 2026, and I thought I knew every corner of Pharloom. Then permadeath reminded me that confidence is a trap. One bad dodge, one careless pogo, and everything I built was gone. I sat there, staring at the screen... and then I started again. That loop is brutal, but it is also why I keep coming back. If you are thinking about stepping into Steel Soul Mode, let me share what I have learned.
What Is Steel Soul Mode?
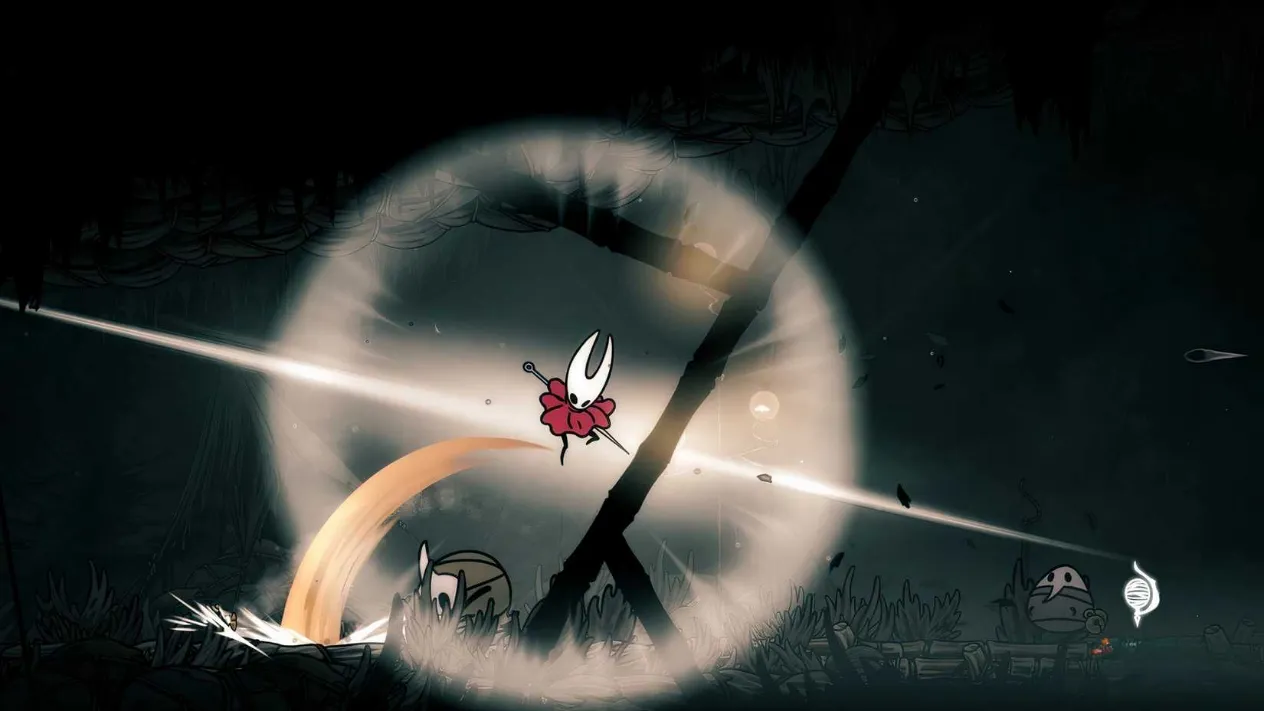
Steel Soul Mode is Hollow Knight: Silksong's hardest test. It features permadeath, so once you die, you restart the entire game. Every enemy and boss you defeated comes back. But this mode does not just recycle the base experience. Bosses can gain new attack patterns. The Moorwing, for example, might push into a fourth or fifth phase that throws even more attacks at you. Enemies may also appear in places you would never expect, forcing you to rethink old routes and old strategies.
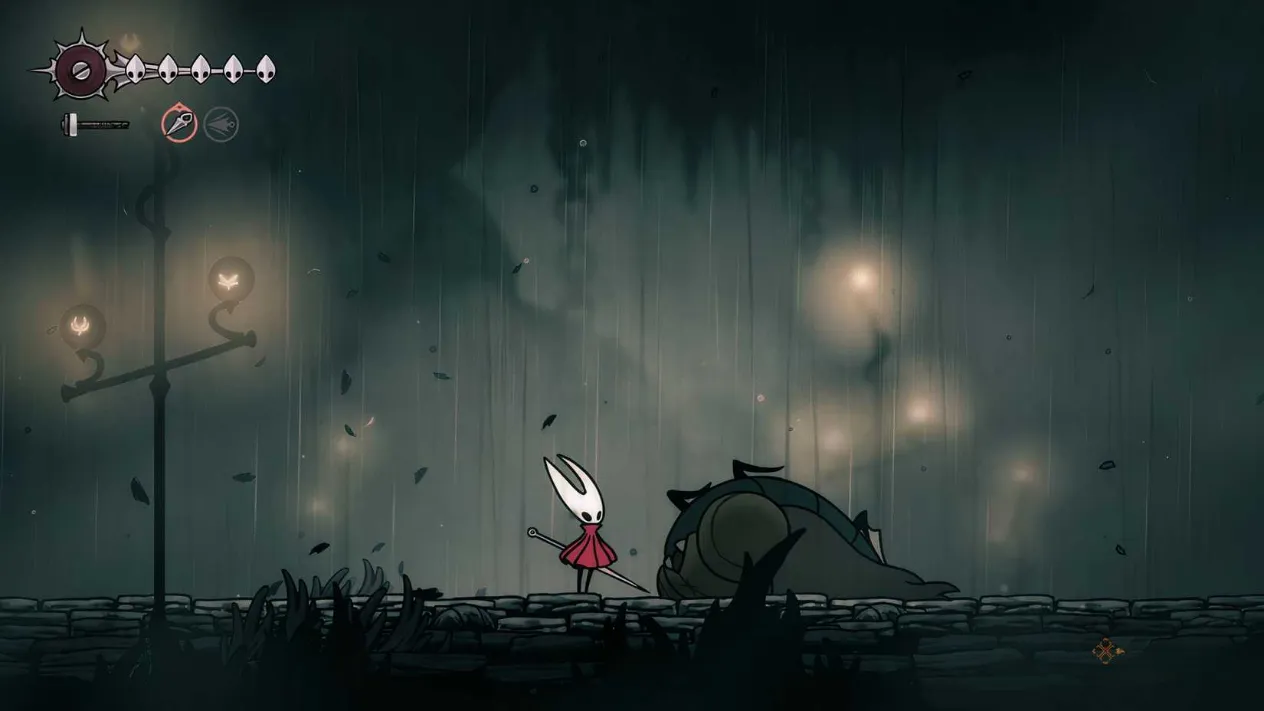
That unpredictability makes every run feel unique. It also makes every mistake feel permanent. ?
How To Unlock Steel Soul Mode
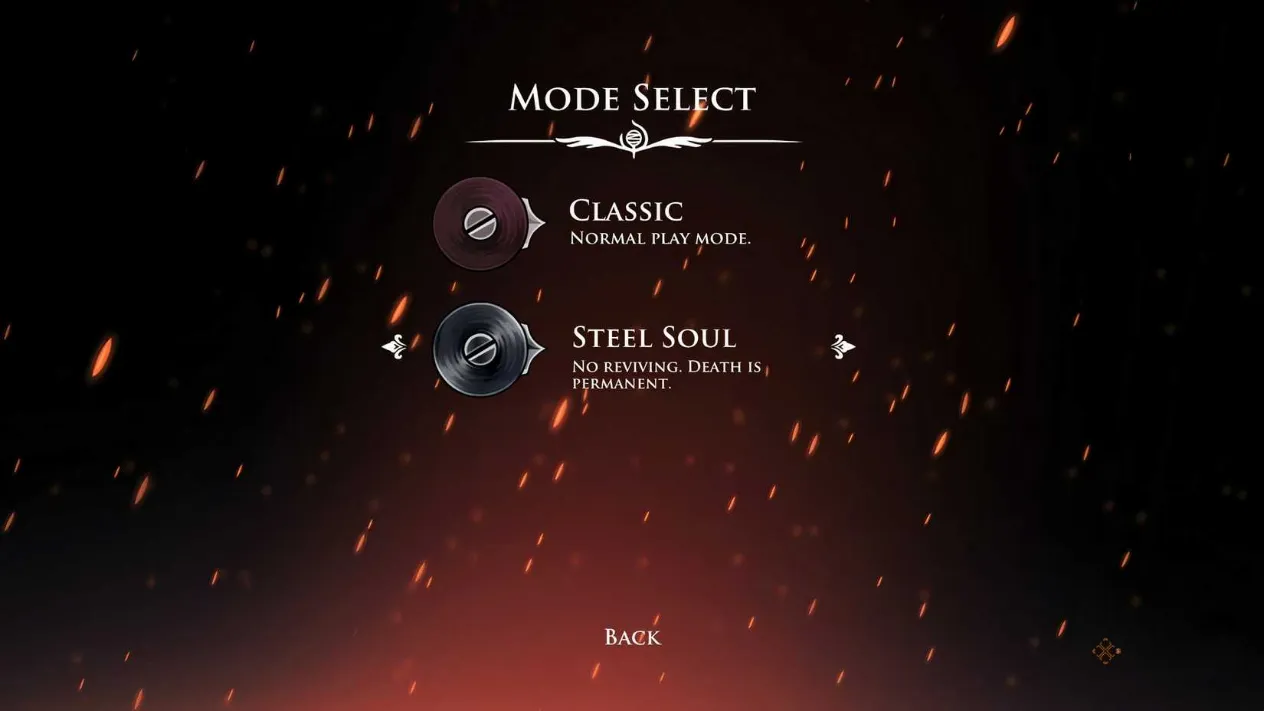
You can unlock Steel Soul Mode in two ways. The straightforward method is to simply play Hollow Knight: Silksong and beat it. The second method is a hidden code, and it is much faster.
On the main menu, go to the Extras option. Once you are in the Extras menu, press the following buttons on your controller's D-pad: Up, Down, Up, Down, Left, Right, Left, Right.
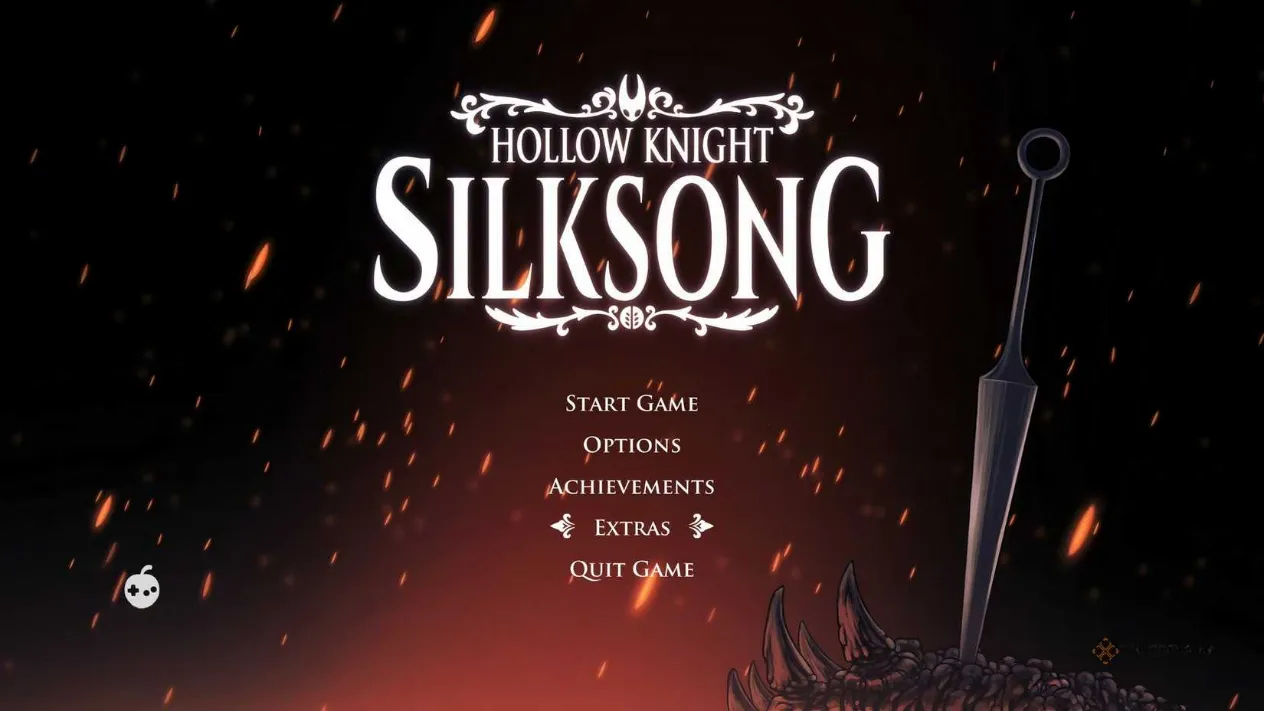
The screen should flash white for a moment. That flash is your signal that the game registered the code. Afterward, when you start a new game, you will see Steel Soul Mode listed under Classic Mode.
Tips To Complete Steel Soul Mode

When you combine a harder playstyle with permadeath, the whole game can feel impossible. Trust me, the first few hours will humble you. But with the right approach, Steel Soul Mode becomes a tense, thrilling dance instead of a wall.
Acquire The Crest Of The Reaper
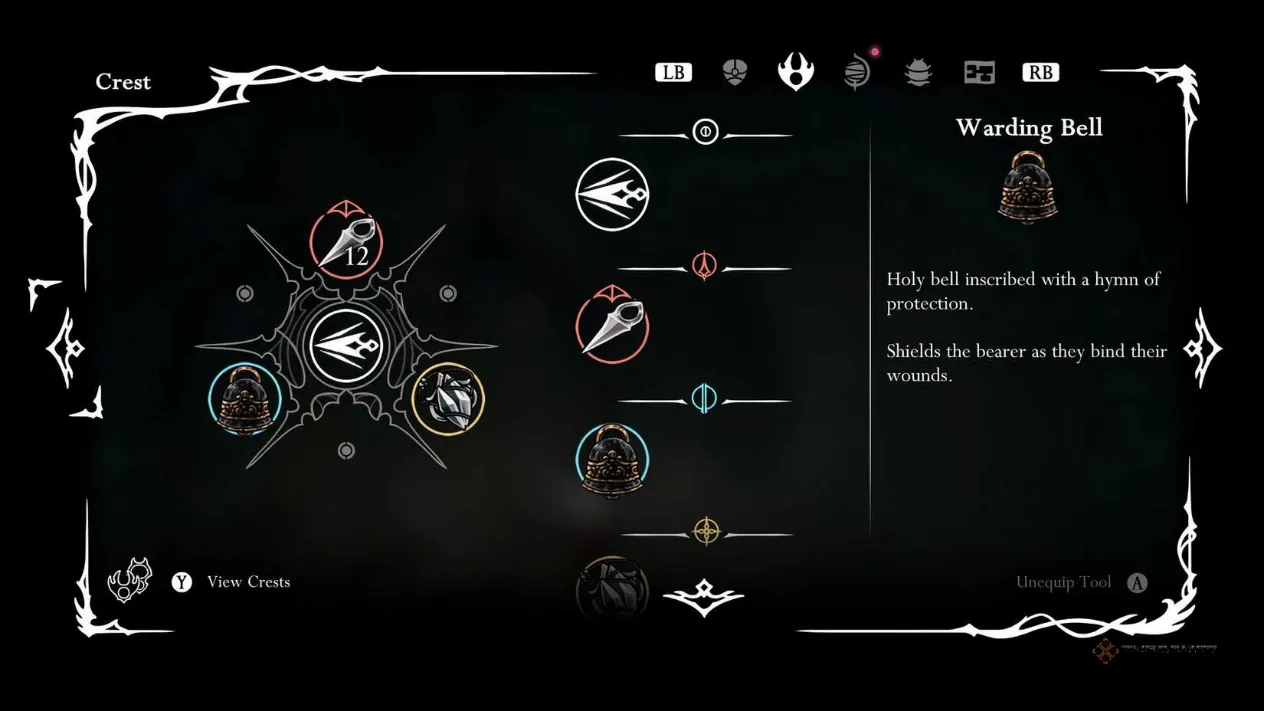
Crests change how Hornet attacks and moves, and some let you equip more tools and items. The Crest of the Reaper is one of the best early picks for Steel Soul Mode because it helps you generate more Silk when you attack enemies.
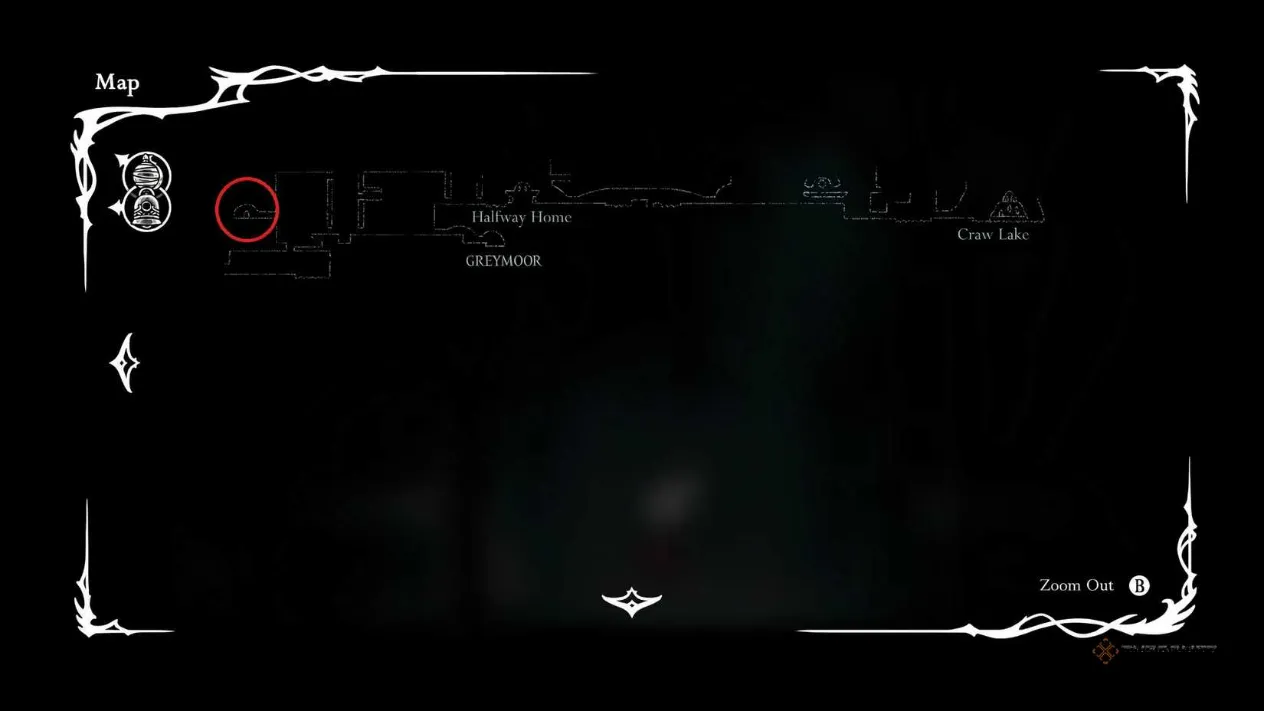
You can find it early in the Greymoor region. It sits north of the Moorwing boss fight and west of the Halfway House. Before you claim it, you need to survive a few waves of enemies.
Whenever you heal, the Crest of the Reaper causes enemies to drop extra Silk orbs. You can collect those orbs by walking or jumping into them. That means you refill your Silk gauge much faster, which lets you heal or use skills more often.
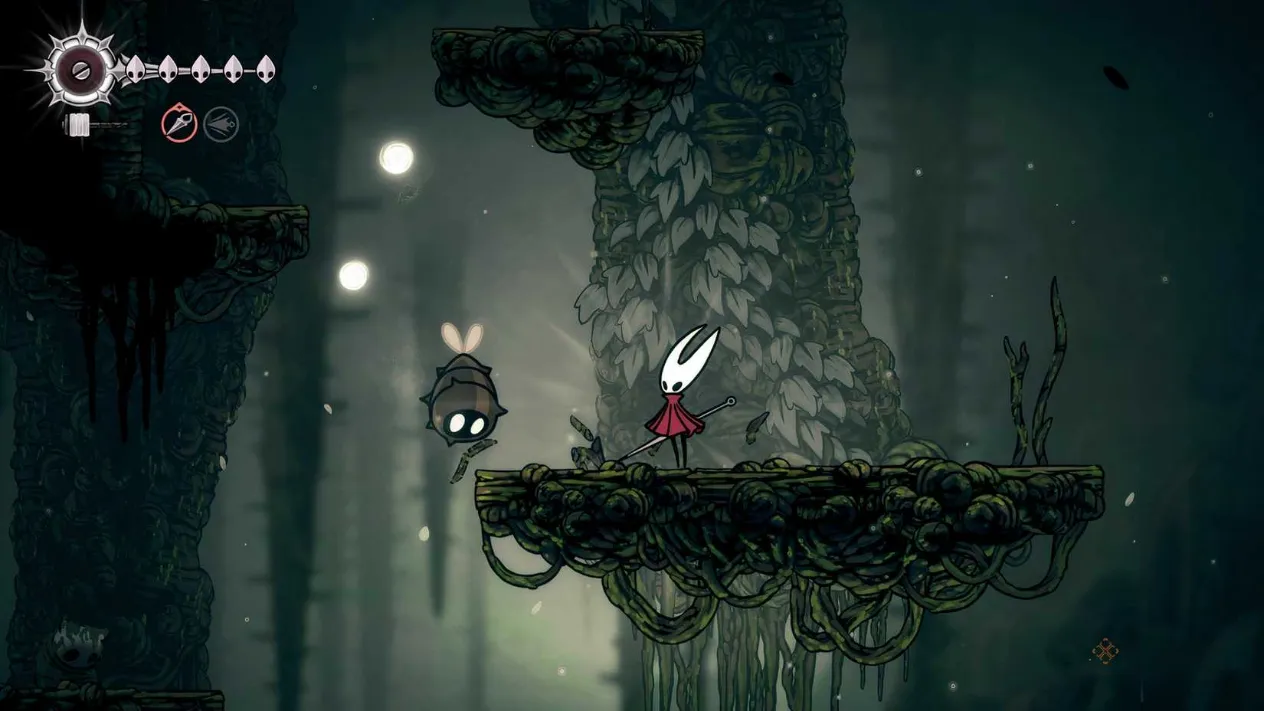
To get the most from this Crest, you might need to stay on the attack. As you hit enemies and successfully heal yourself, you build Silk significantly quicker. It rewards aggression, but only controlled aggression.
Attempt Pogo Attacks
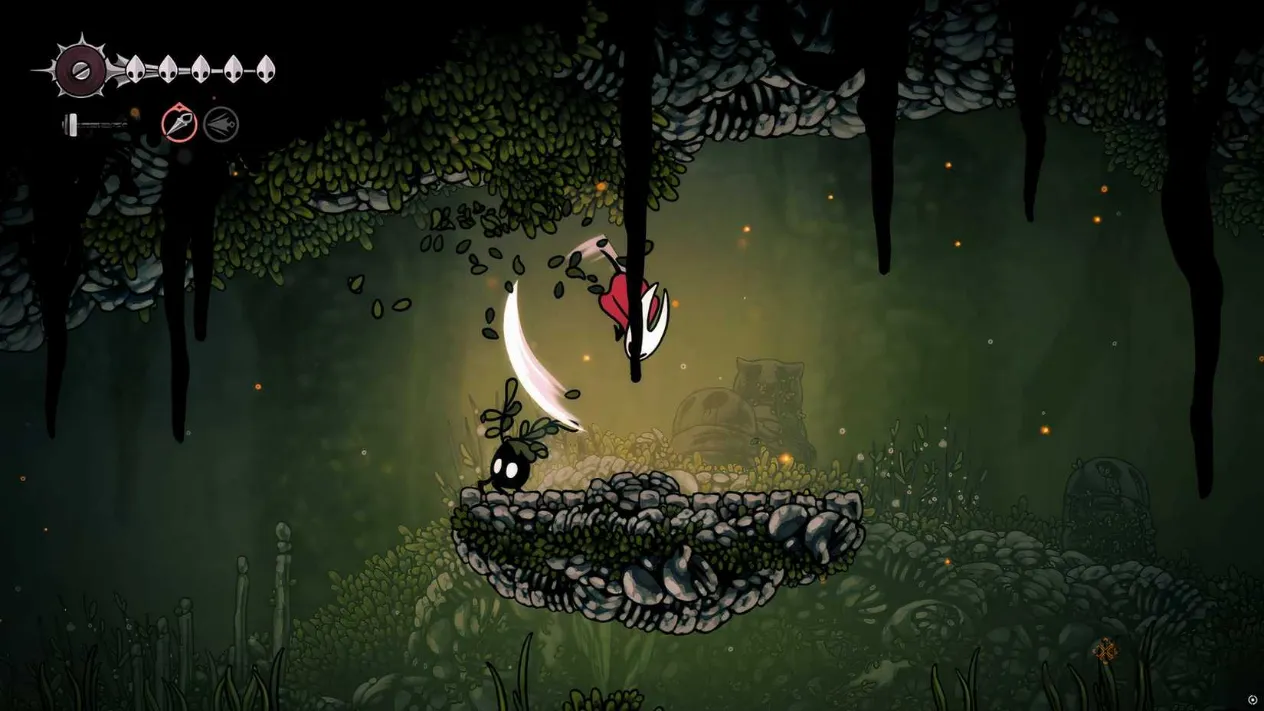
Pogo attacks mean attacking downward while you are in the air. If you land those downward slashes, Hornet does a mini bounce that helps her avoid most attacks. When you time the bounce toward a nearby enemy, you can chain another Pogo attack and get a second bounce.
Those bounces change the flow of a fight. You become more mobile, harder to hit, and better able to control space. In Steel Soul Mode, where one mistake ends the run, that mobility is priceless. ?️
Pick Your Battles
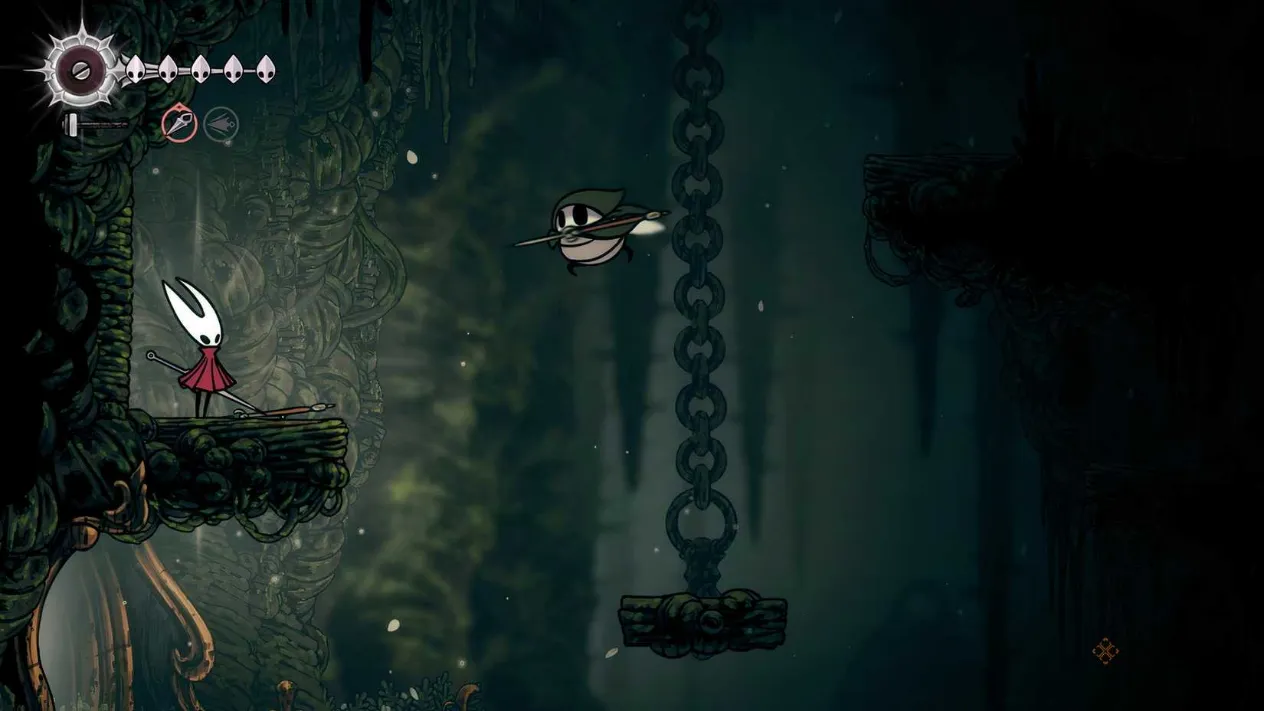
Benches are absent in Steel Soul Mode, so respawning is not an option. That makes every fight a risk. It would be smart to be more selective about what you fight.
Not every enemy needs to be attacked. You can avoid many of them entirely. Attack only when it is necessary. For example, if you are low on Silk and need to heal, you can quickly strike a few enemies to regain the resource.
By prioritizing your battles, you save strength for the fights that matter. Instead of wasting Silk on smaller enemies, you keep a safety net for the larger ones. Honestly, I have lost more runs than I care to admit because I got greedy against a random enemy. You know what? That is the point of Steel Soul Mode. It teaches patience.
Tip
Why It Helps
Crest of the Reaper
Generates extra Silk orbs when healing, letting you heal or use skills more often
Pogo attacks
Bounce off enemies to avoid damage and chain extra hits
Pick your battles
Conserves Silk and reduces the risk of permadeath
Final Thoughts
Steel Soul Mode in Hollow Knight: Silksong is not for everyone. It is punishing, unpredictable, and sometimes downright cruel. But if you love mastering a game to its bones, it is one of the most rewarding challenges you can take on in 2026. Take your time. Learn the patterns. Respect every enemy. And when you fall... well, you know what to do. Get back up, and try again.
I will leave the rest for you to discover. Some lessons only permadeath can teach. ⚔️
Half the battle with a game like Silksong is simply getting your hands on it at a fair price — especially when you are already planning to sink dozens of hours into a permadeath run. Between regional pricing differences, seasonal sales, and DLC bundles that appear out of nowhere, the number on the store page can shift more than you would expect. If you would rather not refresh a dozen storefronts every week hoping to catch a drop, this price tracking tool handles that for you by quietly monitoring the games on your wishlist and letting you know the moment something is actually worth buying.
For anyone who treats gaming as a long-term hobby rather than a one-off purchase, that kind of patience pays off in the same way Steel Soul Mode does. You wait for the right moment, and you commit only when the odds are in your favor.
What Is Steel Soul Mode?
Steel Soul Mode is Hollow Knight: Silksong's hardest test. It features permadeath, so once you die, you restart the entire game. Every enemy and boss you defeated comes back. But this mode does not just recycle the base experience. Bosses can gain new attack patterns. The Moorwing, for example, might push into a fourth or fifth phase that throws even more attacks at you. Enemies may also appear in places you would never expect, forcing you to rethink old routes and old strategies.
That unpredictability makes every run feel unique. It also makes every mistake feel permanent. ?
How To Unlock Steel Soul Mode
You can unlock Steel Soul Mode in two ways. The straightforward method is to simply play Hollow Knight: Silksong and beat it. The second method is a hidden code, and it is much faster.
On the main menu, go to the Extras option. Once you are in the Extras menu, press the following buttons on your controller's D-pad: Up, Down, Up, Down, Left, Right, Left, Right.
The screen should flash white for a moment. That flash is your signal that the game registered the code. Afterward, when you start a new game, you will see Steel Soul Mode listed under Classic Mode.
Tips To Complete Steel Soul Mode
When you combine a harder playstyle with permadeath, the whole game can feel impossible. Trust me, the first few hours will humble you. But with the right approach, Steel Soul Mode becomes a tense, thrilling dance instead of a wall.
Acquire The Crest Of The Reaper
Crests change how Hornet attacks and moves, and some let you equip more tools and items. The Crest of the Reaper is one of the best early picks for Steel Soul Mode because it helps you generate more Silk when you attack enemies.
You can find it early in the Greymoor region. It sits north of the Moorwing boss fight and west of the Halfway House. Before you claim it, you need to survive a few waves of enemies.
Whenever you heal, the Crest of the Reaper causes enemies to drop extra Silk orbs. You can collect those orbs by walking or jumping into them. That means you refill your Silk gauge much faster, which lets you heal or use skills more often.
To get the most from this Crest, you might need to stay on the attack. As you hit enemies and successfully heal yourself, you build Silk significantly quicker. It rewards aggression, but only controlled aggression.
Attempt Pogo Attacks
Pogo attacks mean attacking downward while you are in the air. If you land those downward slashes, Hornet does a mini bounce that helps her avoid most attacks. When you time the bounce toward a nearby enemy, you can chain another Pogo attack and get a second bounce.
Those bounces change the flow of a fight. You become more mobile, harder to hit, and better able to control space. In Steel Soul Mode, where one mistake ends the run, that mobility is priceless. ?️
Pick Your Battles
Benches are absent in Steel Soul Mode, so respawning is not an option. That makes every fight a risk. It would be smart to be more selective about what you fight.
Not every enemy needs to be attacked. You can avoid many of them entirely. Attack only when it is necessary. For example, if you are low on Silk and need to heal, you can quickly strike a few enemies to regain the resource.
By prioritizing your battles, you save strength for the fights that matter. Instead of wasting Silk on smaller enemies, you keep a safety net for the larger ones. Honestly, I have lost more runs than I care to admit because I got greedy against a random enemy. You know what? That is the point of Steel Soul Mode. It teaches patience.
Tip
Why It Helps
Crest of the Reaper
Generates extra Silk orbs when healing, letting you heal or use skills more often
Pogo attacks
Bounce off enemies to avoid damage and chain extra hits
Pick your battles
Conserves Silk and reduces the risk of permadeath
Final Thoughts
Steel Soul Mode in Hollow Knight: Silksong is not for everyone. It is punishing, unpredictable, and sometimes downright cruel. But if you love mastering a game to its bones, it is one of the most rewarding challenges you can take on in 2026. Take your time. Learn the patterns. Respect every enemy. And when you fall... well, you know what to do. Get back up, and try again.
I will leave the rest for you to discover. Some lessons only permadeath can teach. ⚔️
Half the battle with a game like Silksong is simply getting your hands on it at a fair price — especially when you are already planning to sink dozens of hours into a permadeath run. Between regional pricing differences, seasonal sales, and DLC bundles that appear out of nowhere, the number on the store page can shift more than you would expect. If you would rather not refresh a dozen storefronts every week hoping to catch a drop, this price tracking tool handles that for you by quietly monitoring the games on your wishlist and letting you know the moment something is actually worth buying.
For anyone who treats gaming as a long-term hobby rather than a one-off purchase, that kind of patience pays off in the same way Steel Soul Mode does. You wait for the right moment, and you commit only when the odds are in your favor.
No Replies
In the intricate, shadow-draped realm of Hollow Knight: Silksong, wishes are more than mere side quests; they are threads that pull players deeper into the game's hidden corners. Among these, the Fine Pins wish offers a generous payout of Rosaries ?, but it demands a trek across the Choral Chambers. As of 2026, this guide remains the definitive resource for hunters seeking to finish the task without wasting hours. The key lies in knowing exactly which enemies to hunt and where they lurk.
Prerequisites for the Fine Pins Wish:
Defeat the Last Judge
Navigate the Underworks
Unlock the Choral Chambers
Free the First Shrine (clear silk around the bell)
Unlock Songclave
Accept the wish from the wish board
To even receive the Fine Pins wish, players must have progressed significantly. The quest becomes available only after unlocking the Choral Chambers, which itself requires defeating the Last Judge and navigating the Underworks. Once the Choral Chambers are accessible, the path continues. Players must climb the right side of the biome to reach the next boss arena. However, before stepping into that fight, there is a crucial detour: freeing the First Shrine by clearing the silk around the bell located at the top right of the biome. This action unlocks the Songclave area, a hub where the wish board resides. From that board, the Fine Pins wish can be accepted.
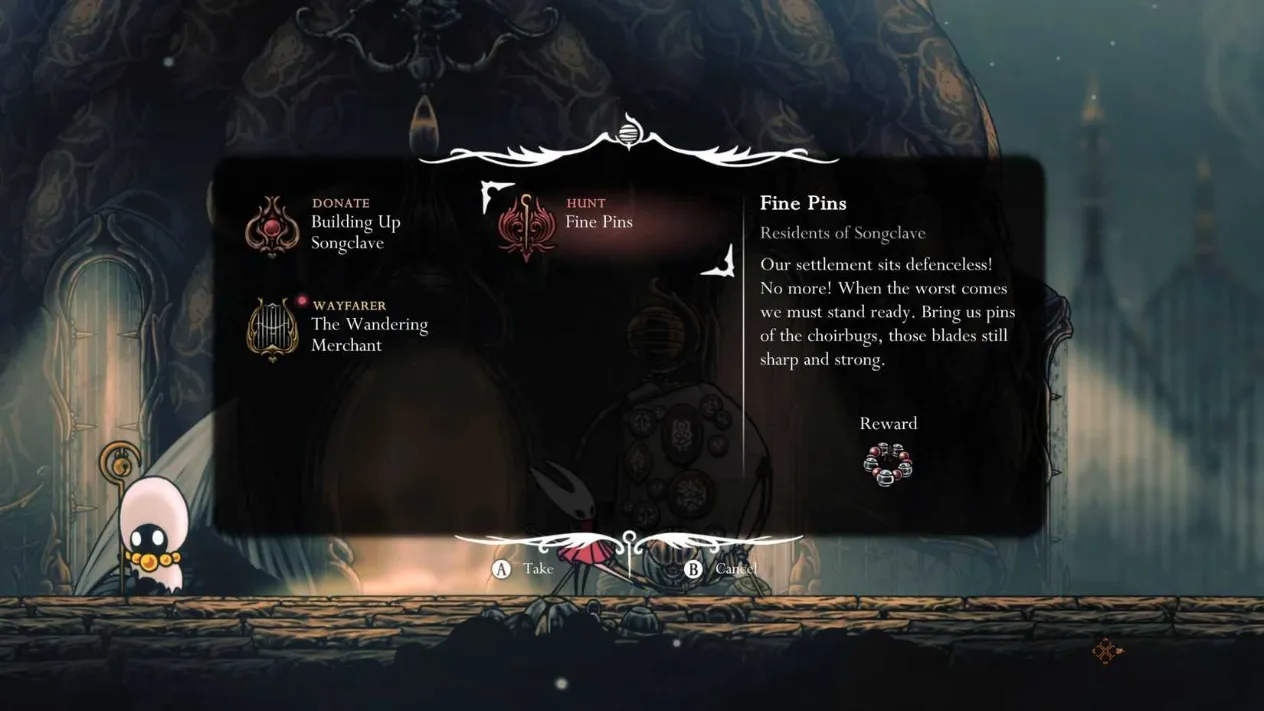
Once the wish is active, the real hunt begins. The objective is straightforward: collect Fine Pins by defeating two specific enemy types in the Choral Chambers—Reed and Choristor. These foes are not bosses, but they are scattered throughout the biome. Finding them can feel like trying to isolate a single instrument in a chaotic orchestra; the environment is noisy with other enemies, but once you recognize their distinct silhouettes, they become easier to spot.
⚔️ The Reed is a flying creature that primarily relies on melee attacks, yet it can also throw its pin as a projectile. More annoyingly, it sometimes parries your attacks and launches a swift counter. To handle a Reed, stay mobile and strike after it commits to an attack or a failed parry. The Choristor, by contrast, resembles a knight and stays grounded. It mixes melee and ranged attacks, and it can leap toward your location while spinning to deal damage. Dodging its spin and punishing the recovery window is the safest approach.
Enemy
Appearance
Combat Behavior
How to Counter
Reed
Flying creature
Melee attacks, can throw its pin, occasionally parries and counterattacks
Stay mobile, attack after it throws or parries
Choristor
Knight-like, ground-based
Melee and ranged attacks, can jump and spin
Keep distance, dodge the spin, punish recovery

Both enemies wield a pin, and when defeated, they have a chance to drop a Fine Pin. This drop is not guaranteed, so players may need to eliminate several of each. The telltale sign of a drop is a distinct white glow emanating from the enemy's body as it falls to the ground. Chasing that glow is akin to following a will-o'-the-wisp through a marsh—brief, beautiful, and easy to lose if you are not quick. Grab it before it disappears.
? For efficient farming, focus on areas with high concentrations of Reed and Choristor. The Choral Chambers have several rooms where these enemies respawn after resting at a bench. A good strategy is to clear a room, return to the nearest bench, and repeat. Because the drop rate is probabilistic, patience is key. The Fine Pins wish is a double-edged sword: it promises a pile of Rosaries, but demands the persistence of a gold panner sifting through riverbed pebbles. Still, the reward is worth it, especially for players saving up for expensive upgrades or tools.
It is also worth noting that the Fine Pins wish does not require a specific number of pins to be turned in—it simply asks for a certain quantity, typically a handful. The exact number may vary, but the process remains the same. As players accumulate pins, they can return to the wish board in Songclave to complete the quest and claim their Rosaries. The amount of Rosaries rewarded is substantial, making this one of the more profitable wishes in the game. For those who have already unlocked fast travel or have a bench nearby, the cycle becomes almost meditative.
Moreover, the Fine Pins wish serves as a microcosm of Silksong's risk-reward philosophy. It does not demand pixel-perfect platforming or a grueling boss fight; instead, it tests the player's knowledge of enemy behavior and map layout. By mastering the Reed's parry timing and the Choristor's spin, players can turn a potential chore into a rhythmic dance. The white glow of a dropped pin becomes a beacon of progress, a small victory in a world that often feels hostile and opaque.
In conclusion, the Fine Pins wish is a perfect example of Silksong's design: a seemingly simple task that rewards game knowledge over raw skill. By unlocking Songclave, identifying Reed and Choristor, and exploiting respawn points, players can turn a potential grind into a brisk, profitable outing. Whether you are a completionist or simply in need of Rosaries, this wish is worth the effort. So sharpen your needle, keep an eye out for that white glow, and may your hunt be swift.
The same instinct that makes a well-planned farming loop satisfying—knowing precisely what you want, where it spawns, and refusing to settle for a worse return—tends to follow players out of the game and into the rest of their library. Patience and savvy pay off in a virtual economy, and they pay off even more when you're spending real money on the games themselves. The best pickups rarely appear at full retail on launch day; they surface quietly during a sale window that most people never notice because nobody told them it was happening.
That gap is exactly what game deals today was built to close. Instead of bouncing between a dozen storefronts, newsletters, and discount trackers in the hope of catching a price drop before it expires, you get one place to scan the current offers across platforms and genres—indie metroidvanias included. If you are the sort of player who would rather map out an efficient route than overpay out of impatience, it is worth a look before your next purchase.
Prerequisites for the Fine Pins Wish:
Defeat the Last Judge
Navigate the Underworks
Unlock the Choral Chambers
Free the First Shrine (clear silk around the bell)
Unlock Songclave
Accept the wish from the wish board
To even receive the Fine Pins wish, players must have progressed significantly. The quest becomes available only after unlocking the Choral Chambers, which itself requires defeating the Last Judge and navigating the Underworks. Once the Choral Chambers are accessible, the path continues. Players must climb the right side of the biome to reach the next boss arena. However, before stepping into that fight, there is a crucial detour: freeing the First Shrine by clearing the silk around the bell located at the top right of the biome. This action unlocks the Songclave area, a hub where the wish board resides. From that board, the Fine Pins wish can be accepted.
Once the wish is active, the real hunt begins. The objective is straightforward: collect Fine Pins by defeating two specific enemy types in the Choral Chambers—Reed and Choristor. These foes are not bosses, but they are scattered throughout the biome. Finding them can feel like trying to isolate a single instrument in a chaotic orchestra; the environment is noisy with other enemies, but once you recognize their distinct silhouettes, they become easier to spot.
⚔️ The Reed is a flying creature that primarily relies on melee attacks, yet it can also throw its pin as a projectile. More annoyingly, it sometimes parries your attacks and launches a swift counter. To handle a Reed, stay mobile and strike after it commits to an attack or a failed parry. The Choristor, by contrast, resembles a knight and stays grounded. It mixes melee and ranged attacks, and it can leap toward your location while spinning to deal damage. Dodging its spin and punishing the recovery window is the safest approach.
Enemy
Appearance
Combat Behavior
How to Counter
Reed
Flying creature
Melee attacks, can throw its pin, occasionally parries and counterattacks
Stay mobile, attack after it throws or parries
Choristor
Knight-like, ground-based
Melee and ranged attacks, can jump and spin
Keep distance, dodge the spin, punish recovery
Both enemies wield a pin, and when defeated, they have a chance to drop a Fine Pin. This drop is not guaranteed, so players may need to eliminate several of each. The telltale sign of a drop is a distinct white glow emanating from the enemy's body as it falls to the ground. Chasing that glow is akin to following a will-o'-the-wisp through a marsh—brief, beautiful, and easy to lose if you are not quick. Grab it before it disappears.
? For efficient farming, focus on areas with high concentrations of Reed and Choristor. The Choral Chambers have several rooms where these enemies respawn after resting at a bench. A good strategy is to clear a room, return to the nearest bench, and repeat. Because the drop rate is probabilistic, patience is key. The Fine Pins wish is a double-edged sword: it promises a pile of Rosaries, but demands the persistence of a gold panner sifting through riverbed pebbles. Still, the reward is worth it, especially for players saving up for expensive upgrades or tools.
It is also worth noting that the Fine Pins wish does not require a specific number of pins to be turned in—it simply asks for a certain quantity, typically a handful. The exact number may vary, but the process remains the same. As players accumulate pins, they can return to the wish board in Songclave to complete the quest and claim their Rosaries. The amount of Rosaries rewarded is substantial, making this one of the more profitable wishes in the game. For those who have already unlocked fast travel or have a bench nearby, the cycle becomes almost meditative.
Moreover, the Fine Pins wish serves as a microcosm of Silksong's risk-reward philosophy. It does not demand pixel-perfect platforming or a grueling boss fight; instead, it tests the player's knowledge of enemy behavior and map layout. By mastering the Reed's parry timing and the Choristor's spin, players can turn a potential chore into a rhythmic dance. The white glow of a dropped pin becomes a beacon of progress, a small victory in a world that often feels hostile and opaque.
In conclusion, the Fine Pins wish is a perfect example of Silksong's design: a seemingly simple task that rewards game knowledge over raw skill. By unlocking Songclave, identifying Reed and Choristor, and exploiting respawn points, players can turn a potential grind into a brisk, profitable outing. Whether you are a completionist or simply in need of Rosaries, this wish is worth the effort. So sharpen your needle, keep an eye out for that white glow, and may your hunt be swift.
The same instinct that makes a well-planned farming loop satisfying—knowing precisely what you want, where it spawns, and refusing to settle for a worse return—tends to follow players out of the game and into the rest of their library. Patience and savvy pay off in a virtual economy, and they pay off even more when you're spending real money on the games themselves. The best pickups rarely appear at full retail on launch day; they surface quietly during a sale window that most people never notice because nobody told them it was happening.
That gap is exactly what game deals today was built to close. Instead of bouncing between a dozen storefronts, newsletters, and discount trackers in the hope of catching a price drop before it expires, you get one place to scan the current offers across platforms and genres—indie metroidvanias included. If you are the sort of player who would rather map out an efficient route than overpay out of impatience, it is worth a look before your next purchase.
No Replies
As of 2026, Hollow Knight: Silksong presents players with seven unique crests and more than sixty tools, a combination that can overwhelm even veterans. By the time the final act arrives, the sheer number of options makes it difficult to know which crest, Silk Skills, and support tools will produce the most reliable results. The following endgame build has proven itself as one of the strongest Act 3 configurations available. It focuses on the Shaman Crest, electric Silk Skills, and a compact set of utility tools that keep Hornet alive while she shreds bosses. Most of the setup can be assembled during Act 2, but its centerpiece, Pale Nails, is locked behind Act 3 progression. As a result, this build is intended for players who have already reached the late game and are preparing for the toughest encounters in Pharloom.

The Shaman Crest and Its Three Silk Skills
The foundation of the build is the Shaman Crest, which players can find in the Ruined Chapel area of the Moss Grotto. It only becomes available after they have unlocked the Silk Soar ability in the Abyss. The Shaman Crest allows players to equip three Silk Skills at the same time, making it ideal for a setup that relies on spending silk aggressively. The three recommended Silk Skills are Pale Nails, Sharpdart, and Cross Stitch.
Pale Nails is the centerpiece. Players can obtain it during Act 3 by binding Grand Mother Silk's arm at the top of The Cradle. It delivers massive damage and scales beautifully with Volt Filament. Sharpdart can be acquired much earlier by binding the statue behind the Needolin door on the west side of the Wormways. It gives Hornet a fast way to reposition behind enemies and dodge incoming attacks. Cross Stitch comes from defeating the Phantom boss in the Exhaust Organ area of Bilewater. It adds a parry option, which is invaluable against aggressive bosses.
Blue and Yellow Slots
Assuming the player already has both Vesticrests and has used Memory Lockets to unlock the two blue slots on the Shaman Crest, the build should leave three blue slots and one yellow slot. The yellow slot is almost always reserved for the Compass, which makes traversing the world of Pharloom far less tedious. It is not a combat tool, but the quality-of-life improvement is difficult to ignore.
For the blue slots, Volt Filament is mandatory. It imbues Silk Skills with an electric charge, and that charge is what turns the build from strong into broken. Weavelight is the next best choice, as it improves silk regeneration and keeps the skill rotation flowing. Wispfire Lantern adds passive damage, which helps during both exploration and boss fights. If the player has collected enough Spool Fragments, Spool Extender can replace Wispfire Lantern for additional silk capacity.
Slot
Tool
Purpose
Crest
Shaman Crest
Enables three Silk Skills
White Slot #1
Sharpdart
Mobility, repositioning, and evasion
White Slot #2
Pale Nails
Primary damage dealer
White Slot #3
Cross Stitch
Parrying and defense
Blue Slot #1
Volt Filament
Adds electric charge to Silk Skills
Blue Slot #2
Weavelight
Improves silk regeneration
Blue Slot #3
Wispfire Lantern
Passive damage; swap for Spool Extender if needed
Yellow Slot
Compass
Map traversal and navigation
How the Build Plays
The gameplay loop is simple but devastating. Hornet builds silk, then spends it on shock-imbued Silk Skills. Pale Nails does most of the heavy lifting, while Sharpdart covers mobility and Cross Stitch offers defensive parries. Volt Filament ensures every skill carries extra damage. Weavelight sustains the rotation, and Wispfire Lantern chips away at enemies between attacks. Compass keeps the player oriented, though it can be swapped out in challenge runs if map knowledge is sufficient.
The build's main weakness is its late-game requirement. Pale Nails cannot be acquired until Act 3, so players in Act 1 or early Act 2 should treat this as a target rather than an immediate solution. Once assembled, however, the setup can melt bosses and make many of Silksong's hardest fights far more manageable. For 2026 players returning to Pharloom or pushing through the final act for the first time, this Shaman Crest build remains a top-tier choice.
Quick Reference
Crest: Shaman Crest
Silk Skills: Pale Nails, Sharpdart, Cross Stitch
Blue Tools: Volt Filament, Weavelight, Wispfire Lantern (or Spool Extender)
Yellow Tool: Compass
Best For: Act 3 boss fights, endgame progression, and high-damage Silk Skill spam
Players who prefer a more defensive approach can adjust the blue slots, but the core of the build should remain intact. The Shaman Crest, Pale Nails, and Volt Filament form an exceptionally powerful trio, and the supporting tools only make the setup more consistent. In a game with so many moving parts, this build stands out as a clear and effective answer to Silksong's toughest challenges.
Getting the most out of a build like this often comes down to the hardware on the other side of the screen. Tight parry timings and fast Silk Skill rotations feel noticeably easier with a responsive controller or a low-latency display, and tracking down a fair price on those upgrades can be almost as much of a grind as the game itself. Prices bounce around constantly between storefronts, particularly during seasonal sales, so it usually pays to watch an item over a few weeks instead of buying at the first number you see.
That is where this price tracking tool earns its place. DealNest lets you follow a product over time and check whether a discount is genuinely worth acting on, which is handy whether you are replacing a worn-out controller, stocking up on spare thumbsticks, or picking up a copy of the game for a friend. A little patience on the shopping side can stretch the same budget a lot further.
The Shaman Crest and Its Three Silk Skills
The foundation of the build is the Shaman Crest, which players can find in the Ruined Chapel area of the Moss Grotto. It only becomes available after they have unlocked the Silk Soar ability in the Abyss. The Shaman Crest allows players to equip three Silk Skills at the same time, making it ideal for a setup that relies on spending silk aggressively. The three recommended Silk Skills are Pale Nails, Sharpdart, and Cross Stitch.
Pale Nails is the centerpiece. Players can obtain it during Act 3 by binding Grand Mother Silk's arm at the top of The Cradle. It delivers massive damage and scales beautifully with Volt Filament. Sharpdart can be acquired much earlier by binding the statue behind the Needolin door on the west side of the Wormways. It gives Hornet a fast way to reposition behind enemies and dodge incoming attacks. Cross Stitch comes from defeating the Phantom boss in the Exhaust Organ area of Bilewater. It adds a parry option, which is invaluable against aggressive bosses.
Blue and Yellow Slots
Assuming the player already has both Vesticrests and has used Memory Lockets to unlock the two blue slots on the Shaman Crest, the build should leave three blue slots and one yellow slot. The yellow slot is almost always reserved for the Compass, which makes traversing the world of Pharloom far less tedious. It is not a combat tool, but the quality-of-life improvement is difficult to ignore.
For the blue slots, Volt Filament is mandatory. It imbues Silk Skills with an electric charge, and that charge is what turns the build from strong into broken. Weavelight is the next best choice, as it improves silk regeneration and keeps the skill rotation flowing. Wispfire Lantern adds passive damage, which helps during both exploration and boss fights. If the player has collected enough Spool Fragments, Spool Extender can replace Wispfire Lantern for additional silk capacity.
Slot
Tool
Purpose
Crest
Shaman Crest
Enables three Silk Skills
White Slot #1
Sharpdart
Mobility, repositioning, and evasion
White Slot #2
Pale Nails
Primary damage dealer
White Slot #3
Cross Stitch
Parrying and defense
Blue Slot #1
Volt Filament
Adds electric charge to Silk Skills
Blue Slot #2
Weavelight
Improves silk regeneration
Blue Slot #3
Wispfire Lantern
Passive damage; swap for Spool Extender if needed
Yellow Slot
Compass
Map traversal and navigation
How the Build Plays
The gameplay loop is simple but devastating. Hornet builds silk, then spends it on shock-imbued Silk Skills. Pale Nails does most of the heavy lifting, while Sharpdart covers mobility and Cross Stitch offers defensive parries. Volt Filament ensures every skill carries extra damage. Weavelight sustains the rotation, and Wispfire Lantern chips away at enemies between attacks. Compass keeps the player oriented, though it can be swapped out in challenge runs if map knowledge is sufficient.
The build's main weakness is its late-game requirement. Pale Nails cannot be acquired until Act 3, so players in Act 1 or early Act 2 should treat this as a target rather than an immediate solution. Once assembled, however, the setup can melt bosses and make many of Silksong's hardest fights far more manageable. For 2026 players returning to Pharloom or pushing through the final act for the first time, this Shaman Crest build remains a top-tier choice.
Quick Reference
Crest: Shaman Crest
Silk Skills: Pale Nails, Sharpdart, Cross Stitch
Blue Tools: Volt Filament, Weavelight, Wispfire Lantern (or Spool Extender)
Yellow Tool: Compass
Best For: Act 3 boss fights, endgame progression, and high-damage Silk Skill spam
Players who prefer a more defensive approach can adjust the blue slots, but the core of the build should remain intact. The Shaman Crest, Pale Nails, and Volt Filament form an exceptionally powerful trio, and the supporting tools only make the setup more consistent. In a game with so many moving parts, this build stands out as a clear and effective answer to Silksong's toughest challenges.
Getting the most out of a build like this often comes down to the hardware on the other side of the screen. Tight parry timings and fast Silk Skill rotations feel noticeably easier with a responsive controller or a low-latency display, and tracking down a fair price on those upgrades can be almost as much of a grind as the game itself. Prices bounce around constantly between storefronts, particularly during seasonal sales, so it usually pays to watch an item over a few weeks instead of buying at the first number you see.
That is where this price tracking tool earns its place. DealNest lets you follow a product over time and check whether a discount is genuinely worth acting on, which is handy whether you are replacing a worn-out controller, stocking up on spare thumbsticks, or picking up a copy of the game for a friend. A little patience on the shopping side can stretch the same budget a lot further.
No Replies
By 2026, the grand strategy genre has become a beautiful black hole for anyone with a spare evening and a weakness for maps. Mara, a longtime armchair emperor, sat down after dinner to play one more turn. When she finally looked up, the sun was rising, her coffee was cold, and she had accidentally redrawn the borders of three nations. That is the magic of these games: they do not just ask for attention; they take it hostage. Managing economies, waging wars, and forming alliances are the whole nine yards, and players would not have it any other way.
Victoria 3: The Victorian Sandbox Finally Blossomed
Victoria 3 had a difficult launch, with fans lamenting the lack of content in this title. Thankfully, like most other Paradox Interactive games, it took a few years and many updates to let fans enjoy a ton of things to do in this title, which takes place during the Victorian Era. By 2026, the game has grown into a proper economic and political playground. Helping a nation's economy prosper, forming alliances, dealing with potential wars, and interacting with the many gameplay pillars of this title never ceases to be engaging. Players fascinated by this historical era will love reshaping the world in their image in Victoria 3. The learning curve can feel like a slap in the face, but once it clicks, it is pure velvet.
Endless Legend and the Fantasy 4X Hook
Endless Legend is perfect for players who want to enjoy a game like Civilization with a fantasy twist. The unique factions of this title ensure that every playthrough feels different. With a whopping fourteen factions to choose from, players will never get bored with this amazing grand strategy game. Hopefully, Endless Legend 2 will continue this title's legacy and draw more eyes toward the franchise. In 2026, the original still holds up like a well-forged sword, and its faction quests remain some of the most inventive in the genre.
Hearts of Iron 3 vs Hearts of Iron 4: Control Freaks Rejoice
While Hearts of Iron 4 may be the more modern experience, giving out loose tactical instructions and relying on the AI to secure a victory can make for a frustrating affair. This is why players loved Hearts of Iron 3, since it gave players more control over the developments on the battlefield. Getting into this title can be challenging, but players who do not mind the learning curve will eventually grow to love the tactical brilliance of Hearts of Iron 3. Ensuring that history is not altered in World War 2 or trying to change the course of history are both fun ways to play this military grand strategy game. Sometimes the old warhorse still knows the best tricks.
Total War: Warhammer 2
The Total War games have always been focused on real-world scenarios, which is why the collaboration with Warhammer came as a pleasant surprise to fans. The first game showed a ton of promise that was more than fulfilled in Total War: Warhammer 2. Players will find it hard to tear themselves away from the screen as they get invested in the game's excellent battles and fun grand strategy elements. The fact that most people consider Total War: Warhammer 2 to be one of the series' best games speaks volumes when it comes to the excellence of this video game. Even in 2026, when the trilogy is complete, many veterans still boot up the second game for that sweet, chaotic campaign.
Europa Universalis 4: The Eternal Time Sink
To this day, there is something about Europa Universalis 4 that makes it impossible for gamers to put down. The geopolitical conflicts are incredible to play around with as the world transitions to modern times and several superpowers stake their claim. Colonizing territories, managing the nation's economy, and engaging in the tactful art of diplomacy are all a huge part of what makes Europa Universalis 4 so special. Players will see the hours fly by as they control the nation of their choice and help it become more dominant than ever. It is the kind of game that makes a person say, I will just fix this one border, and then accidentally annex half a continent.
Stellaris: Sci-Fi Domination with a Role-Playing Twist
Stellaris was the first time Paradox Interactive developed a grand strategy game in a fictional world. The sci-fi trappings of this game, coupled with some surprisingly fun role-playing elements, ensure that this game of intergalactic dominance will be a blast for fans to engage with. Slowly learning the ropes via a well-structured beginning is way easier than fans would assume and makes Stellaris one of the best beginner-friendly grand strategy games. As things start becoming more complex, players should have the patience and knowledge needed to move past the game's challenging moments. By 2026, its endless updates and mods have turned it into a galaxy-sized rabbit hole.
Civilization 7 and the Comfort of Civilization 6
Civilization 7 has experienced a rough launch, and it will likely take a while for this game to reach the same heights as its predecessors. Even if players may be disappointed right now, they can still return to Civilization 6 to enjoy this series at its very best. The sheer amount of content in this game is impressive, allowing players to control different leaders and turn their nation into a superpower everyone will fear. The immense variety of difficulty options ensures that players can ease themselves into the experience before they decide to truly challenge themselves. For many, Civilization 6 remains the reliable old friend who always has a seat at the table.
Crusader Kings 3: Scheming, Stress, and Succession
Crusader Kings 3 burst onto the scene as one of the best and most approachable grand strategy games in the genre. A huge reason for this stems from a great tutorial and ingenious tooltips to give players the information drip they need to understand how this game works. What really helps Crusader Kings 3 shine is its excellent role-playing, which has no business being so engaging. Players must make decisions in line with their character's personality or risk Stress buildup, which can lead to severe negative repercussions later down the line. It is a game where murdering your uncle can be a legitimate diplomatic strategy, and somehow that makes perfect sense.
Quick Comparison Table
Game
Main Hook
Best For
Victoria 3
Victorian economy and politics
History fans who love spreadsheets
Endless Legend
Fantasy 4X with unique factions
Players wanting Civ with magic
Hearts of Iron 3
Deep battlefield control
Tactical control freaks
Total War: Warhammer 2
Epic fantasy battles plus campaign
Warhammer and battle lovers
Europa Universalis 4
Colonization and diplomacy
Map painters and schemers
Stellaris
Sci-fi empire building
Newcomers and role-players
Civilization 6
Classic 4X turn-based play
Anyone craving one more turn
Crusader Kings 3
Dynasty role-playing and intrigue
Story-driven strategists
The Bottom Line
Grand strategy games are meant to be addictive experiences that players can enjoy for hours on end. Managing economies, waging wars, and forming alliances are just a few of the many ways fans can lose themselves in these massive titles without even realizing how much time is passing in the real world. Once players get past the initial learning curve, mastering these games makes for a great time as players do everything in their power to become a superpower. From grand strategy games set during real-world time periods to ones that delve into the realm of fiction, these games are a blast to play as players become enamored with their gameplay loops. In 2026, the genre is still alive, kicking, and dangerously good at stealing weekends. So go ahead, boot up that save file, and promise yourself just one more turn. The sun will understand. ?⚔️
Of course, diving into any of these titles—especially the older ones with a decade of expansions stacked on top—can get surprisingly pricey. Between base games, DLC packs, and seasonal sales that never quite line up when you actually want them, the cost of building a proper grand strategy library adds up fast. It helps to do a little recon before committing, which is exactly the kind of patience these games teach you anyway.
If you would rather spend your budget on another hundred hours of map painting than on full retail price, it pays to compare prices here at DealNest. A quick look across retailers can turn that "maybe later" purchase into tonight's campaign, so you can get back to the important decisions—like whether to betray an ally or just quietly outlast them.
Victoria 3: The Victorian Sandbox Finally Blossomed
Victoria 3 had a difficult launch, with fans lamenting the lack of content in this title. Thankfully, like most other Paradox Interactive games, it took a few years and many updates to let fans enjoy a ton of things to do in this title, which takes place during the Victorian Era. By 2026, the game has grown into a proper economic and political playground. Helping a nation's economy prosper, forming alliances, dealing with potential wars, and interacting with the many gameplay pillars of this title never ceases to be engaging. Players fascinated by this historical era will love reshaping the world in their image in Victoria 3. The learning curve can feel like a slap in the face, but once it clicks, it is pure velvet.
Endless Legend and the Fantasy 4X Hook
Endless Legend is perfect for players who want to enjoy a game like Civilization with a fantasy twist. The unique factions of this title ensure that every playthrough feels different. With a whopping fourteen factions to choose from, players will never get bored with this amazing grand strategy game. Hopefully, Endless Legend 2 will continue this title's legacy and draw more eyes toward the franchise. In 2026, the original still holds up like a well-forged sword, and its faction quests remain some of the most inventive in the genre.
Hearts of Iron 3 vs Hearts of Iron 4: Control Freaks Rejoice
While Hearts of Iron 4 may be the more modern experience, giving out loose tactical instructions and relying on the AI to secure a victory can make for a frustrating affair. This is why players loved Hearts of Iron 3, since it gave players more control over the developments on the battlefield. Getting into this title can be challenging, but players who do not mind the learning curve will eventually grow to love the tactical brilliance of Hearts of Iron 3. Ensuring that history is not altered in World War 2 or trying to change the course of history are both fun ways to play this military grand strategy game. Sometimes the old warhorse still knows the best tricks.
Total War: Warhammer 2
The Total War games have always been focused on real-world scenarios, which is why the collaboration with Warhammer came as a pleasant surprise to fans. The first game showed a ton of promise that was more than fulfilled in Total War: Warhammer 2. Players will find it hard to tear themselves away from the screen as they get invested in the game's excellent battles and fun grand strategy elements. The fact that most people consider Total War: Warhammer 2 to be one of the series' best games speaks volumes when it comes to the excellence of this video game. Even in 2026, when the trilogy is complete, many veterans still boot up the second game for that sweet, chaotic campaign.
Europa Universalis 4: The Eternal Time Sink
To this day, there is something about Europa Universalis 4 that makes it impossible for gamers to put down. The geopolitical conflicts are incredible to play around with as the world transitions to modern times and several superpowers stake their claim. Colonizing territories, managing the nation's economy, and engaging in the tactful art of diplomacy are all a huge part of what makes Europa Universalis 4 so special. Players will see the hours fly by as they control the nation of their choice and help it become more dominant than ever. It is the kind of game that makes a person say, I will just fix this one border, and then accidentally annex half a continent.
Stellaris: Sci-Fi Domination with a Role-Playing Twist
Stellaris was the first time Paradox Interactive developed a grand strategy game in a fictional world. The sci-fi trappings of this game, coupled with some surprisingly fun role-playing elements, ensure that this game of intergalactic dominance will be a blast for fans to engage with. Slowly learning the ropes via a well-structured beginning is way easier than fans would assume and makes Stellaris one of the best beginner-friendly grand strategy games. As things start becoming more complex, players should have the patience and knowledge needed to move past the game's challenging moments. By 2026, its endless updates and mods have turned it into a galaxy-sized rabbit hole.
Civilization 7 and the Comfort of Civilization 6
Civilization 7 has experienced a rough launch, and it will likely take a while for this game to reach the same heights as its predecessors. Even if players may be disappointed right now, they can still return to Civilization 6 to enjoy this series at its very best. The sheer amount of content in this game is impressive, allowing players to control different leaders and turn their nation into a superpower everyone will fear. The immense variety of difficulty options ensures that players can ease themselves into the experience before they decide to truly challenge themselves. For many, Civilization 6 remains the reliable old friend who always has a seat at the table.
Crusader Kings 3: Scheming, Stress, and Succession
Crusader Kings 3 burst onto the scene as one of the best and most approachable grand strategy games in the genre. A huge reason for this stems from a great tutorial and ingenious tooltips to give players the information drip they need to understand how this game works. What really helps Crusader Kings 3 shine is its excellent role-playing, which has no business being so engaging. Players must make decisions in line with their character's personality or risk Stress buildup, which can lead to severe negative repercussions later down the line. It is a game where murdering your uncle can be a legitimate diplomatic strategy, and somehow that makes perfect sense.
Quick Comparison Table
Game
Main Hook
Best For
Victoria 3
Victorian economy and politics
History fans who love spreadsheets
Endless Legend
Fantasy 4X with unique factions
Players wanting Civ with magic
Hearts of Iron 3
Deep battlefield control
Tactical control freaks
Total War: Warhammer 2
Epic fantasy battles plus campaign
Warhammer and battle lovers
Europa Universalis 4
Colonization and diplomacy
Map painters and schemers
Stellaris
Sci-fi empire building
Newcomers and role-players
Civilization 6
Classic 4X turn-based play
Anyone craving one more turn
Crusader Kings 3
Dynasty role-playing and intrigue
Story-driven strategists
The Bottom Line
Grand strategy games are meant to be addictive experiences that players can enjoy for hours on end. Managing economies, waging wars, and forming alliances are just a few of the many ways fans can lose themselves in these massive titles without even realizing how much time is passing in the real world. Once players get past the initial learning curve, mastering these games makes for a great time as players do everything in their power to become a superpower. From grand strategy games set during real-world time periods to ones that delve into the realm of fiction, these games are a blast to play as players become enamored with their gameplay loops. In 2026, the genre is still alive, kicking, and dangerously good at stealing weekends. So go ahead, boot up that save file, and promise yourself just one more turn. The sun will understand. ?⚔️
Of course, diving into any of these titles—especially the older ones with a decade of expansions stacked on top—can get surprisingly pricey. Between base games, DLC packs, and seasonal sales that never quite line up when you actually want them, the cost of building a proper grand strategy library adds up fast. It helps to do a little recon before committing, which is exactly the kind of patience these games teach you anyway.
If you would rather spend your budget on another hundred hours of map painting than on full retail price, it pays to compare prices here at DealNest. A quick look across retailers can turn that "maybe later" purchase into tonight's campaign, so you can get back to the important decisions—like whether to betray an ally or just quietly outlast them.
No Replies
In 2026, Hollow Knight: Silksong continues to be a labyrinthine metroidvania where backtracking is not a chore but a conversation with earlier failure. Among its most intriguing optional pursuits are the four Simple Keys, items scattered across the first two Acts. These keys do not advance the critical path; instead, they function like a locksmith's skeleton key for the game's hidden narratives, opening doors that yield NPC storylines, new routes, and substantial Rosary caches. For players who measure progress in map percentage and lore fragments, locating every Simple Key remains a rite of passage. The following account, compiled from community exploration and in-game discovery, details where each key rests and what each lock reveals.
The Four Simple Keys
Key
Location
Acquisition
Cost or Requirement
1
Bone Bottom Shop
Purchase from the shopkeeper beside the Wish Board
500 Rosaries
2
Sinner's Road
Defeat the Roachkeeper after a climbing puzzle near the top
Access to Sinner's Road above Halfway Home in Greymoor
3
Sands of Karak
Found on a bench beside a poor bug
Requires Hornet's grappling hook in Act 2; reach via Blasted Steps west
4
Jubilana the Merchant
Purchase from Jubilana at the First Shrine in the Citadel
Complete Wish "The Wandering Merchant"; 650 Rosaries
The first key is the most straightforward, yet it demands patience. In Bone Bottom, the shopkeeper next to the Wish Board offers the Simple Key for 500 Rosaries. That price is a small fortune in the early hours, when every Rosary feels like a bead of sweat. Players who prioritize the key must delay other purchases, turning the shop into a study in opportunity cost.
The second key hides in Sinner's Road, a vertical gauntlet above Halfway Home in Greymoor. After reaching the upper reaches and potentially repairing the bench, adventurers face a compact climbing puzzle. At its summit waits a Roachkeeper. Killing this foe drops the key, a reward that feels less like a drop and more like a toll collected by a hostile gatekeeper.
The third key resides in the Sands of Karak, a region unlocked after obtaining Hornet's grappling hook in Act 2. Access comes through the Blasted Steps on the far west of the map. The Sands themselves are a traversal puzzle of staggering precision, a desert that behaves like a living combination lock. After encountering the elevator that returns to the Grand Gate's entrance, players head east through a blocked-off door. Inside, a bench holds a poor bug and the key. The scene is quiet, almost mournful, as if the key were a relic left by someone who could not escape.
The fourth key requires narrative legwork. In the Citadel, next to the First Shrine, Jubilana the Merchant sells the final Simple Key for 650 Rosaries. Before she does, players must pick up the Wish "The Wandering Merchant" and track her down in the Citadel. Once that quest is complete, she relocates to the First Shrine. The key is expensive, but it is also a symbol of a relationship earned rather than a transaction forced.
The Four Doors They Unlock
Door
Location
Reward or Consequence
Deep Docks
Underground, lava-filled ruins
Access to a challenging area with stronger enemies and a boss
Sinner's Road
Immediately south of the area's bench
Frees the jailed Green Prince
Wormways
Northeastern side of Bone Bottom
Two routes: bottom path with worm vomit, or higher path with volatile earth; leads deeper into Wormways
High Hills
Just before the Gauntlet fight in the Citadel
A large cache of Rosaries rather than a new area or NPC
The first door most players encounter sits in Deep Docks, an underground ruin of lava and grating. After unlocking the fast travel point, the path heads east and down grates opened by levers. Continuing east over lava leads to a large locked door. The area beyond is no gentle tutorial; its boss and enemies are far stronger than what early-game travelers have faced. The door is a warning wrapped in a reward.
The second door lies in Sinner's Road, immediately south of the bench. Using the Simple Key found in the same region opens the cell and frees the Green Prince. This is one of Silksong's clearest examples of a key doing narrative work: the lock is not a barrier but a cage, and the reward is a character's freedom.
The third door is in Wormways, on the northeastern side of Bone Bottom. Two approaches exist. The lower route is a straight path to the door, but it requires avoiding vomit from a large worm. The higher entrance demands navigation across volatile earth. Both lead to more Wormways, reinforcing the region's layered, intestinal design.
The fourth door, in High Hills, is unusual because it is not out of the way. It sits just before the Gauntlet fight in the Citadel. Unlike the other doors, it primarily leads to a boatload of Rosaries rather than a new area or NPC encounter. For players chasing upgrades, this door is a piggy bank with a lock.
Strategic Takeaways for 2026
? Budget Rosaries early: the Bone Bottom key costs 500, and Jubilana's costs 650. Saving requires discipline.
?️ Treat keys as map multipliers: each one opens content that can feed back into exploration.
⚔️ Prepare for Deep Docks: the enemies and boss there punish underprepared builds.
? Follow NPC threads: the Green Prince and Jubilana quests show how Silksong blends combat with character work.
? Explore Wormways carefully: both routes have hazards, but the region rewards persistence.
In 2026, Silksong's Simple Keys remain a masterclass in optional design. They are not required to finish the story, yet they transform the map from a set of corridors into a web of promises. For players who seek every secret, the keys are less like items and more like invitations written in iron. The doors they open may lead to treasure, to prisoners, or to nothing more than a pile of Rosaries, but each one confirms that in Silksong, curiosity is always worth the cost.
The same instinct that makes a locked door in Deep Docks worth the detour — weighing the cost of entry against what waits behind it — is the instinct that serves players well outside of Hallownest and Pharloom. A key priced at 500 Rosaries is only "expensive" until you compare it to the alternatives and realize what it unlocks. That habit of scanning the map, comparing options, and refusing to pay full price for something you can get for less is exactly what turns a careful explorer into a savvy buyer.
If that mindset follows you out of the game, DealNest is built for it — a place where the comparison work is already done, so you can skip the guesswork and go straight to the reward. Whether you're chasing a rare item or just stretching a limited budget across a long list of wants, the goal is the same one Silksong teaches: never spend more than the door is worth. Check the listings, compare the options, and find the best deal before you commit.
The Four Simple Keys
Key
Location
Acquisition
Cost or Requirement
1
Bone Bottom Shop
Purchase from the shopkeeper beside the Wish Board
500 Rosaries
2
Sinner's Road
Defeat the Roachkeeper after a climbing puzzle near the top
Access to Sinner's Road above Halfway Home in Greymoor
3
Sands of Karak
Found on a bench beside a poor bug
Requires Hornet's grappling hook in Act 2; reach via Blasted Steps west
4
Jubilana the Merchant
Purchase from Jubilana at the First Shrine in the Citadel
Complete Wish "The Wandering Merchant"; 650 Rosaries
The first key is the most straightforward, yet it demands patience. In Bone Bottom, the shopkeeper next to the Wish Board offers the Simple Key for 500 Rosaries. That price is a small fortune in the early hours, when every Rosary feels like a bead of sweat. Players who prioritize the key must delay other purchases, turning the shop into a study in opportunity cost.
The second key hides in Sinner's Road, a vertical gauntlet above Halfway Home in Greymoor. After reaching the upper reaches and potentially repairing the bench, adventurers face a compact climbing puzzle. At its summit waits a Roachkeeper. Killing this foe drops the key, a reward that feels less like a drop and more like a toll collected by a hostile gatekeeper.
The third key resides in the Sands of Karak, a region unlocked after obtaining Hornet's grappling hook in Act 2. Access comes through the Blasted Steps on the far west of the map. The Sands themselves are a traversal puzzle of staggering precision, a desert that behaves like a living combination lock. After encountering the elevator that returns to the Grand Gate's entrance, players head east through a blocked-off door. Inside, a bench holds a poor bug and the key. The scene is quiet, almost mournful, as if the key were a relic left by someone who could not escape.
The fourth key requires narrative legwork. In the Citadel, next to the First Shrine, Jubilana the Merchant sells the final Simple Key for 650 Rosaries. Before she does, players must pick up the Wish "The Wandering Merchant" and track her down in the Citadel. Once that quest is complete, she relocates to the First Shrine. The key is expensive, but it is also a symbol of a relationship earned rather than a transaction forced.
The Four Doors They Unlock
Door
Location
Reward or Consequence
Deep Docks
Underground, lava-filled ruins
Access to a challenging area with stronger enemies and a boss
Sinner's Road
Immediately south of the area's bench
Frees the jailed Green Prince
Wormways
Northeastern side of Bone Bottom
Two routes: bottom path with worm vomit, or higher path with volatile earth; leads deeper into Wormways
High Hills
Just before the Gauntlet fight in the Citadel
A large cache of Rosaries rather than a new area or NPC
The first door most players encounter sits in Deep Docks, an underground ruin of lava and grating. After unlocking the fast travel point, the path heads east and down grates opened by levers. Continuing east over lava leads to a large locked door. The area beyond is no gentle tutorial; its boss and enemies are far stronger than what early-game travelers have faced. The door is a warning wrapped in a reward.
The second door lies in Sinner's Road, immediately south of the bench. Using the Simple Key found in the same region opens the cell and frees the Green Prince. This is one of Silksong's clearest examples of a key doing narrative work: the lock is not a barrier but a cage, and the reward is a character's freedom.
The third door is in Wormways, on the northeastern side of Bone Bottom. Two approaches exist. The lower route is a straight path to the door, but it requires avoiding vomit from a large worm. The higher entrance demands navigation across volatile earth. Both lead to more Wormways, reinforcing the region's layered, intestinal design.
The fourth door, in High Hills, is unusual because it is not out of the way. It sits just before the Gauntlet fight in the Citadel. Unlike the other doors, it primarily leads to a boatload of Rosaries rather than a new area or NPC encounter. For players chasing upgrades, this door is a piggy bank with a lock.
Strategic Takeaways for 2026
? Budget Rosaries early: the Bone Bottom key costs 500, and Jubilana's costs 650. Saving requires discipline.
?️ Treat keys as map multipliers: each one opens content that can feed back into exploration.
⚔️ Prepare for Deep Docks: the enemies and boss there punish underprepared builds.
? Follow NPC threads: the Green Prince and Jubilana quests show how Silksong blends combat with character work.
? Explore Wormways carefully: both routes have hazards, but the region rewards persistence.
In 2026, Silksong's Simple Keys remain a masterclass in optional design. They are not required to finish the story, yet they transform the map from a set of corridors into a web of promises. For players who seek every secret, the keys are less like items and more like invitations written in iron. The doors they open may lead to treasure, to prisoners, or to nothing more than a pile of Rosaries, but each one confirms that in Silksong, curiosity is always worth the cost.
The same instinct that makes a locked door in Deep Docks worth the detour — weighing the cost of entry against what waits behind it — is the instinct that serves players well outside of Hallownest and Pharloom. A key priced at 500 Rosaries is only "expensive" until you compare it to the alternatives and realize what it unlocks. That habit of scanning the map, comparing options, and refusing to pay full price for something you can get for less is exactly what turns a careful explorer into a savvy buyer.
If that mindset follows you out of the game, DealNest is built for it — a place where the comparison work is already done, so you can skip the guesswork and go straight to the reward. Whether you're chasing a rare item or just stretching a limited budget across a long list of wants, the goal is the same one Silksong teaches: never spend more than the door is worth. Check the listings, compare the options, and find the best deal before you commit.
No Replies
